
 TL;DR:
⚡ Quick Fix: Fix Compatibility Mode in Word
Convert the Document: Open File > Info and click Convert to update the document to the current Word format and unlock newer features.
Change Default Save Format: Go to File > Options > Save and set new documents to save as Word Document (.docx), not an older Word format.
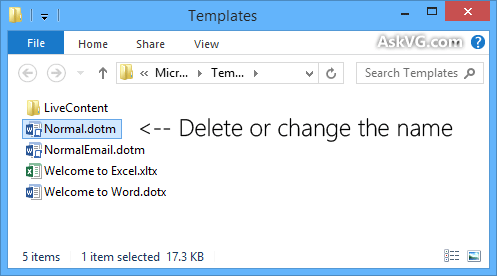
Reset Word Template: Delete or rename the Normal.dotm template if every new document opens in Compatibility Mode.
Repair Damaged Word Files: If the document still opens incorrectly or seems corrupted, use Repairit Word file repair tool to restore the file before saving it again.
Ask AI for a summary
 ChatGPT
 Perplexity
 Gemini
 Claude
 Grok
Grok
The "Compatibility Mode" in the title bar simply indicates that the document was last created or saved as an older version of the word file. Since it restricts the users from accessing the advanced features of MS Word, it's good to resolve the issue as early as possible. Here's the complete guide to fix "Compatibility mode" issue in Word.

Part 1: What's "compatibility mode" issue in word?
The newer versions of Microsoft Office have introduced various advanced features that aren't compatible with the older ones. Therefore, a "Compatibility Mode" appears in the title bar whenever the user opens the document created or saved in the older version.
It was introduced by Microsoft in the Office 2007 version to support the old documents and files. This mode simply disables new or enhanced word features so that you can edit the document using earlier versions. Compatibility mode ensures that different versions can continue working together, and the previous versions won't look any different.
It is not something you should worry about as Microsoft Word ensures that your old documents work correctly in all versions. However, it restricts the users from accessing the new features; hence you should fix "Compatibility mode" issue in Word to get the best out of your document. The features that are disabled mainly depend on the type of Compatibility mode a copy is using.
Part 2: Reasons For "Compatibility Mode" Issue
Before jumping into the solution to resolve Compatibility Mode trouble in Microsoft Word, it is essential to know the reasons for such trouble. Here are some of them.
-
Documents are created or saved in the older version.
Compatibility Mode issue mainly generates when the document is created or saved in the older versions of Word. For example, you can access all new features and formatting styles when creating a new document in Office 2013 or 2016. However, if you intend to open Microsoft documents created with office 2010, it will open in the Compatibility Mode.
-
Your Word application is set to create documents in the older file format.
There is no need to worry about whether fewer documents are opening in the Compatibility Mode. However, if every document is created in this mode only, then it might be possible that your Microsoft Word application is set to create files in an older format or save them with an older extension.
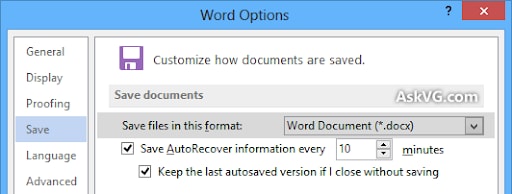
To fix "Compatibility mode" issue in Word, you can head to Files > Options > Save. Tap on "Save files in this format" and make sure it's set to the modern type of document.
Part 3: Methods To Resolve The Compatibility Mode Error
Below is mentioned the list of best possible solutions to resolve the Compatibility Mode error in Microsoft Word.
Method 1: Using Microsoft Word Options
It might be possible that you've changed the default file format mistakenly to save new documents in Word with an older extension, leading to the trouble. Follow the instructions to restore the default format.
-
Launch Microsoft Word and open File Menu or ORB. Click "Options."
-
Go to the Save tab. Tap on the "Save files in this format" section and choose Word Document (Docx) from the drop-down menu.
-
Save the changes and restart Word to see whether the error gets resolved or still appearing.
Method 2: Use Word's Convert feature to convert a document to the current Word version
Using the convert feature is yet another best way to fix "Compatibility mode" issue in Word. Here's the step-by-step guide to carry out the process.
-
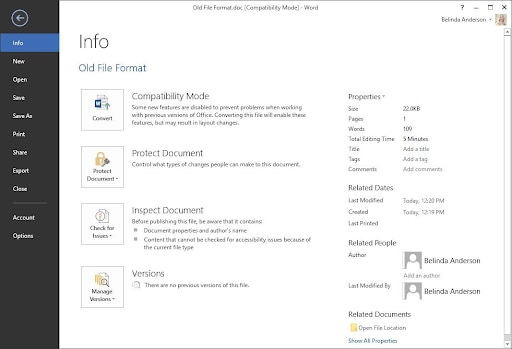
Open the file using Compatibility Mode and click on the "File Tab" in the menu bar.
-
The info category will appear on the screen.
-
Locate the "Convert" option and tap on it.
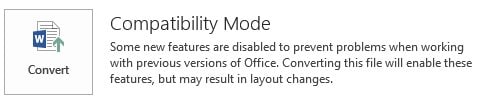
As soon as you click on the Convert tab, a pop-up message will be displayed. Click on the Ok button.
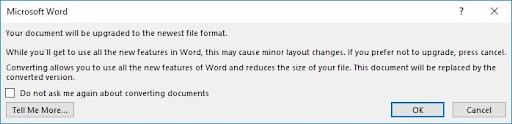
The document will get updated to the newest file format and the "Compatibility Mode" vanishes from the title bar.
Method 3: Deleting Default Document Template
Sometimes, upgrading from previous versions corrupts the Default Document Template, due to which it starts creating all new documents in the Compatibility Mode. To resolve the error, it's important to reset this template by using the following steps.
-
Open the "Run" dialog box. Type "%appdata%\Microsoft\Templates" and press Enter.
-
Search for the "Normal.dotm" file in the folder. You need to either delete the file or rename it to some other name.
-
Open the Microsoft Word document again, and it will automatically create a new Normal.dotm file in the Templates folder, which will resolve this issue.
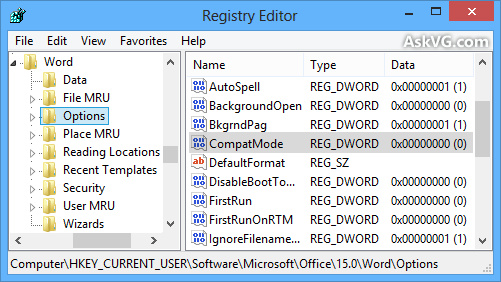
Method 4: Using Registry Editor
If the methods mentioned above don't work, you can use Registry Editor tweak to eliminate the Compatibility Mode trouble. Check the steps here.
-
Launch the Run dialog box and type regedit. Press Enter to open Registry Editor.
-
Go to the following keys.
Office 2007: HKEY_CURRENT_USER\Software\Microsoft\Office\12.0\Word\Options
Office 2010: HKEY_CURRENT_USER\Software\Microsoft\Office\14.0\Word\Options
Office 2013: HKEY_CURRENT_USER\Software\Microsoft\Office\15.0\Word\Options
-
Locate the DWORD CompatMode on the right side of the pane. If you find the same, then get it deleted.
-
However, if you don't find any result, then create a new DWORD. Set its name to CompatMode and value to 0.
-
Once you are done, close the Registry Editor and check whether the problem gets fixed or not.
Method 5: Try Wondershare Repairit file repair
Still, facing the trouble? Use Wondershare Repairit -Word File Repair method and fix "compatibility mode" in Word in no time. It is a third-party app that assists users in resolving all issues related to the file.
Features:
-
It supports 4 file formats, namely DOCX, PPTX, XLSX, PDF.
-
This tool will repair files from almost all devices and storage media.
-
It comes with a batch processing feature that allows repairing different file formats simultaneously.
Step-by-step instructions to fix compatibility mode trouble:
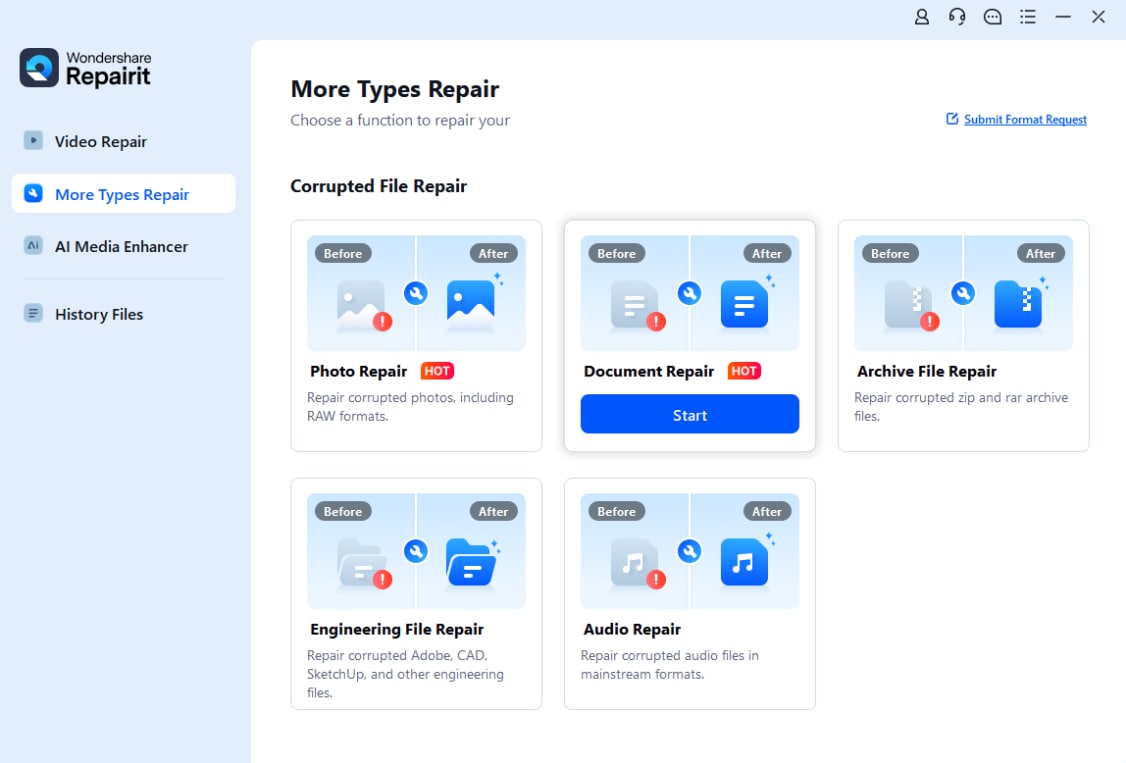
Step 1: Load the File on Repairit
-
Install the Wondershare Repairit tool on your PC. Launch it and go to the File Repair section on the left-hand side.
-
Click on Add button, and it will open a browser window so you can go to the folder from where you need to upload the file.
-
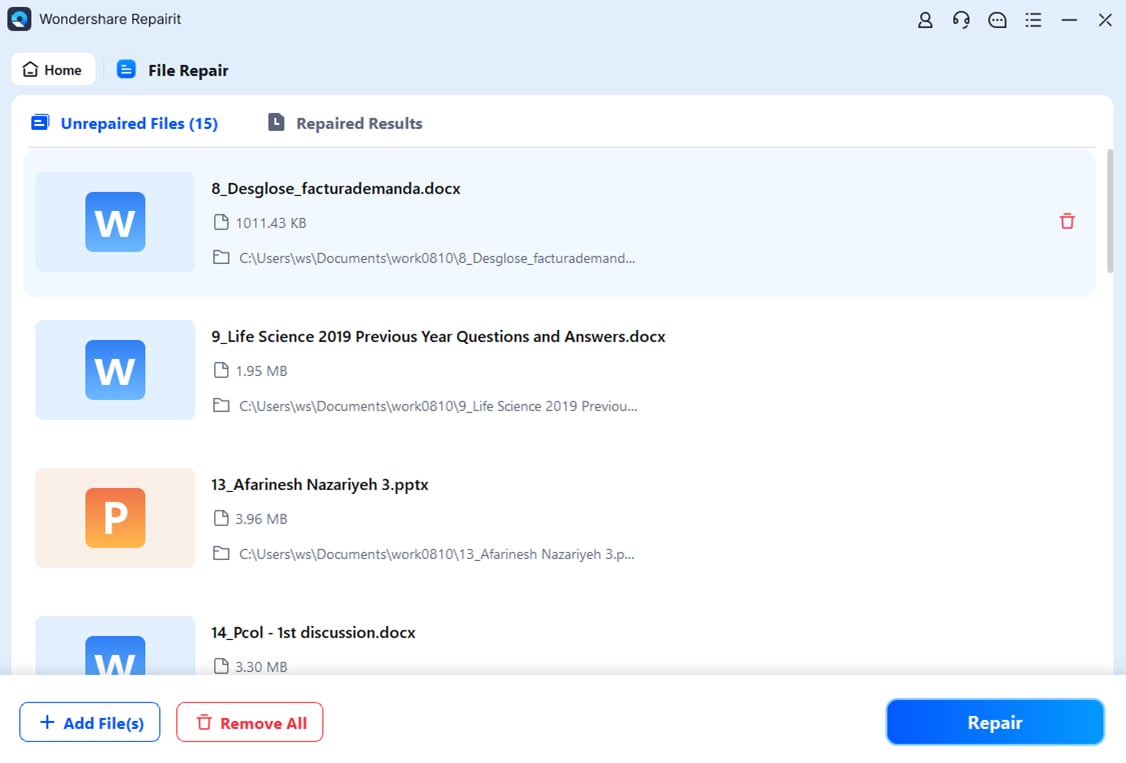
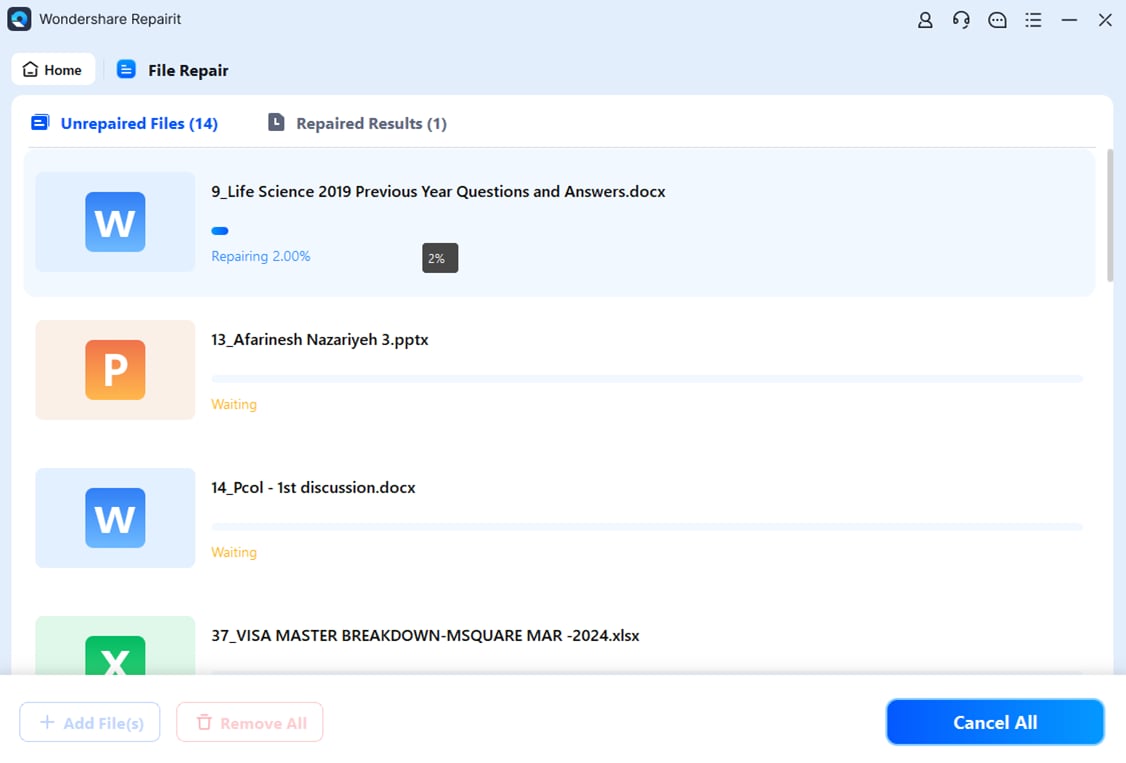
Once you select the file to repair, it will load them and display the progress on the screen.
-
If you have mistakenly uploaded the wrong file, then click on the Trash icon adjacent to its details. The user can also remove all files if they want to delete all files on the go by tapping the "Remove All" button available at the bottom of the window.
Step 2: Start the Repairing Process
-
Once the files are uploaded, click on the Repair button to start fixing the Compatibility Mode issue.
-
The progress will be displayed on the screen. The files will be marked "Completed" or "Repairing," depending on their repairing status.
-
The tool will notify you when the file repairing is done by prompting the pop-up message.
Step 3: Preview and Save
-
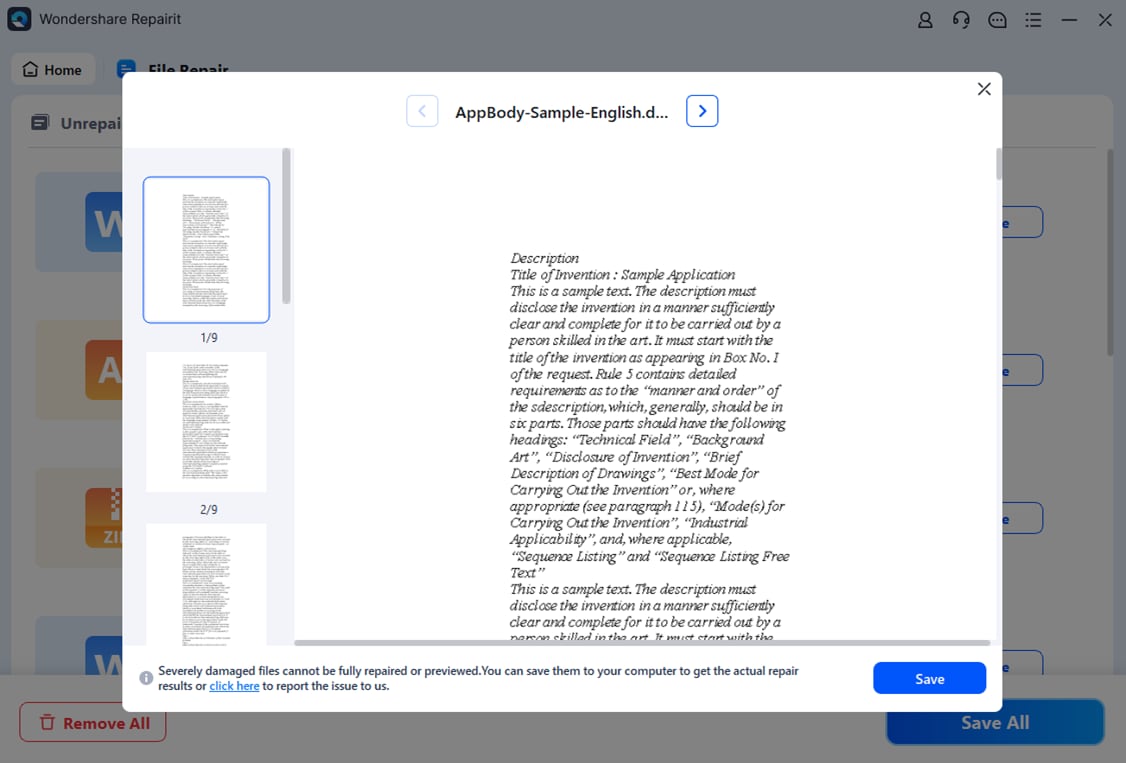
As soon as the file repairing is completed, you can preview the file by tapping on the "Preview" button located adjacent to the file details to check whether the Compatibility Mode trouble is fixed or not.
-
You can now click on the Save button. Besides this, the users can also tap on the Save All option from the bottom panel to export all the repaired files at once.
-
You can now go to the folder where you wish to save all those files.
Bonus:
For cloud service users, Repairit also provides an online file repair tool to fix your "compatibility mode" in Word issue without launching any software. Fix your corrupted Word, Excel, PPT, and PDF files online safely in just three steps!
Method 6: Use the Save As dialog box to convert a document to the current Word version
Carry out the below-mentioned instructions to use the save as dialog box and fix "Compatibility mode" issue in Word.
-
Open the file that is using the Compatibility Mode. Tap on the "Save As" dialog box and choose the location where you wish to save the new copy.
-
In the File Name box, type a new name for the document. Click on the Word Document in the "save as type" list.
-
Tick the checkbox next to "Maintain Compatibility with previous versions of the word."
Part 4: Tips And Tricks To Avoid "Compatibility Mode" Issue
Though you are now well-aware of the practical solutions to fix "Compatibility mode" issue in Word, it's good to know the tips and tricks to avoid this troublesome situation in the future. A few of them are mentioned here.
-
Turn off the Compatibility Mode.
-
Keep a check on the default file format and save it to the newer version only.
-
Instead of using Save, use the "Save As" option to avoid this issue.
-
Use the modern or new version of Microsoft Word. This lets you save the file in the Docx format, which automatically removes the error.
Further Reading:
Here are the useful articles to help you.
1. Repair MS Word File after Virus Infection.
2. Repair Word 2010 in Control Panel.
3. Ways to Repair Word Error This File Could Not be Found.
Closing Up
There you have the complete guide to fix "Compatibility mode" issue in Word. The compatibility mode is one of those errors that can be neglected for a while as it doesn't cause any trouble.
However, you need to leave this mode to access the latest features of Microsoft Word. All the methods listed above are 100% effective and will immediately resolve the trouble. However, if you are looking for a quick solution, install the Wondershare Repairit tool on your system and fix the Compatibility Mode issue right away. This third-party software takes the least time to solve the problem and offers guaranteed results.
FAQs
-
1. How to Find Out Which Compatibility Mode a Document Is UsingWhat are the four types of formatting?
Follow the steps to check the compatibility mode of a document.
Choose File > Info.
Go to the Inspect Document section and click Check for Issues > Check Compatibility.
Tap "Select versions to show." A check mark appears next to the name of the mode that the document is currently in.
Four types of formatting are:
Word 2013-2016 Mode
Word 2013
Word 2010 Compatibility Mode
Word 2007 mode
-
2. How to Update a Document and Leave Compatibility Mode?
To update a document, you need to:
Go to the File tab.
Open the Info section.
Click on the "Convert" button and update a document to the newest version.