Converting PowerPoint presentations into videos has become valuable in today's landscape. This transformation expands the reach of your content. It also facilitates sharing on diverse platforms. Whether you prefer online tools or offline methods, this guide covers you. We'll walk you through the process, exploring online and offline platforms. It ensures you have ultimate control over saving a PowerPoint as a video. Read on to learn more.
In this article
How to Convert PowerPoint Presentations to Videos Online?
Converting PowerPoint to video online offers a quick and hassle-free solution. Online platforms provide user-friendly interfaces that simplify the conversion process. Notable platforms include Online-Convert, Aspose.Slides, and Converter 365.
Online Convert

Online-Convert is a versatile tool that converts files, including PPT to MP4. As a web-based utility, it is compatible with any platform. It allows file uploads from various sources such as your computer, Dropbox, Google Drive, or a specified URL. The MP4 converter within Online-Convert provides customization options for video parameters. It offers a comprehensive solution for transforming PPT files into videos.
Aspose.Slides

Aspose.Slides offers a free online service for transforming PowerPoint presentations into videos. You can convert individual slides or entire presentations using the tool. Additionally, you have the option to personalize the transition time between slides. This tool provides a versatile solution for converting presentations into videos.
Converter 365

Converter 365 is an online file converter. It accommodates various video formats and file types, including GIFs, music, and videos. Users can upload PowerPoint presentations from either a computer or a mobile device. Or, they can opt for automatic uploads using a PPT URL. The platform supports concurrent conversions, ensuring quick upload times for standard-sized PPTs.
Despite its adaptability, the free version imposes a maximum file size of 100 MB. Additionally, it retains data for a limited period of 24 hours.
Step-by-Step Guide for Online Conversion
Regardless of the online platform you choose, here are the general steps for converting your PowerPoint presentation to video.
Step 1: Choose a reputable online platform for PowerPoint to video conversion. Here, let’s use Aspose.Slides.

Step 2: Locate and upload your PowerPoint file to the platform.

Step 3: Customize video settings, including resolution and format.

Step 4: Begin the conversion process through the platform.

Step 5: Once the conversion is complete, download the video file to your device.

Convert PowerPoint Presentations to Videos on Windows & Mac
For those who prefer it offline, Windows & Mac provide features to convert PowerPoint presentations to videos. Here are the steps:
Step 1: Launch your PowerPoint file on a Windows computer.

Step 2: Click on the "File" menu and then select "Export" from the menu.

Step 3: Go to the "Create a Video" option in the export menu.

Step 4: Adjust slide duration, resolution, and narration settings.

Step 5: Click the "Create Video" button and save the file to your desired location.

Adding Audio to Your Video Presentation
Enhancing your video presentation with audio elements can significantly improve its impact. Here's a list of the steps to achieve this:
- Record Narration. Within PowerPoint, record narration for each slide.
- Insert Background Music. Enhance the atmosphere with background music.
- Adjust Audio Levels. Ensure a balanced mix of narration and background music.
- Synchronize Audio with Slides. Align audio elements with corresponding slides for a seamless experience.
Repairing Damaged or Corrupted Video After Exporting

Encountering frustrating errors with your downloaded converted videos? Look no further - introducing Wondershare Repairit Video Repair Desktop!
Wondershare Repairit is ideal for converting PowerPoint presentations to video. It effectively handles codec decoding errors and export glitches, ensuring a smooth editing experience. The tool safeguards the integrity of downloaded videos, making it valuable for enhancing the overall quality and reliability of converted presentations. In summary, Wondershare Repairit simplifies the conversion process, making it smoother and more dependable.

-
Repair damaged videos with all levels of corruption, such as video not playing, video no sound, out-of-sync video or audio, playback errors, header corruption, flickering video, missing video codec, etc.
-
Repair full HD, 4K, and 8K videos and support 18 popular formats, including MOV, MP4, M2TS, INSV, M4V, WMV, MPEG, ASF, etc.
-
Repair damaged or corrupted videos caused by video compression, system crash, video format change, etc.
-
Repair critically damaged or corrupted videos available on SD cards, mobile phones, cameras, USB flash drives, etc.
-
Repairit has a quick and advanced scanning mode. You can use either depending on the level of corruption the video file has undergone.
-
No limit to the number and size of the repairable videos.
-
Support Windows 11/10/8/7/Vista, Windows Server 2003/2008/2012/2016/2019/2022, and macOS 10.10~macOS 13.
Key features
- Versatile Repair Capability. Repairit fixes video issues from shooting, recording, transferring, editing, converting, or processing. It ensures an instant and effective repair.
- Wide Format Support. Supporting a diverse range of file formats such as MOV, MP4, M2TS, MKV, MTS, 3GP, AVI, FLV, MXF, INSV, M4V, WMV, RSV, KLV, MPEG, MPG, ASF, TS, and more, Repairit caters to a variety of video files.
- Advanced Repair Mode with Exclusive Patent Technology. Repairit's advanced repair mode utilizes exclusive patent technology. It increases the success rates in fixing damaged videos compared to competitors.
- Batch Video Repair. Repairit can handle many damaged videos. It provides seamless repair for both identical and varied video files.
- HD & 8K Video Repair. Repairit mends full HD, 4K, and 8K videos from various cameras or smartphones. It maintains the original quality throughout the repair process.
Step-by-step guide on using Repairit
Step 1: Launch Wondershare Repairit on your desktop. Once opened, you are on the “Video Repair” tab, then click “Add” to upload the damaged video file.

Note: Wondershare Repairit supports various video formats, including MOV, MP4, M4V, M2TS, MKV, MTS, 3GP, AVI, FLV, etc. It can repair multiple video formats.
Step 2: After adding the corrupted videos, the interface displays information for each corrupted video, including Image name, File Path, File Size, Video Watching Time, Video Resolution, and Filming Equipment. Click the "Repair" button to initiate the video repair process.

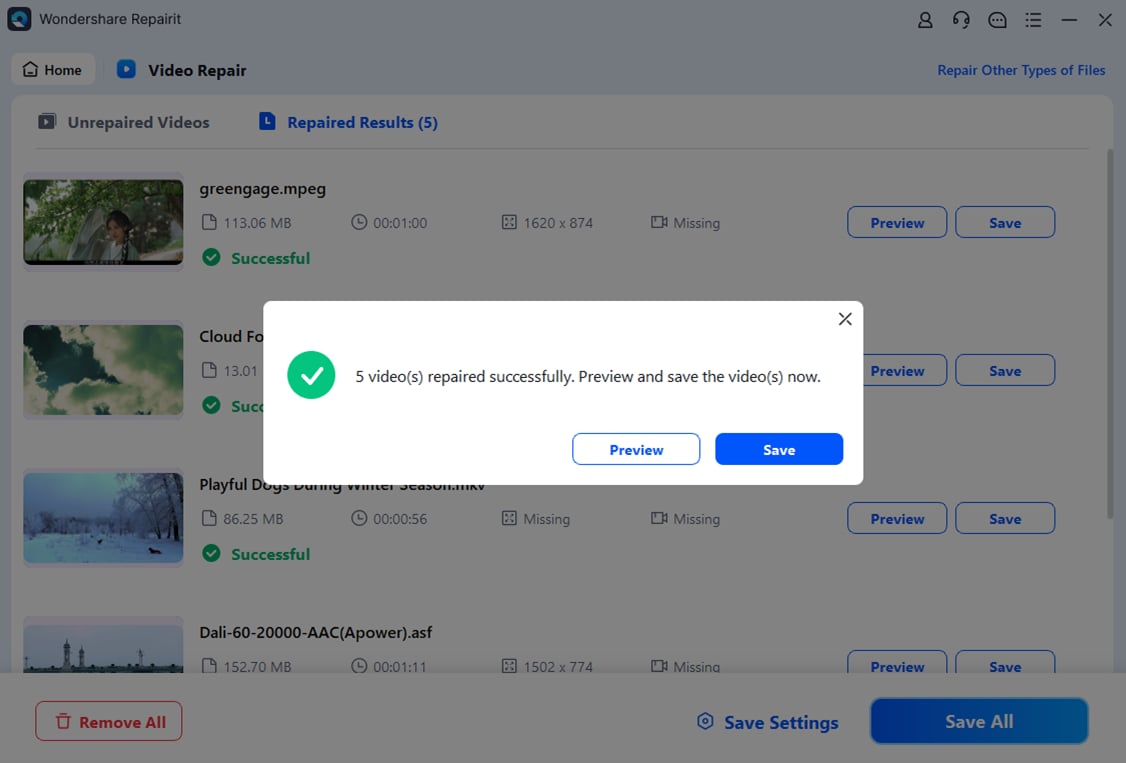
Once the repair process is complete, a window will prompt you to save and preview the repaired videos. Click "OK" to save the repaired videos.

Step 3: Review the repaired videos by clicking the "Preview" button. Ensure that the video content meets your expectations before saving them.

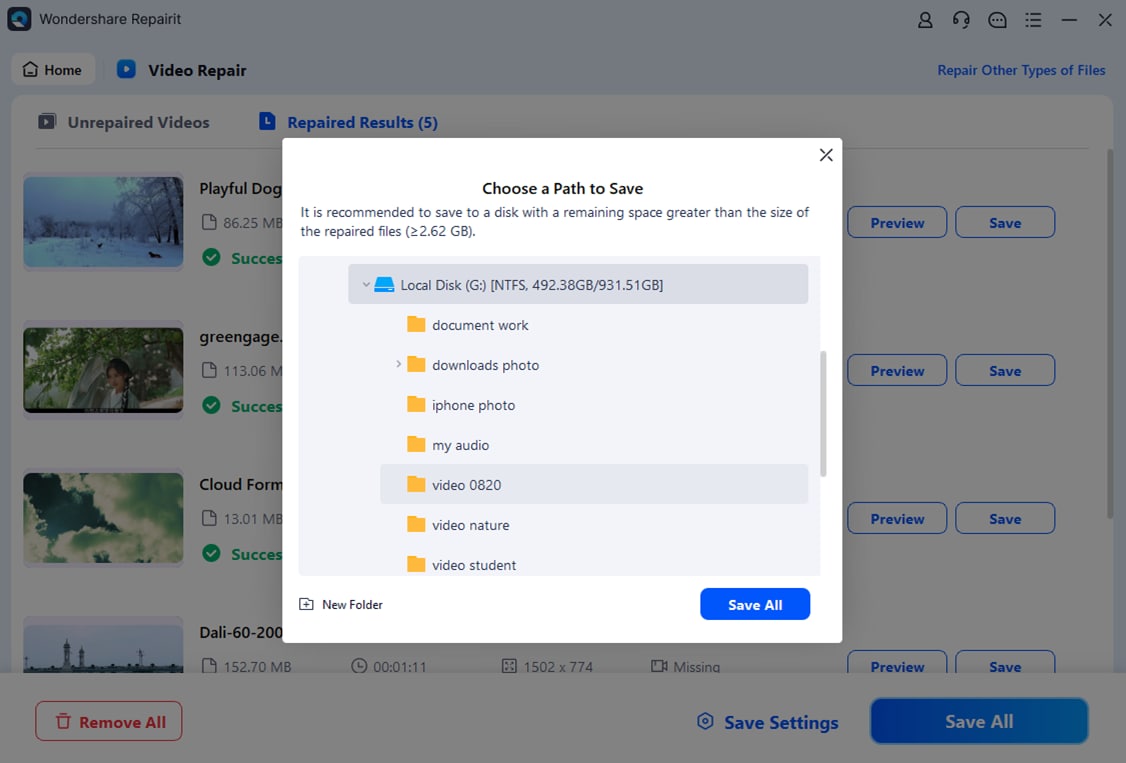
If the repaired videos are satisfactory, click the "Save" button and choose a path to save them.

Tips for Optimizing Video Output for Various Platforms
As you navigate the realm of video creation and distribution, ensuring optimal output for various platforms is key. From compatibility checks to troubleshooting export issues and optimizing file sizes, these steps will guide you. They will help you deliver your video content across diverse devices and platforms.
- Consider Platform-Specific Settings: Adjust video settings to match the requirements of different platforms.
- Check File Format Compatibility: Ensure the chosen video format is widely supported.
- Review Slide Elements: Confirm that complex slide elements are compatible with video conversion.
- Choose Appropriate Resolution: Select a resolution that balances quality and file size.
- Utilize Compression Techniques: Explore compression options to reduce file size.
Conclusion
Converting PowerPoint presentations to videos involves various methods. These range from trusted online platforms to native features on both Windows and Mac. The versatility of this process allows you to cater to different preferences and requirements. It makes your presentations accessible to a broader audience. As technology evolves, exploring both online and offline methods, experimenting with audio elements, and optimizing for different platforms will enhance the impact of your video presentations.
FAQ
Can I adjust the volume of narration and background music separately?
Yes, most presentation software allows you to adjust audio levels independently. In PowerPoint, for example, you can use the "Audio Tools" tab to modify the narration and background music volume.How do I ensure a smooth transition between slides and audio elements?
Synchronize your audio with specific slides. In PowerPoint, use the "Play across slides" option when setting up audio to ensure that the narration and background music seamlessly transition with the slides.Are there copyright considerations for using background music in presentations?
Yes, it's essential to use royalty-free or properly licensed music to avoid copyright issues. Many online platforms offer royalty-free music libraries that you can use for your presentations.


 ChatGPT
 Perplexity
 Google AI Mode
 Grok
Grok

