
 TL;DR:
To resolve the Microsoft Print to PDF failure in Windows 11, users must typically re-enable the feature in Windows Features, manually reinstall the PORTPROMPT local port driver, or remove commas from the target filename.
● Reinstalling the required driver involves manually adding a local printer via the Printers and Scanners menu, selecting the PORTPROMPT: (Local Port) configuration, and replacing the current Microsoft driver.
● The print operation will automatically fail if you include commas in the saved file's name, and changing the default Documents output directory requires modifying the HKEY_LOCAL_MACHINE\SYSTEM\CurrentControlSet\Control\Print\PDF Port\Ports path in the Registry Editor.
● If the printing process stalls due to a corrupted source document, restoring the file requires a recovery application like Wondershare Repairit, which processes damaged PDFs across Windows and macOS environments.
Ask AI for a summary
 ChatGPT
 Perplexity
 Gemini
 Claude
 Grok
Grok
“My Microsoft Print to PDF Windows 11 cannot print PDF. Is it possible to resolve the Print to PDF not working issue without performing any drastic changes?”
Windows users love the print to PDF function, and it’s useful for its ability to get high-quality PDF files. However, some users experience issues such as their web browser becoming unresponsive or no download process starting when using this tool.
If you rely on Windows 11's integrated Print To PDF printer from Microsoft, it can become a problem called “Microsoft Print To PDF.” Some people also report receiving error messages while installing Printer Driver Software after installing Windows updates. This post will share how to fix the Microsoft Print to PDF Windows 11 cannot print PDF issue.
Part 1. Causes of Print to PDF Not Working
There could be any number of reasons why the Microsoft Print to PDF isn’t working on your computer. Here, we will disclose some of them:
• Problems with the Printer or Hardware
There is a possibility that your printer isn’t working correctly. Moreover, such an issue generally occurs when the USB cable between the computer and printer is faulty or damaged.
• The Print queue isn’t cleared
We recommend clearing any pending tasks in the print queue before starting a new one. If there are some tasks in the queue already, then the PDF print not working issue will definitely occur.
• Issues with the PDF Editor
A temporary glitch with the Adobe Reader could cause issues when printing to PDF, which is why it’s essential for you as a user to maintain updated software and hardware that meet minimum system requirements. You can fix the problem by restarting the software.
• Issues with the file itself.
If there are issues with the file itself, print to PDF may not work. This usually happens when the file contains errors or corruptions that prevent it from being printed or converted to a new PDF file.
• The Printer memory could be full
If your printer’s memory is full, then there’s a slight chance that you wouldn’t be able to print a new file. To determine if the issue is with a specific file or all of them, print out another PDF and see if that solves your problem. If not, then maybe there’s something wrong with either printer memory (a large amount) and other installed programs such as antivirus software scanning through files unnecessarily, which can also cause errors on devices where they’re running in tandem.
• You haven’t installed the latest Windows update
Some Windows updates are offered to resolve specific issues, such as Print to PDF not working. In that case, updating the operating system is the best option to fix the problem.
Part 2. Ways to Fix Print to PDF Not Working
Here are the best methods anyone can apply to fix the problems printing PDF files:
Method 1: Turn off the Microsoft Print to PDF feature and turn it on again
If you can’t find what’s wrong with Microsoft Print to PDF, try disabling and enabling the utility. It should eliminate errors related to the feature not working correctly and get the printing facility up and running again. Follow the instructions below:
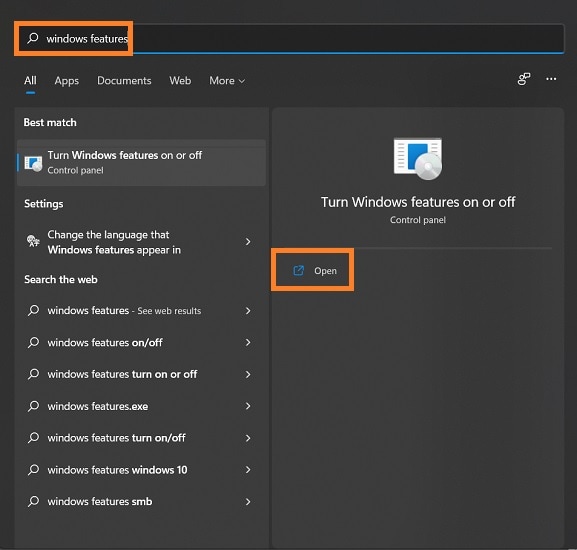
• Using the Search bar next to the Start button, enter Windows Features.
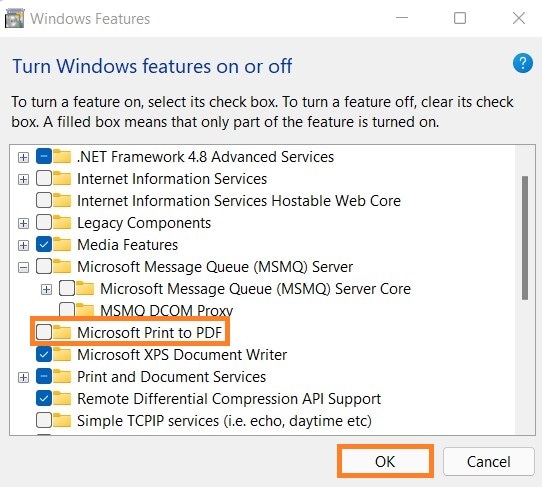
• Once the new dialogue box opens, locate the Microsoft Print to PDF option from the list.
• Simply uncheck the option, and click on OK.
• Restart the PC.
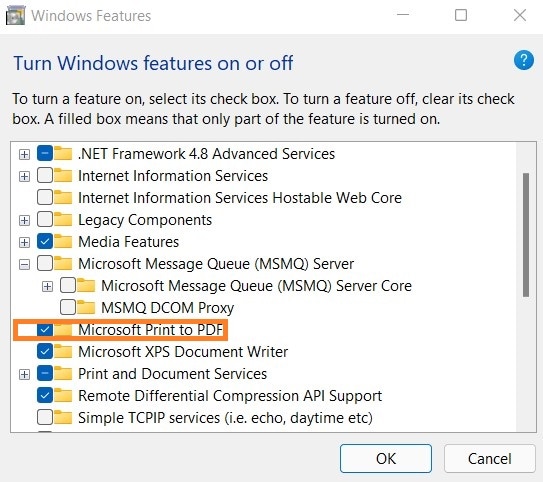
• Repeat the first two steps, and enable the Microsoft Print to PDF tab.
• Click the OK button, and check if the utility works or not.
Method 2: Set Microsoft Print to PDF as the default printer
There are a few different things that can interfere with your ability to print in Windows 10. If you have another printer connected, it might be taking away from the performance of the Print to PDF function on computers. Here’s is how you can set it as the default printer:
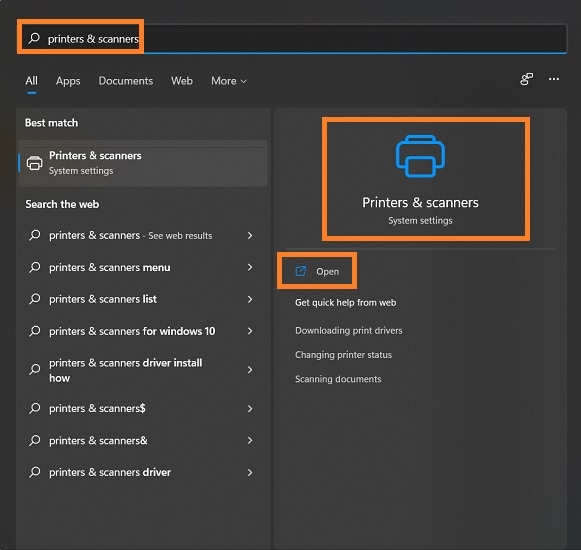
• Type Printers and Scanners into the search bar and open it.
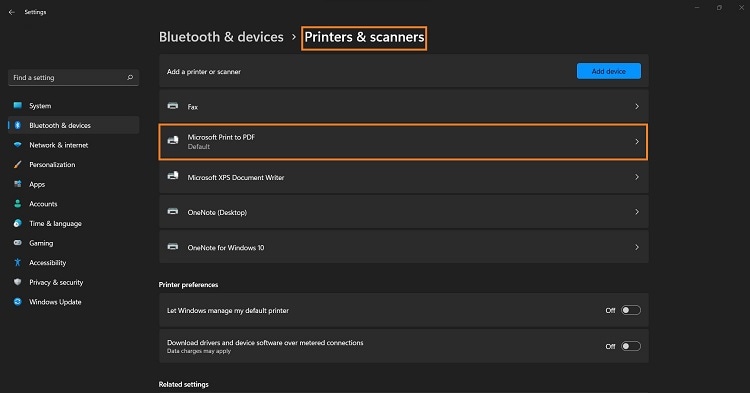
• Click on the Microsoft Print to PDF button from the list.
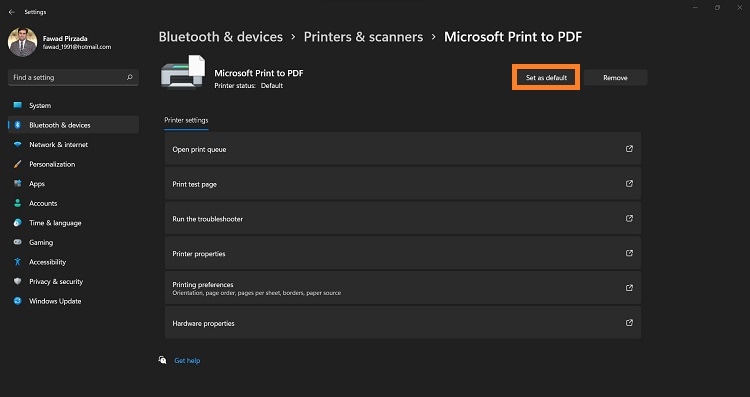
• Finally, select the Set as default tab, and restart the PC.
• You should be able to use the Print to PDF utility.
Method 3: Reinstall Microsoft Print to PDF drivers
Keeping your drivers up-to-date is essential to ensure there are no outdated codes that could cause conflict with Windows 11 once it releases a newer version. You can reinstall the driver to resolve the Microsoft Print to PDF missing issue. Simply apply the steps listed below to understand the solution:
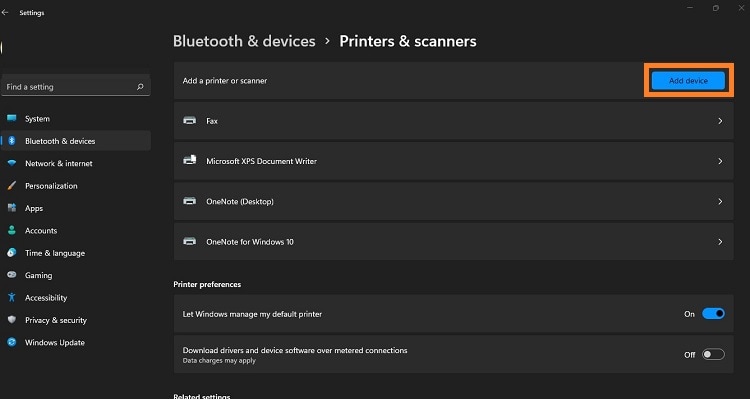
• Open Printers and Scanners section from Windows Settings.
• Click on Add Device button, and then select Add manually.
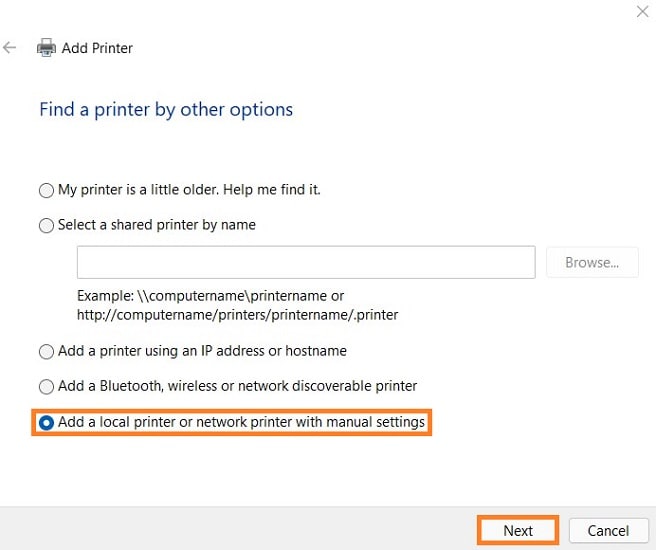
• Choose the Add a local printer or network printer from the new window with manual settings option, and click on Next.
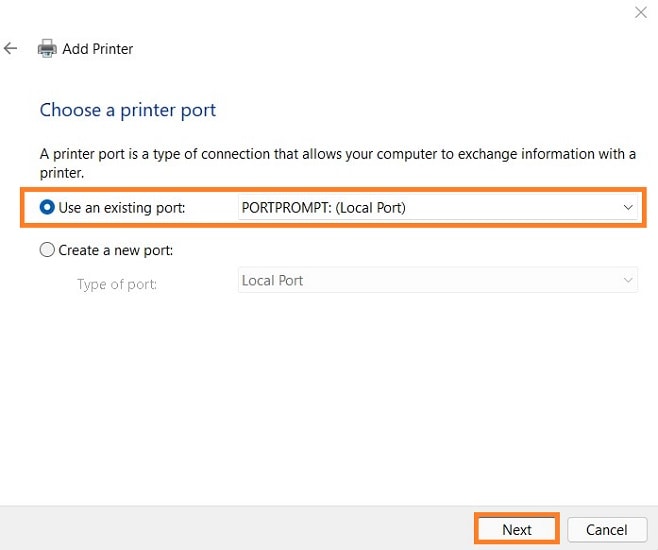
• Select Use an existing port, and pick the PORTPROMPT: (Local Port) option. After that, click on Next.
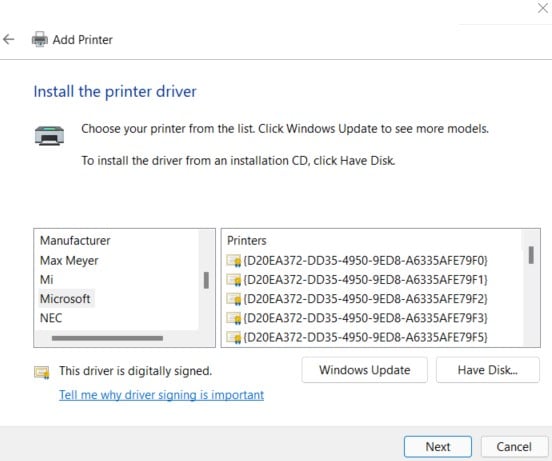
• Select Microsoft, and in front, pick Print to PDF before hitting Next.
• From there, pick Replace the current driver and hit Next. Lastly, rename the printer Microsoft Print to PDF restart your computer.
Method 4: Update Windows 11
Windows 11 is an excellent opportunity to get your system up-to-date and running smoothly. Upgrading can restore many issues plaguing you for some time, such as bugs or security holes in the older version of Windows, such as the Print to PDF not working. The guide is as follows:
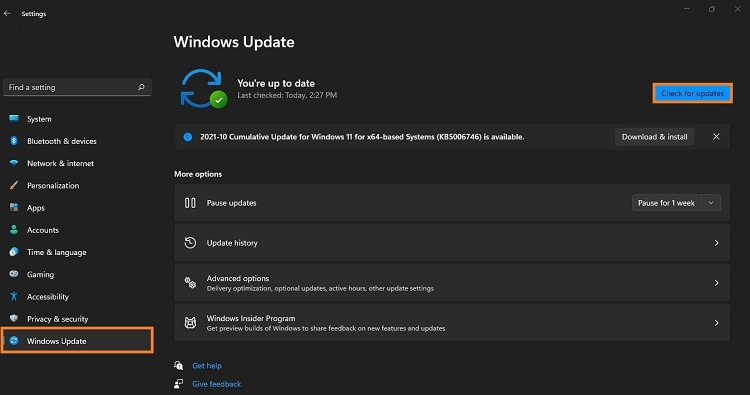
• Access Windows Update from the Setting menu.
• Restart your PC to install the updates.
Method 5: Don’t use commas when saving a PDF
Bytes or symbols in a file’s name can make the Print to PDF feature difficult to work. This is because these characters will cause issues when saving your website, image, or document as a PDF. If you notice this happening and don’t use commas anywhere within the filename, then everything should work just fine.
Method 6: Change the output directory
The output file for the Print to PDF operation is generally saved in your Documents folder. If you wish to save anywhere else on the Windows 11 PC, then simply apply these instructions:
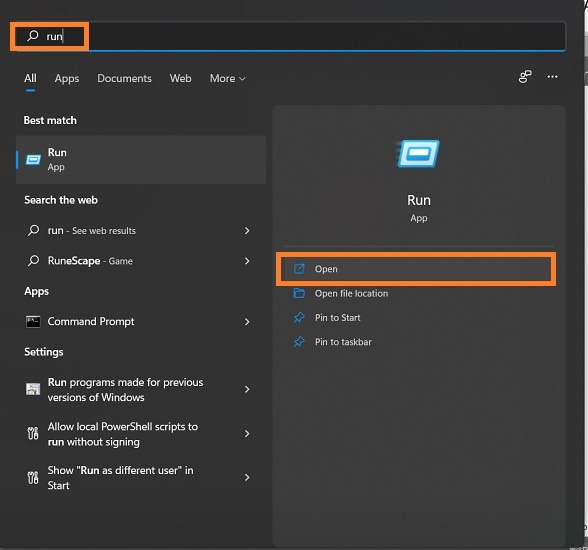
• Enter Run on the Windows Search Bar and click on Open to launch the Run dialogue box.
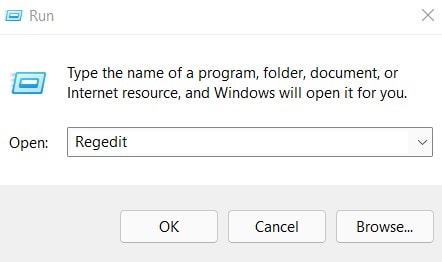
• Next, access the Registry Editor. For that, enter regedit, and click OK.
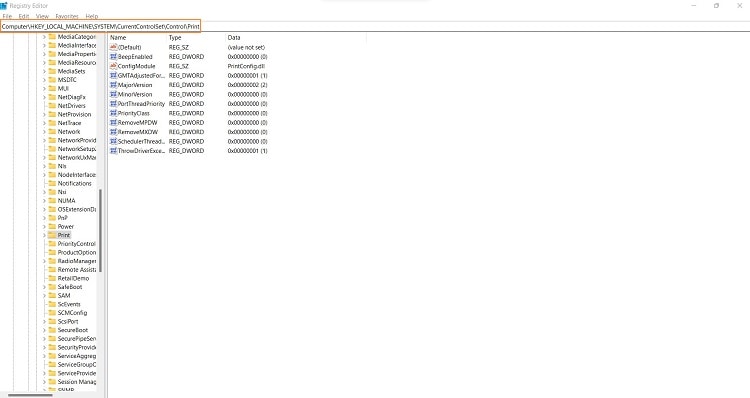
• Enter the following path into the address bar:
HKEY_LOCAL_MACHINE\SYSTEM\CurrentControlSet\Control\Print\PDF Port\Ports
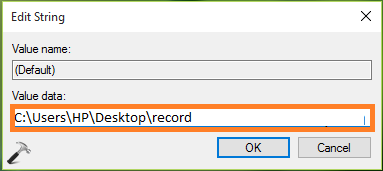
• Open the (Default) registry string (REG_SZ) option, and set the new path for Print to PDF.

• Next, click OK, and close the Editor.
Part 3. Fix Print to PDF Not Working Caused by the File Itself Being Corrupted
One of the primary reasons you can’t access Print to PDF is when the file you wish to print is damaged or invalid. Under such circumstances, the only thing you can do is repair the said PDF document using file repairing software, and there’s no service better than Wondershare Repairit.
It is readily available on Windows and macOS. Moreover, the tool can restore corrupted images and videos, thanks to an intuitive and responsive interface. Moreover, the tool can restore corrupted images and videos, thanks to an intuitive and responsive interface.

-
Repair damaged files with all levels of corruption, including blank files, files not opening, unrecognizable format, unreadable content, files layout changed, etc.
-
Support to repair all formats of PDF, Word, Excel, PowerPoint, Zip, and Adobe files.
-
Perfectly repair corrupted files with a very high success rate, without modifying the original file.
-
No limit to the number and size of the repairable files.
-
Support Windows 11/10/8/7/Vista, Windows Server 2003/2008/2012/2016/2019/2022, and macOS 10.10~macOS 14.
Steps on how to fix corrupted files with this file repair tool
Follow the tutorial to carry out the corrupted document repair process.
Step 1: Add corrupted files
-
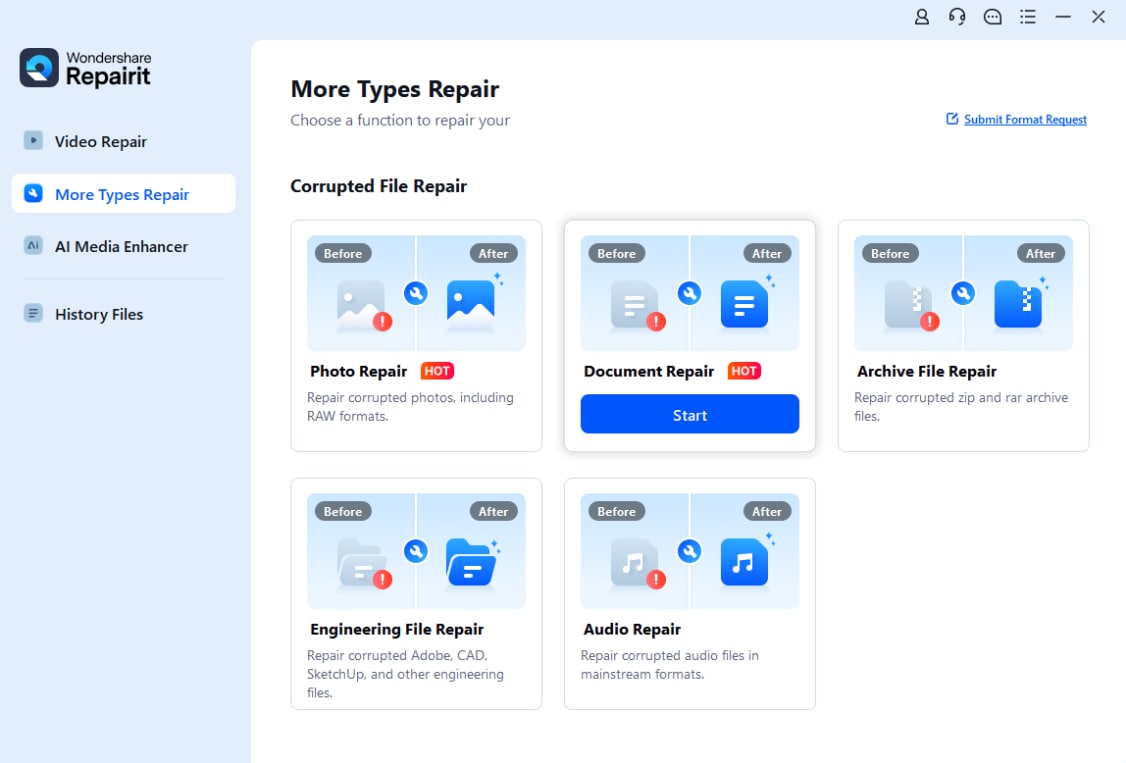
Launch the Wondershare Repairit on your computer and click on the File Repair option. There, you need to add the file you want to repair.
-
This will open a browser window so you can navigate to the location where the file is saved.
-
You can choose multiple documents and upload them the same on Repairit. Please add PPTX, DOCX, XLSX, or PDF files here.
-
Once you select the file, the application will load them and display the progress on the screen.
-
However, if you accidentally added any file, click on the Delete icon and remove it from the list.
Step 2: Repair corrupted files
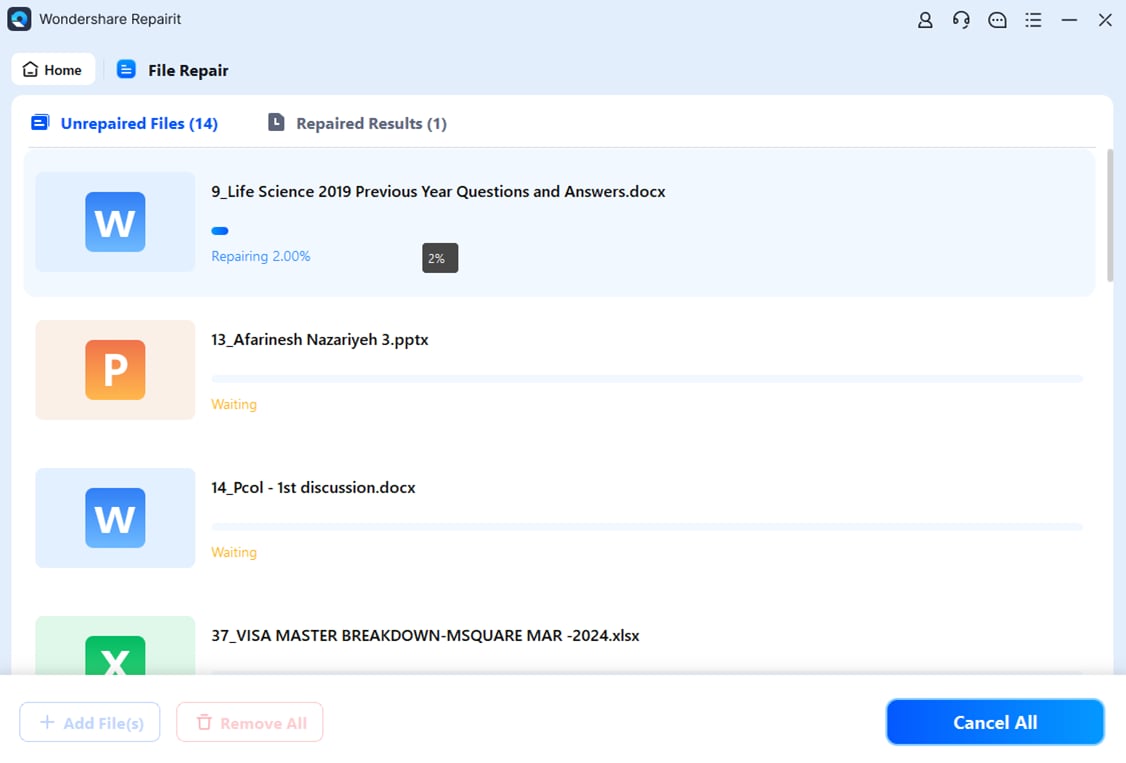
Once you are done with adding files you want to get back, click on the “Repair” button available at the bottom-right corner of the page. It will scan the files and resolve the major issues.
You can easily check the progress of the repairing process for any file. It lets you know that files are being repaired, being scanned, or waiting to be repaired.
The application will notify you as soon as the file repair process is completed. Those files that are repaired successfully will depict a ‘Completed’ sign adjacent to their icon.
A pop-up message will appear on the screen informing how many files are being repaired.
Step 3: Preview and Save Files
Since the software has repaired the corrupted files, you can easily preview and save them to your system. Click on the “Preview” button available in front of every repaired file.
Once you tap on the button, a new page will open where you can preview the file.
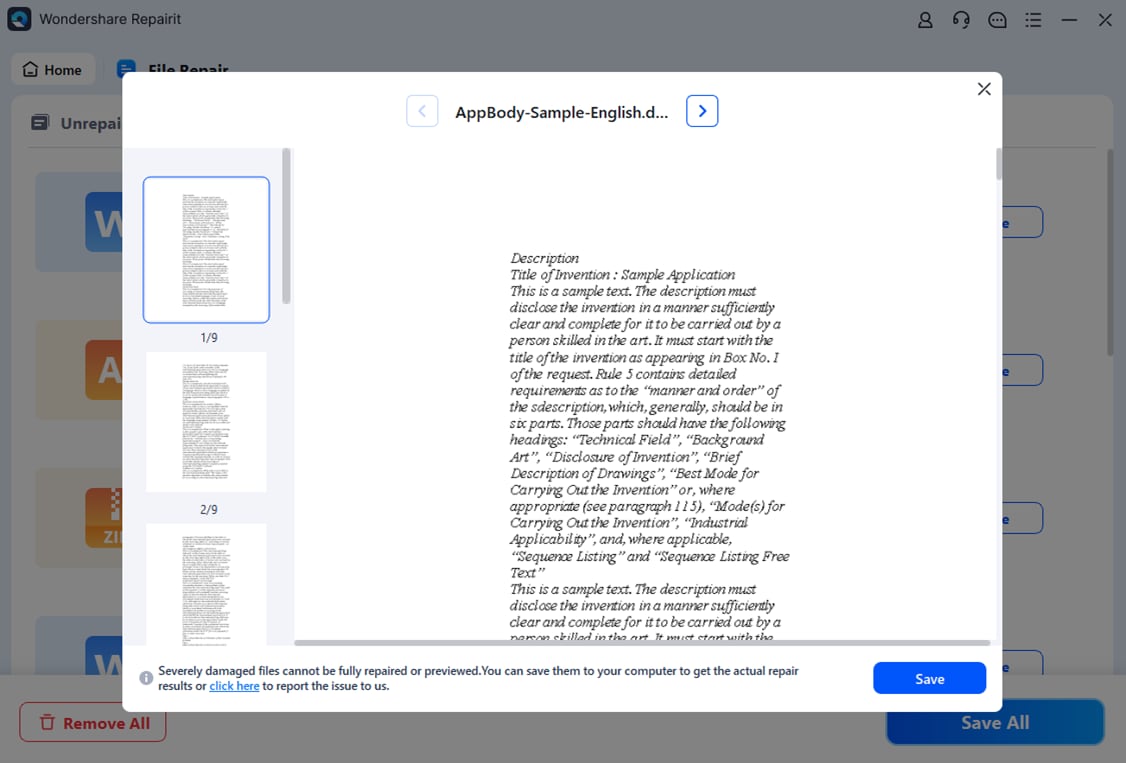
Hit the “Save” button to store the repaired files. Please choose a different save location to avoid data overwriting.
If you wish to save all files simultaneously, click on the “Save All” button and get the job done right.
You can simply go to the specific location of the windows where you want to save the repaired files.
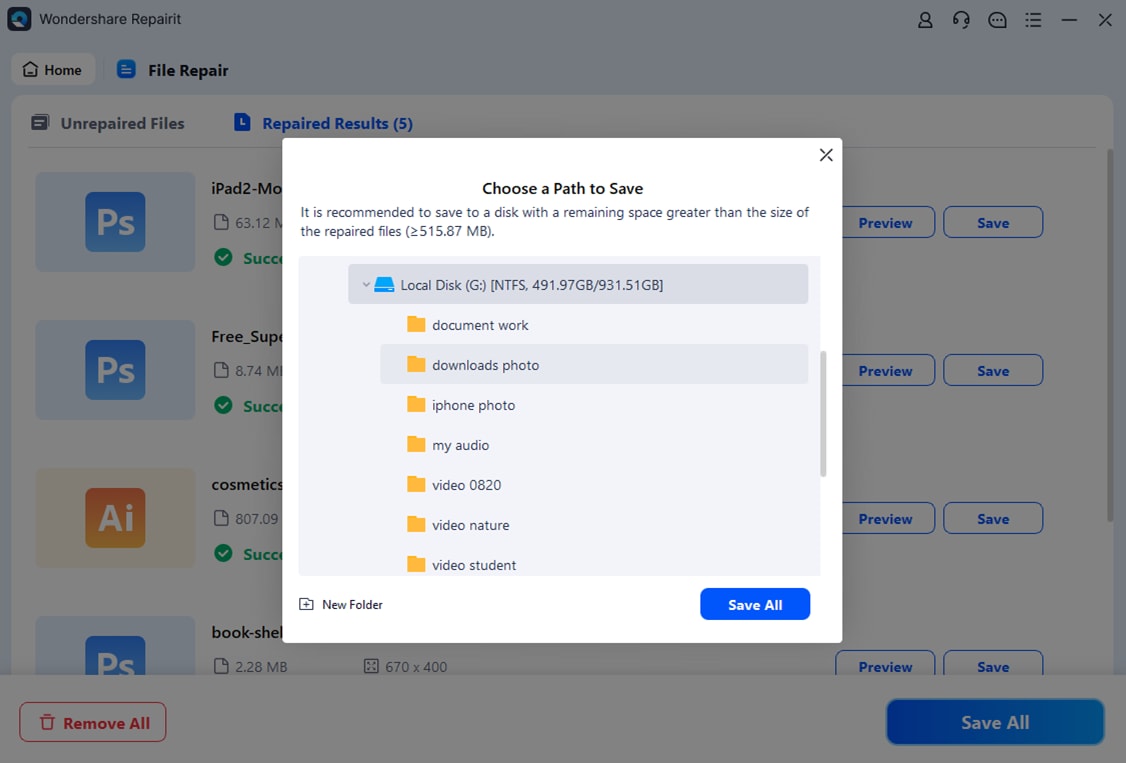
In this way, users can save all the corrupted files. The tool will let you know how many files have been saved.
Bonus: Repairit also offers an online file repair tool to fix Print to PDF not Working issue, and you can upload your corrupted file to the operation console, then it will start automatic repair for you.
Conclusion
Some people find it difficult to use Microsoft Print to PDF because of the lack of features or errors. However, if you follow our guide below and take care not to have any other problems in the future, then everything should get resolved for good! Still, if you come across a damaged PDF document that needs repairing, then Wondershare Repairit is the best choice.