Everyone uses PDF files to share confidential information. Furthermore, it is regarded as the best format because it preserves all of the content of a document without changing its layout. Furthermore, the PDF's owner protected it with a password. However, this security can be a problem in a variety of situations, such as accessing an Aadhar file, a bank statement, an income tax file, e-books, a credit-card statement, and so on. Furthermore, due to security concerns, users are unable to print, edit, or copy those files. As a result, they look for a solution that will allow them to easily remove the permission password from a PDF. When the Adobe fill and sign are not working, it can take some time to figure out what's wrong unless you know exactly what steps to take to solve the problem.
Part 1: Reason of Adobe Fill and Sign not Working
Fill and Sign is an option in Adobe Reader DC and Pro DC that allows users to fill out information and add a digital signature to a PDF file. When users try to fill out or sign a PDF file/form, they frequently encounter the issue that the Adobe Fill and Sign are not working. Because creators do not convert their PDF files into interactive fillable forms, not all PDF forms are fillable.
In other words, they purposefully create a PDF that can't be filled up or signed by anyone else. Platforms are the name for these types of forms. Users may want to make these forms interactive so that they can sign or fill in the information due to a variety of business requirements. As a result, in this post, we'll show customers how to apply a one-stop solution to fix the Adobe Fill and Sign are not working problem in just a few clicks.
Part 2: How to Fix Adobe Fill and Sign not Working
There are a variety of reasons why a user's Adobe fill and sign app isn't working or why the "Sign" option is greyed out. The security constraints imposed on PDF files are the primary cause of this issue. Once these restrictions are lifted, a user can sign the PDF form using an electronic signature.
Method 1: Adobe Acrobat Software Solution
More than five million organizations around the world rely on Acrobat DC to create and edit the smartest PDFs, convert PDFs to Microsoft Office formats, and so much more. When you need to collaborate with people in remote locations, fill and sign a form or get one signed, trust Acrobat DC to help you make it happen from anywhere.
Step 1: Download the latest Adobe Acrobat software version.
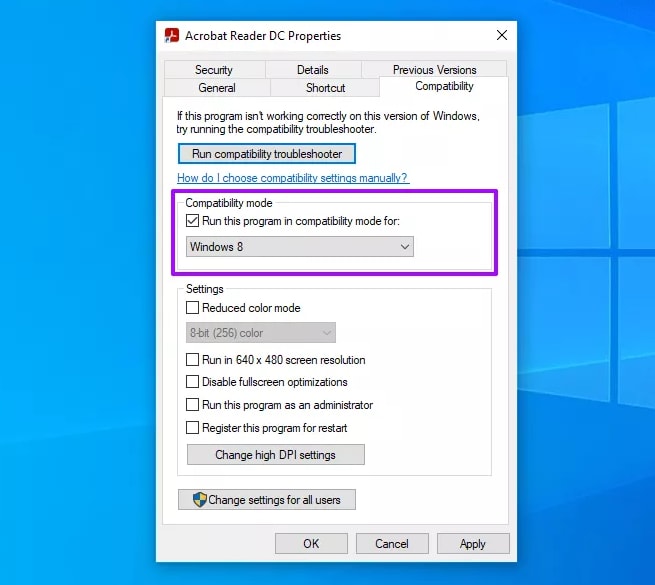
Step 2: To resolve compatibility issues with Windows 10, launch Acrobat Reader DC in Compatibility Mode. Begin by selecting Properties from the context menu of the Acrobat Reader DC icon on your desktop. Then select Properties. Switch to the Properties dialogue box's Compatibility tab, check the box under Compatibility Mode, and select Windows 8. Then, click Apply, and then OK.
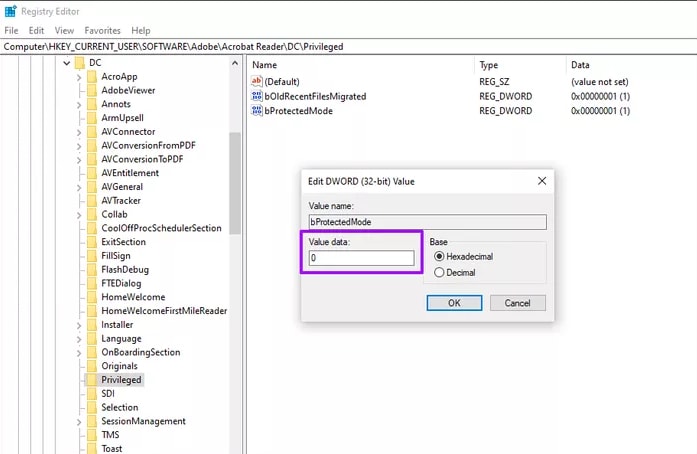
Step 3: Acrobat Reader DC utilizes a feature known as Protected Mode to protect your computer from malicious PDF documents. In rare cases, Protected Mode can also prevent the software from loading. As a result, try turning it off. You must use the Registry Editor to disable Protected mode because you cannot open Acrobat Reader DC.
1. Press Windows+R, type regedit, and then click OK to open the System Registry.
2.Copy the following path into the address bar of the Registry Editor window and press Enter:
“Computer\HKEY_CURRENT_USER\SOFTWARE\Adobe\Acrobat Reader\DC\Privileged”
3. Double-click the registry entry labeled bProtectedMode.
4. Set the value to '0' and click OK.
5. Exit the Registry Editor.
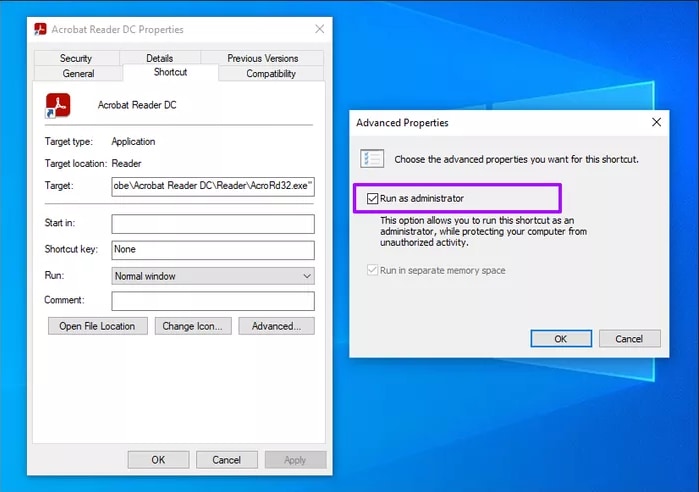
Step 4: Run Acrobat Reader DC with elevated rights. To do so, right-click your desktop's Acrobat Reader DC shortcut and select Run as Administrator. Click Yes in the User Account Control dialogue box that appears.
Method 2: SysTools PDF Unlocker
Step 1: Launch the PDF Unlocker application. To begin the PDF unlocking process, click Unlock.
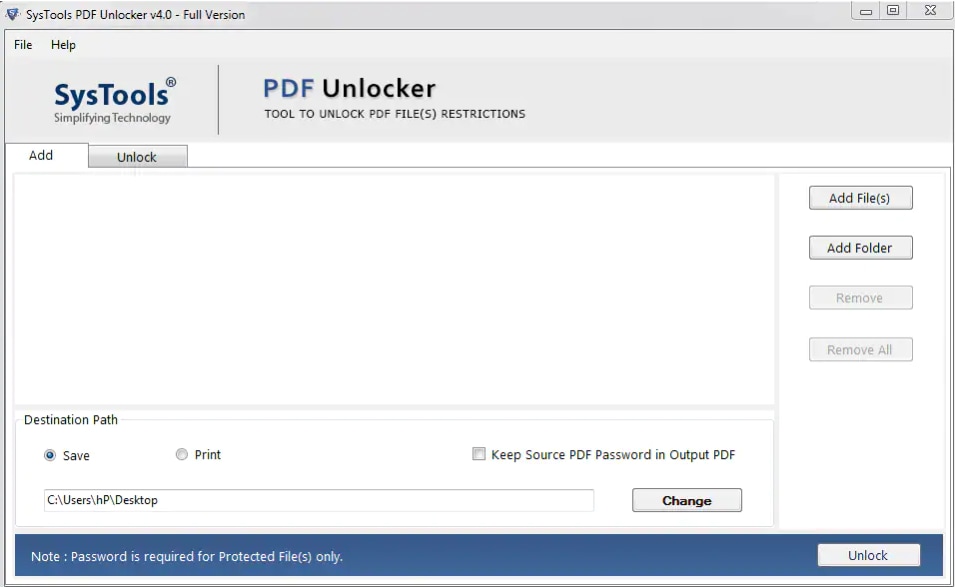
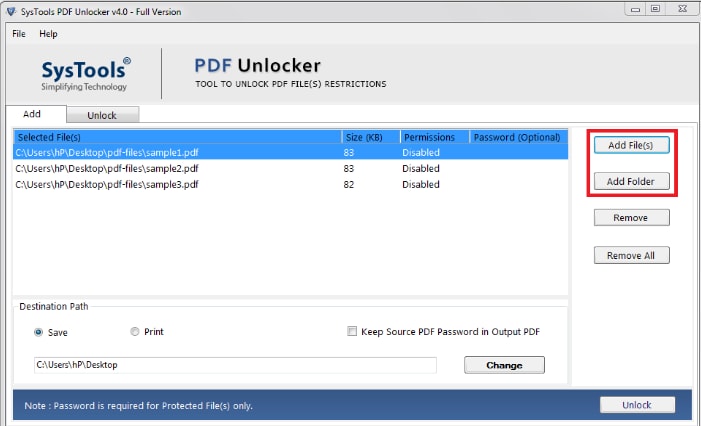
Step 2: Click the Add Files and Add Folder button to select the PDF files section.
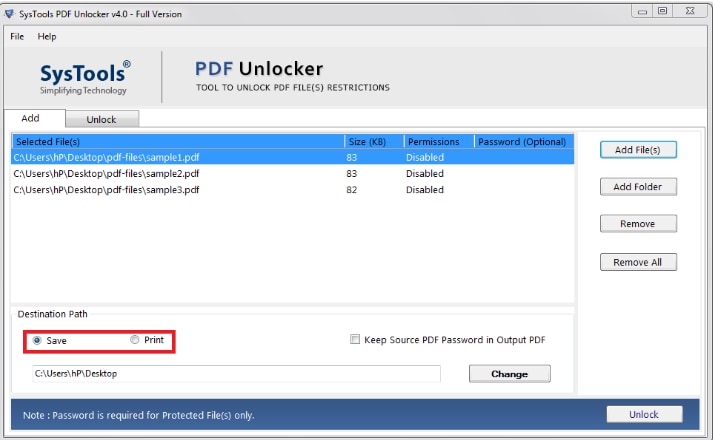
Step 3: Here you have the option of printing or saving the documents. Click "Change" to change the saving location.
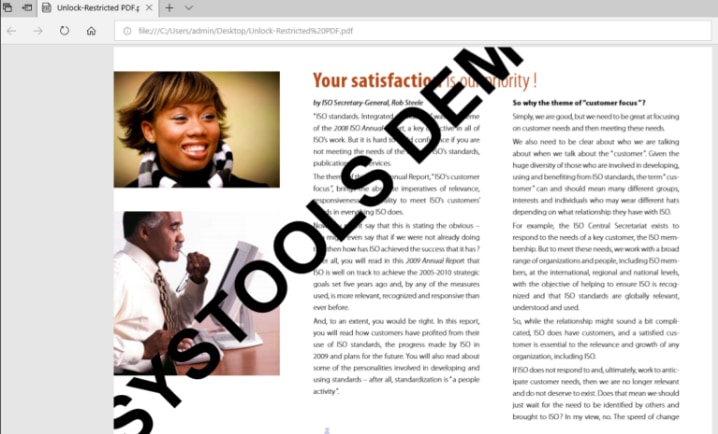
Step 4: Select the Unlock PDF option. Finally, go to the Destination location and open the unlocked PDF without any restrictions. You can now easily fill out and sign PDF files.
Method 3: How to unlock PDF online using EasePDF
Online utilities are very convenient, and we found that some online PDF solutions provide PDF unlocking functions. EasePDF is one of the best PDF solutions including PDF unlocking applications. It does not require any additional software or plug-ins. In addition, if you only have a few secure PDF files, there is no need to pay. The following steps can help you simplify the process.
Step 1: First, navigate to EasePDF website.
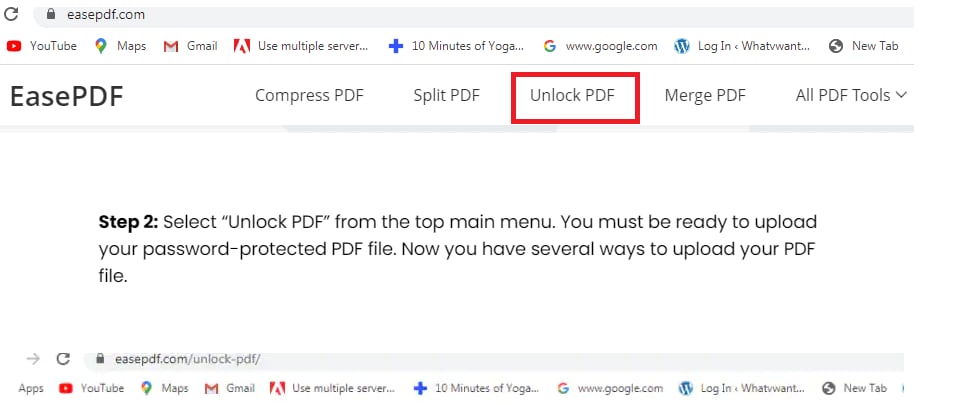
Step 2: Select “Unlock PDF” from the top main menu. You must be ready to upload your password-protected PDF file. Now you have several ways to upload your PDF file.
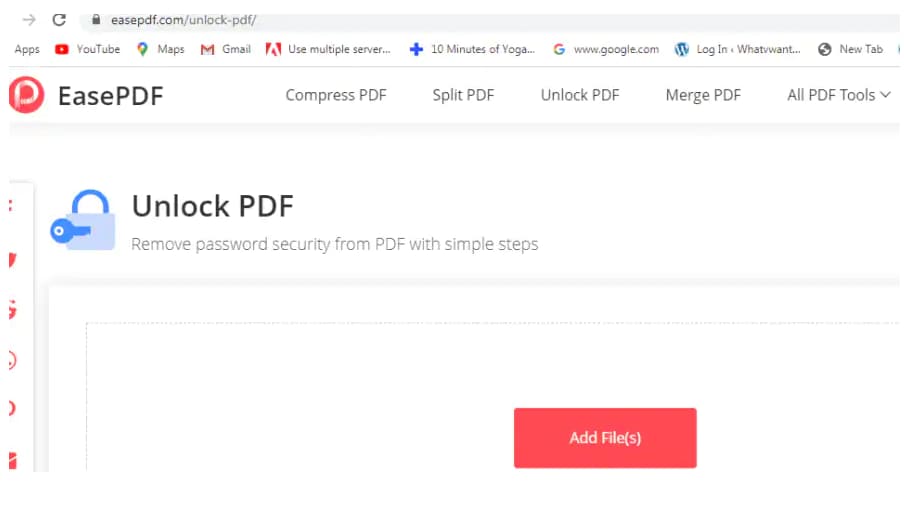
Step 3: Drag your PDF file into the loading area, or just click "Add File(s)" to upload it. Select "Unlock PDF" from the drop-down menu. As a result, the server will now begin decrypting your PDF file.
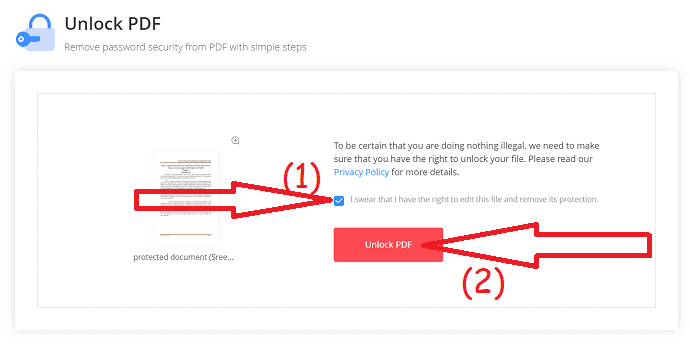
Step 4: Now you must be able to download the unlocked PDF file or to save it to your folder wherever you desire it.
Method 4: How to Unlock PDF online with iLovePDF
iLovePDF is the online tool that may be used to unlock your PDF file's password. It makes no difference whether or not you have the proper password. Its advanced password detection procedure will assist you in fast and easily unlocking the PDF file so that it can be viewed and edited by others. It has a lot of power, but there are some limitations to how you can utilize it.
Step 1: Launch iLovePDF, upload protected PDF files and click on “Unlock PDF”
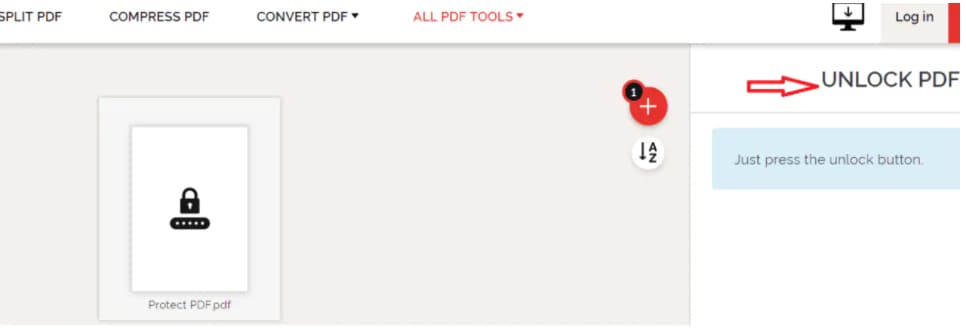
Step 1: Launch iLovePDF, upload protected PDF files and click on “Unlock PDF”
Step 2: You can also drag your PDF file into the loading area, or just click "Add File(s)" to upload it. To remove the encryption from your PDF file, simply press the "Unlock PDF" button.
Part 3: Repairing PDF Files Corrupted Or Not Opened? Try Wondershare Repairit
Unable to fill and sign in PDF file? Maybe the PDF file is corrupted. Try to install the Wondershare Repairit tool on your Windows PC right away. This third-party tool delivers the fastest results and is by far the easiest method to repair corrupted addendum files.

-
Repair damaged files with all levels of corruption, including blank files, files not opening, unrecognizable format, unreadable content, files layout changed, etc.
-
Support to repair all formats of PDF, Word, Excel, PowerPoint, and Adobe files.
-
Perfectly repair corrupted files with a very high success rate, without modifying the original file.
-
Support Windows 11/10/8/7/Vista, Windows Server 2003/2008/2012/2016/2019/2022, and macOS 10.10~macOS 14.
Step 1: Load your files on the Wondershare Repairit
-
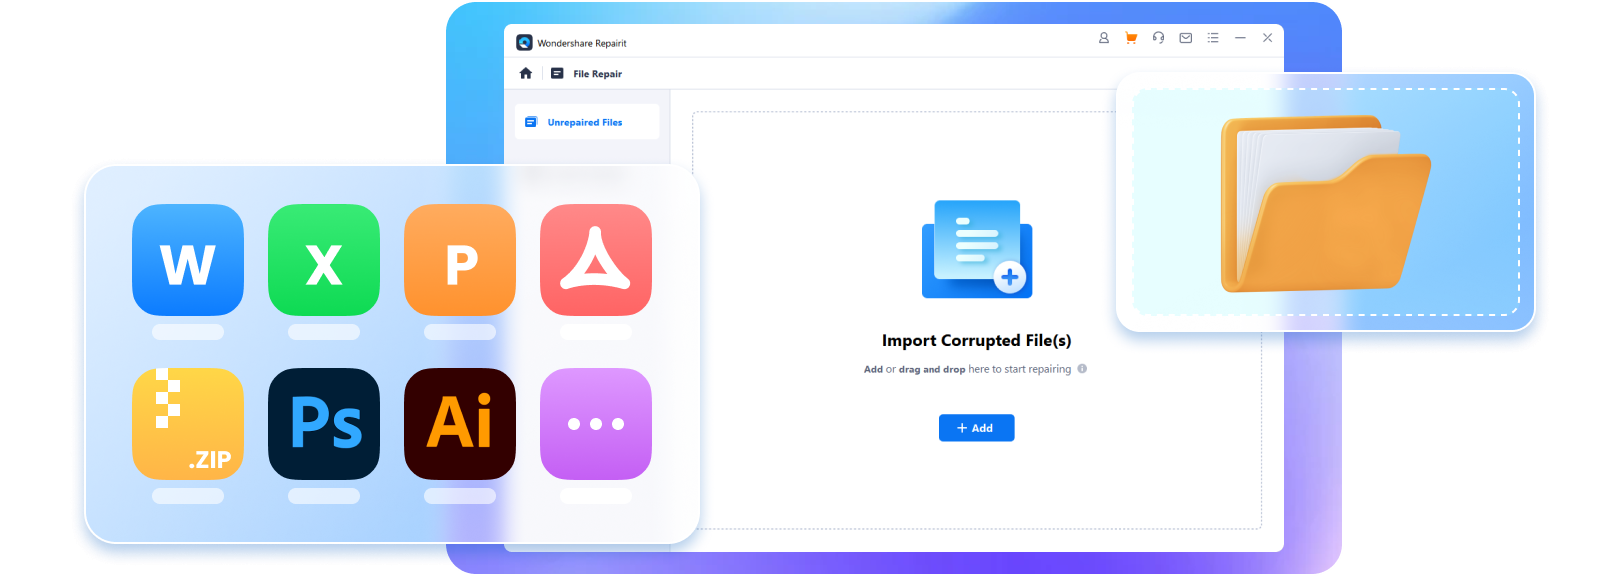
Firstly, launch the Wondershare Repairit on your system and go to the More Types Repair > File Repair section.
-
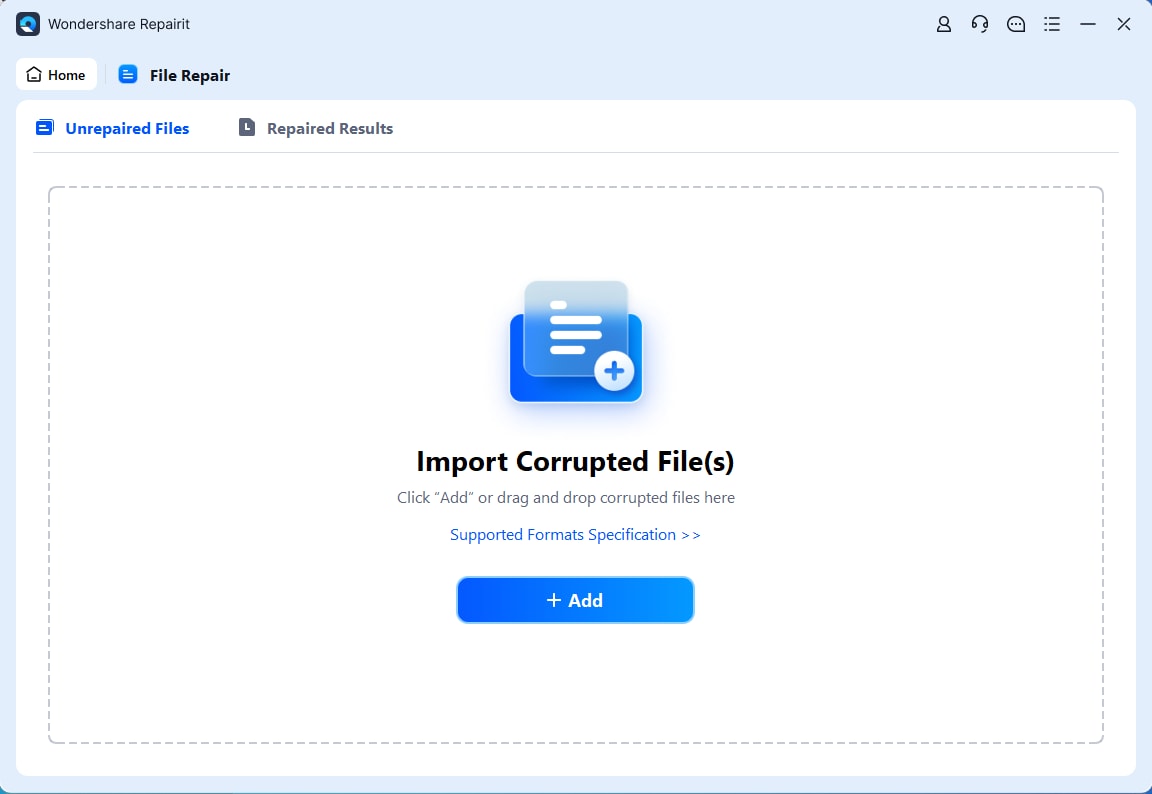
Click on the “Add” button, and it will take you to the browser window from where you can go to the location where the corrupted repair addendum wording file is stored. The user can select multiple documents and upload them on the tool at once.
-
The application boasts a filter that notifies you if you try to upload any incompatible format. Once you choose the files, the tool starts uploading them and will display the progress on the screen.
-
If you have uploaded the wrong file, you can easily remove it by clicking on the Trash icon adjacent to the file details.
Step 2: Start the file repairing process
-
Once the documents are uploaded, tap on the “Repair” option at the bottom to commence the process.
-
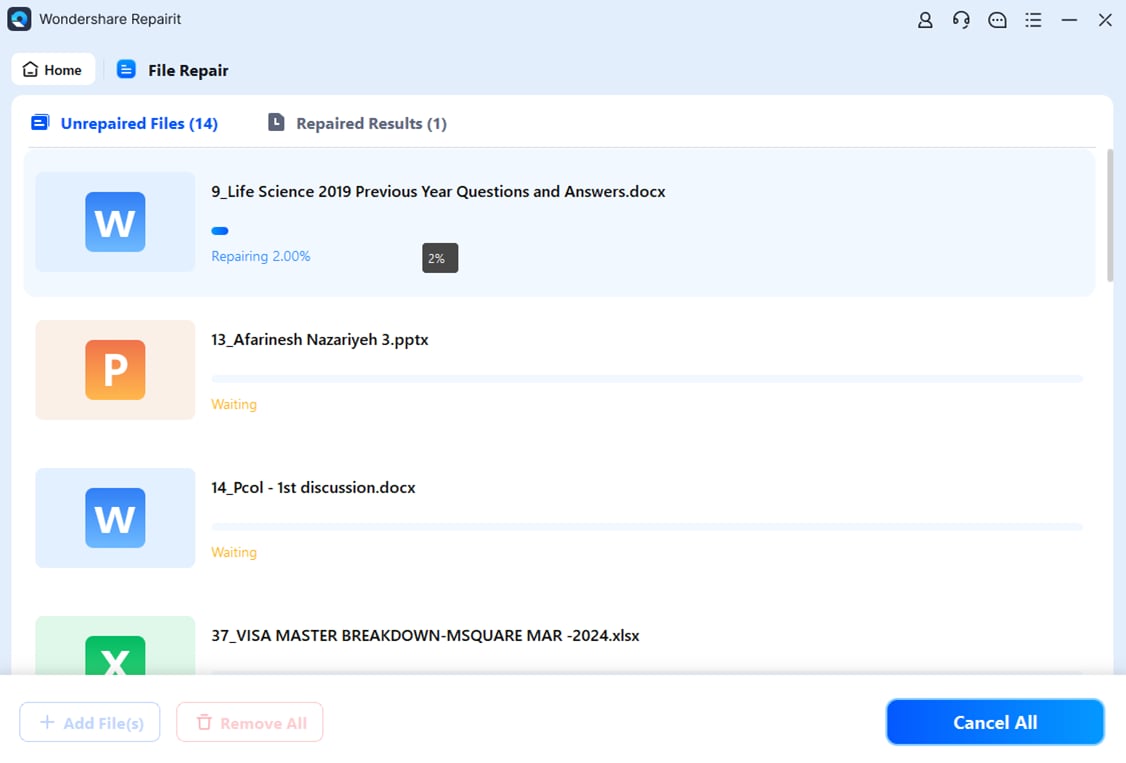
The tool will start scanning the loaded documents and troubleshooting all kinds of issues related to them.
-
It will also display the progress of the repairing process on the screen. Additionally, the tool will let you know the status of files that are being scanned, waiting to be repaired, or already completed.
-
A relevant prompt is generated on the screen indicating the number of files that have been repaired.
-
Also, if the repair addendum wording file is corrupted badly and cannot get repaired, the tool will notify you about the same. You can then connect with the expert to access your document.
Step 3: Preview and save repaired files
-
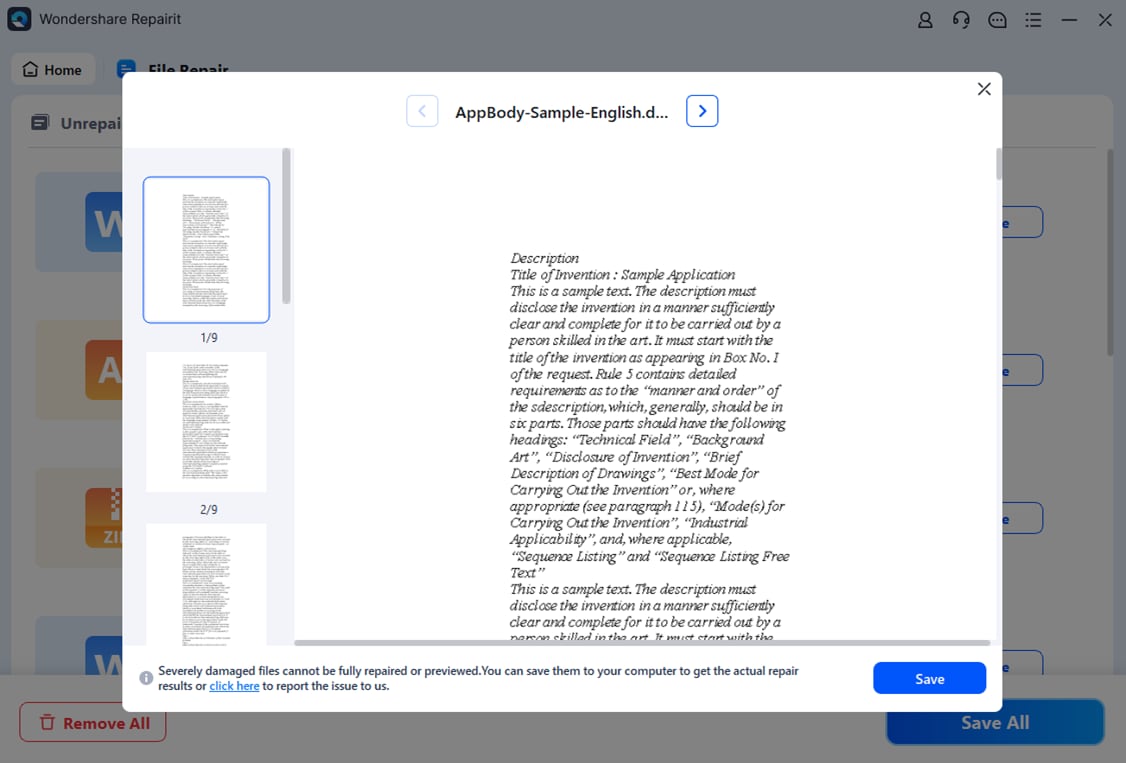
Click the “Preview” button and check the repaired file before exporting the document. If it is correct, then save the file to your desired location by clicking on the “Save” button.
-
Click the “Save All” button from the bottom panel to export all repaired files at once.
-
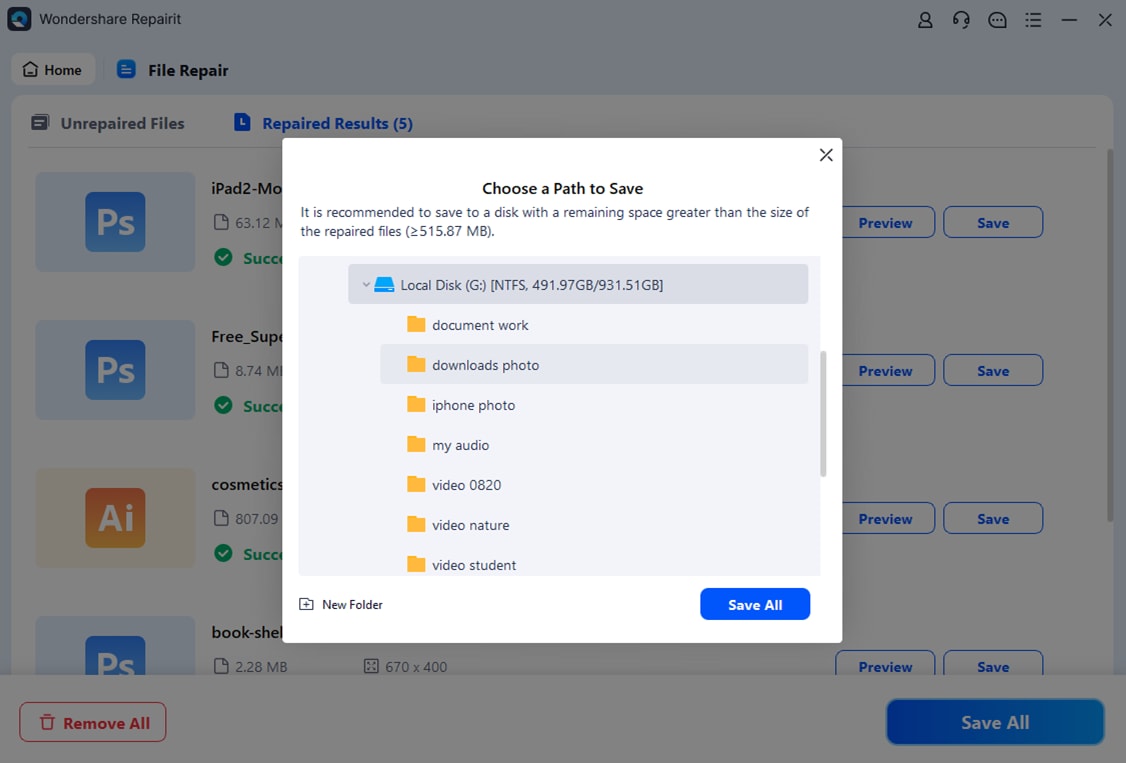
You can also choose the specific location where you want to save your repaired files.
-
The tool lets you know how many files are being exported.
Conclusion
Many times, a user must remove the owner password from a PDF document in order to access it without difficulty. However, the lack of a perfect solution prevents the user from accessing the document's content. As a result, after analyzing the situations of many people in relation to the encrypted PDF file, we reviewed a variety of software. As a result, we have presented the best 2020 program to remove permission passwords from Adobe PDF documents in this blog. Every piece of software shown above is an excellent or cost-effective utility that is worthy of your consideration. So, choose wisely!
FAQs
-
1. How do I repair Microsoft Office?
Follow the steps given here to repair Microsoft Office. Click “Start” and go to the “Control Panel”. Now, double-click “Programs & Features” and then tap “Microsoft Office”. Click “Change”. Select “Quick Repair” and then hit the “Repair” button. -
2. How do I repair a MOV file?
Three quick fixes to repair a MOV file are listed here. Re-download MOV files online and then re-import the file to the media player. Try to play it again and check whether the issue gets resolved or not. Run the virus scanner to eliminate the existing malware and spyware from the PC. Restart the media player and play the file again. Use third-party tools to repair the MOV file.

 ChatGPT
 Perplexity
 Google AI Mode
 Grok
Grok
