Excel worksheets frequently contain sensitive information, whether it’s a company’s financial data or personal information about hundreds or thousands of employees. That makes their protection vital to the security of that information.
But what if you frequently work with a protected file and are tired of constantly inputting a password, or if you want to unprotect an Excel worksheet that doesn’t include sensitive data?
This Excel worksheet protection removal guide aims to resolve that. Stay around as we explore the methods for unprotecting sheets on Excel, teach you to remove worksheet protection, and examine a tool for unprotecting Excel worksheets online.
In this article
Part 1. What Is a Protected Excel Worksheet?
Due to their sensitive nature, Excel worksheets are often protected. At its core, a protected Excel worksheet is a spreadsheet (XLS or XLSX) file with a password to prevent accidental changes and unauthorized tampering with the file’s data.
Unlike workbook protection, which protects the entirety of an XLS or XLSX file, protecting an Excel worksheet refers to adding a password only for a single sheet or tab. That lets users open the Excel file but prevents them from accessing a specific tab at the bottom that may contain sensitive information.
Contrary to popular belief, it’s not a surefire way of preventing access. After all, a protected Excel worksheet isn’t entirely secure, and anyone who knows what they’re doing with VBA can crack the password in a few minutes, especially on Excel versions older than 2010.
Part 2. How to Unprotect an Excel Worksheet With/Without a Password?
The process of unprotecting a worksheet differs depending on whether you know the password. If you do, it’s a matter of a few clicks. However, you can also unprotect an Excel worksheet without a password, and we’ll show you how to perform both tasks below. Let’s dive in.
Using Excel When You Know the Password
Unlocking worksheets in Excel when you have the password is as easy as locking them in the first place. It’s often a process you can complete in a few seconds, and you can follow these steps to unprotect a worksheet with the password:
Step 1: Open your Excel file and find a sheet you want to unprotect.
Step 2: Right-click the sheet tab at the bottom and tap the Unprotect sheet option.
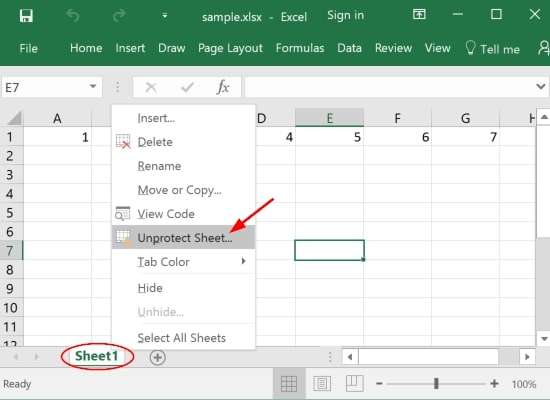
Step 3: Input your password and click OK.
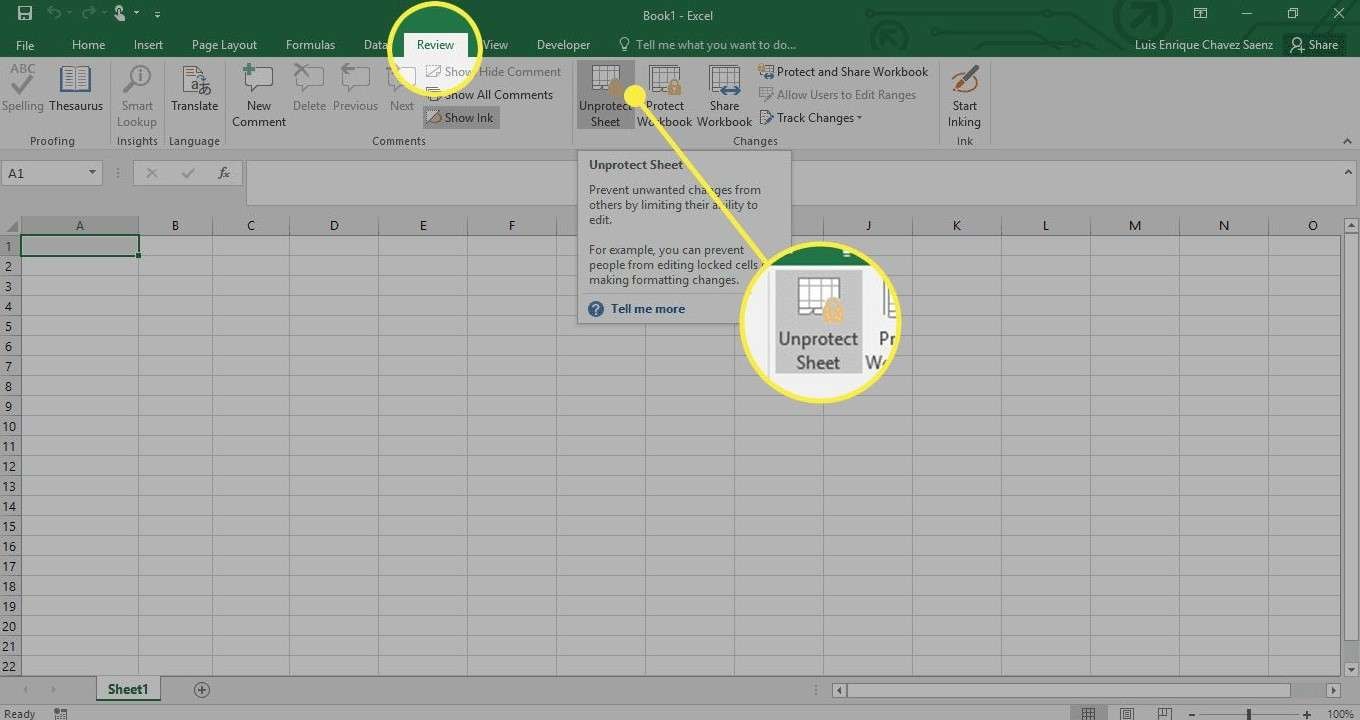
You can also do this by navigating to the Review tab and clicking the Unprotect Sheet button. Alternatively, head to the Home tab and click Cells > Format > Unprotect Sheet in the drop-down menu.
3 Methods Used for Excel Unprotection without Password
Using a Visual Basic Script in Excel
Not knowing the password certainly changes things, but unlocking an Excel worksheet without a password is still possible. All you need to do is use a Visual Basic script in Excel, also known as VBA code or VBA macro. Here’s how:
Step 1: Launch Excel on your computer and select the password-protected sheet by selecting its tab at the bottom of the window.
Step 2: Hit the ALT + F11 keys on your keyboard to open Visual Basic Editor.
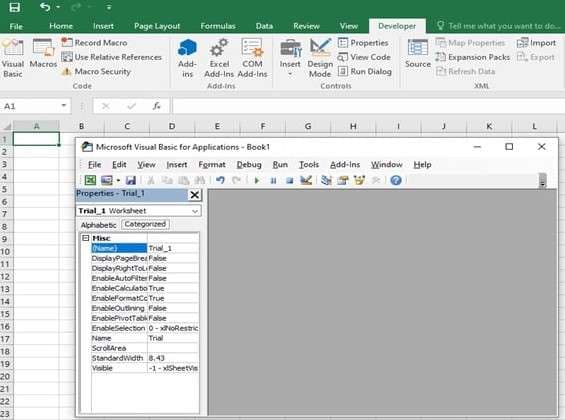
Step 3: Right-click your Excel workbook in the left sidebar and tap Insert > Module.
Step 4: When a window appears, input the following code.
| Sub PasswordBreaker() ‘Breaks worksheet password protection. Dim i As Integer, j As Integer, k As Integer Dim l As Integer, m As Integer, n As Integer Dim i1 As Integer, i2 As Integer, i3 As Integer Dim i4 As Integer, i5 As Integer, i6 As Integer On Error Resume Next For i = 65 To 66: For j = 65 To 66: For k = 65 To 66 For l = 65 To 66: For m = 65 To 66: For i1 = 65 To 66 For i2 = 65 To 66: For i3 = 65 To 66: For i4 = 65 To 66 For i5 = 65 To 66: For i6 = 65 To 66: For n = 32 To 126 ActiveSheet.Unprotect Chr(i) & Chr(j) & Chr(k) & _ Chr(l) & Chr(m) & Chr(i1) & Chr(i2) & Chr(i3) & _ Chr(i4) & Chr(i5) & Chr(i6) & Chr(n) If ActiveSheet.ProtectContents = False Then MsgBox “Password is “ & Chr(i) & Chr(j) & _ Chr(k) & Chr(l) & Chr(m) & Chr(i1) & Chr(i2) & _ Chr(i3) & Chr(i4) & Chr(i5) & Chr(i6) & Chr(n) Exit Sub End If Next: Next: Next: Next: Next: Next Next: Next: Next: Next: Next: Next End Sub |
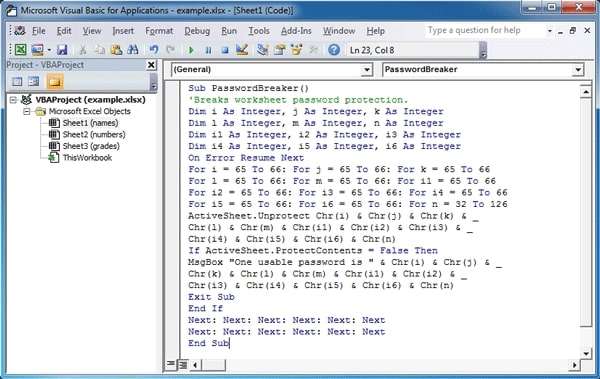
Step 5: Tap the F5 key to run this Excel worksheet password breaker. The Excel VBA unprotect worksheet macro will output a fake password.
Step 6: Once you see it, tap OK to unprotect a worksheet without a password.
Furthermore, the Excel VBA unprotect worksheet macro only works for Excel 2010 and older versions. After all, Microsoft has significantly improved its encryption algorithms for newer versions of Office.
Using Google Sheets
Google’s alternative to Microsoft Excel, Sheets, is another fantastic method for unprotecting Excel worksheets without a password. Here’s a quick guide for it:
Step 1: Open the Google Sheets web app in a browser and head to File > Open to upload your protected XLS or XLSX file.
Step 2: Check whether the password protection has been lifted and ensure you can edit the sheet.
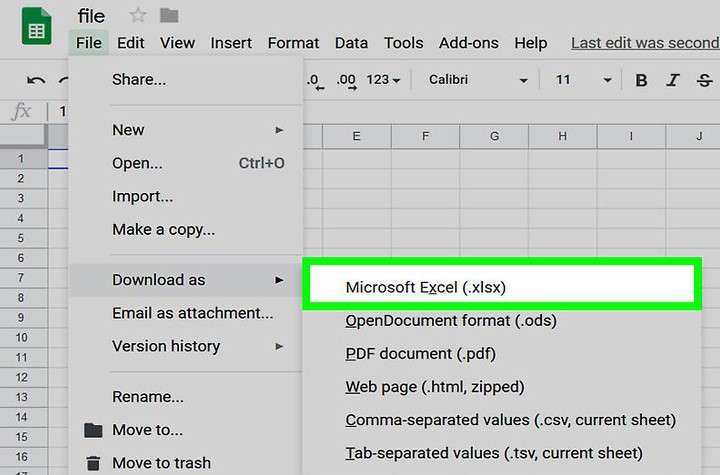
Step 3: If it worked, head to File > Download as > Microsoft Excel (.xlsx) and save it as a new Excel file.
Using Zip and Notepad
A combo of an archiving utility and the built-in Notepad program can also unlock Excel worksheets without a password, and here’s how you can try this method yourself:
Step 1: Open File Explorer and find the password-protected Excel file.
Step 2: Tap View > Show > Image name extensions to see the .xls and .xlsx extensions on your Excel files.
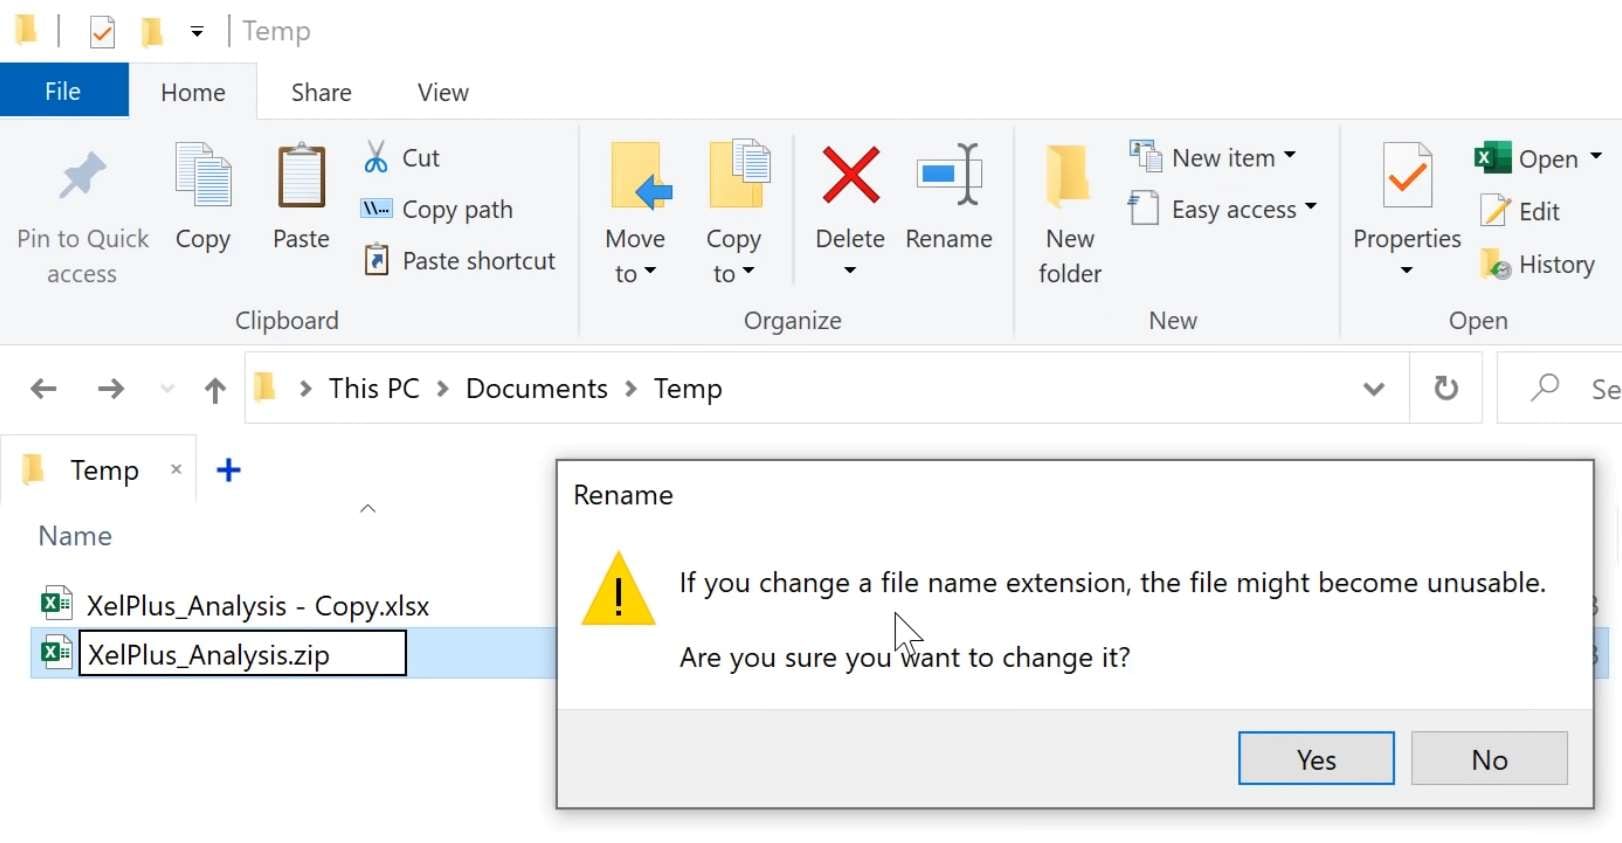
Step 3: Select your protected Excel file, hit F2 to rename it, and change its extension from .xls or .xlsx to .zip. Tap Yes to confirm.
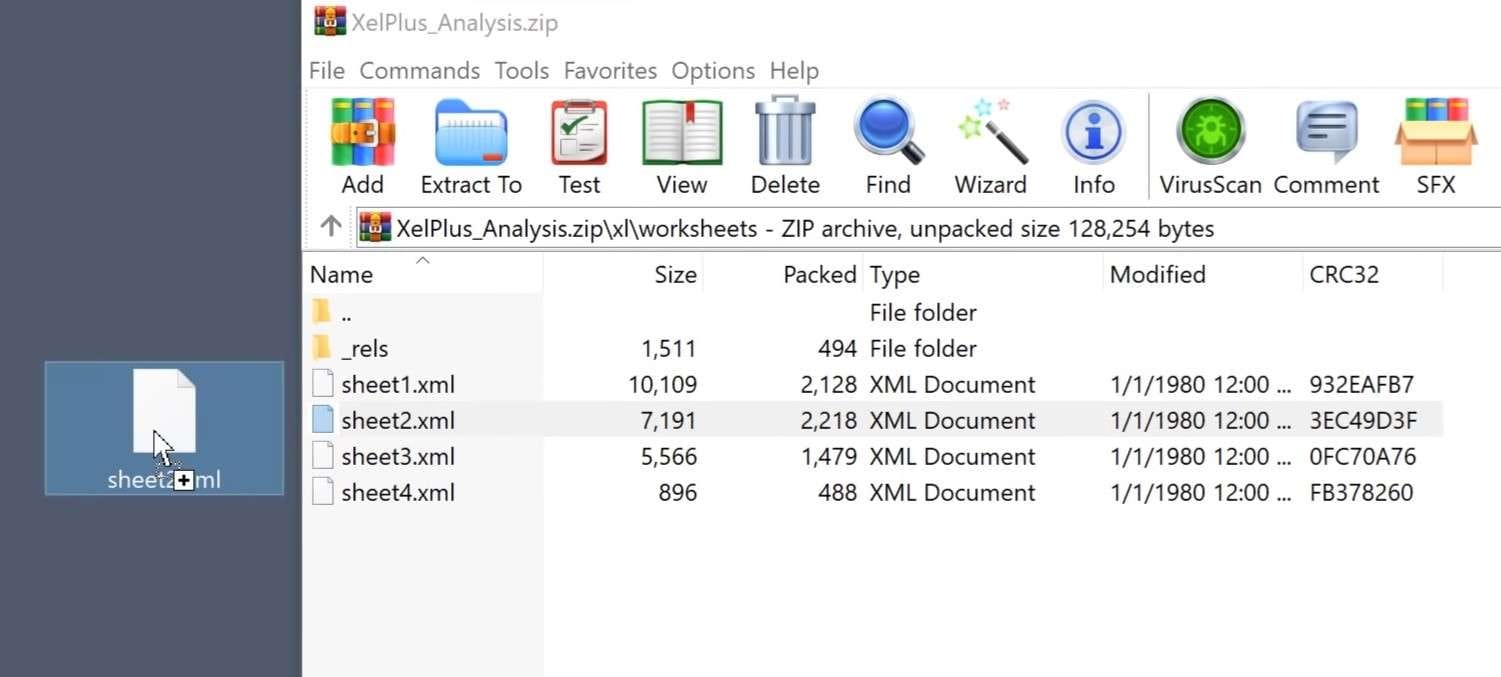
Step 4: Open the ZIP file with WinZip, WinRAR, or 7-zip.
Step 5: Go to xl > worksheets and drag-and-drop the XML file of the protected sheet to the Desktop.
Step 6: Open the extracted XML file with Notepad.
Step 7: Tap CTRL + . to search for “protect” and find the part of code that starts with “

Step 8: Drag and drop the edited XML file from the Desktop into the ZIP program.
Step 9: Close the ZIP app and change the extension from .zip to .xls or .xlsx.
Part 3. How to Unprotect Excel Worksheets Online?
The methods above vary considerably regarding their effectiveness at unlocking Excel worksheets without passwords, prompting many users to look into online services that promise to unlock Excel files. Thus, you can also unprotect Excel worksheets online with dedicated password removal services.
Using an Online Password Removal Service
While dozens of websites offer such services, we’ve found LostMyPass incredibly effective, while the service’s transparent success rates and pricing are undoubtedly a plus. Using it is a breeze, and here’s what you’ll need to do to unprotect Excel worksheets online:
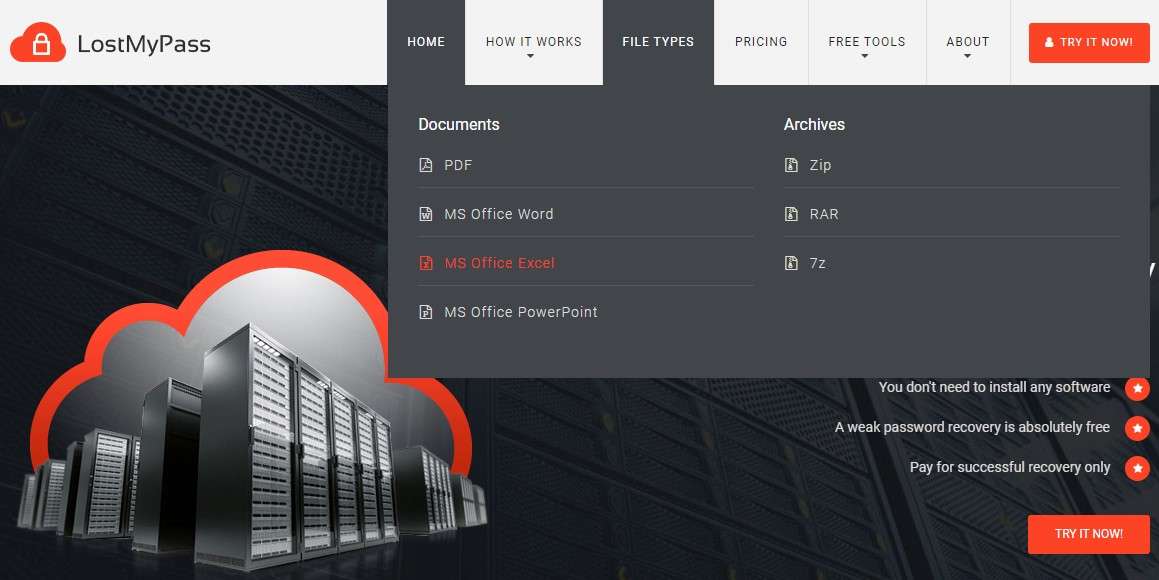
Step 1: Visit the LostMyPass website and head to File Types > MS Office Excel.
Step 2: Complete the CAPTCHA to agree to the website’s terms and conditions, then drop a protected Excel file into the field to upload it.
Step 3: Give LostMyPass a few minutes to unlock the file. If it’s successful, you can save it to your device by tapping the Download Unlocked File button.

However, it’s recommended that you avoid online password removal services if your Excel files contain sensitive data. Even the most secure tools are vulnerable to online attacks and might leak your sensitive information during uploads and downloads. They can also corrupt your data during password removal.
Part 4. How to Repair a Corrupted Excel File After Password Removal
Most of the abovementioned methods are excellent at unlocking your files, but the ones that unprotect Excel worksheets without a password are especially prone to file corruption. Even if you’ve used them and that happened, it’s important not to stress about it, as such situations can be dealt with, too.
A tool like Wondershare Repairit Excel File Repair makes handling a corrupted Excel file after password removal a breeze. This powerful file repair solution is fantastic for restoring corrupted documents like Excel, PowerPoint, Word, PDF, ZIP, PSD, PSB, and AI files.

Wondershare Repairit - Excel File Repair
1,010,994 people have downloaded it.
-
Repair damaged Excel files with all levels of corruption, including blank files, files not opening, unrecognizable format, unreadable content, files layout changed, etc.
-
Repairs all kinds of data stored in damaged Excel files such as tables, charts, formulas, comments, images, etc.
-
Support all formats of Excel files: XLSX/XLSM/XLTX/XLTM/XLS
-
Perfectly repair corrupted files with a very high success rate, without modifying the original file.
-
No limit to the number and size of the repairable files.
-
Support Windows 11/10/8/7/Vista, Windows Server 2003/2008/2012/2016/2019/2022, and macOS 10.10~macOS 13.
-
Except Excel, Repairit also supports all formats of PDF, Word, Excel, PowerPoint, ZIP, and Adobe files.
Whether you’re dealing with Excel corruption errors, unreadable content, or an unrecognizable file format, Wondershare Repairit can quickly and safely repair multiple corrupted Excel files simultaneously, and here’s how you can use it, too:
Step 1: Launch the app on your computer and head to More Types Repair > File Repair.

Step 2: Tap the Add button to import your corrupted Excel files. The app has batch-repair capabilities; you can add and repair multiple spreadsheet items simultaneously.
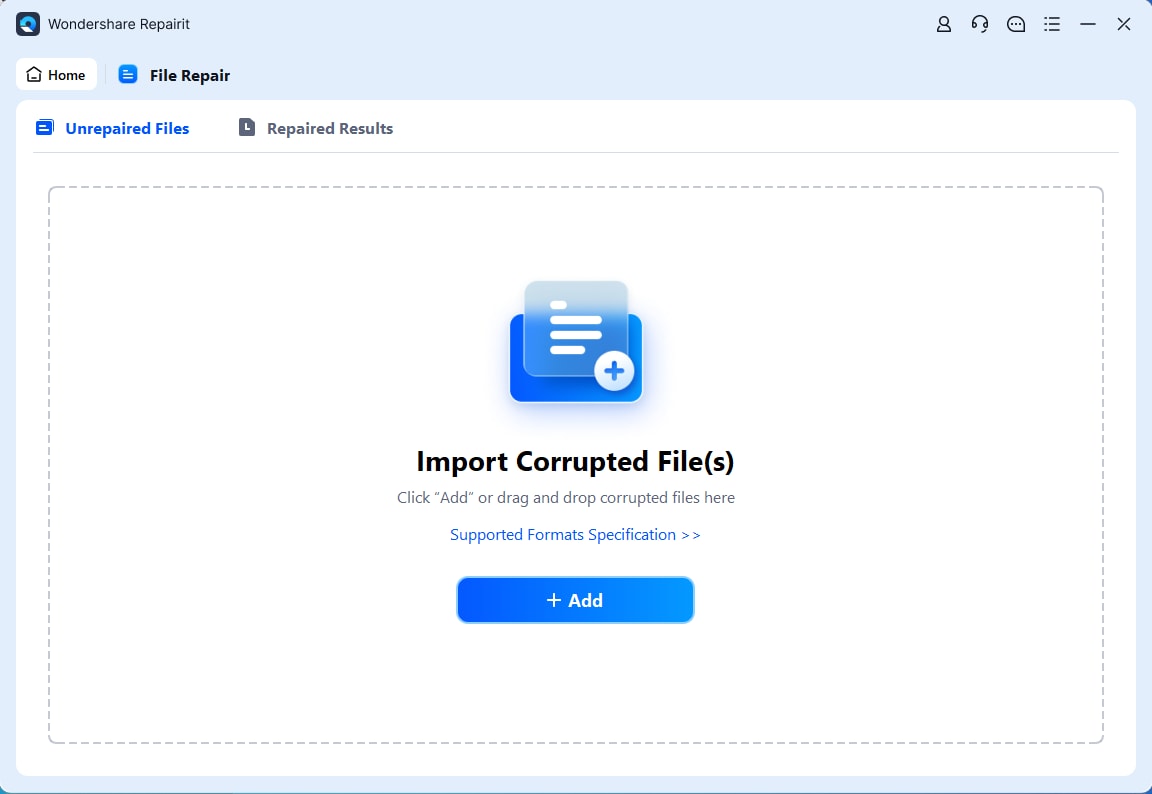
Step 3: Once you’ve added all your corrupted files, tap the Repair button to initiate the process.

Step 4: Wait for the app to repair the files as you watch its progress. Tap OK when you get the “Files repaired successfully” notification.

Step 5: Select the Repaired Results option on the left and preview the repaired file to verify its integrity.
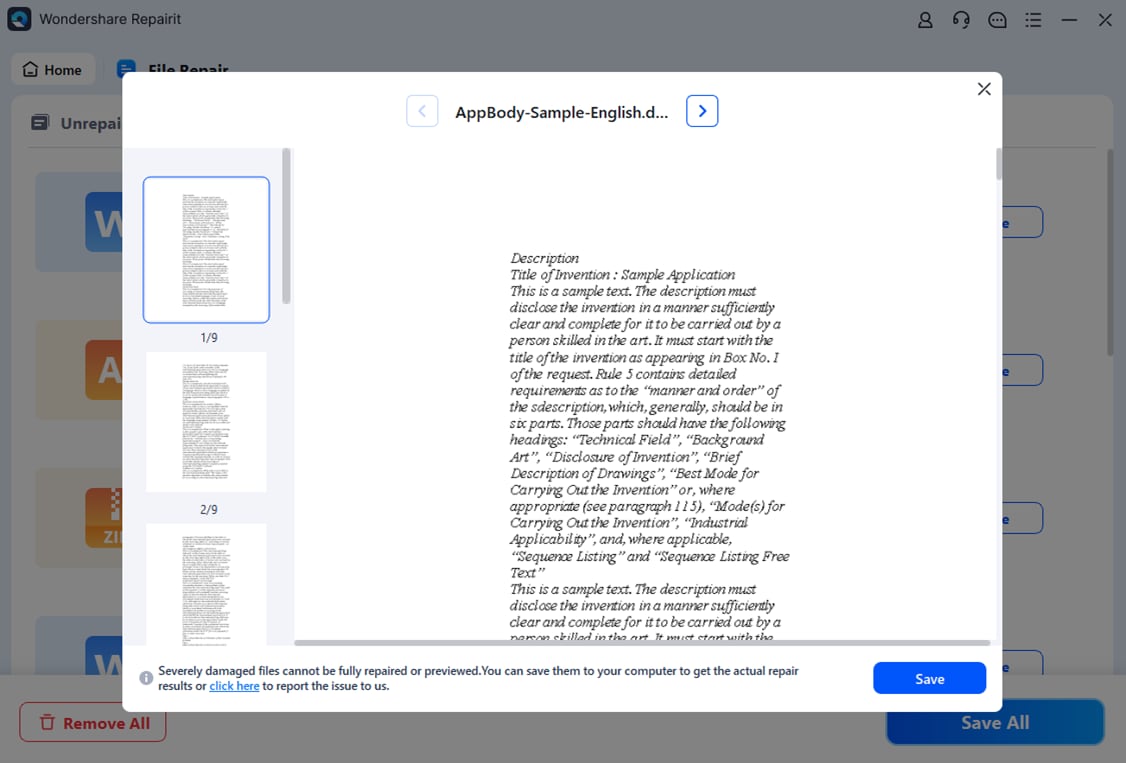
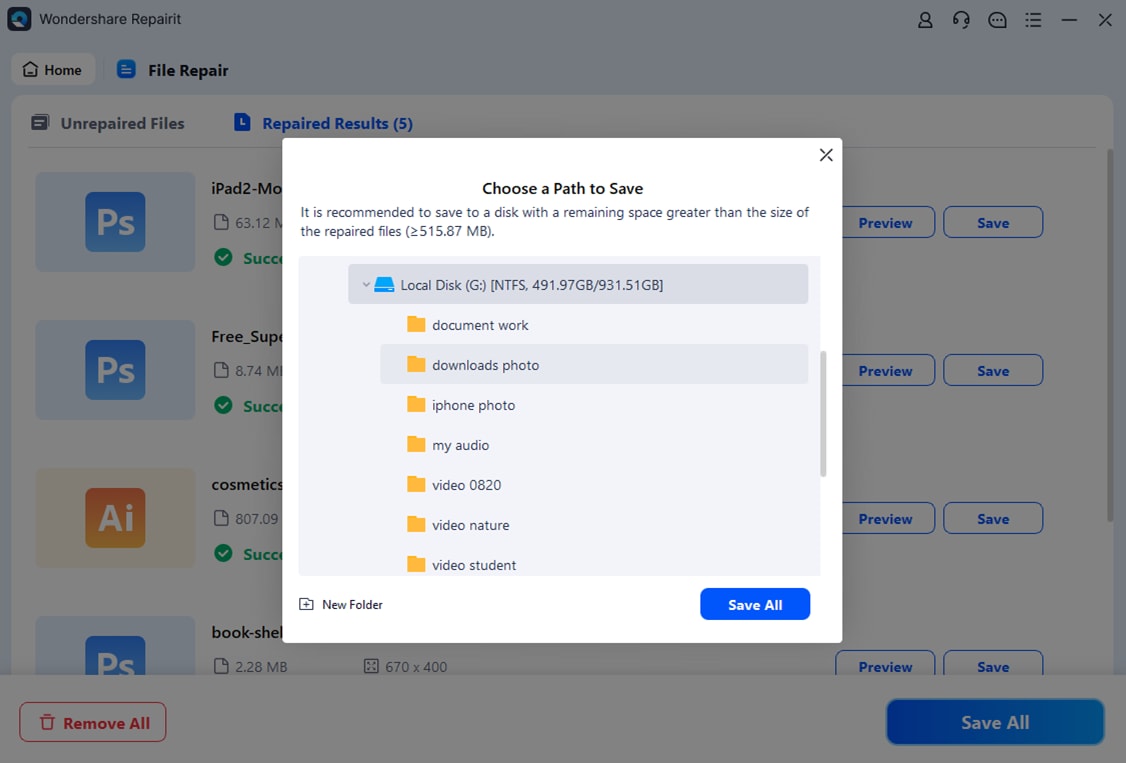
Step 6: If satisfied with the preview, tap Save to choose a location and save your repaired Excel file to your computer.
Whether you’re using older Excel versions and have corrupted XLS files or the latest Microsoft Excel app with corrupted XLSX files, Wondershare Repairit has you covered. The app supports Microsoft Excel 2019, 2016, 2013, 2010, 2007, and Office 365, making it indispensable for any file corruption situation.
Conclusion
Due to the sensitive nature of data within Excel files, many users choose to protect them with passwords, which can limit others from accessing and changing data within a spreadsheet. However, there are situations where you may want to collaborate with colleagues or avoid inputting the password each time you open the file, prompting many to remove worksheet protection.
When you have the password, this process is a breeze, and we’ve shown you how to unprotect Excel worksheets in such situations.
Not knowing the password is a different story. Still, even then, solutions like Visual Basic scripts, Google Sheets, and ZIP utility combined with Notepad can help unlock Excel worksheets without a password.
Many online tools are also fantastic options, and while we’ve shown you how to unprotect Excel worksheets online for free, we also suggest avoiding these tools if your file has sensitive data.
Finally, it’s worth noting that corruption is one of the most common side effects of unprotecting Excel worksheets without a password, but even those situations have a solution – Wondershare Repairit.
The dedicated file repair tool works with almost all Excel versions, restores corrupted files back to their original health in a few simple steps, and supports various other file formats, making it indispensable for any file corruption situation.


 ChatGPT
 Perplexity
 Google AI Mode
 Grok
Grok

