People consider using GoPro to capture amazing videos of different situations. The good thing about GoPro is that they allow you to capture amazing and high-quality videos anytime you want. If you want to download, transfer, and upload GoPro videos to your Mac, Windows, iPhone, Android, and Instagram, you have come to the right place. We are going to share details and steps that will let you download GoPro videos easily.
In this article
- 01 How to Transfer, Upload, and Download GoPro Video to Mac?
- 02 How to Download, Transfer and Upload GoPro Video to Windows
- 03 How to Download, Transfer and Upload GoPro Video to iPhone
- 04 How to Download, Transfer and Upload GoPro Video to Android Phone
- 05 How to Upload GoPro Video to Instagram
- 06 How to Repair Corrupted GoPro Videos?
Part 1: How to Transfer, Upload, and Download GoPro Video to Mac?
Suppose you want to view GoPro videos on your Mac, read on to know how to do it. We will share four simple steps that will allow you to transfer GoPro video without any fuss. Just follow the solutions below, and you will be all set.
Solution 1: Using Quick
Step 1: See if your Mac has Quick installed. If not, download it on the computer first.
Step 2: Now, take out the USB cable and connect the Mac to your GoPro camera via that USB cable.
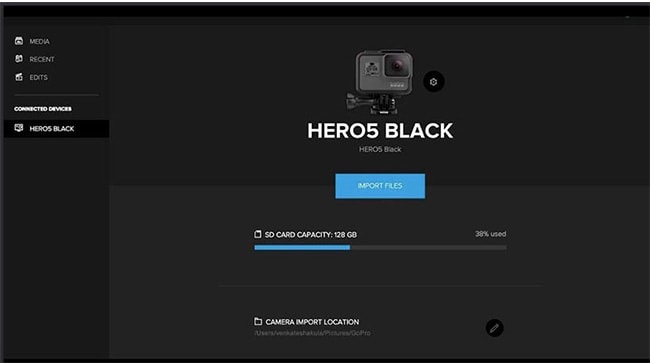
Step 3: Once you connect the GoPro camera, launch Quick on your computer. After you launch it, you will see the Import Files option. Click on the Import Files option to start importing all the videos from your GoPro camera to Mac.

Solution 2: Using an SD Adapter
Step 1: If you already have an SD adapter, insert the SD card of your GoPro inside the SD adapter carefully.
Step 2: Take the adapter and insert it in the SD adapter slot. It should be on either side.
Step 3: You will have to launch the finder window. After launching it, look for the SD card.
Step 4: Double click to open the SD card. You will see two options there, one is DCMI and the second one is MICS. You need to select DCMI.

Step 5: Click on the 100GOPRO folder that you see on the screen. If you see 101GOPRO/102GOPRO, click on that option.

Step 6: Everything set, and now you can start importing photos from the GoPro SD card to your Mac PC.
Solution 3: Using Image Capture-Automatic Feature
Step 1: Connect the GoPro device to your Mac, and you will instantly see the Image Capture notification.
Step 2: Select all the files that you wish to transfer to your Mac PC. If you want to transfer all the images, select the Import all option.
Solution 4: Using Image Capture-Manual Feature
Step 1: Just like the previous solution, connect your GoPro device to your Mac PC. If you don't see the pop-up message automatically, you need to select the magnifying glass first. The option will be in the top-right corner.
Step 2: You will see the Spotlight section. You can type iPhoto or Image Capture. Once done, you can start importing all the files.

Part 2. How to Download, Transfer and Upload GoPro Video to Windows
For Windows users, if you want to get GoPro videos, here in this part, we will discuss how to download, transfer, and upload GoPro Videos to Windows easily. You can try one out of the four different ways to import videos.
Solution 1: Launch Quick
Step 1: Use one USB cable to connect the GoPro device to your Windows computer. Download Quick.
Step 2: Now launch Quick on your Windows computer.
Step 3: Click the Import Files option to start importing the files from your GoPro device to your Windows PC.
Readers may note that this option is available for HERO7 Black and earlier models.
Solution 2: Automatic with Auto Launch
Step 1: Connect your GoPro camera to your computer. While connecting, you will see a prompt asking you to take action and decide what you would like to do.

Step 2: You need to open the device. This will let you view all the files with File Explorer.

Step 3: Choose import photos and videos. You will see the screen with all the files. Choose the files that you wish to transfer.

Solution 3: Manually with File Explorer
Step 1: Choose Open Device to view all the files. File explorer will get launched. Once you see your GoPro camera, double click on it.

Step 2: You need to double click on the GoPro client disc volume option.

Step 3: Open DCIM. Then access the GoPro folder. Now copy the files and transfer, download, or upload them on your Windows computer.

Part 3. How to Download, Transfer and Upload GoPro Video to iPhone
Sometimes, you may want to transfer upload GoPro videos directly to your iPhone. We have a few solutions that will let you transfer, download, and upload GoPro videos straight to your iPhone.
Solution 1: Transfer GoPro videos to iPhone via iTunes
Step 1: First things first. You will have to connect your GoPro device to the computer and transfer the files to your computer for this solution.
Step 2: Get the latest iTunes version. Visit Preferences and then Devices. After that, choose iPhones to sync automatically.
Step 3: Hit the File tab. You will see it on the toolbar. Then you need to click on File first and then add a folder to the Library. This will allow you to add the GoPro videos to your iTunes library from your computer.

Step 4: Once you see your GoPro device's videos, you need to hit the iPhone icon. Afterward, go to Settings, then comes summary, after that Movies, and later Sync Movies. Click on the apply option at the end to start the syncing process.

Solution 2: Uploading a video of GoPro to iPhone through iCloud
Step 1: With a USB cable, connect your GoPro device to your computer. The computer will detect your GoPro device as an external drive.
Step 2: Open a browser, and launch iCloud.com. Use your Apple credentials and log in.
Step 3: Now click on the iCloud Drive. Then hit the cloud icon. Go on and select all the videos from GoPro's storage folder to transfer them to your iPhone.
Step 4: Once you locate the files, simply click on open. It will begin the uploading process of the videos to iCloud Drive.

Solution 3: Transfer the Files wirelessly to your iPhone
Step 1: Download and launch the GoPro application on your iPhone and hit the camera icon on the left corner.
Step 2: Click on "Add a Camera" to pick your GoPro camera name.
Step 3: Turn on "Your Camera" and "My Camera". After that, you need to select "Connect New Device."

Step 4: Switch on wifi and afterward add the password. Once your device is connected to wifi, you will see your GoPro gadget is accessible on the GoPro application. Hit "Proceed" to associate GoPro with your iPhone gadget.
Step 5: Press the GoPro media button to check all recorded media on your camera that you have shot and spared.
Step 6: Snap on the edit button and select the video documents to move to the iPhone. After the affirmation, the GoPro recordings will be on iPhone for you to watch later.
Part 4. How to Download, Transfer and Upload GoPro Video to Android Phone
GoPro has completely changed the way people used to see the world. Since you will be using GoPro to capture different moments, here are four different ways to easily transfer GoPro Videos to Android.
Solution 1: Through GoPro App
Step 1: Visit the app store and download GoPro.
Step 2: Connect your Android device with the GoPro camera. All the files will begin to get downloaded and transferred.
Solution 2: Via SD cards
Step 1: Open the gallery and go to the GoPro folder.
Step 2: Now press and hold the thumbnail to begin the multi-selection process.
Step 3: Select the videos or photos that you wish to transfer.
Step 4: You will see three dots, click on that and select move to the album.

Step 5: Create Album will be your next selection. Add a new name to the album and click on create.
Solution 3: Use Quick Key
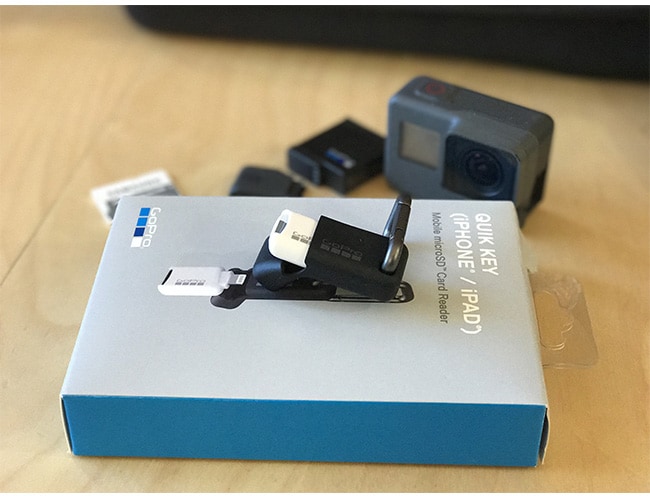
Step 1: Put the microSD in the Quick Key.
Step 2: Insert the USB for Quick Key to the Android device.
Step 3: Select the Star Pairing option, then choose the GoPro SD card.
Step 4: Once GoPro is paired, you may go ahead and start transferring and downloading the GoPro files to your Android device.

Solution 4: Using a MicroSD
Step 1: Turn off both your GoPro device and your smartphone.
Step 2: Put out the SD card from the GoPro device, insert it in your Android device. Power on the phone.
Step 3: Go to Gallery and then Albums. Search for GoPro files.
Step 4: Select the files that you wish to copy to your phone's internal Drive.

Part 5. How to Upload GoPro Video to Instagram
Sharing your GoPro videos to Instagram can now be done directly. Instagram is the best place to upload your GoPro videos. Here's how you need to do it.
Step 1: Launch the GoPro app. Browse through the files that you would like to upload. Tap on the files one by one.

Step 2: You will see a share icon on the app. Click on that, and you will see multiple social media platforms where you can share your files. Select Instagram. You can trim the video if you want. And that is how you can share your stunning GoPro moment with everyone.
Part 6. How to Repair Corrupted GoPro Videos?
If you ever come across corrupted GoPro videos, you can use Repairit GoPro Video Repair Software to solve the issue quickly. It can repair multiple video formats, such as MP4, FLV, MKV, MTS, M2TS, MOV, etc. Here are the features of Repairit Video Repair:

Wondershare Repairit - GoPro Video Repair
1,010,994 people have downloaded it.
-
Repair damaged videos with all levels of corruption, such as video not playing, video no sound, out-of-sync video or audio, playback errors, header corruption, flickering video, missing video codec, etc.
-
Repair videos of diverse formats, including MOV, MP4, M2TS, MKV, MTS, 3GP, AVI, FLV, MXF, KLV, INSV, M4V, WMV, MPEG, ASF, etc.
-
Repair damaged or corrupted videos caused by video compression, system crash, video format change, etc.
-
Repair critically damaged or corrupted videos available on SD cards, mobile phones, cameras, USB flash drives, etc.
-
Repairit has a quick and advanced scanning mode. You can use either depending on the level of corruption the video file has undergone.
-
No limit to the number and size of the repairable videos.
-
Support Windows 11/10/8/7/Vista, Windows Server 2003/2008/2012/2016/2019/2022, and macOS 10.10~macOS 14.
Repair corrupted GoPro videos on your computer
Step 1: Download Wondershare Repairit Video Repair Software
First, download Wondershare Repairit Video Repair Software on your computer. You can download this tool both for Windows and Mac.
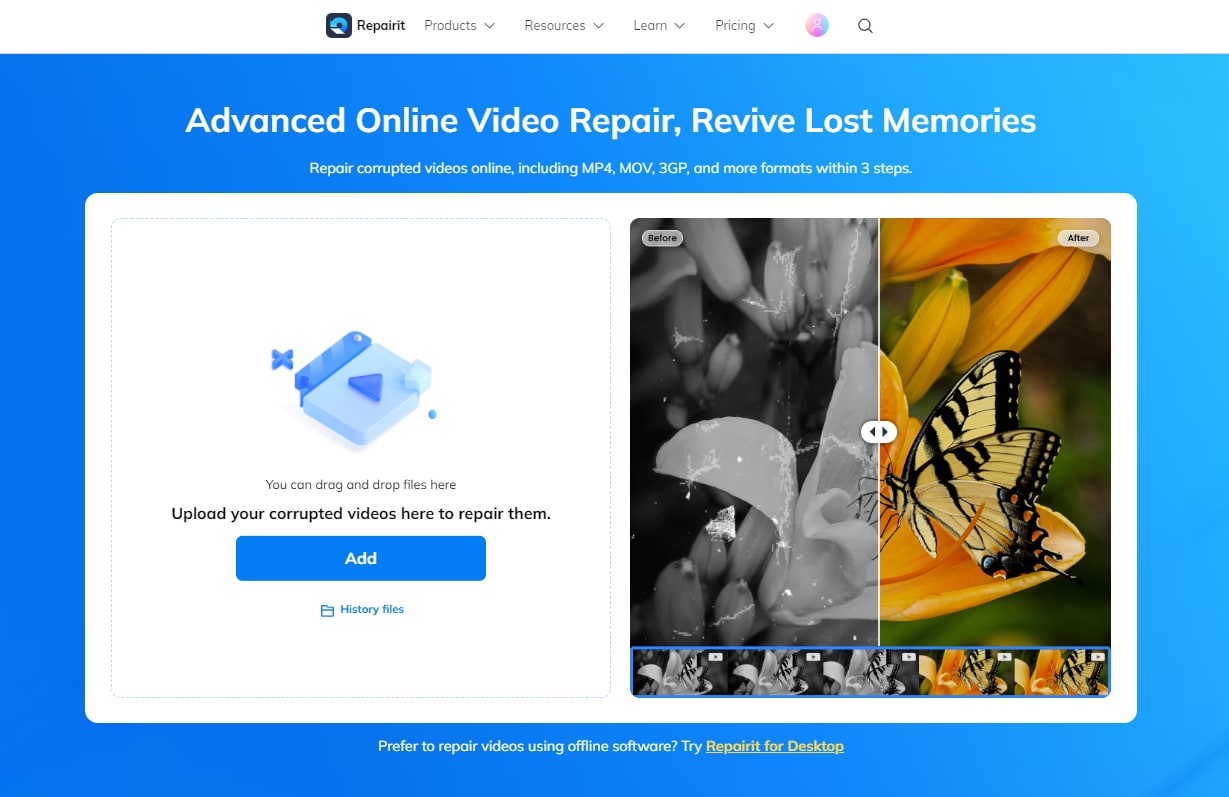
Once downloaded and installed. Launch the tool on your computer. You will see the "Add" option. Click on that to start adding the corrupt GoPro videos.

Step 2: Start Repairing
You will see the "Repair" option. Click on that, and the tool will first analyze and then repair the File.

Step 3: Preview the repaired video and click on the save option.
Once the files get repaired, you need to click on the "OK" option. Click on the "Preview" option to take a look at the File. If you are satisfied, click on save now to save the File.

If you do not want to download a software on your Windows or Mac, you can also try the online version of Repairit. Here are its features:
-
Repair damaged videos with all levels of corruption, such as video not playing, video no sound, out-of-sync video or audio, playback errors, header corruption, flickering video, missing video codec, etc.
-
It supports customers repair 150 videos per month and supports each video of 3GB online.
-
The online version supports various video formats: MOV/MP4/M2TS/MKV/MTS/3GP/AVI/FLV/MXF/M4V.
-
Security enough: videos are transferred via a 2048-bit encrypted connection and deleted after 3 hours.
-
It fixes videos online without damaging the original quality or integrity.

Closing Word
GoPro videos can easily be transferred, downloaded, and uploaded anywhere you want if you know the correct steps. Now you know which tool to use for those looking for a top solution to repair their corrupted GoPro videos. Wondershare Repairit Video Repair Software is easy to use and reliable. So, go on and repair GoPro files if you need to, or upload them directly.
People Also Ask
-
1. Is GoPro better than iPhone?
iPhone can surely capture great photos; however, the GoPro cameras are advanced. It also depends largely on how you want your photos to be. Anyhow, GoPro will provide you with a better camera. -
2. Can I use GoPro for Facebook live?
Yes, it's able to use GoPro for Facebook live. The steps are as follows.
Step 1: Download the GoPro app and launch it on your phone. Once done, connect your camera.
Step 2: From the list of cameras of GoPro, you need to search for your camera and select that.
Step 3: With the help of the prompts, pair your phone app with GoPro.
Step 4: Go to the Live4 app and hit the "+" icon log in using your Facebook ID.
Step 5: Grant the permissions that you see. You will see some options on top, click on the GoPro option; you can select the live stream and live stream your GoPro video. -
3. What is the best camera for Facebook Live?
Since it is about Facebook Live, one of the best options to go for is GoPro Hero7. -
4. How can I improve my GoPro footage?
Make sure to update your GoPro camera. It must have the latest software. It is how your camera will perform optimally. Also, ensure that it is smudge-free. -
5. What is the fastest way to upload gopro videos to cloud?
You need to download and launch the GoPro Quick app. Click the settings icon and choose GoPro Subscription, then tap "Mobile Upload" to turn the function on. With the Auto Upload on, the GoPro Quick app will auto-upload GoPro footage from your GoPro camera connected to GoPro Quick to the cloud.


 ChatGPT
 Perplexity
 Google AI Mode
 Grok
Grok
