

 TL;DR:
⚡ Quick Fix: Improve Video Quality in Premiere Pro
Boost your video resolution and fix blurry footage instantly with these 3 steps:
● Apply Unsharp Mask in Premiere: Create an Adjustment Layer above your clip, search for the Unsharp Mask effect, and drag it onto the layer. Tweak the amount and radius sliders to fine-tune sharpness.
● Optimize High-Quality Export Settings: Click File > Export > Media (or press Ctrl+M). Adjust the format, codec, and bitrate settings to match your target resolution and maximize render quality.
● Upscale with AI One-Click Alternative: If Premiere's workflow is too complex, use Wondershare Repairit AI Video Enhancer to automatically denoise, unblur, and upscale low-res videos up to 4K.
Ask AI for a summary
 ChatGPT
 Perplexity
 Gemini
 Claude
 Grok
Grok
In today's ever-changing world of digital content creation, it's crucial to maintain high-quality video standards. Whether you're a videographer, YouTuber, or content creator, ensuring that your videos look good is key. Even your brand-sponsored and collaboration videos require high-quality content.
But now there is no need to worry. Luckily, Adobe Premiere Pro, a popular and reliable video editing software, comes packed with tools that can help enhance your videos. From sophisticated color adjustments to precise editing controls, Premiere Pro offers features that can significantly improve video quality.
Additionally, we've mentioned another excellent alternative tool for video upscaling. So, without further ado, read this entire blog to learn about how to improve video quality in Adobe Premiere Pro in 2024. Keep reading!
In this article
Part 1. How to Improve Video Quality in Adobe Premiere Pro
Premiere Pro is one of Adobe's most versatile and powerful tools for enhancing video quality. It is designed to help users edit video clips and movies professionally. This editing software is widely recognized for its cutting-edge features that enhance the visual editing process to a new level. By using Premiere Pro, you can improve video quality and create high-quality videos that attract your audience and leave a lasting impression.
To use Premiere Pro to enhance video quality feature, follow the steps outlined below. Make sure to follow every step and pay attention to every detail to avoid issues while editing your video in Premiere Pro.
Step 1: Import Your Video in Adobe Premiere Pro
To start, open Adobe Premiere Pro on your computer. Look for the "File" tab in the top left corner of the interface. Click on it, and a list of options will appear. Scroll down and look for the "Import" button and tap on it.
Alternatively, you can use the shortcut by pressing CTRL and . on your keyboard simultaneously. This will bring up a "File" tab. Select your video file and add it to the Timeline by dragging it into the workspace. This process allows you to import your video into Premiere Pro and start editing it in your project timeline.

Step 2: Add an Adjustment Layer
Next, find the File icon on the right side of your video in the Premiere Pro Timeline, alongside the trash bin icon. Clicking on it displays a list of options. Look for the Adjustment Layer option in the list and click on it.
This will create a new adjustment layer that you can drag onto the Timeline. Make sure to place the adjustment layer above your video on the Timeline. This step allows you to add effects to your video and make adjustments without altering the original video file.

Step 3: Cut Adjustment Layer (Optional)
On the Timeline in Adobe Premiere Pro, locate the adjustment layer you added earlier. Here, you'll decide whether you want to sharpen the entire video or just a specific part of it. To sharpen a specific part, use the Razor tool or press the C key on your keyboard (which is a shortcut).
This tool lets you cut the adjustment layer so you can focus on sharpening only the necessary parts. If you want to sharpen the entire video, you can skip this step and leave the adjustment layer as it is.

Step 4: Apply Unsharp Mask Effect
Next, click on the adjustment layer you added earlier, which should have an FX icon on it. This indicates that effects can be applied to this layer. Then, navigate to the "Effect Controls" panel or the "Effects" tab in the top left corner of the interface.
Here, find the "Unsharp Mask" effect and drag it onto the adjustment layer on your Timeline. This effect will help you sharpen and enhance the quality of your video.

Step 5: Adjust Unsharp Mask Parameters
Now it's time to fine-tune the settings of the Unsharp Mask effect to enhance your video quality. You'll notice a set of sliders and parameters on the left side of the interface. These sliders allow you to adjust various elements such as the amount of sharpening, the size of the sharpening effect, and the threshold for applying the effect.
Experiment with these sliders to achieve the desired level of sharpness and clarity in your video. Additionally, you can add a mask to your video by clicking on the Oval, Rectangle, or Pen symbol in the Effects Controls panel. This allows you to apply the sharpening effect selectively to specific areas of your video if needed.

Step 6: Export Your Video
At last, let's learn how to render and export your video in high quality using Premiere Pro. First, locate the Export Settings by clicking on the "File" tab at the top left corner of the interface, then select "Export" from the dropdown menu. In the Export Settings window, you can choose various options to customize your export settings according to your preferences.
You can adjust parameters such as the format, resolution, bitrate, and codec to optimize the quality of your video. Once you've configured the export settings to your liking, click the "Export" button to start the rendering and exporting process. Once exporting is done, the process of improving video quality with Premiere Pro is now finished.

That’s how you can use Adobe Premiere enhance video quality features. We understand these steps may seem complicated, especially for new users, due to its several features. But, if you carefully follow each guideline that is mentioned above then definitely you will not miss anything.
Adobe Premiere Pro provides a range of video editing tools to enhance your videos, including upscaling, compressing, rotating, cropping, and many more. With regular practice and experimentation, you can develop your skills and become more proficient in editing top-quality videos using the Adobe Premiere Pro Upscale Video feature.
Part 2. The Best Alternative Enhancer to Upscale Video And Improve Video Quality
If you find Adobe's operation too complicated and unfriendly for novices, and want to find an easy-to-use software to improve video quality, Wondershare Repairit AI Video Enhancer is an excellent tool that you can use. This software employs artificial intelligence (AI) technology to analyze and enhance the quality of your videos, resulting in impressive outcomes.

Wondershare Repairit AI Video Enhancer can effectively enhance and upscale your video's resolution, even if it has low resolution, noise, or other issues, while still maintaining its clarity and details. Additionally, Repairit aims for simplicity and user-friendly enhancements, this software has a user-friendly interface and advanced algorithms that make it a convenient and efficient solution for enhancing video quality and producing impressive visuals within simple clicks.
Key Features
- Enhance video quality with powerful AI algorithms.
- Sharpen, denoise, and unblur videos to retrieve the best visual appeal.
- Fix all video issues in all scenarios with leading AI tech.
- Upscale video to 4K resolution to get a cinematic viewing experience.
- Support 8 formats: MP4/MOV/AVI/MKV/3GP/FLV/MGP/WEBM
- No limit to the video size or number.
| Pros | Cons |
| User-friendly interface, easy and convenient operation | Only supports 8 formats |
| Offers batch video editing | |
| Wide format compatibility | |
| Versatile application | |
| Precise enhancement in details | |
| Improve the video quality with 3 simple clicks |
User’s Step-by-Step Guide to Use Wondershare Repairit AI Video Enhancer
As mentioned earlier, users can easily improve their video quality thanks to the user-friendly interface of Wondershare Repairit AI Video Enhancer. However, to edit videos using this software, you can follow the simple steps below:
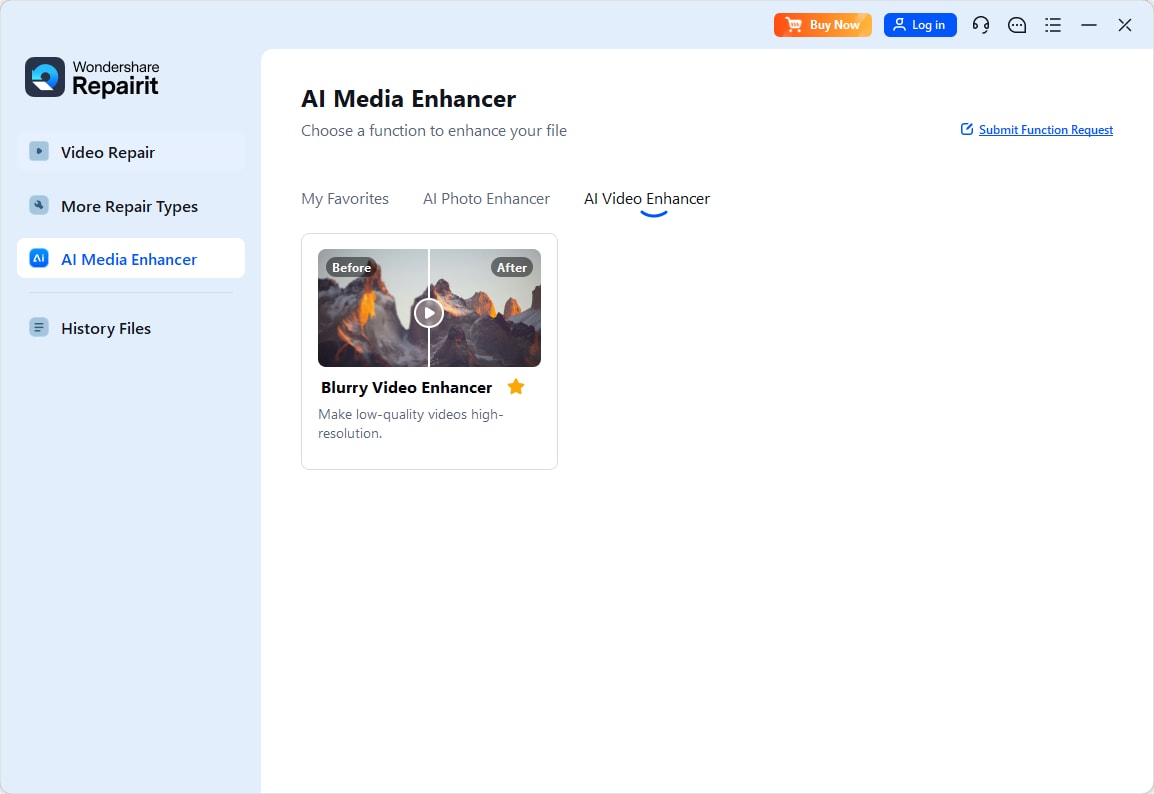
Step 1: Download the Wondershare Repairit AI Video Enhancer Tool
Download and install Repairit, and launch it on your computer. When the application starts, locate the "More Types Repair" menu. From there, select the "AI Video Enhancer" option to access the advanced video enhancement features.
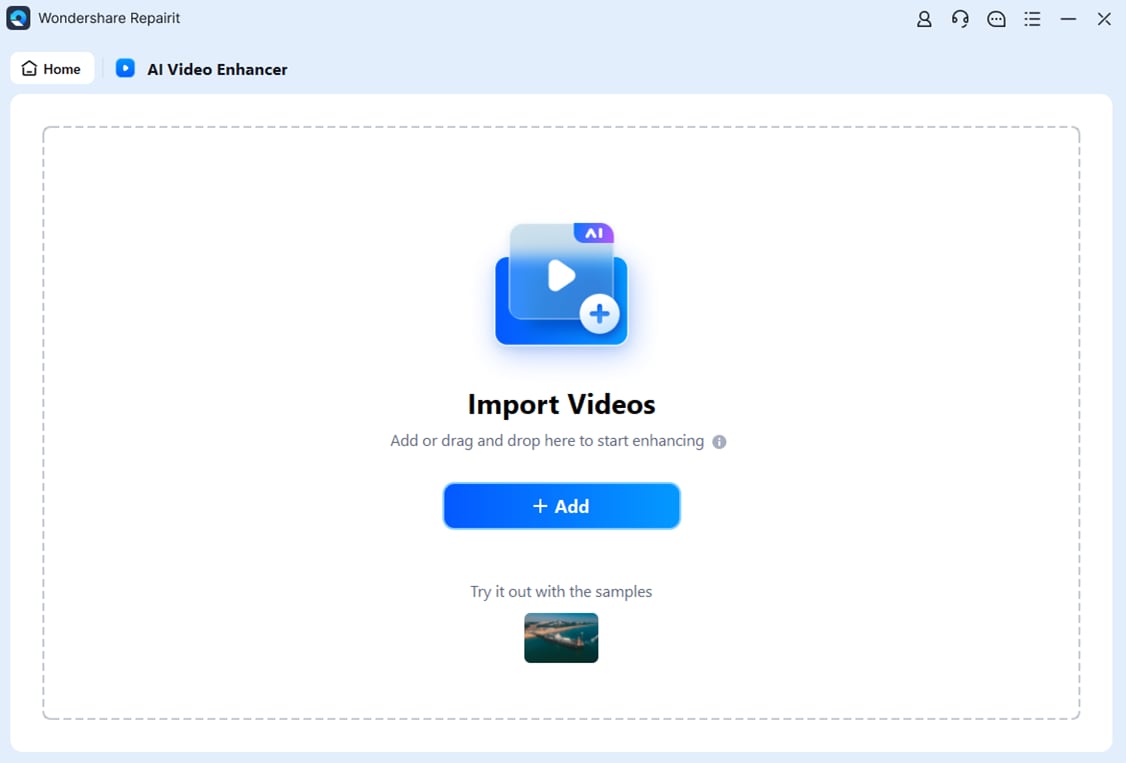
Step 2: Import Your Low-Quality Videos
Select the "+Add" option within the application interface to upload all the videos that require quality improvement. Alternatively, you can drag and drop the videos directly into the application window.
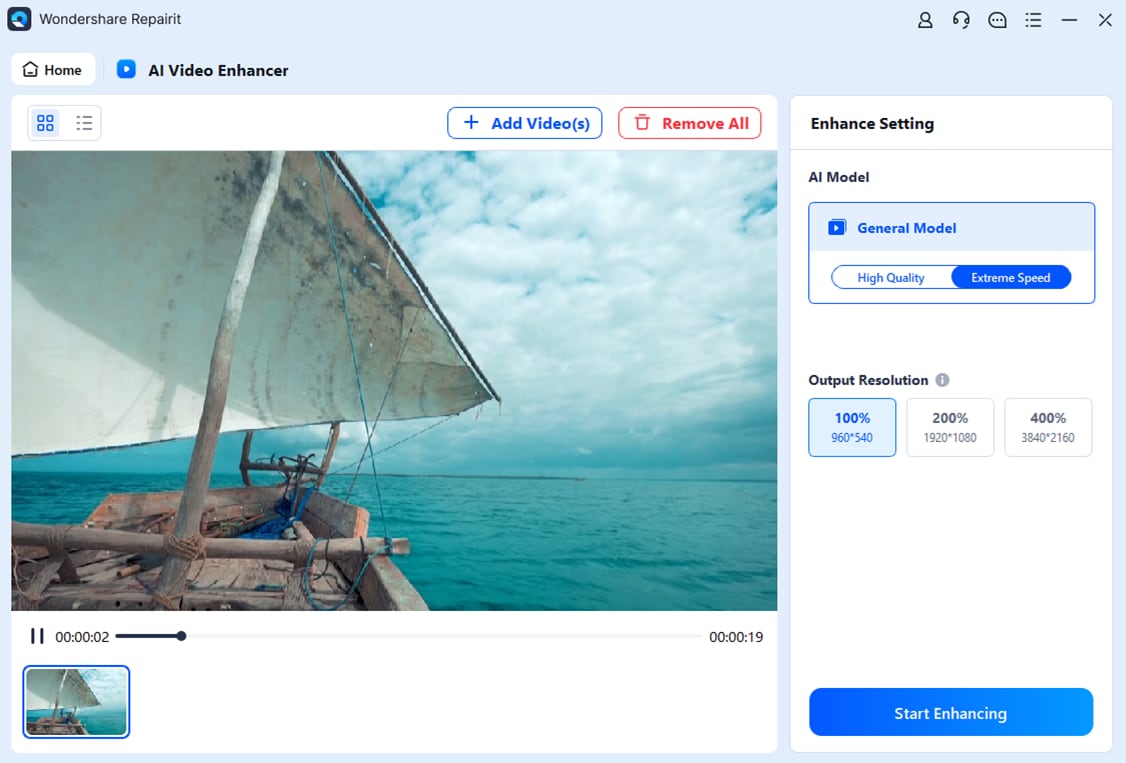
Step 3: Start the Enhancement Process
Click on the "Start Enhancing" button after uploading all the videos. Then, choose the degree of improvement you desire, ranging from 100% to 400%. This allows you to customize the level of enhancement according to your preferences and requirements.
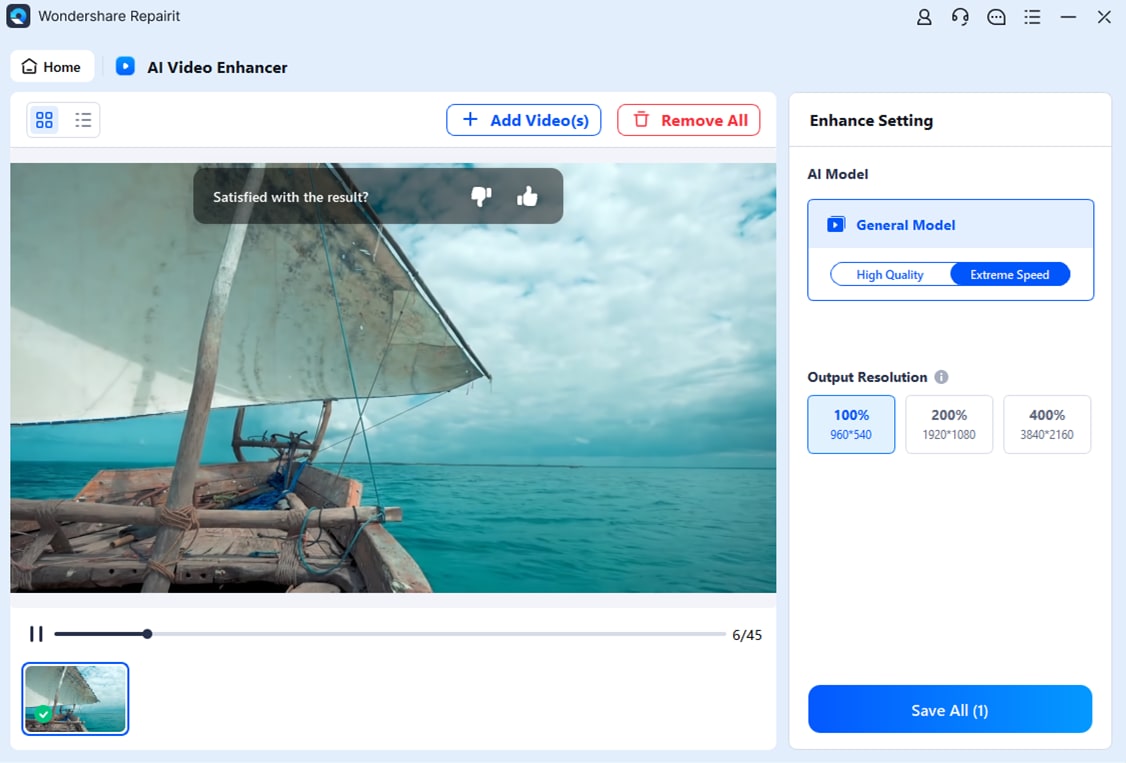
Step 5: Save Your High-Quality Videos
After the enhancement process is finished, preview your improved videos and click on "Save All". Specify a location on your computer where you'd like to save the enhanced videos. That's it! Your previously low-quality videos are now improved and enhanced, ready to impress your audience.
To Wrap Up
Ultimately, maintaining high-quality video standards is vital for creators in today's digital world. However, Adobe Premiere Pro offers powerful tools to improve video quality, ranging from sharpening to color adjustments. Moreover, the upscale video Premiere Pro feature enables you to instantly boost the quality of your videos. Just follow the steps mentioned above clearly and turn your content into high-quality, engaging videos for your audience.
Also, if you are looking for an alternative, Wondershare Repairit AI Video Enhancer can be an excellent choice. It uses AI technology to upscale and enhance video quality effortlessly. With user-friendly interfaces and advanced features, both Adobe Premiere Pro and Wondershare Repairit AI Video Enhancer are invaluable resources for improving your video content to the next level. Thank you.
