Choosing between Repairit Photo Enhancer vs HitPaw Photo Enhancer comes down to how you want to enhance photo quality in day-to-day work. Both rely on AI to improve image clarity, sharpen blurry photos, and upscale image resolution, but they differ in workflow, control, and how natural the final images look. This comparison focuses on output quality, ease of use, supported formats, and pricing so you can decide which AI photo enhancer fits your images and your budget.
Enhance Photo Quality with Repairit Photo Enhancer
 Security Verified. Over 7,302,189 people have downloaded it.
In this article
- Repairit Photo Enhancer vs HitPaw Photo Enhancer: Quick Verdict
- Repairit Photo Enhancer vs HitPaw Photo Enhancer: Key Differences
- Repairit Photo Enhancer vs HitPaw Photo Enhancer: Comparison Table
- What Repairit Photo Enhancer and HitPaw Photo Enhancer Are Best For
- Repairit Photo Enhancer vs HitPaw Photo Enhancer: AI Enhancement Features and Capabilities
- Repairit Photo Enhancer vs HitPaw Photo Enhancer: Output Quality and Real-World Results
- Repairit Photo Enhancer vs HitPaw Photo Enhancer: Workflow and Ease of Use
- Repairit Photo Enhancer vs HitPaw Photo Enhancer: Pricing and Trial Options
- Who Should Choose Repairit Photo Enhancer
- Who Should Choose HitPaw Photo Enhancer
- Pros and Cons of Repairit Photo Enhancer and HitPaw Photo Enhancer
- How to Enhance Photos After Choosing the Right Tool
Repairit Photo Enhancer vs HitPaw Photo Enhancer: Quick Verdict
Both tools can enhance photo quality for soft or low-resolution images, but they suit slightly different priorities.
Repairit Photo Enhancer is better suited to users who want balanced AI enhancement across clarity, sharpness, noise reduction, and natural-looking details. It is helpful if you regularly enhance portraits, product photos, and social media visuals and want a guided, repeatable workflow.
HitPaw Photo Enhancer is aimed more at quick, straightforward sharpening and upscaling. It works well for users who mainly need to improve a few blurry or small images with a minimum of decisions and are comfortable with a simpler feature set.
If you want an AI enhancer you can rely on for ongoing projects, Repairit Photo Enhancer is usually the more flexible choice. If you mostly fix occasional low-resolution photos and prefer the shortest possible workflow, HitPaw may be enough.
Repairit Photo Enhancer vs HitPaw Photo Enhancer: Key Differences
When comparing Repairit Photo Enhancer vs HitPaw Photo Enhancer, a few practical differences stand out that affect everyday use.
- Best use cases: Repairit targets a mix of portraits, product shots, old digital photos, and social media content, while HitPaw focuses more on sharpening and enlarging blurry or low-resolution images.
- Output style: Repairit is designed to balance sharpness and noise reduction for a natural appearance, especially on faces. HitPaw emphasizes visible sharpness and resolution gains, which can sometimes look more processed depending on the source image.
- Workflow depth: Repairit offers a guided, step-based approach with options for choosing enhancement type and reviewing previews. HitPaw keeps things closer to a three-step flow: import, enhance, export.
- Feature coverage: Both offer AI upscaling, sharpening, and some noise handling, but Repairit is more oriented toward recurring use and varied image types. HitPaw keeps its feature set narrower to stay very simple.
- Who will feel at home: Repairit is comfortable for users who enhance groups of images regularly and care about consistency. HitPaw is a better fit for people who want quick, occasional fixes with minimal configuration.
Repairit Photo Enhancer vs HitPaw Photo Enhancer: Comparison Table
| Aspect | Repairit Photo Enhancer | HitPaw Photo Enhancer |
|---|---|---|
| Best for | Users wanting balanced AI enhancement, natural-looking results, and a reusable workflow for portraits, products, and everyday photos. | Users who mainly need to sharpen and upscale a few blurry or low-resolution images quickly. |
| Ease of use | Beginner friendly with guided steps, previews, and clear enhancement options. | Very simple import, enhance, export flow with limited configuration. |
| Output style | Aims for clear, detailed, and natural-looking images across common scenarios. | Prioritizes visible sharpness and resolution improvement for soft images. |
| AI features | AI upscaling, sharpening, clarity and detail enhancement, noise reduction, portrait-focused modes, and batch-friendly workflow. | AI upscaling, sharpening, detail enhancement, noise reduction, and presets for quick improvement. |
| Supported formats | Typically supports common image formats like JPG, JPEG, PNG; details may vary by platform. | Focuses on standard consumer formats such as JPG, JPEG, PNG, depending on version. |
| Devices | Available on mainstream desktop platforms, with potential web-based access depending on updates. | Commonly available for desktop systems, with editions aimed at consumer PCs. |
| Workflow focus | Suited to repeated enhancements and consistent quality across multiple photos. | Optimized for fast one-off enhancements with minimal steps. |
| Pricing approach | Tiered plans with possible trials; aimed at individuals and small teams using AI enhancement regularly. | Consumer-oriented licenses like monthly or yearly options, often with limited trial usage. |
What Repairit Photo Enhancer and HitPaw Photo Enhancer Are Best For
Both tools aim to improve photo quality, but they target slightly different scenarios.
Repairit Photo Enhancer is designed for users who:
- Want to enhance portraits, product photos, travel shots, and social media images with a single tool.
- Need AI upscaling, sharpening, and noise reduction that keeps faces and textures looking realistic.
- Work with batches of similar photos and value a repeatable, guided workflow.
HitPaw Photo Enhancer is more suited to users who:
- Primarily want to sharpen blurry photos and enlarge low-resolution images quickly.
- Prefer a simple set of presets and fewer decisions before exporting.
- Work with occasional images instead of large projects or frequent enhancement sessions.
If your photo work is ongoing and varied, Repairit typically fits better. If you only need a straightforward way to improve a handful of soft images, HitPaw may cover your needs without extra complexity.
Repairit Photo Enhancer vs HitPaw Photo Enhancer: AI Enhancement Features and Capabilities
In terms of AI capabilities, Repairit vs HitPaw photo enhancer comparison revolves around how broadly each tool handles different enhancement tasks.
Repairit Photo Enhancer AI features include:
- AI upscaling that increases image resolution so photos look sharper on larger screens and in prints.
- Sharpening tools to improve image clarity and reduce a soft or slightly blurry look.
- Clarity and detail enhancement that makes edges and textures more defined while aiming to keep them natural.
- Noise reduction tuned to smooth grain in low-light or high-ISO photos without overly flattening details.
- Portrait-focused enhancement modes that improve facial clarity and skin detail in a realistic way.
- A batch-friendly workflow that helps when you need to apply similar enhancements across many images.
HitPaw Photo Enhancer AI features focus on:
- AI-based upscaling to enlarge low-resolution photos for more detailed viewing.
- Sharpening designed to rescue slightly blurry or soft images.
- Detail enhancement to make edges and visible textures clearer.
- Noise reduction tools for reducing grain and artifacts in lower-quality files.
- Presets that provide quick improvement for portraits and general photos without deep manual tuning.
Both tools can enhance portraits and low-quality images, but Repairit tends to cover a wider range of everyday use cases with more emphasis on natural-looking results, while HitPaw favors speed and simplicity.
Repairit Photo Enhancer vs HitPaw Photo Enhancer: Output Quality and Real-World Results
Output quality is often the deciding factor when choosing an AI photo enhancer for blurry images.
With Repairit Photo Enhancer, the design goal is to balance sharpness, noise reduction, and natural textures. In many everyday situations, such as portraits and product photography, this can lead to images that look clearer without obvious over-processing. Skin tones and fine details usually remain more realistic, which helps when images will be viewed up close or used in marketing material.
With HitPaw Photo Enhancer, the emphasis is on visible sharpness and resolution improvement. Slightly blurry or soft images can gain noticeable edge definition and appear more detailed after upscaling. For casual uses like sharing on social media or quickly improving small images, this can be sufficient, even if the result sometimes looks more AI-processed.
In practice, if you frequently work with portraits or brand visuals where subtlety matters, Repairit is often the safer option. For quick improvements to screenshots, memes, or casual photos, HitPaw can still deliver usable results with minimal effort.
Repairit Photo Enhancer vs HitPaw Photo Enhancer: Workflow and Ease of Use
Both tools are beginner friendly, but they guide you through enhancement differently.
Repairit Photo Enhancer workflow typically includes:
- Launching the app and choosing an enhancement type or AI preset, such as general clarity or portrait improvement.
- Importing one or multiple photos from your computer.
- Selecting options like upscaling level or intensity if needed, without dealing with complex layers.
- Running AI enhancement and viewing a preview or result.
- Comparing before and after where available and adjusting if necessary.
- Exporting the enhanced images in your desired resolution and format.
This step-based flow is designed for users who want clear guidance without learning full-scale editing software.
HitPaw Photo Enhancer workflow is closer to:
- Opening the app and picking an AI mode or preset if offered.
- Importing your blurry or low-resolution photo.
- Starting the enhancement so AI can sharpen and upscale the image.
- Reviewing a preview if available.
- Exporting the improved image.
This straightforward approach is effective for quick, one-off tasks, but it offers less room to adapt the workflow to different image types or recurring projects.
Repairit Photo Enhancer vs HitPaw Photo Enhancer: Pricing and Trial Options
Exact pricing and trial details for both tools can change, so it is important to check the latest offers on their official pages. Still, their general approaches are clear.
Repairit Photo Enhancer pricing and trial usually involves:
- Tiered plans that may vary by subscription length and number of devices.
- Options to try a trial or limited version first so you can judge how well it improves your own photos.
- Pricing positioned for individuals and small teams that use AI enhancement regularly in content workflows.
HitPaw Photo Enhancer pricing and trial typically offers:
- Consumer-friendly licenses such as monthly, yearly, or longer-term plans.
- Limited trial opportunities so you can test performance on your images before buying.
- Pricing that targets casual users and hobbyists who need a simple enhancer rather than a full suite.
If you plan to enhance photos frequently, investing in a plan that supports ongoing use, like those associated with Repairit, will usually make more sense. If you only need AI enhancement occasionally, HitPaw's consumer-style licenses may be sufficient.
Who Should Choose Repairit Photo Enhancer
Repairit Photo Enhancer is a strong fit for users who want a balance between clarity, natural appearance, and ease of use.
- You regularly enhance portraits, product images, or social media photos and need them to look natural rather than heavily processed.
- You care about combining sharpening, denoising, and upscaling in one workflow instead of using multiple tools.
- You want AI help but prefer a guided experience instead of dealing with manual layers and advanced editing concepts.
- You plan to enhance groups of similar photos and want consistent results across your projects.
- You see AI photo enhancement as part of a broader content workflow for a small business, brand, or personal portfolio.
For these reasons, Repairit generally suits creators, marketers, and small teams who treat photo enhancement as a recurring task rather than a rare one-off fix.
Who Should Choose HitPaw Photo Enhancer
HitPaw Photo Enhancer may be a better match if your needs are narrower and speed matters more than fine-tuned control.
- You mostly work with a few soft or low-resolution images and simply want them to look clearer and larger.
- You prefer an interface with very few options so you can go from import to export as quickly as possible.
- You do not need advanced editing tools or detailed adjustments to color and tone.
- You are enhancing images for casual sharing rather than for close inspection in print or professional contexts.
- You are comfortable using another editor if you later need more advanced retouching.
In these scenarios, HitPaw can deliver acceptable improvements without requiring you to learn much about image editing or AI enhancement models.
Pros and Cons of Repairit Photo Enhancer and HitPaw Photo Enhancer
Repairit Photo Enhancer Pros and Cons
HitPaw Photo Enhancer Pros and Cons
How to Enhance Photos After Choosing the Right Tool
Once you have compared Repairit Photo Enhancer vs HitPaw Photo Enhancer and decided which approach fits your needs, the next step is actually enhancing your images. If you want a guided, repeatable workflow for improving clarity, sharpness, and resolution, Repairit Photo Enhancer offers a practical way to put AI enhancement into everyday use without learning complex editing techniques.
Key Features
- AI upscaling to increase resolution and make low-resolution photos more usable.
- Sharpening and clarity enhancement to bring out edges and textures while avoiding an overly harsh look.
- Noise reduction that smooths grain in low-light images while trying to retain important details.
- Portrait-focused modes that improve facial clarity and skin detail in a realistic manner.
- Support for processing multiple images with similar enhancement settings, which helps when working in batches.
- A guided interface that walks users through choosing models, previewing results, and exporting final images.
Step-by-step guide
Step 1. Choose an AI enhancement model based on your needs, such as general enhancement, portrait improvement, or image upscaling.

Step 2. Import your photo into Repairit Photo Enhancer to begin the enhancement process.
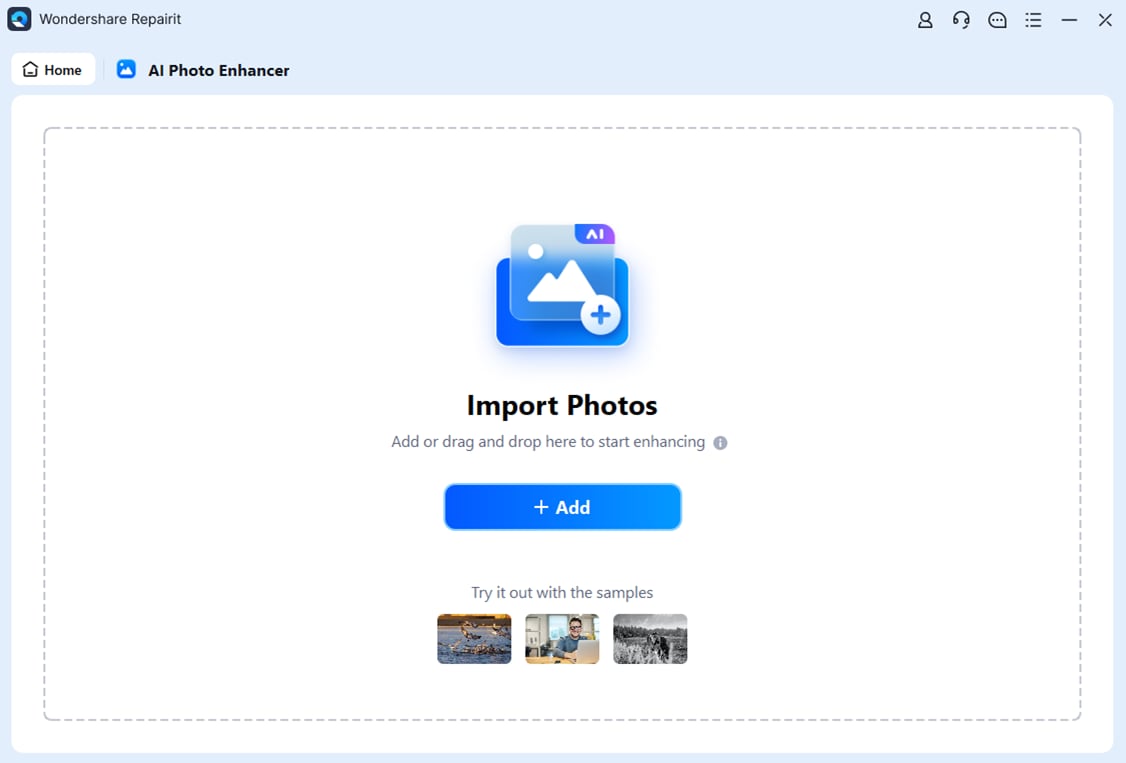
Step 3. Apply the enhancement settings and let the AI improve clarity, sharpness, and overall image quality.

Step 4. Preview the enhanced result and save the improved photo to your device.

Final Verdict
Both Repairit Photo Enhancer and HitPaw Photo Enhancer use AI to improve image clarity, sharpen soft photos, and upscale low-resolution files, but they prioritize different user needs.
Repairit Photo Enhancer leans toward a more rounded experience: it is designed for repeated use, supports varied image types, and focuses on delivering clear yet natural-looking enhancements. This makes it a strong option for creators, small businesses, and anyone who regularly improves photos for websites, social channels, or presentations.
HitPaw Photo Enhancer focuses on speed and simplicity. Its streamlined, three-step workflow is suitable if you mainly sharpen and upscale a few blurry or small images and do not need more advanced control.
In many cases, Repairit will be the better long-term fit if you value consistency, natural output, and a guided workflow across many photos. HitPaw remains a reasonable choice when you only need quick, occasional sharpening and upscaling. The right pick ultimately depends on how often you enhance images, how critical natural-looking results are, and whether you prefer a richer workflow or the simplest possible interface.
Next: Repairit Photo Enhancer vs Remini
FAQ
-
1. Is Repairit Photo Enhancer better than HitPaw Photo Enhancer for every type of photo?
Not in every situation. Repairit Photo Enhancer is typically stronger when you want natural-looking results, balanced sharpening and noise reduction, and a workflow you can reuse across many projects. HitPaw Photo Enhancer can still be sufficient if you mainly need to sharpen and upscale occasional blurry or low-resolution images with minimal setup. -
2. Which tool is easier for beginners, Repairit Photo Enhancer or HitPaw Photo Enhancer?
Both are beginner friendly, but HitPaw Photo Enhancer uses a very simple import, enhance, and export flow with few choices. Repairit Photo Enhancer adds more guidance and model selection, which can feel slightly more involved but is often more helpful if you enhance images frequently. -
3. Which produces more natural-looking portraits, Repairit or HitPaw?
In many everyday portrait scenarios, Repairit Photo Enhancer is designed to keep skin tones and facial details looking realistic while improving clarity and reducing noise. HitPaw Photo Enhancer focuses more on sharpening and upscaling, which can work well for soft images but may appear more processed on some portraits. -
4. Do I still need a separate editor if I use these AI photo enhancers?
For a lot of users, AI enhancement from Repairit Photo Enhancer or HitPaw Photo Enhancer is enough for social media, simple presentations, or quick sharing. If you need detailed retouching, compositing, or precise color grading, you may still want to pair either enhancer with a more traditional photo editor. -
5. How should I decide between Repairit Photo Enhancer and HitPaw Photo Enhancer?
Think about how often you enhance photos, how important natural-looking output is, and how much control you want. Choose Repairit Photo Enhancer if you enhance images regularly, care about balanced AI adjustments, and work with varied content. Choose HitPaw Photo Enhancer if you mainly need quick sharpening and upscaling for a few soft or low-resolution images.