Choosing between Repairit Photo Eraser and PhotoDirector comes down to how often you need to erase objects from photos and how much control you want. Repairit focuses on fast AI object removal with a straightforward workflow. PhotoDirector is a broader photo editor that includes object removal among many tools. This guide compares them so you can quickly decide which fits your daily clean up tasks, from removing distractions and text to deleting watermarks while keeping the background looking natural.
Remove Unwanted Objects with Repairit Photo Eraser
 Security Verified. Over 7,302,189 people have downloaded it.
In this article
- Repairit Photo Eraser vs PhotoDirector: Quick Verdict
- Repairit Photo Eraser vs PhotoDirector: Key Differences
- Repairit Photo Eraser vs PhotoDirector: Comparison Table
- What Repairit Photo Eraser and PhotoDirector Are Best For
- Repairit Photo Eraser vs PhotoDirector: Object Removal Capabilities
- Repairit Photo Eraser vs PhotoDirector: Background Fill and Realism
- Repairit Photo Eraser vs PhotoDirector: Workflow and Ease of Use
- Repairit Photo Eraser vs PhotoDirector: Pricing and Trial Options
- Who Should Choose Repairit Photo Eraser
- Who Should Choose PhotoDirector
- Pros and Cons of Repairit Photo Eraser and PhotoDirector
- How to Remove Unwanted Objects After Choosing the Right Tool
Repairit Photo Eraser vs PhotoDirector: Quick Verdict
For most everyday cleanups, Repairit Photo Eraser may be a better fit if you want to erase objects, text, and watermarks in a few guided steps without dealing with a full editor. It focuses on AI driven object removal, so you usually spend more time choosing what to erase and less time fine tuning settings.
PhotoDirector is more suitable if you also plan to adjust colors, use layers, and combine object removal with other edits inside one application. It tends to reward users who are comfortable with more tools and manual control, even if that means a slightly slower workflow for simple object erasing.
Repairit Photo Eraser vs PhotoDirector: Key Differences
The main difference between the two tools is focus. Repairit Photo Eraser is designed around a single, streamlined task: remove unwanted objects and let AI rebuild the background. You import, brush over the distraction, run the eraser, and export. The interface and decisions are kept minimal so beginners can get usable results quickly.
PhotoDirector, by contrast, places object removal inside a larger editing environment. You choose from different selection tools, retouching brushes, and adjustment options. This provides more manual control when you need to refine edges around complex subjects or blend filled areas with nearby textures, but it can slow down quick, one off cleanups.
In terms of realism, Repairit leans on AI to generate a natural looking fill automatically. It works especially well on common background distractions, small objects, or simple text over flat surfaces. PhotoDirector often expects you to help the process by adjusting selections, cloning nearby areas, or layering edits to reduce visible artifacts, which may be preferable for methodical users.
Repairit Photo Eraser vs PhotoDirector: Comparison Table
| Criteria | Repairit Photo Eraser | PhotoDirector |
|---|---|---|
| Best for | Casual users needing fast AI object removal and simple cleanups | Users who want object removal plus broader photo editing tools |
| Ease of use | Very simple, focused workflow with few settings to learn | More menus and options, easier if you are used to full editors |
| Object removal | AI driven erase that prioritizes automation and speed | Object removal integrated with selection and retouching tools |
| Workflow | Upload, brush object, AI remove, export in a few clicks | Import, choose removal tool, refine selection, adjust and export |
| Strengths | Quick clean up images, remove background distractions, delete watermarks with minimal setup | Multi feature editor with layers of manual control and extra adjustment options |
| Weaknesses | Less suitable for complex, multi step creative edits | More complex interface and slower for one off object removal tasks |
What Repairit Photo Eraser and PhotoDirector Are Best For
Both tools can remove unwanted objects, but they shine in different scenarios.
Repairit Photo Eraser is usually best when you want to:
- Erase random passersby, signs, or small items that distract from the main subject.
- Remove simple watermarks, logos, or text overlays from images where you have clear rights to do so.
- Clean up product photos, social posts, or listing images quickly without learning a full editor.
- Handle repeated, everyday cleanups with consistent, AI driven results.
PhotoDirector is typically stronger when you want to:
- Combine object removal with color grading, cropping, and other post processing in one project.
- Manually refine complex selections around hair, overlapping people, or textured backgrounds.
- Use multiple retouching tools to repair scenes that need more than a single AI pass.
- Build layered edits where object removal is only one element of a bigger creative idea.
Repairit Photo Eraser vs PhotoDirector: Object Removal Capabilities
According to the overview, Repairit Photo Eraser is positioned as AI photo editing software focused on quickly removing unwanted objects, distractions, and watermarks. PhotoDirector, by contrast, is a full photo editor where object removal is one of many features rather than the core focus.
In terms of range, both can typically handle:
- Removing single objects such as signs, trash bins, or cables.
- Cleaning up background distractions that pull attention from the subject.
- Erasing simple watermarks, logos, or overlaid text when allowed.
Repairit emphasizes AI automation, which can be especially effective for routine tasks like removing people in the background, text over flat areas, or small objects on uniform surfaces. You mark the area, and the AI predicts how the missing region should look, which tends to be efficient for straightforward scenes.
PhotoDirector often provides multiple selection tools and retouch brushes. This can help when:
- You need to delete larger elements that touch detailed edges, such as a person overlapping trees or railings.
- You want to remove text or graphics over gradients and patterns, then manually blend the result.
- You need to combine object removal with manual touch ups using clone or heal tools.
For very complex scenes with overlapping elements, a PhotoDirector style workflow with more manual control may give you more chances to refine the final result, while Repairit tends to focus on doing as much as possible in a single AI driven step.
Repairit Photo Eraser vs PhotoDirector: Background Fill and Realism
After an object is erased, the key question is how natural the background looks. Repairit Photo Eraser leans on AI assisted background fill to reconstruct removed areas as naturally as possible. For many everyday images with clear textures, such as skies, walls, or pavements, the AI can often create a visually convincing fill with minimal visible seams.
However, realism still depends on the image. In busy scenes with overlapping patterns or fine details, some artifacts may appear, such as slightly repeated textures or subtle blur. In those cases, you might repeat the removal on a smaller area or combine it with light manual cleanup.
PhotoDirector usually expects users to play a more active role in realism. After running an object removal or content aware fill, you can:
- Refine edges around the removed region.
- Use clone or heal tools to fix patches that look repeated.
- Layer multiple small removals instead of one large operation.
This extra manual control can help reduce artifacts when removing large people, clustered text, or elements that cross complex backgrounds. The trade off is that it generally takes longer and requires more familiarity with the tools.
Repairit Photo Eraser vs PhotoDirector: Workflow and Ease of Use
The core workflow difference is simplicity versus breadth. With Repairit Photo Eraser, the flow is simple: import a photo, brush over the object, let the AI remove it, then export. The interface is centered around this single task, so it is approachable even for users who rarely edit images.
PhotoDirector adds more decision points. You typically:
- Import images into a project or library.
- Choose an object removal or content aware tool from multiple options.
- Refine the selection manually, sometimes with different brush or lasso tools.
- Optionally stack additional edits like color adjustments or cropping.
- Export the final file.
Repairit is generally quicker when your priority is to erase one or two distractions and move on. PhotoDirector can feel more flexible for users who enjoy fine tuning and want to integrate object removal into a broader editing session. For beginners, the additional menus and panels in a full editor can introduce a steeper learning curve.
Repairit Photo Eraser vs PhotoDirector: Pricing and Trial Options
Repairit Photo Eraser generally follows a focused pricing approach around its object removal features, often with trial options so you can test the AI workflow before committing. Because it concentrates on a narrower use case, you are typically paying for a streamlined eraser rather than a full editing suite.
PhotoDirector is usually sold as a broader photo editing package. It may be available as a standalone license, a subscription, or as part of a bundle, depending on current offers. Trials or limited versions are often used so potential users can explore the interface and toolset.
Exact prices, plan limits, and promotions change over time, so it is best to check each official site for the latest details. When comparing value, consider how often you will use the additional editing tools in PhotoDirector versus how much you primarily care about quick, repeatable object removal.
Who Should Choose Repairit Photo Eraser
Repairit Photo Eraser is a strong match for users who:
- Want an AI eraser to remove unwanted objects in a few steps.
- Prefer a simple interface over a full editing suite.
- Frequently clean up images for social media, online listings, or quick sharing.
- Value fast background distraction removal more than deep editing control.
- Appreciate a guided, consistent workflow for similar cleanup tasks.
Who Should Choose PhotoDirector
PhotoDirector may be the better fit for users who:
- Need object removal plus wider editing features in one app.
- Want to fine tune selections and touch ups with multiple manual tools.
- Are comfortable with more complex software and layered editing workflows.
- Plan longer term projects that mix cleanup with creative adjustments and effects.
- Prefer to manage an entire photo library and editing pipeline in a single environment.
Pros and Cons of Repairit Photo Eraser and PhotoDirector
Repairit Photo Eraser Pros and Cons
PhotoDirector Pros and Cons
How to Remove Unwanted Objects After Choosing the Right Tool
Once you decide which direction fits your workflow, the next step is to put it into practice. If you lean toward a focused, AI driven option, you can use Repairit Photo Eraser as a practical way to remove distractions, watermarks, and text while keeping the workflow short.
Key Features
For object removal and background cleanup, Repairit Photo Eraser offers:
- AI driven object eraser that fills removed areas automatically.
- Simple brush based selection for distractions and watermarks.
- Clean import to export workflow optimized for speed.
- Support for common image formats so you can work with everyday photos easily.
- Refinement options that help adjust the edge of removed regions when needed.
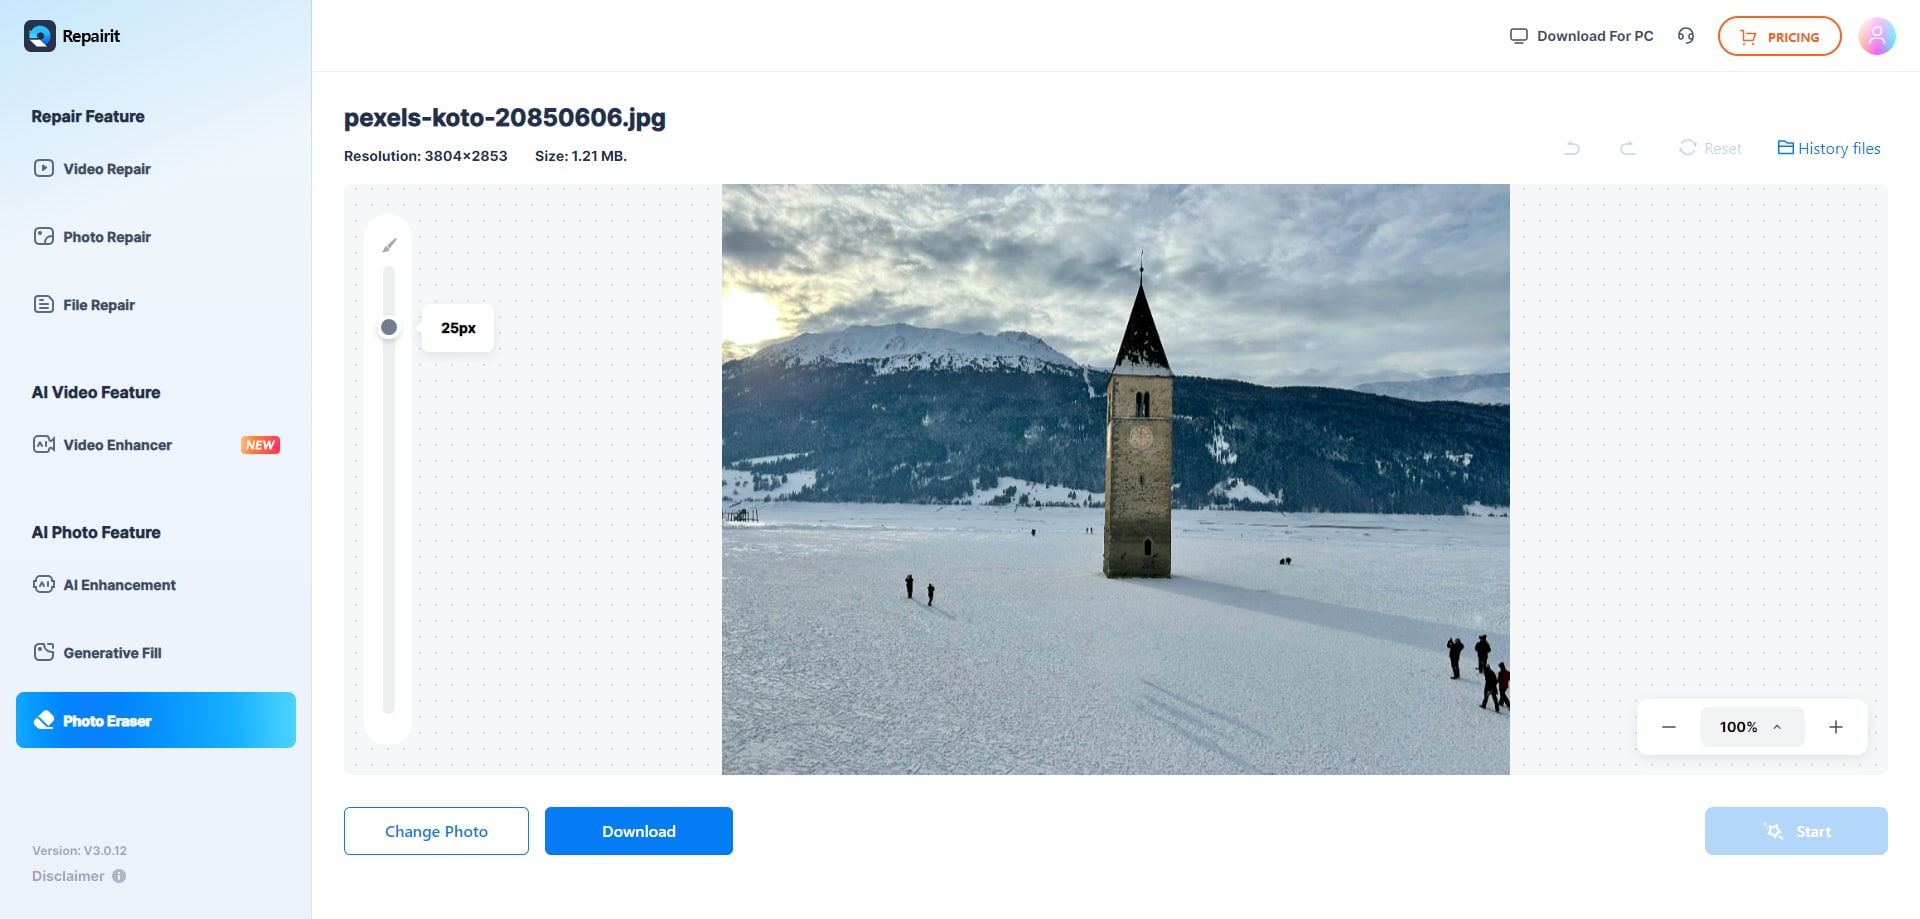
Step-by-step guide
Step 1. Upload the photo you want to edit and start the object removal process.

Step 2. Adjust the brush size and select the object or area you want to remove from the image.
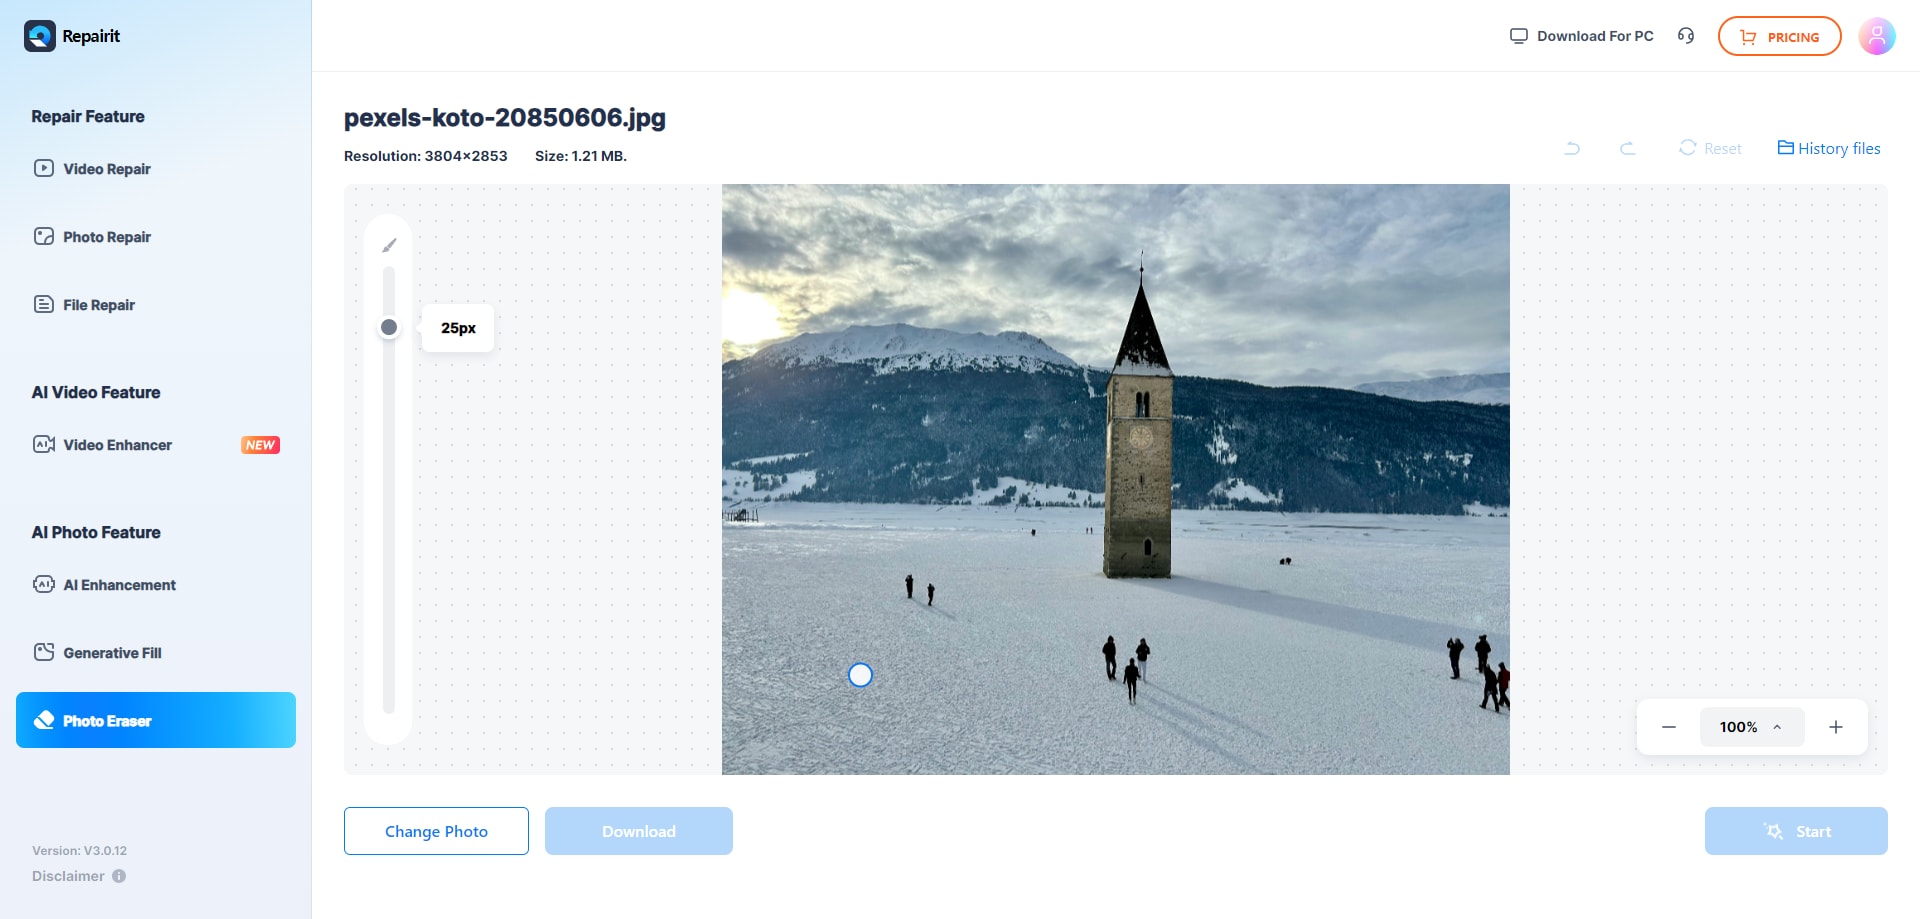
Step 3. Let the AI process the image and download the cleaned photo after the object is removed.
Final Verdict
Both tools can handle object removal, distraction cleanup, and watermark or text deletion, but they suit different working styles. Repairit Photo Eraser centers on an AI driven, streamlined workflow where you spend most of your time simply marking what you want gone and reviewing the automatic background fill. For many everyday photos, this balance of speed and realism is enough to share or publish the result without further editing.
PhotoDirector remains a reasonable choice for users who prefer an all in one editing environment. If you often pair object removal with extensive color work, local adjustments, or layered compositions, its broader toolset and manual controls may fit better, even if that means more steps for each cleanup.
In practice, many users may find value in starting with a focused AI eraser for routine tasks and turning to a fuller editor only when projects demand deeper control. That way, you keep simple cleanups fast while still having options for more complex scenes.
Next: Repairit Photo Eraser vs Gimp
FAQ
-
1. Is Repairit Photo Eraser easier to use than PhotoDirector for object removal?
For most beginners and casual users, Repairit Photo Eraser is easier because it focuses on a single task: erase objects from photos with AI. PhotoDirector offers more tools, which means more flexibility but also a steeper learning curve. -
2. Which is better for deleting watermarks, Repairit Photo Eraser or PhotoDirector?
Repairit Photo Eraser is usually faster for straightforward watermark removal thanks to its guided AI workflow. PhotoDirector can handle watermark removal too, but you may spend more time adjusting tools and refining areas within its full editor. -
3. Can I get realistic background fill after removing objects with both tools?
Both tools aim to reconstruct the background where objects are removed. Repairit relies on AI to fill the gap automatically, which works well for many casual photos. PhotoDirector gives you more options to refine the result if you are comfortable adjusting selections and touch ups. -
4. When should I choose PhotoDirector instead of Repairit Photo Eraser?
Choose PhotoDirector if you want object removal plus broader editing features like color adjustments, layers, and creative effects in one place. If your priority is quick AI based cleanups with minimal editing, Repairit Photo Eraser is often the more efficient choice.