When using CapCut, you may encounter the extract audio pro error, which prevents the application from separating the audio track from a video clip. Instead of producing a standalone audio layer, the app may freeze, display an error message, or fail silently. This usually occurs due to incompatible audio codecs, corrupted files, or temporary app glitches.
In most cases, the error can be fixed with simple troubleshooting, but sometimes the underlying video or audio file may require repair. This guide walks through practical solutions for resolving the error on both mobile and desktop versions of CapCut.
In this article
Part 1. What Does the Extract Audio CapCut Pro Error Mean?
This error occurs when CapCut cannot separate the audio track from a video clip. Normally, CapCut allows users to right-click a video clip and choose Extract Audio, which creates a separate audio track on the timeline. This makes it possible to edit audio independently of the video.
When the error appears, the extraction process fails. Common symptoms include:
- CapCut is displaying an audio extraction failed message
- The Extract Audio option is not responding
- Audio not appearing on the timeline after extraction
- The application freezes while processing the clip
In many cases, the problem is related to the video file itself rather than the CapCut software.
Part 2. Why Extract Audio CapCut Pro Error Happens
Several technical factors can trigger this error. It is important to understand the root cause to make it easier to apply the correct fix.
1. Unsupported Video or Audio Codecs
CapCut works best with standard formats like MP4 (H.264), AAC audio, WAV, and MP3. If a video contains unusual codecs or mixed encodings, the app may fail to decode the audio stream.
Examples include:
- MKV files
- HEVC encoded videos
- M4A variants with unusual compression
- Screen recordings with proprietary audio formats
2. Corrupted Video or Audio Files
If the source video is partially damaged, CapCut may not be able to read the audio layer correctly. File corruption can occur due to interrupted downloads, incomplete file transfers, and export interruptions. When the audio stream itself is damaged, extraction fails entirely.
3. Outdated CapCut Version
Older versions of CapCut sometimes lack support for newer audio codecs or contain unresolved bugs. Updating the application often resolves extraction errors because newer builds include:
- Updated codec libraries
- bug fixes
- improved file compatibility
4. Low Storage or Memory Resources
CapCut needs a temporary workspace to separate and process audio tracks. If your device has limited storage or RAM, the extraction process may fail, the app may freeze, or the audio files may not generate. Maintaining 1--2 GB of free space is generally recommended for smooth editing.
5. Cache or Temporary Data Conflicts
Over time, CapCut accumulates cached media files and temporary data. Excessive cache can interfere with editing operations.
This sometimes causes:
- audio extraction failures
- media import glitches
- corrupted project data
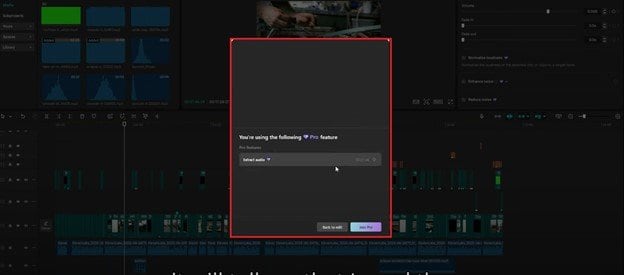
6. Feature Restrictions in Certain Versions
Some users report that the Extract Audio tool occasionally appears with a Pro label, depending on region, version, or update changes. While the feature itself is usually available, certain advanced audio options may require a subscription.
Part 3. Quick Fixes for Audio CapCut Pro Error
If CapCut fails to extract audio from your video, try the solutions below. Each fix focuses on a common cause of the error and can be completed quickly.
Fix 1: Update CapCut to the Latest Version
Outdated versions of CapCut may contain bugs or lack support for certain video and audio codecs, which can prevent the app from extracting sound correctly.
Step 1. Open CapCut on the desktop and check for updates.
Step 2. Install the latest version, restart the app, and try extracting the audio again.

Fix 2: Restart the CapCut Application
Temporary glitches or background processes may interrupt audio extraction. Restarting clears temporary system conflicts.
Step 1. Completely close CapCut and remove it from the recent apps list.
Step 2. Reopen the app, load your project again, and try the Extract Audio function.
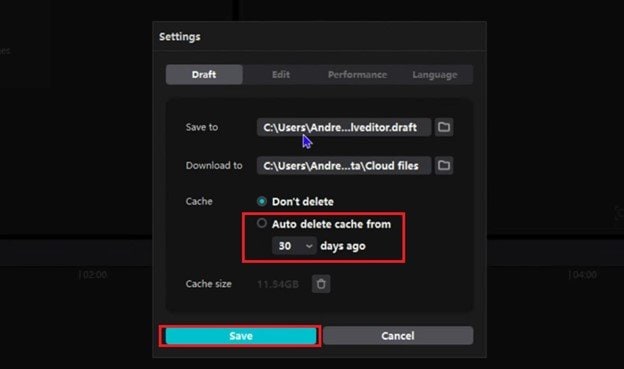
Fix 3: Clear CapCut Cache
Accumulated cache files can interfere with editing features and cause errors during media processing. Clearing the cache removes temporary files that may disrupt normal operation.
Step 1: Click on Menu. Choose Settings.
Step 2: Under Cache, choose auto delete cache from, then choose from the options. Save changes.
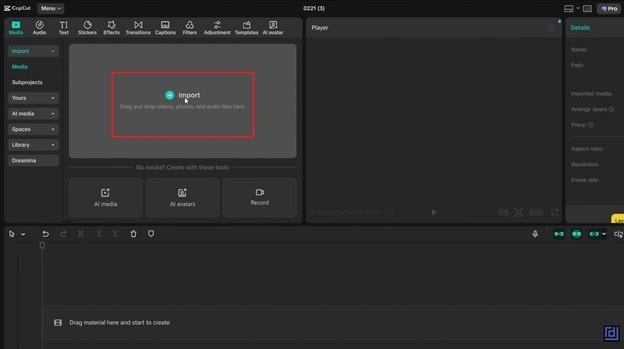
Fix 4: Re-Import the Video File
Sometimes CapCut misreads a video file during the first import, which prevents the audio track from being detected properly. Re-importing refreshes the media file data inside the project.
Step 1. Remove the video clip from the timeline and delete it from the project media list.
Step 2. Import the same video again and try to extract audio.
Fix 5: Free Up Device Storage
Audio extraction requires temporary storage to process and generate the audio file.
Step 1. On Media, select Myspace. Delete unnecessary files or move media to cloud storage to create free space.
Step 2. Restart CapCut and attempt to extract the audio again.

Part 4. When You Should Use Audio Repair (Important Insight)
Not every case needs repair, but it becomes necessary when:
- The audio is missing even outside CapCut
- The video plays but has no sound
- Multiple apps fail to detect audio
- The extracted audio is always silent
These are strong indicators of file-level corruption, not just app issues. When standard troubleshooting steps fail, the issue is often tied to file-level audio corruption rather than CapCut itself.
In these cases, using a dedicated repair solution such as Repairit Audio Repair can help restore the damaged audio stream. The tool analyzes broken or incomplete audio data caused by recording interruptions, transfer errors, or storage issues, then reconstructs the file so it becomes readable again.
Once repaired, the file can typically be re-imported into CapCut and processed without triggering extraction errors.

-
Repair damaged audios with all levels of corruption, such as audio not working, clipping audio, humming audio, rumbling audio, sibilant audio, out-of-sync audio, etc.
-
Repair audios of diverse formats, including MP3, M4A, FLAC, AAC, WAV, etc.
-
Repair damaged or corrupted audios from mutiple devices: portable voice recorder, recording software, shooting apparatus, SD cards, phones, hard drives, USB flash drives, etc.
-
Support Windows 11/10/8/7/Vista, Windows Server 2003/2008/2012/2016/2019/2022, and macOS 10.12~macOS 14.
Part 5. Best Practices to Avoid Audio Extraction Errors
Here are a few simple best practices to help avoid audio extraction errors in CapCut and make editing smoother.
- Use Standard Formats Only - Always use widely supported formats such as MP4 with H.264 video and AAC audio to ensure smooth compatibility with CapCut. Unusual codecs or containers can cause decoding failures and prevent audio extraction from working properly.
- Keep CapCut Updated - Regularly updating CapCut ensures you have the latest codec support and bug fixes that improve audio extraction reliability. Older versions may struggle with newer video formats, which can cause unexpected errors during processing.
- Avoid Repeated File Transfers - Transferring files multiple times between devices can increase the risk of data corruption, especially for large video files. Using a direct and stable transfer method helps preserve the integrity of both video and audio streams.
- Don't Interrupt Exports or Downloads - Interrupting a video export or download can result in incomplete files with damaged audio tracks. Always wait for the process to finish fully before using the file in CapCut.
- Maintain Sufficient Storage Space - Keeping enough free storage on your device allows CapCut to process and extract audio without interruptions. Low storage can prevent temporary files from being created, leading to extraction failures.
- Back Up Important Files - Saving backup copies of your original videos ensures you can recover them if corruption occurs. This is especially important when working with important or irreplaceable media files.
Conclusion
The extract audio CapCut Pro error can interrupt your editing workflow, but it is usually caused by manageable issues such as incompatible formats, corrupted files, or limited device resources.
Most users can fix the problem by updating CapCut, clearing the cache, converting the video format, or re-importing the file. However, if the issue stems from damaged audio data, repairing the file becomes necessary to restore functionality.
FAQs
-
Why does CapCut say "Failed to extract audio"?
This usually happens when the video uses unsupported codecs or has a corrupted audio stream. Updating the app or converting the video format can fix it. -
Why is Extract Audio not working in CapCut?
The feature may fail due to file incompatibility, app glitches, or insufficient storage. Restarting the app or re-importing the file often resolves it. -
Does CapCut Pro affect audio extraction?
Basic audio extraction is typically free, but some advanced audio features may require Pro, depending on the version. The error itself is usually unrelated to subscription status. -
Why is my extracted audio silent?
Silent audio usually indicates a damaged or empty audio track in the video. Repairing the file or using another source can fix the issue. -
What is the best format for CapCut audio extraction?
MP4 with H.264 video and AAC audio is the most compatible format. It ensures smooth decoding and extraction.