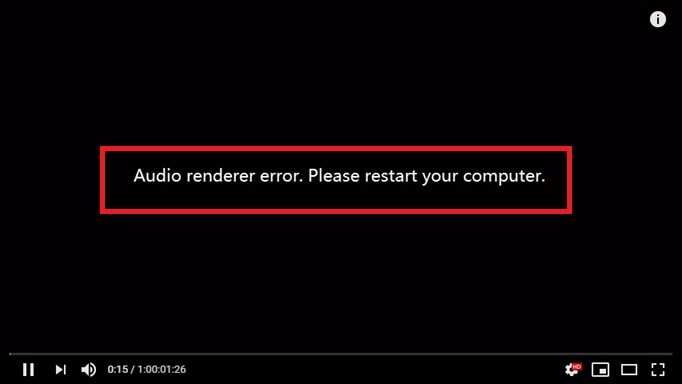
The audio renderer error usually appears when audio suddenly stops playing while a video or file continues to run. Users often encounter it on Windows, macOS, or platforms like YouTube, sometimes accompanied by a message suggesting a system restart.
Despite that message, restarting the computer does not always resolve the issue. The error can be caused by audio drivers, device conflicts, browser behavior, or, in less common cases, corrupted audio files.
This guide explains what the audio renderer error means, how to determine its cause, which fixes to try first, and when audio file repair is relevant.
Table of Contents
Part 1. What Does Audio Renderer Error Mean?
Audio rendering is the process of converting digital audio into a playable format for speakers or headphones. When this process fails, you see the audio renderer error.
Symptoms:
- No sound or distorted playback.
- Audio stuck at “rendering required files.”
- Error messages in apps like Chrome, YouTube, Premiere Pro, or Voicemeeter.
Since audio rendering involves multiple layers: software, drivers, and hardware, the same error message can appear for different reasons. This is why restarting the computer sometimes works and sometimes does not. Identifying the source of the failure is essential before applying any fix.
Part 2. How to Tell What’s Causing the Audio Renderer Error
Before applying fixes, first determine where the problem originates. The same “audio renderer error” message can point to different issues depending on how and where it appears.
Use the quick checks below to narrow down the cause:
- If the error shows up in every app and with all audio files, the problem is most likely within your operating system. Typical causes include outdated or conflicting drivers, audio services that have stopped running, or misconfigured sound settings.
- If the error only appears while streaming on YouTube, it’s usually tied to the browser. Cached data, corrupted cookies, or extensions like adblockers often interfere with playback. Clearing the cache or disabling extensions is a good first step.
- If the error occurs only with certain tracks or recordings, the files themselves may be damaged or improperly encoded. In this case, repairing or replacing the affected files is the most effective fix.
Part 3: Quick Fixes for Audio Renderer Error for Windows and Mac (Low-Risk Steps First)
Most audio renderer errors can be resolved without advanced tools or data repair. The fixes below are ordered from low-risk to more involved actions, focusing on both technical causes and user experience.
It is recommended to test audio playback after each step before moving on to the next one.
For Windows:
1. Restart Windows Audio
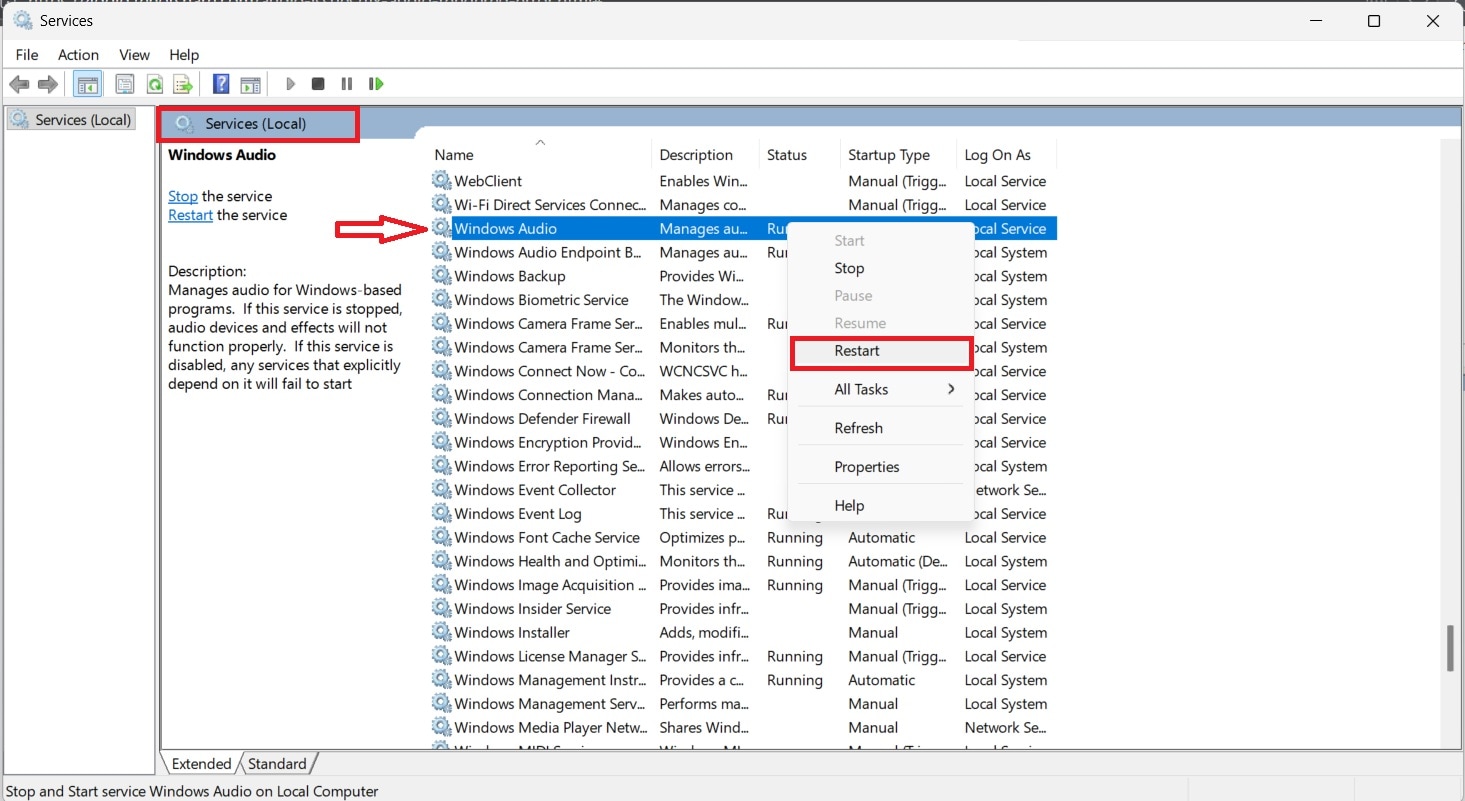
Windows relies on a background service to manage sound output and audio devices. If this service becomes unresponsive or unstable, audio playback may stop working correctly. This often clears minor service-level issues that prevent sound from rendering properly.
Step 1. Press Win + R, type services.msc, and press Enter.
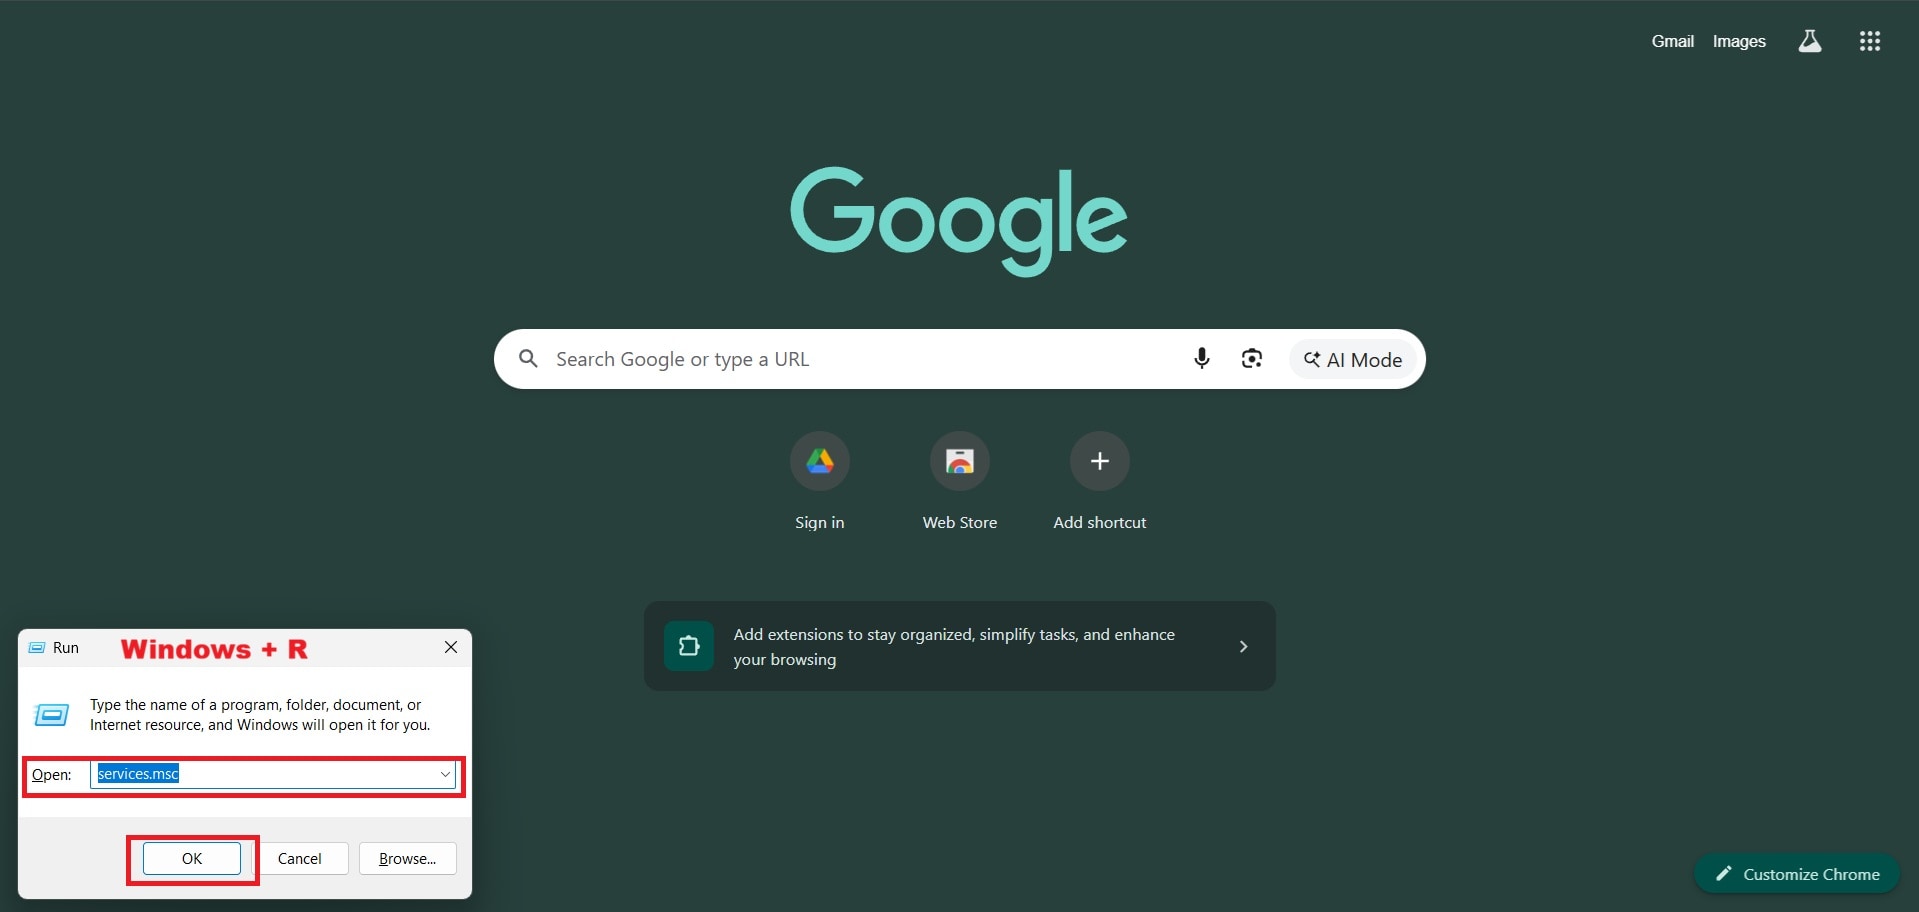
Step 2. Locate Windows Audio, right-click it, and select Restart. Wait a few seconds, then test the affected audio or video again.
2. Match the Sample Rate Between Windows and ASIO
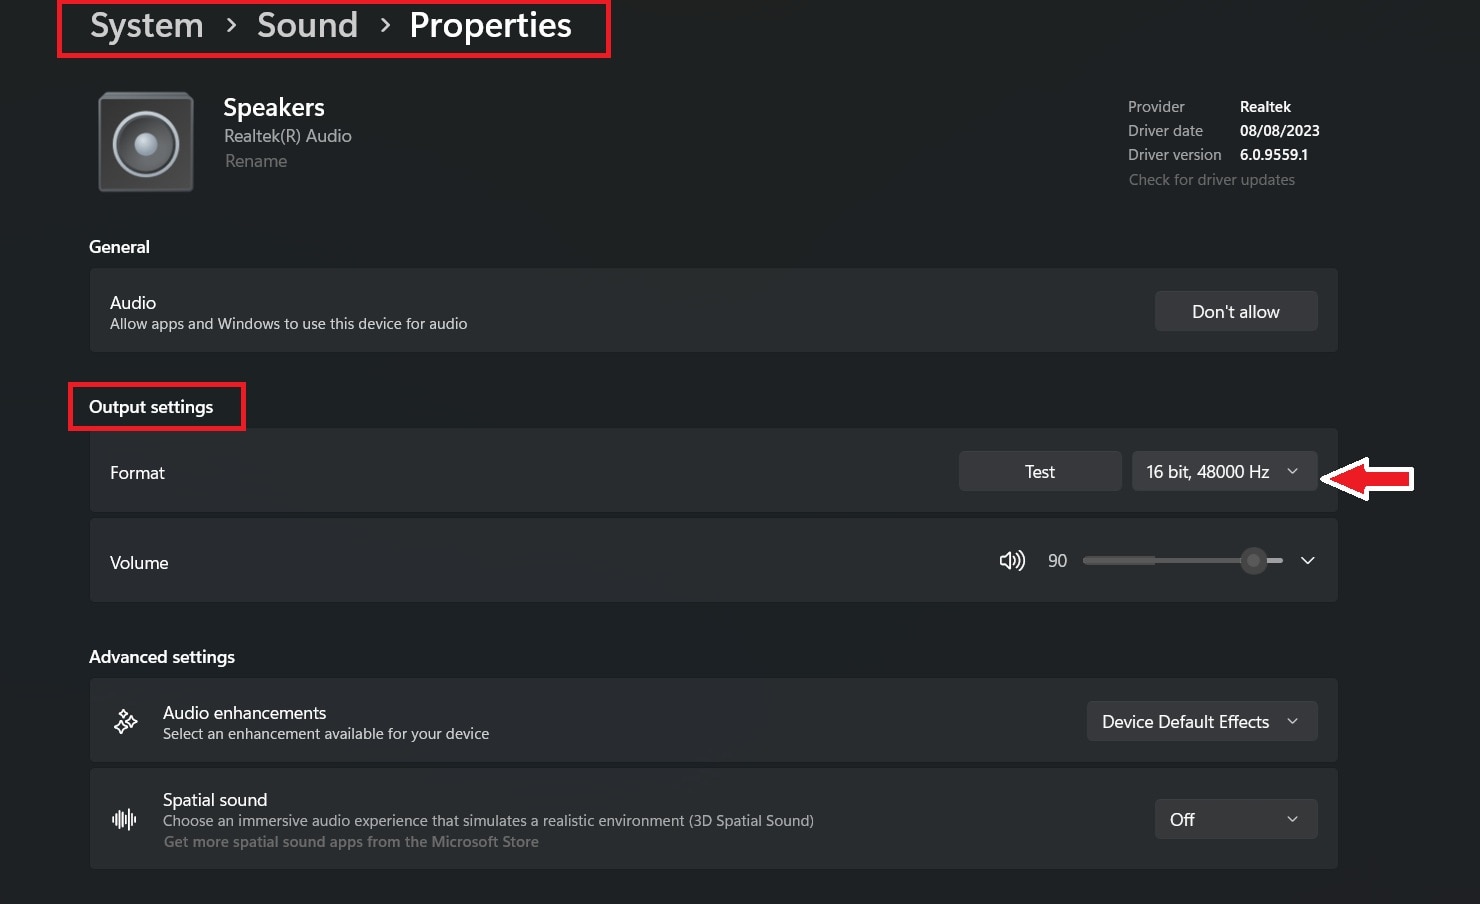
Audio playback depends on consistent sample rate settings between the Windows sound system and the audio driver. If these values do not align, audio data may fail to process correctly.
Setting both to the same standard rate ensures smoother communication between the system and the audio driver.
Step 1. Right-click the speaker icon in the system tray and select Sound.
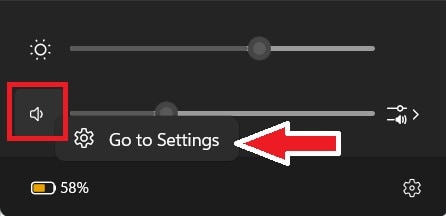
Step 2. Select your output device (for example: Speakers). It will automatically show the Properties. Scroll down and click on Format. Choose a sample rate such as 44,100 Hz or 48,000 Hz. Apply the changes and test audio playback.
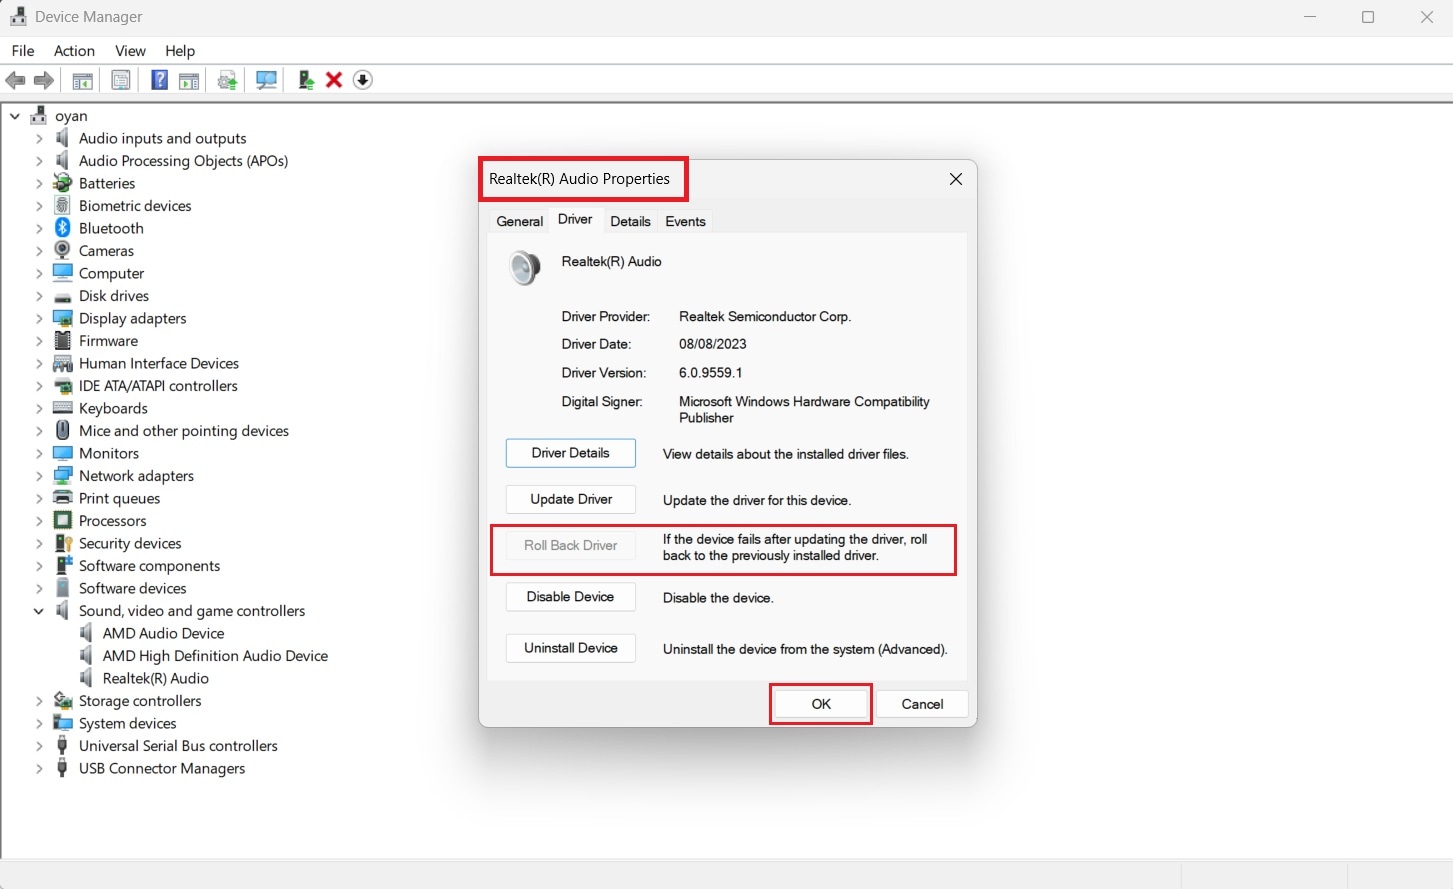
3. Update Audio Drivers
Audio drivers act as the connection between Windows and your sound hardware. If the driver is outdated, incompatible, or recently updated incorrectly, rendering errors may occur.
Step 1. Search for Device Manager and expand Sound, video, and game controllers. Right-click your audio driver and select Update driver to install the latest version.
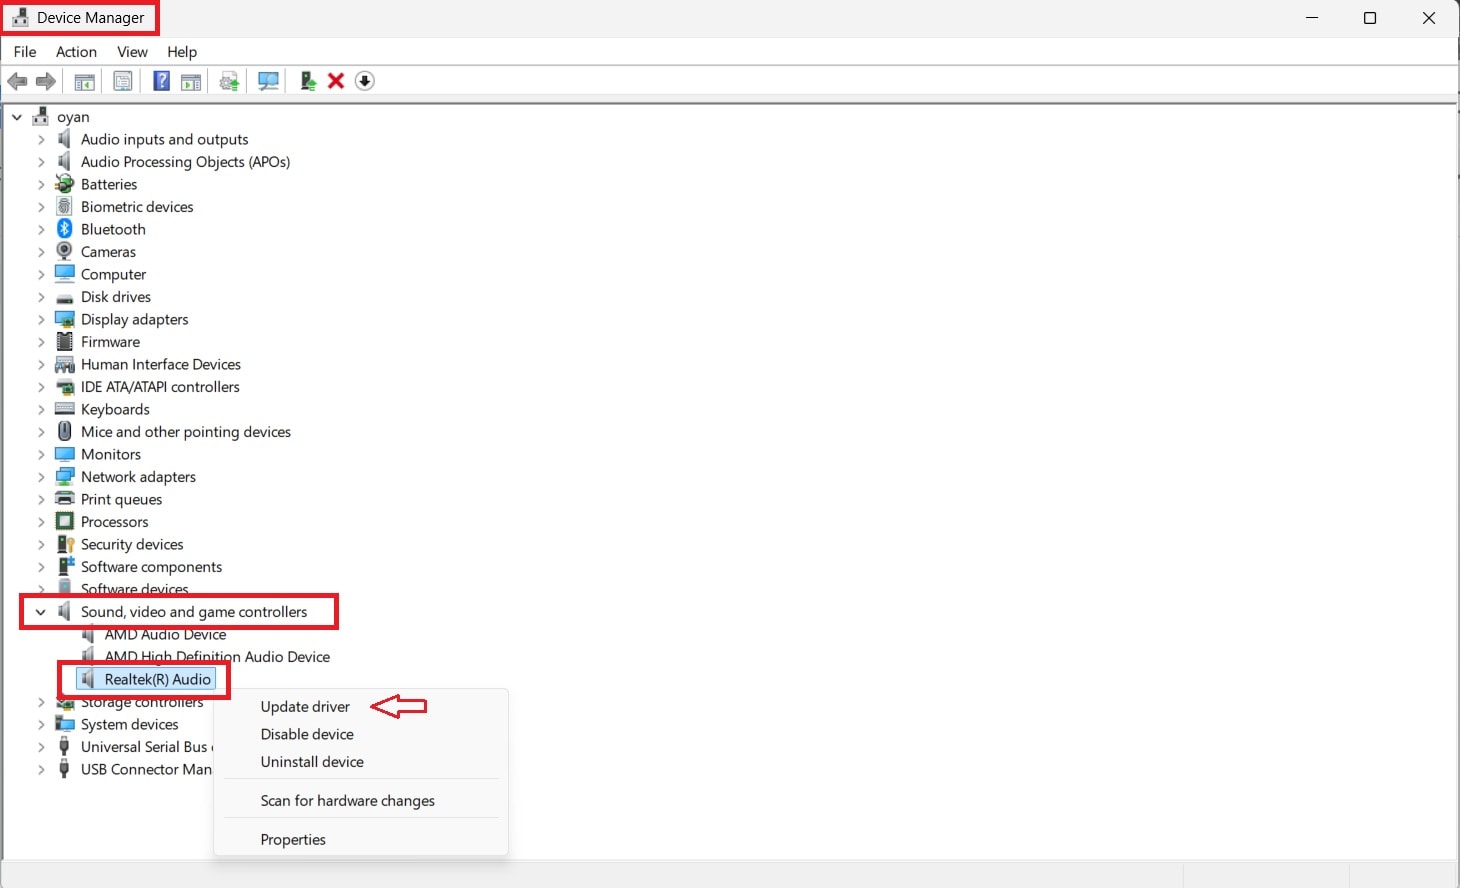
Step 2. If the issue began after an update, open Properties, go to the Driver tab, and choose Roll Back Driver if available.
4. Disable Audio Devices
Sometimes audio devices freeze due to short-term system or driver glitches. When this happens, the device may appear active but fail to produce sound.
Try disabling and enabling the device to force Windows to reinitialize it. This often restores normal audio functionality.
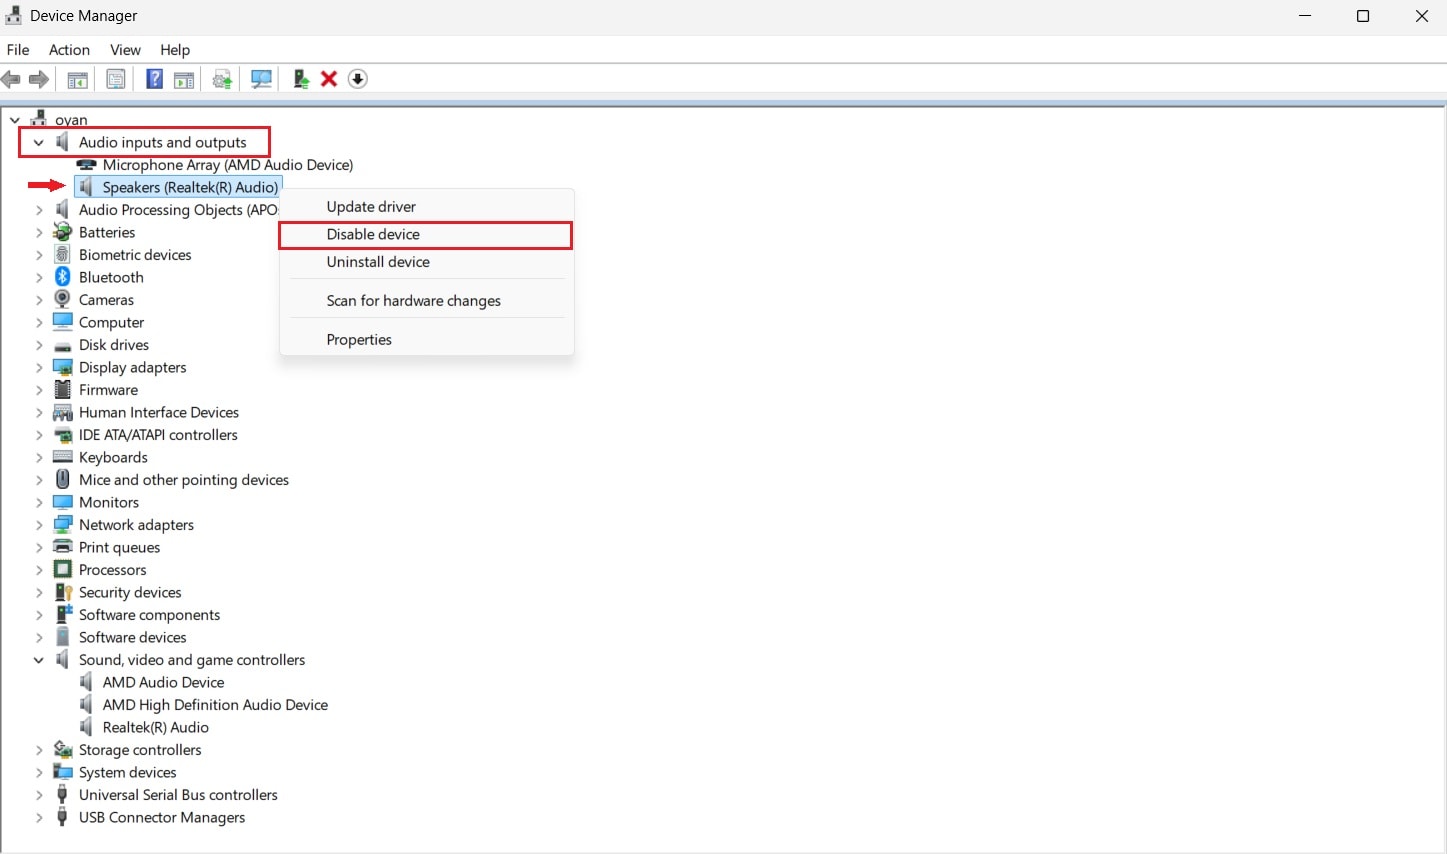
Step 1. Open Device Manager and expand Audio inputs and outputs.
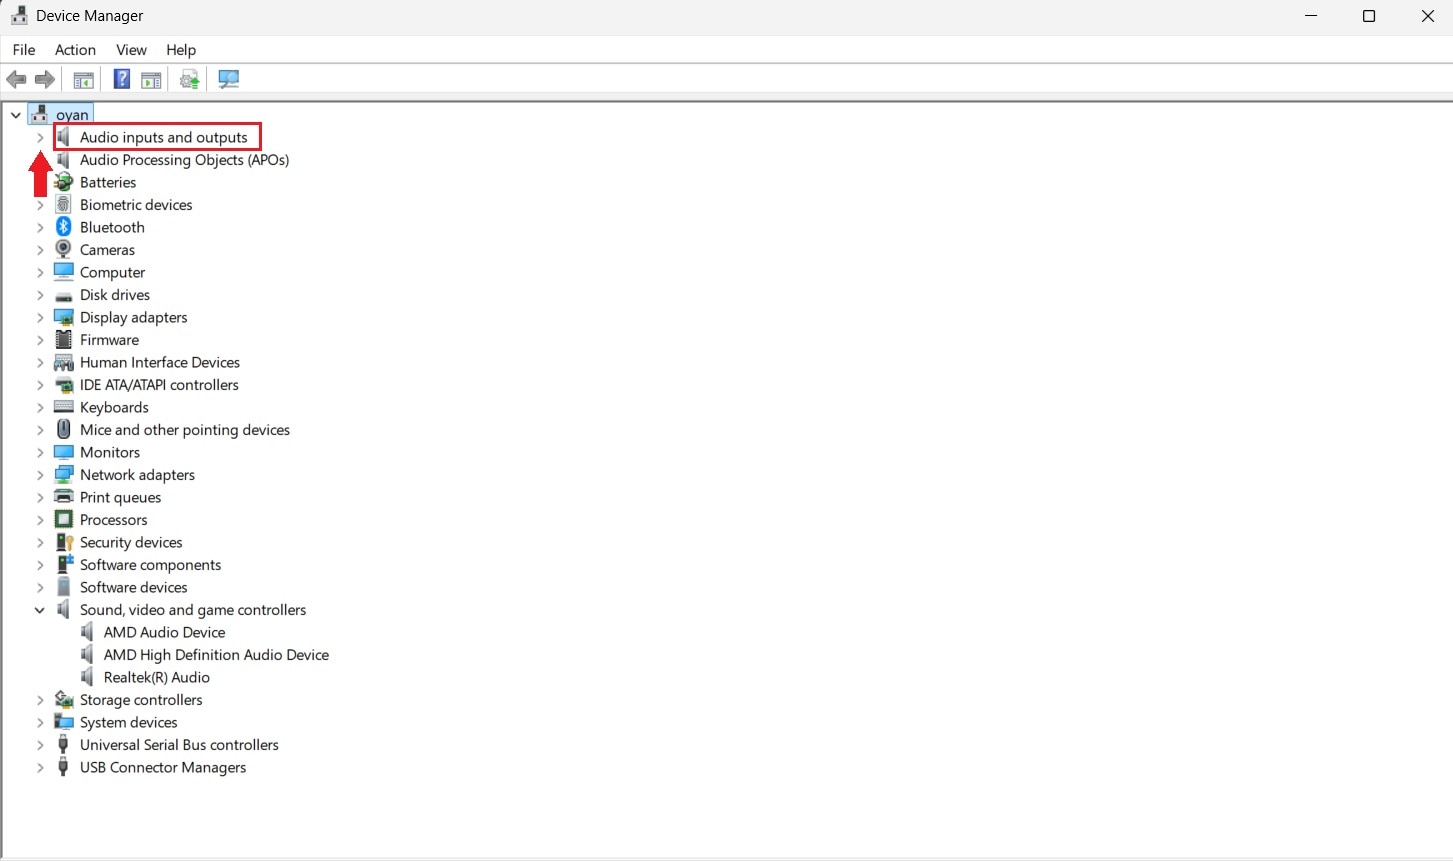
Step 2. Right-click your audio device and select Disable device. After a short pause, right-click it again and choose Enable device, then test audio playback.
5. Run the Windows Audio Troubleshooter
Windows includes an automated audio troubleshooter that checks common sound-related problems. It can detect incorrect settings, driver issues, or output conflicts. Running this tool is helpful when the cause of the error is not immediately obvious.
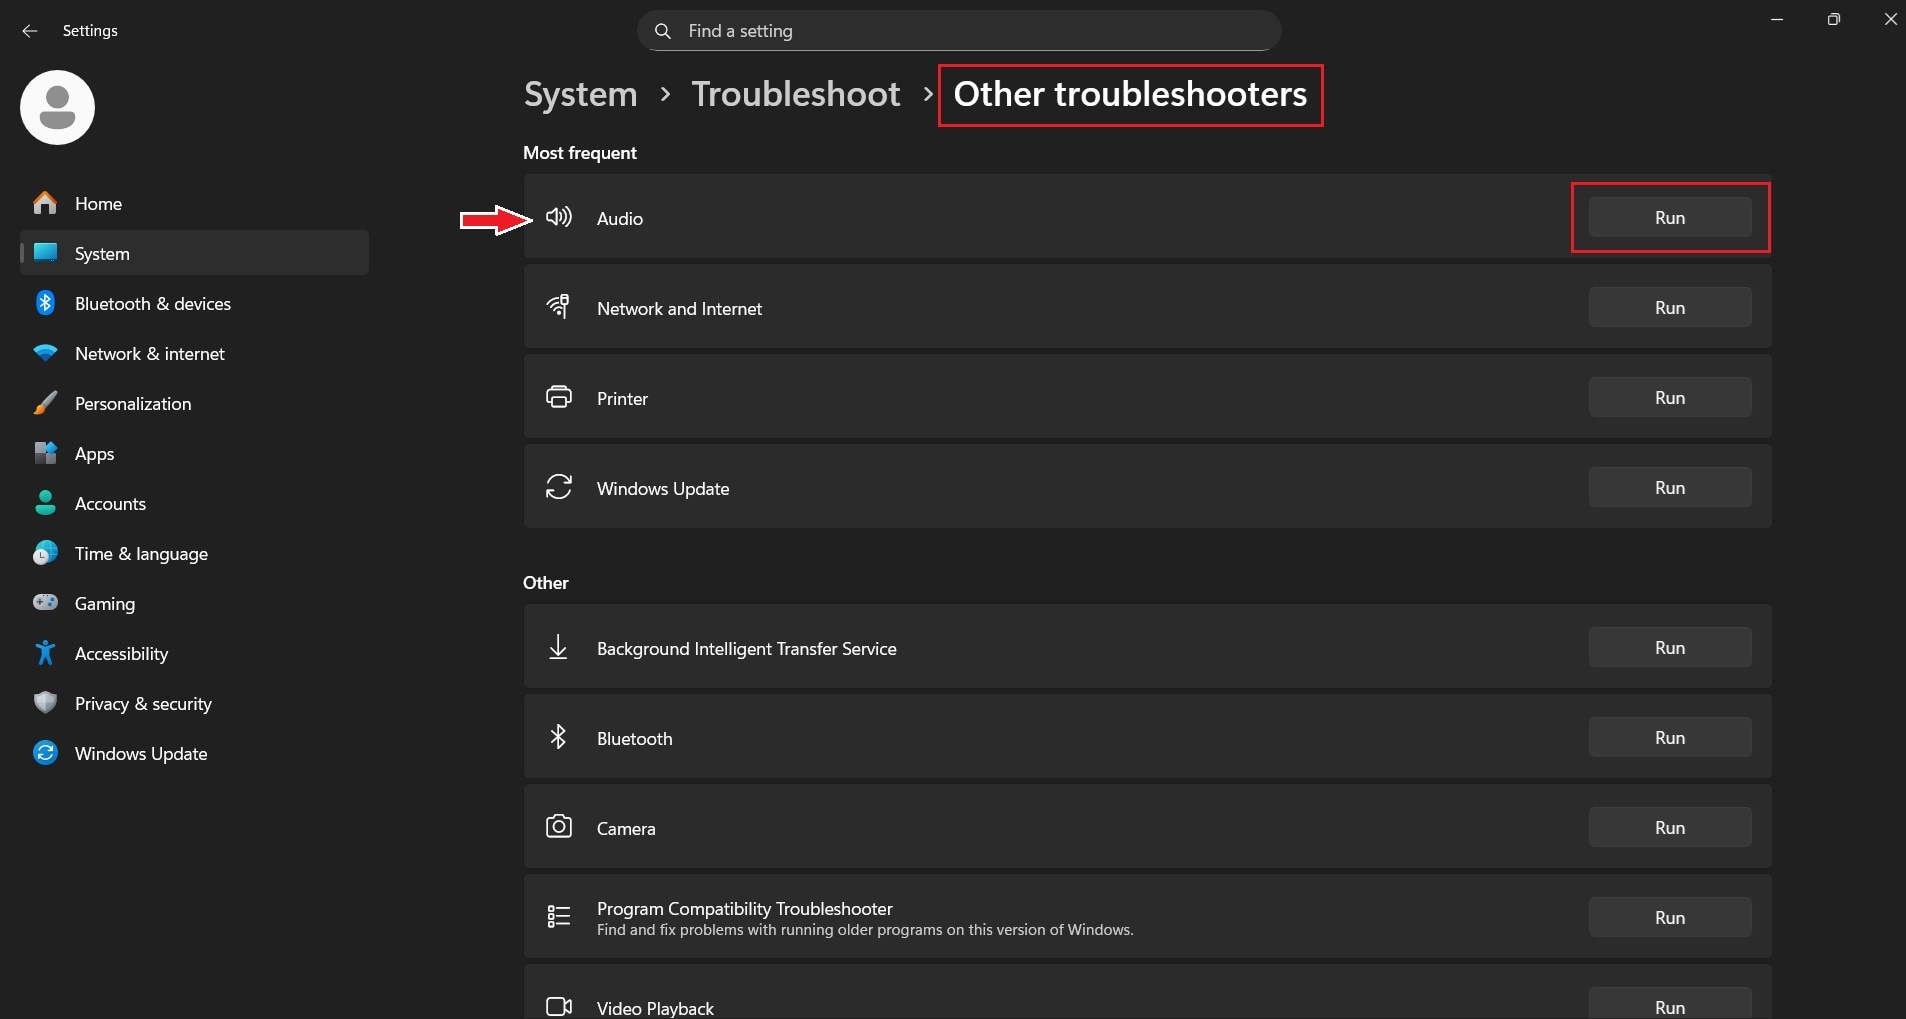
Step 1. Open Settings and go to System. Scroll down and locate Troubleshoot.
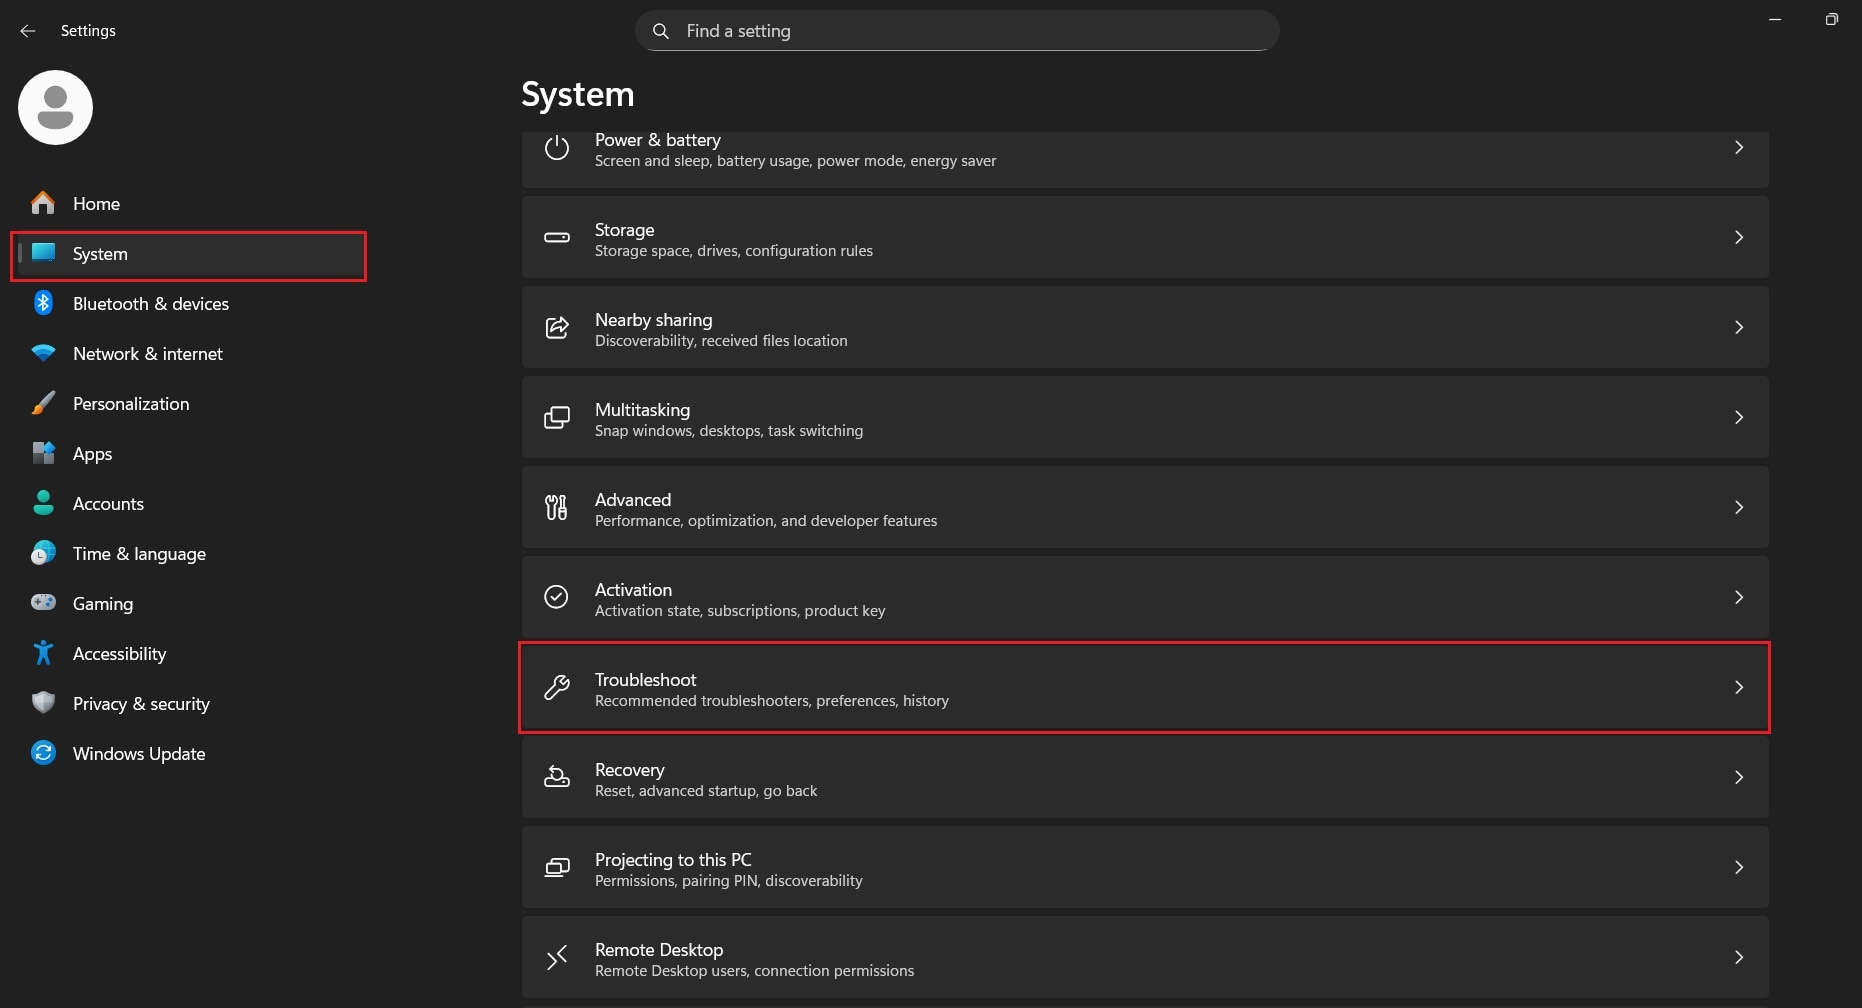
Step 2. Select Other troubleshooters. Click Run next to Audio and follow the on-screen instructions.
For Mac:
Mac users may encounter audio rendering issues due to temporary system conflicts or macOS updates. The methods below focus on stabilizing system audio behavior.
1. Restart Your Mac
Restarting macOS clears background audio processes and reloads system services. This can resolve minor conflicts affecting audio playback.
While simple, this step is effective when the issue is caused by temporary system instability.
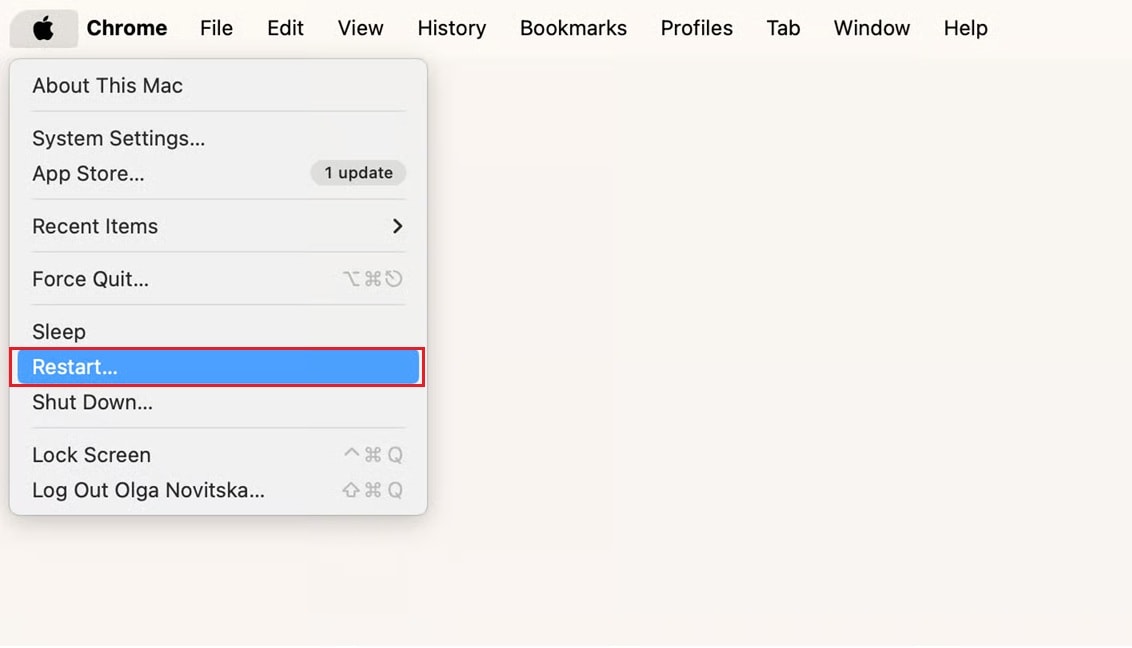
Step 1: Quit all apps (Command + Q) and disconnect external devices. Save any open work.
Step 2: Click the Apple Menu in the top‑left corner and select Restart.
2. Revert to a Previous Operating System
Audio rendering problems sometimes appear after installing a new macOS update. Changes in system components or drivers can affect audio behavior.
Rolling back to an earlier stable version can restore proper sound output. This approach is more advanced but useful when the issue clearly started after an update.
Specific Case: For YouTube
When the audio renderer error appears only on YouTube, the issue is often related to browser settings, extensions, or audio output configuration rather than the system itself.
The methods below focus on common YouTube-specific causes.
1. Disable Ad Blocker Extensions
YouTube audio errors can sometimes be triggered by browser extensions, especially ad blockers. Since many videos load ads before playback, blocking them may interrupt the audio stream.
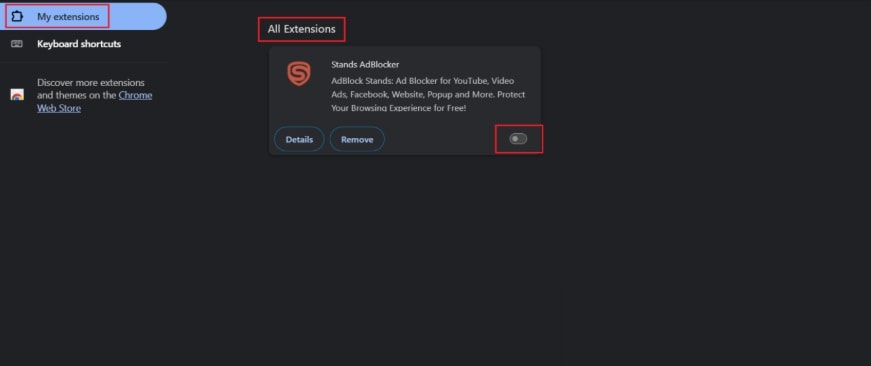
Step 1. Open your browser menu and go to Extensions or Manage Extensions.
Step 2. Under My Extensions, locate your ad blocker extension and turn it off. Refresh the YouTube page and check if the audio plays normally.
2. Clear Browser Cache and Cookies
Cached data and cookies help speed up browsing, but they can occasionally become corrupted. When this happens, YouTube may fail to load audio components correctly.
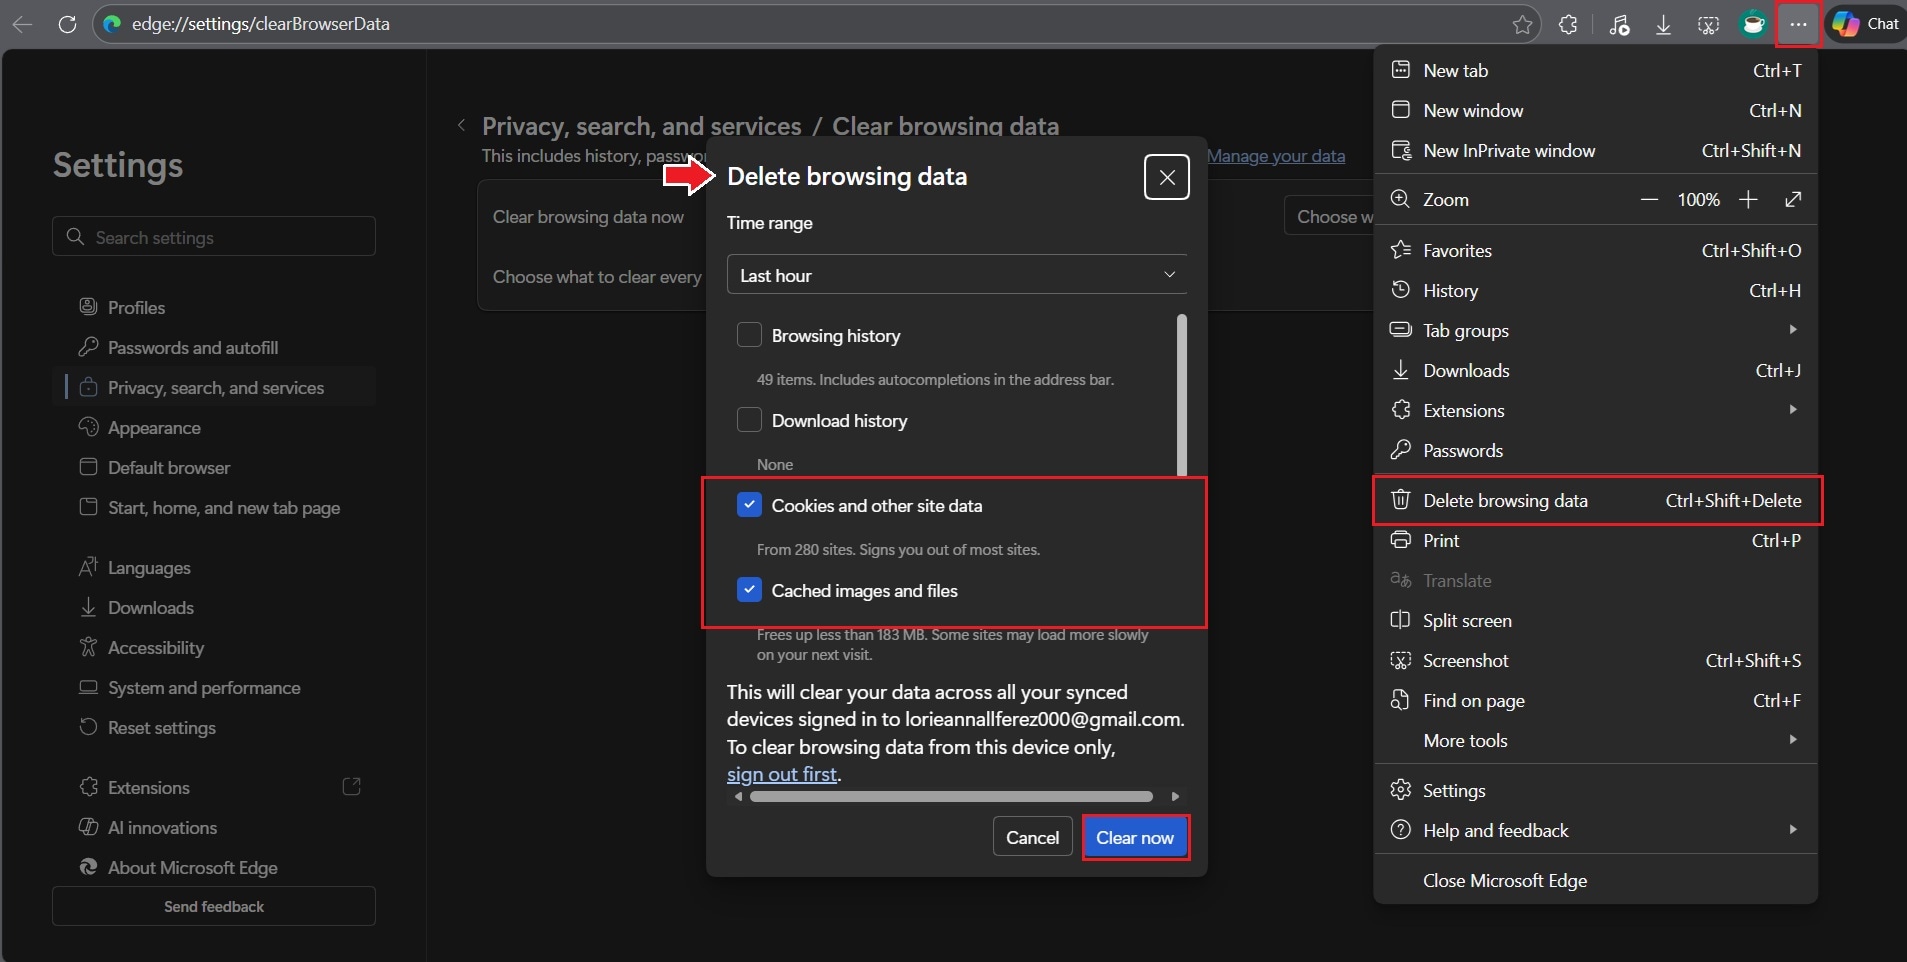
Step 1. Open your browser and click the three-dot menu in the top-right corner.
Step 2. Go to Delete browsing data. Select cookies and cached files, then confirm the action. Restart the browser and play the YouTube video again.
Part 4: Common Causes of Audio Renderer Error
Audio renderer errors are not caused by a single issue. They usually result from conflicts or failures at different layers of the audio playback process. It is important to understand these common causes to help determine which fixes are appropriate and which ones are unlikely to work.
1. Audio Driver: Sound problems on Windows or Mac often come from outdated audio drivers, especially after updates or when new hardware is added.
2. Conflicting Audio Devices: Multiple active output devices, such as speakers, headphones, HDMI outputs, or Bluetooth devices, may conflict with each other. If the wrong one is selected or a device switches suddenly, your audio may stop working.
3. Temporary System or Application Glitches: Sometimes, temporary glitches in your system or apps can cause sound to stop. This might happen if Windows audio services crash, your browser has a playback bug, or an app fails to load its audio properly.
4. Platform-Specific Issues
- On YouTube, audio errors are often linked to browser cache, extensions, or temporary playback issues.
- On Windows 11, certain drivers or update conflicts may repeatedly trigger the error.
- On macOS, the issue is less common but can occur when apps or audio devices fail to communicate properly.
5. Corrupted Audio Files: If the error appears only when playing certain files while others work normally, the audio data itself may be damaged. This usually results from interrupted downloads, transfer errors, or recording problems.
Part 5. When Audio Renderer Error Is Caused by Corrupted Audio Files
Audio file repair does not fix audio renderer errors caused by drivers, hardware, browser settings, or YouTube playback conditions.
File repair is relevant only when:
- The audio file has already been downloaded or recorded
- The same file fails across multiple players
- System-level fixes do not resolve playback
When File-Level Repair Is Appropriate
Audio repair may be relevant if:
- The error occurs with the same file every time.
- The file fails to play in different apps or media players.
- Playback results in silence, stuttering, or immediate failure.
- The file was interrupted during download, transfer, or recording.
What audio file repair tools can and cannot do
It CAN:
- Repair damaged audio file headers and indexes.
- Restore playback for incomplete or improperly encoded files.
- Resolve rendering failures caused by internal file corruption.
It CANNOT:
- Bypass audio renderer errors caused by drivers or OS conflicts.
- Fix YouTube or browser-based playback restrictions.
- Recover audio data that was never downloaded or recorded.
Repairing damaged audio files with Repairit Audio Repair
Repairit Audio Repair offers a specialized feature that restores playback for damaged or unplayable audio files. Instead of simply re‑encoding, it performs structural repair by rebuilding how the audio data is arranged.
The tool works with popular formats, including MP3, WAV, M4A, AAC, FLAC, WMA, and AIFF, and lets users preview the repaired files before saving. It also supports batch processing, making it efficient when multiple files are affected.
Step 1. Add the audio file that triggers the audio renderer error during playback.

Step 2. Repairit automatically matches the corrupted audio with the sample file.
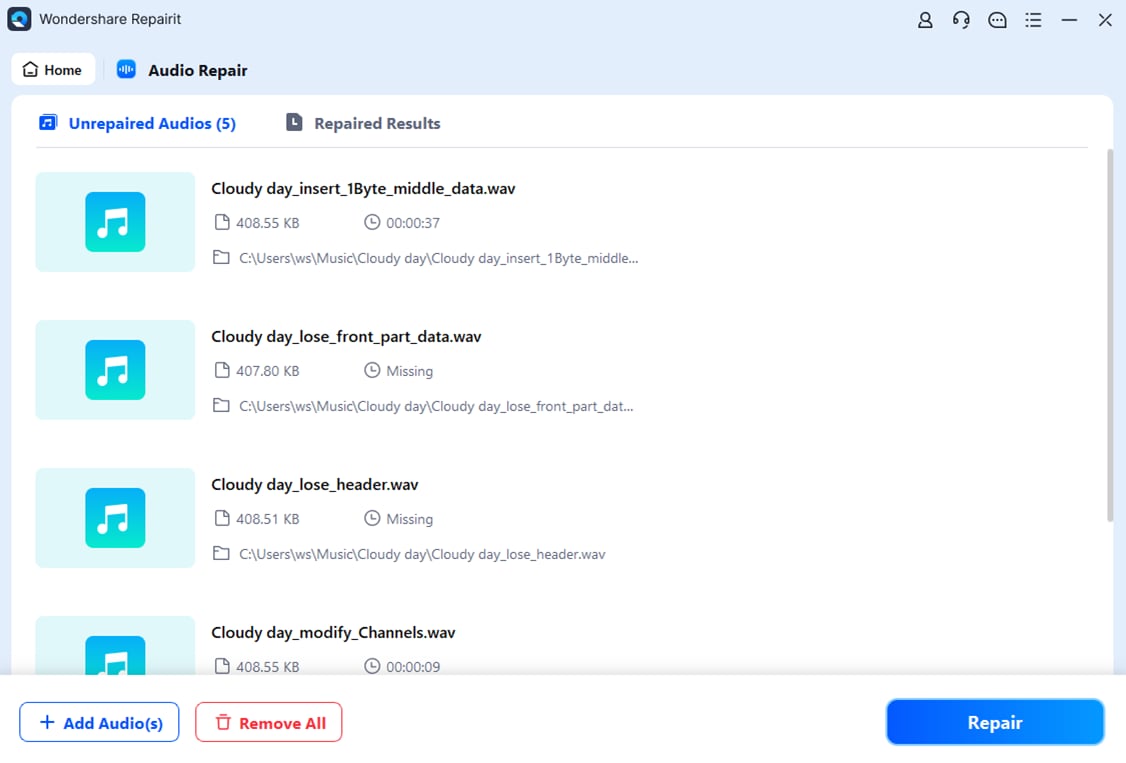
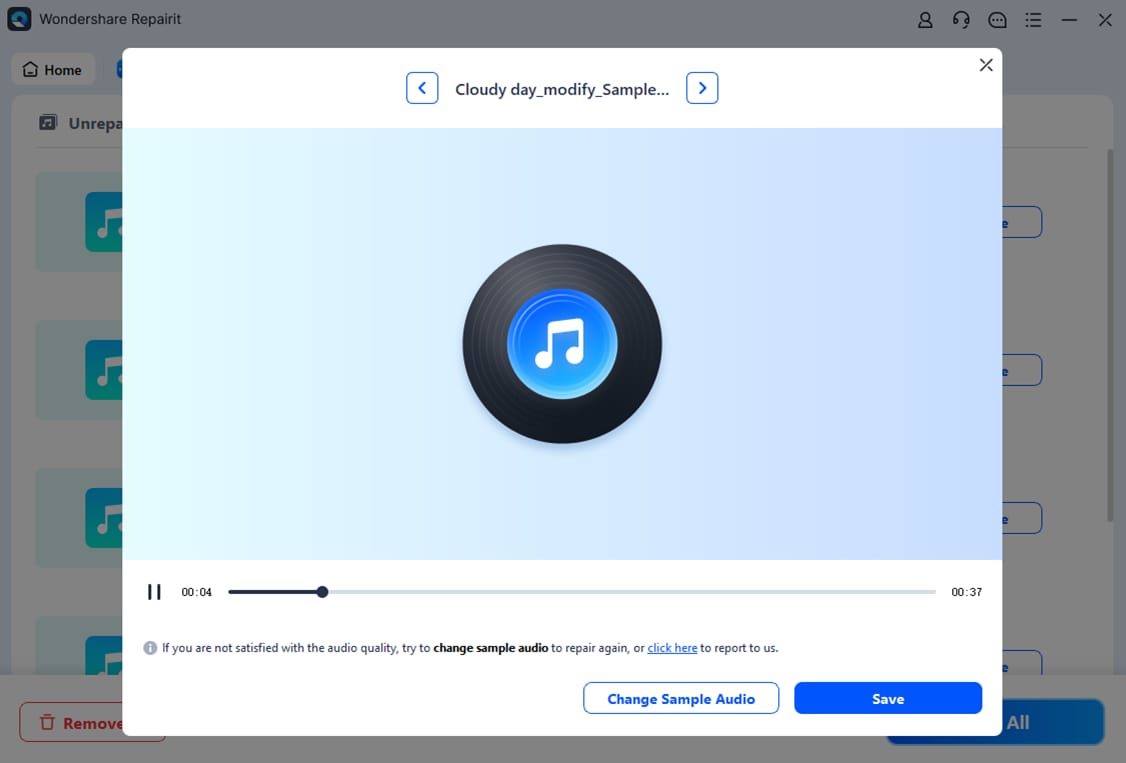
Step 3. Preview repaired audio to confirm the audio renderer error is resolved. Choose a location to save.
Conclusion
Audio renderer errors can originate from system settings, platform behavior, or damaged media files. Most cases are resolved through basic troubleshooting, such as restarting audio services, adjusting devices, or clearing browser data.
Audio file repair should be considered only when specific files consistently fail to play. Identifying the cause first helps avoid unnecessary changes and reduces the risk of data loss.
FAQs
-
How do I fix an audio renderer error on Windows 11?
Start with restarting audio services, checking output devices, and updating drivers before considering advanced fixes. -
Why does YouTube show an audio renderer error?
It usually happens because of browser issues. Cache, cookies, or extensions (like ad blockers) can interfere with playback. Clearing the cache or disabling extensions often fixes it. -
Can corrupted audio files cause an audio renderer error?
Yes. If only certain files fail while others play fine, those files may be damaged or improperly encoded. -
How do I fix an audio renderer error when only certain files fail?
Try repairing the files with an audio repair tool, or re‑download them if possible. If the file itself is broken, system fixes won’t help. -
Is the audio renderer error common on Mac?
It’s less common than on Windows, but it can still happen — usually after system updates or when external devices (like headphones or hard drives) cause conflicts.