

 TL;DR:
To resolve the Microsoft Outlook 0x8004010F data file access error caused by offline storage table (OST) synchronization failures, you must configure a new default email profile or repair the corrupted data file.
● The primary manual fix requires navigating to the Control Panel Mail settings, creating a new IMAP or POP3 profile, manually linking it to your previously located existing Outlook data file, and assigning it as the default profile.
● Because system security tools can block Outlook server synchronization, removing antivirus software from system startup via Task Manager or temporarily disabling Windows Defender Firewall may restore email send and receive functions.
● If manual configuration fails due to severely damaged emails, Wondershare Repairit for Email can batch repair corrupted PST and OST files without size limits across Windows and macOS for Outlook versions 2000 through 2016.
Ask AI for a summary
 ChatGPT
 Perplexity
 Gemini
 Claude
 Grok
Grok
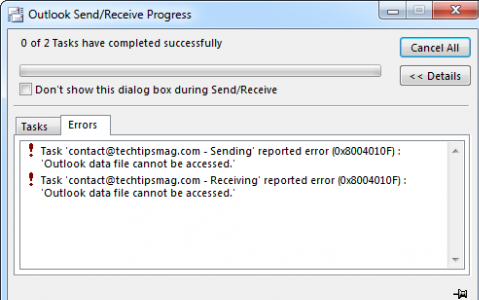
One of the error notifications that may put an Outlook user in dismay is Outlook error 0x8004010f. It is common in the process of sending and receiving emails in Outlook 2010 and 2013 versions. What does it mean? It warns that "Outlook data file cannot be accessed". You may also wonder why this happens and how to solve it as soon as possible.
Then the article is specially designed to help you understand why you got the Microsoft Outlook 0x8004010f error and how to fix it.
Part 1. Causes of Error 0x8004010f in Outlook
All mailbox data on the server is locally stored on a file labeled the Offline Storage Table (OST) file while using MS Outlook. The OST file serves as a copy of the user's Exchange mailbox because it saves locally all records of the account residing on the server.
The OSTs major function is evident when the Exchange server is down as a result of technical or maintenance issues. Should this happen, an Outlook user can continue his work with the OST file locally and once the Exchange server is up and running, changes to the account can be synchronized with the Exchange account.
When a user does not have access to the OST file due to faulty or incomplete synchronization between Outlook and Exchange server, the Outlook 0x8004010f error- "Outlook data file cannot be accessed" will display on the screen. The following are the major reasons for the error:
- Offline Storage file corruption
- Corruption of Outlook profile or Incorrect configuration
- Location change of OST file
- After upgrading Outlook, copying of old OST file used by the previous version
Let us now discuss how to fix the error 0x8004010f.
Part 2. 4 Common Ways to Resolve the Outlook Error 0x8004010F
To resolve the error "Outlook Data File Cannot Be Accessed", several methods can be employed.
1 Set up a new Outlook profile
If the cause of the error is a corrupted outlook profile, setting up a new profile will fix the error. To do this, locate your default outlook file or OST file then proceed to set up a new profile.
There are 3 steps to create a new profile.
Step 1: Locate the default Outlook data file

- Navigate to Control Panel and click Mail.
- After clicking the 'Mail Setup – Outlook' dialog box will open. Next click 'Show Profiles'.
- Choose your present Outlook profile and then click on 'Properties'.
- The 'Mail Setup – Outlook' dialog will appear again. Next click on 'Data Files'.
- Your 'Account Settings' dialog box will appear. Click on the Data Files and take note of the name and location of your default Outlook profile. The default profile will be accompanied by a checkmark.
- Click close and exit.
Step 2: Setup a new Outlook profile
Auto-setup IMAP or POP3 email account
- Navigate to your Control Panel
- After the ' Mail Setup – Outlook' dialog box opens, Click 'Show Profiles'.
- Choose your present Outlook profile and then click on 'Add' next.
- Type a preferred name for your new profile in the 'New Profile dialog box' and click OK next
- The 'Add New Account' dialog box will appear. Input your email details and then click Next
- After you have completed the configuration, click on Finish.
Manual method to create IMAP or the POP3 email account
- Navigate to your Control Panel
- After the 'Mail Setup – Outlook' dialog box opens, Click 'Show Profiles'.
- Choose your present Outlook profile and then click on 'Add' next.
- Type a preferred name for your new profile in the 'New Profile' dialog box and click OK
- The 'Add New Account' dialog box will appear next. Choose the 'Manually configure server settings or additional server types' and then click on Next
- The dialog box 'Choose Service' will appear. Choose Internet E-mail and then click Next
- The dialog box labeled 'Internet E-mail settings' will appear. Input your email account details
- Next, click 'Test Account Settings' to test your account
- Choose the 'Existing Outlook Data File' option and then click 'Browse'
- The dialog box labeled 'Open Outlook Data File' will open next. Locate and choose the Outlook data file you found previously.
- Next, you need to Click OK -- Next -- Close -- Finish simultaneously.
Now your new profile has been successfully created.
Step 3: Configure the new Outlook profile as the default profile
- Navigate to Control Panel
- The dialog box labeled 'Mail Setup – Outlook' appears next. Click Show Profiles.
- Choose the option 'Always use this profile' and select the new profile from the drop-down below it.
- Click OK.
2 Locate and install Outlook data file
To locate and install Outlook data file, follow the following steps as outlined below;
- Navigate to Control Panel and click Mail.
- After clicking the 'Mail Setup – Outlook' dialog box will open. Next click 'Show Profiles'.
- Choose your present Outlook profile and then click on 'Properties'.
- The 'Mail Setup – Outlook' dialog will appear again. Next click on 'Data Files'.
- Your 'Account Settings' dialog box will appear. Click on the Data Files and take note of the name and location of your default Outlook profile. The default profile will be accompanied by a checkmark.
Click close and exit.
3 Disable antivirus software
Antivirus software often conflicts with Outlook error 0x8004010f. To disable your antivirus software, remove them from the system startup by right-clicking the taskbar and selecting the 'Task Manager' menu.
Next, select your antivirus software and click the disable option, then restart windows and attempt to send an email on Outlook.
4 Turn off 'Windows Defender Firewall'
Your 'Windows Defender Firewall' may be the problem. To ensure it is not blocking Outlook, press the Windows+S key on your keyboard. Then input Firewall in the search box to open 'Windows Defender Firewall'.
The next click turns off the Windows Defender Firewall located on the left of the control panel windows. Turn off both Windows Defender Firewall radio options to disable WDF and click the 'OK' button next to exit the window.
The error has been fixed and you can once again send and receive messages with Outlook.
Part 3. Fix the Outlook Error 0x8004010F Caused By Corrupted Emails
If none of the above methods work, the Outlook error may be caused by the corrupted Emails, then you are advised to turn to Wondershare Repairit for Email for help. It is a powerful Outlook error fix software with the following features:

-
Repair damaged PST & OST Files in Outlook in all Email corruption scenarios, such as hard disk crashes & bad sectors, virus attacks & tojan horse, outlook corruption & malfunctions, improper shutdown procedure, etc.
-
Restore Outlook emails deleted for a long time and extract the email messages, folders, calendars, etc. within seconds.
-
Fix outlook error 0x8004010f in MS Outlook 2016, 2013, 2010, 2007, 2003, 2002 (XP), & 2000.
-
Restore Outlook Emails deleted for a long time with a very high success rate.
-
Repair emails in bathes without size limits and support to preview all of them before saving.
-
Compatible with Windows 7/8/8.1/10/11, Windows Server 2012/2016/2019, and MacOS X 10.11~ MacOS 12 (Monterey).
How to Repair the corrupt Outlook file with Repairit?
Step 1: Download and launch Repairit for Email on your PC/Mac.
Download and install this software on your computer. Once you launch the platform, click "Select File" to import your corrupt PST/OST file.

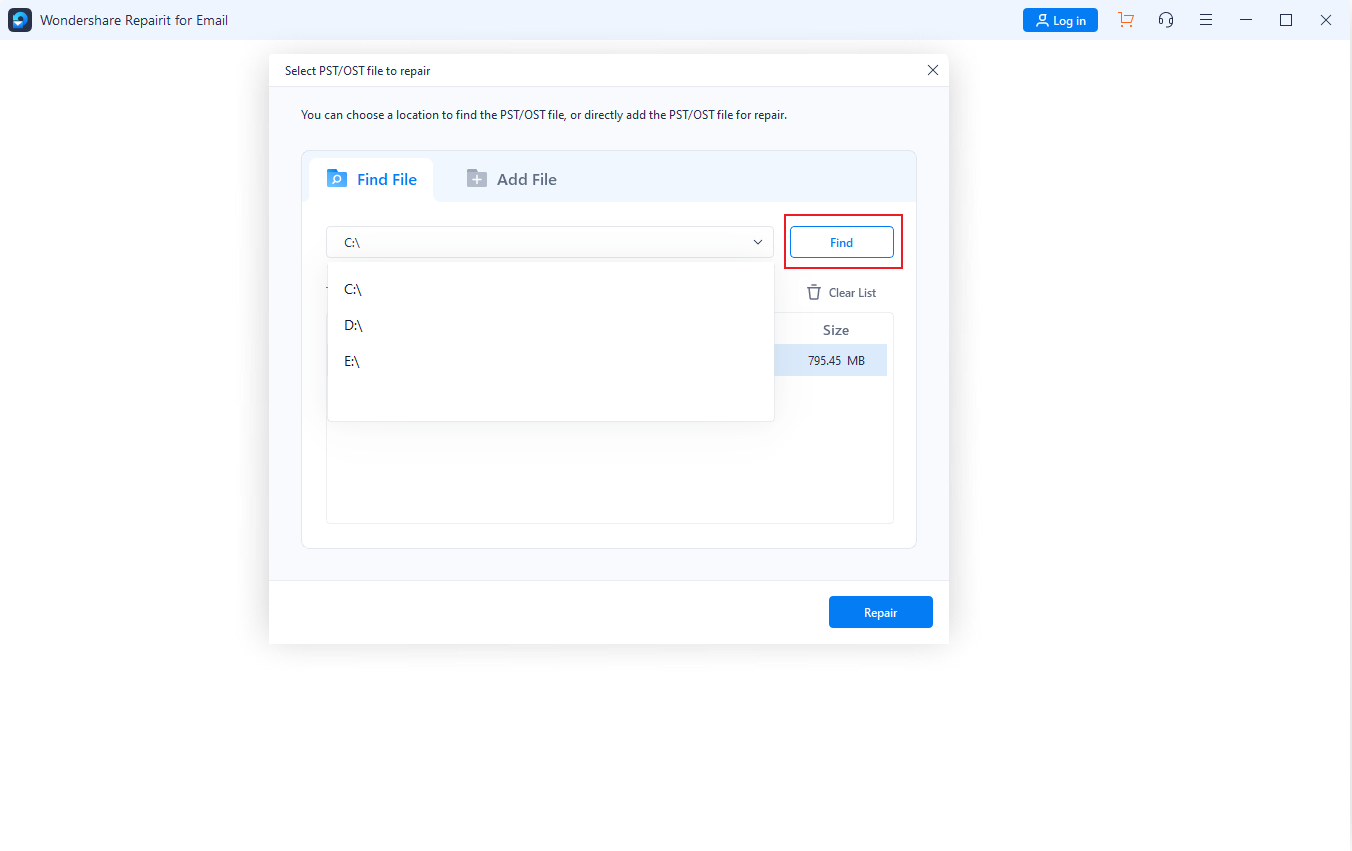
Step 2: Start Repairing Damaged PST Files.
Then select a certain drive by clicking on "Find" to upload the corrupt PST/OST files. After adding the PST/OST file, click the "Repair" button to start the file repair process.
Step 3: Save Repaired PST/OST Data.
After the file Repair process finishes. You can easily preview the email contents of the repaired PST/OST file on the next screen. Following this, select the respective email data you wish to export and click on “Save.”

Once you finished the repair process, open the fixed PST/OST files.
Conclusion
Have you got the Outlook error 0x8004010f fixed? The error is not as terrible as it seems. It is just one of the few errors that may be encountered while using Outlook. Should you also have a taste of this problematic error, be sure to diligently apply the fixes and methods as mentioned above.
If none seems to work, your last resort will be to use Wondershare Repairit for Email which irrevocably your best option at getting the error fixed. Good luck!