Fix "The Attempted Operation Failed" error
Check why "The Attempted Operation Failed" error occurs and the best 8 ways to fix this error
Outlook error the operation failed attachment error is the most common error experienced by the Microsoft Outlook users. You experience it while trying to open email attachments or send attachments in email. The complete message looks like: The operation failed. An object can't be found.
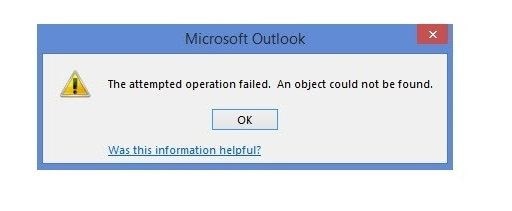
This inhibits the users from opening attachments or sending messages using Outlook. So, to resolve this Outlook problem, we have covered various methods.
However, we recommend you to use Repairit PST repair software to repair common errors in computer, optimize for maximum performance, and to get rid of Outlook error the operation failed.
In this article
Why Does "Microsoft Outlook Operation Failed" Error Occur?
There are tons of reasons for 'the operation has failed' attachment error to occur. It includes:
1. Older Outlook Version
If you are using an old Microsoft Outlook version, you are likely to face this issue. Thus, make sure you keep the software up-to-date.
2. Outlook in Compatibility mode
In Outlook compatibility mode, few components will not be able to work correctly. It can also be the reason.
3. Conflicting applications
Conflicting applications like antivirus/Firewalls on your system can also cause many Outlook problems.
4. Corrupted Office or Outlook installation
If an installation of Office or Outlook is incomplete, then you will not be able to attach attachments successfully.
5. Missing or Corrupted .pst File
If the PST file has corrupted, it will also display the Outlook error message the operation failed the messaging interfaces error.
6. Conflicting Outlook Add-ins or duplicate rules
If there are conflicting Outlook add-ins or rules that are not set correctly, you will experience the attachment error message.
How to Fix "The Attempted Operation Failed in Microsoft Outlook"?
To troubleshoot and fix the error, 'the operation failed,' there are plenty of possible solutions you can use. This includes:
Check These Solutions
- 01 Verify if Microsoft Outlook is in Compatibility Mode
- 02 Update your Outlook
- 03 Create your New Outlook User Profile
- 04 Clean Boot Windows
- 05 Turn Off Antivirus Scanner
- 06 Repair Microsoft Office
- 07 Use Scanpst.exe to Repair Data Files in Outlook
- 08 Use Outlook PST Repair Software (for Corrupt PST File)

1. Verify if Microsoft Outlook is in Compatibility Mode
Firstly, check that the option named 'Run program in the compatibility mode' is not ticked for Microsoft Outlook. To do this, perform the steps below:
Step 1: Go to the start button and type 'outlook.exe' in the search box.
Step 2: Right-click on the Outlook icon that is on the desktop and chooses Properties.
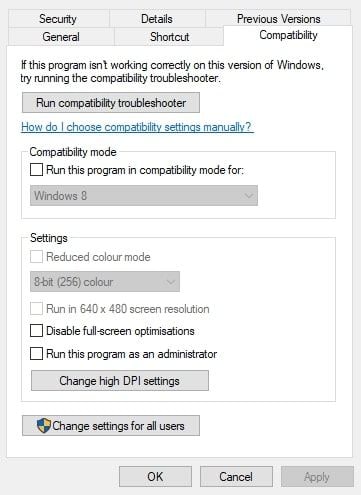
Step 3: Pick the Compatibility tab and deselect the 'Run the program in the compatibility mode' if selected.
Step 4: Choose the 'Apply' option and hit the 'OK' button to close the window.
Step 5: After that, restart your Microsoft Outlook application and check if you can send emails again.
2. Update your Outlook
Check for Microsoft Outlook updates by performing the following steps:
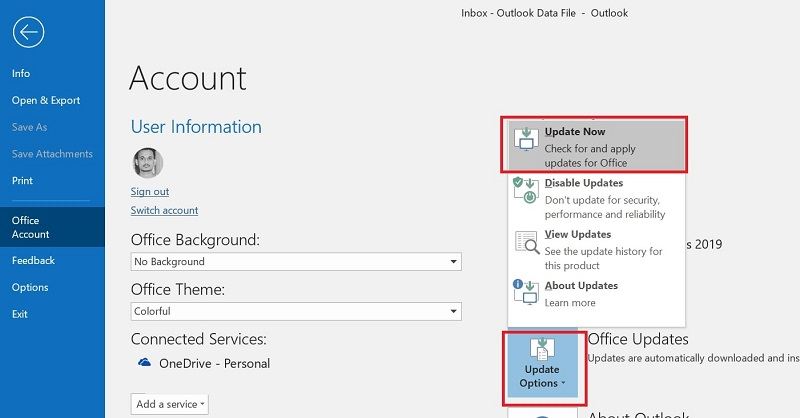
Step 1: Click File > Office Account
Step 2: Tap on 'Update Options' and then 'Update Now' for updating the application.
3. Create your New Outlook User Profile
Outlook error the operation failed can also occur due to a corrupted Microsoft Outlook profile. For setting up a new profile:
Step 1: Launch "Run" by pressing Windows key + R and then click on 'Control Panel' that is in the Open box. Now and click OK.
Note: You can also head to Start > Settings and > Control Panel option.
Step 2: Tap on Mail, which is in Control Panel, and in the Mail Setup Window hit on the 'Show Profiles' button.
Step 3: Now tap on the Add button, enter the profile title, and click on the 'OK' button.
Step 4: In your Add Account window, enter your email account details.
Step 5: Now, click the 'Next' button to proceed to the account setup wizard.
Step 6: In a new profile dialog box, fill the name of the new profile under Profile Name and hit OK.
Step 7: Now in E-mail Accounts dialog box, pick 'Add a new e-mail account' in options
Step 8: After that, hit 'Next' to continue.
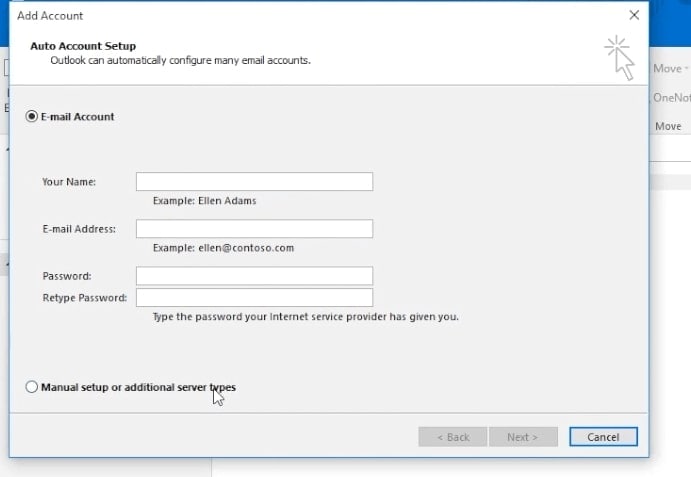
Step 9: Click on the server type on which the e-mail account works, and then hit 'Next' to proceed further.
Step 10: Click on the "More Settings" option and fill all the required details.
Step 11: Finally, click on the Finish button.
4. Clean Boot Windows
To clean startup services and software, use the following steps:
Step 1: Press Windows key + R. It will launch the "Run"
Step 2: Now type 'msconfig' and hit the OK button to access the 'System Configuration.'
Step 3: Select the 'selective startup' button and choose Load system services and original boot configuration options.
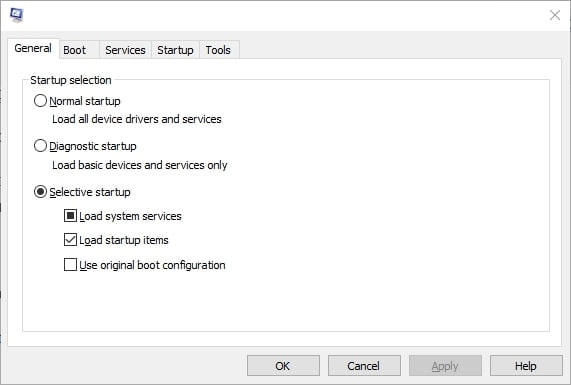
Step 4: Uncheck the box 'Load startup items.'
Step 5: Open the "Services" tab, and tap on the option "Hide Microsoft services."
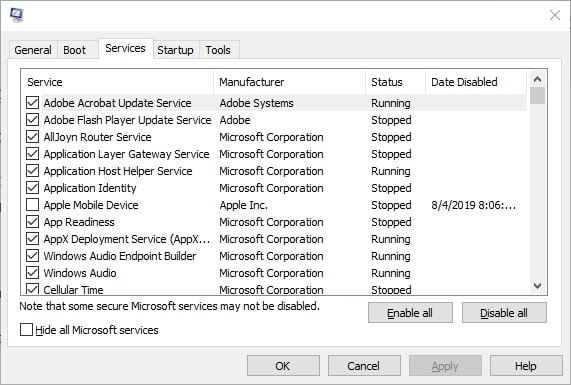
Step 6: Hit the 'Disable all' button. It will deselect all the third-party services. Now click Apply and then click OK.
Step 7: Now, in the pop-up dialog box window select the Restart option.
5. Turn Off Antivirus Scanner
Antivirus software can also be another significant factor behind the operation failed error. Every time you send or receive emails, this application will first scan it.
This slows the process and sometimes causes an error. Therefore, you need to switch it off. After doing that, try to send an email again. If you are still facing this problem, use other solutions.
6. Repair Microsoft Office
Repairing Microsoft Outlook will fix the wrong configuration in Outlook. To do this, follow the steps below:
Step 1: Go to the 'start' menu.
Step 2: Type Series or appwiz.cpl in the search box and hit enter.
Step 3: Now, click on Microsoft Office and Change button.
Step 4: Select the Repair option, then click on continue to start the repair process.
Step 5: Click on continue to begin the repair process.
Step 6: After repairing, restart Outlook and try to open an email attachment or send an email again.
7. Use Scanpst.exe to Repair Data Files in Outlook
If any of the methods mentioned above does not work correctly, then there are high chances that the error 'the operation failed - an object is not found in Microsoft Outlook 2016/2013/2010/2007' is due to corrupted PST data files in Outlook.
So you need to fix this problem by repairing data files (.pst) using Scanpst.exe. To do that, use the following steps:
Step 1: Press Windows key + E key.
Step 2: Now, click on the Office folder that can be seen in File Explorer. The path in Microsoft Office 2019/2016 is:
C: -> Program Files -> Microsoft Office ->root and then Office16
Step 3: Tap on SCANPST.EXE to launch Microsoft Outlook Inbox Repair Tool.
Step 4: Now, click the 'Browse' button.
Step 5: Choose the default PST file. The default path for Outlook 2010 to 2019 is:
C:\Users\%username%\Documents\Outlook Files.
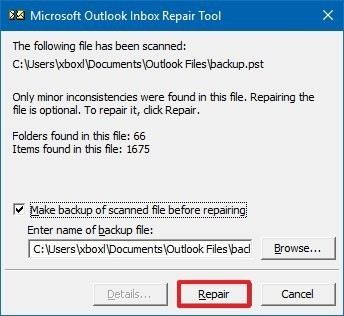
Step 6: Click 'Start' to start scanning.
Step 7: Finally, click the repair button to fix the issues in the file.
8. Use Outlook PST Repair Software (for Corrupt PST File)
If "The Attempted Operation Failed in Outlook" error is caused by corrupted PST files, the tips mentioned above cannot fix this error successfully, you have to seek the help of a professional Outlook repair software to repair corrupted Outlook PST files. Wondershare Repairit for Email is an ideal software to do it!
Why Choose Wondershare Repairit for Email?

-
Repair damaged PST&OST Files in Outlook in all Email corruption scenarios, such as hard disk crashes & bad sectors, virus attacks & tojan horse, outlook corruption & malfunctions, improper shutdown procedure, etc.
-
Restore and recover all mailbox components within the files such as emails, attachments, contacts, calendar items, journals, notes, etc.
-
Restore Outlook Emails deleted for a long time with a very high success rate.
-
Repair emails in bathes without size limits and support to preview all of them before saving.
-
Compatible with Windows 7/8/8.1/10/11, Windows Server 2012/2016/2019, and MacOS X 10.11~ MacOS 12 (Monterey).
Now, you may wonder how to repair corrupt PST files with Wondershare Repairit. Don’t worry! I am sharing a step-by-step process of using the email repair tool.
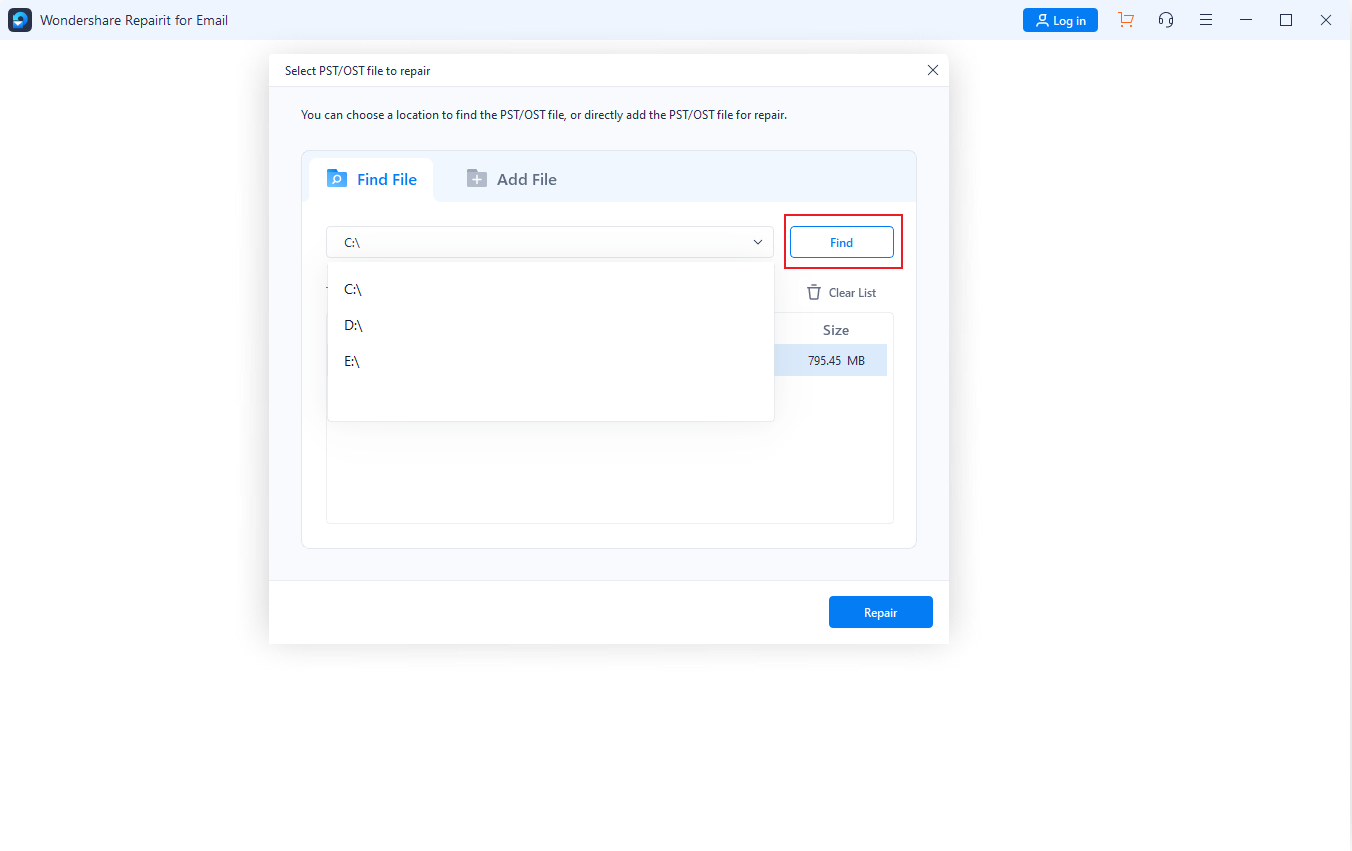
Step 1: Launch Repairit for Email on Windows/Mac.
Uploading your corrupt PST/OST files by clicking on the "+" button.
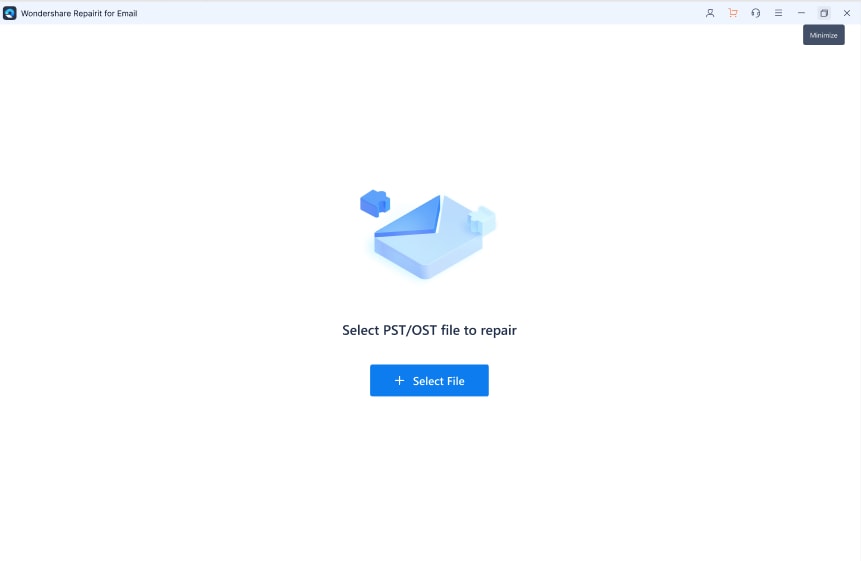
Repairit will let you select the corrupt files from a location. Click on the "find" option to choose Outlook files.
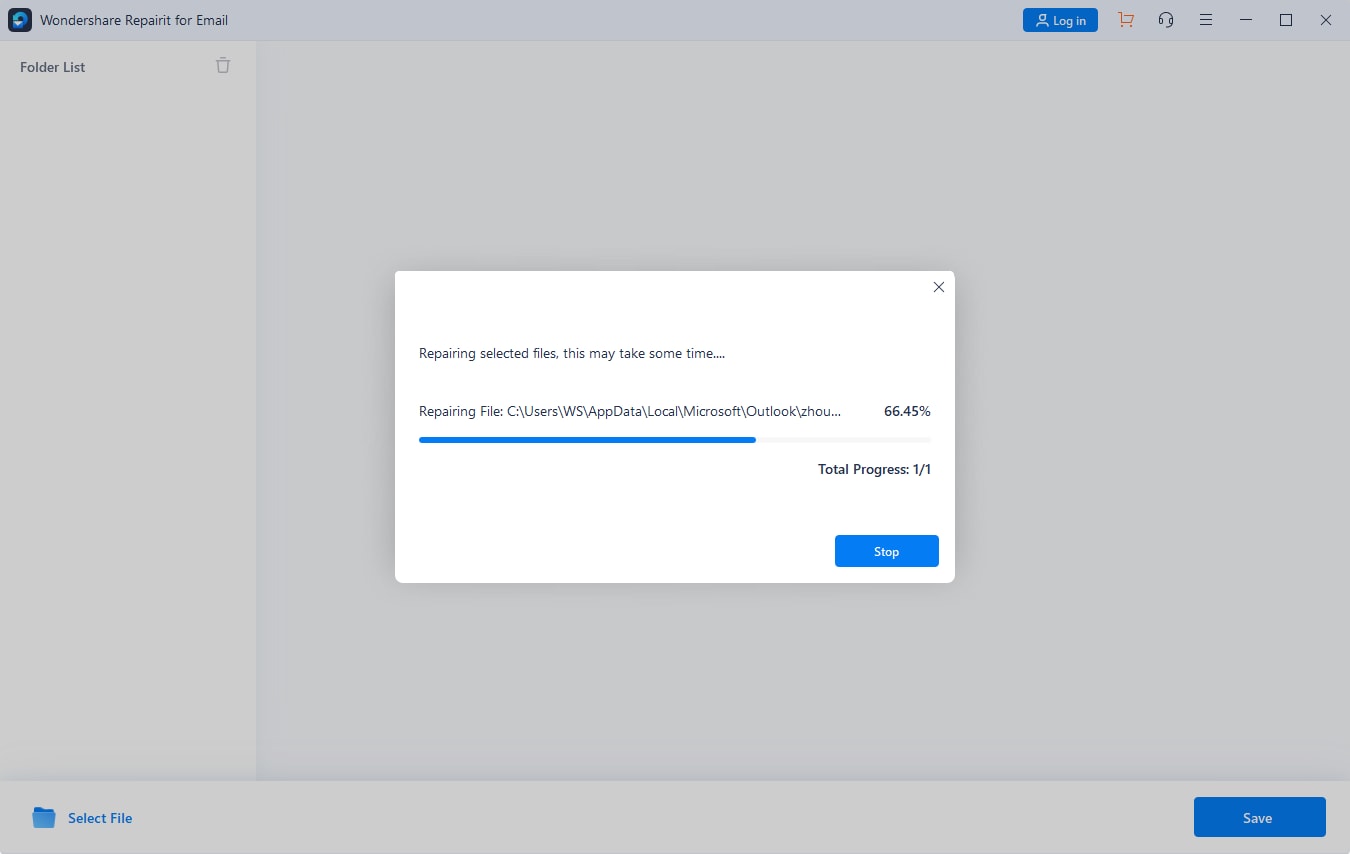
Step 2: Start to repair the Outlook PST files
Repairit will automatically repair the corrupted Outlook PST files in a few seconds.
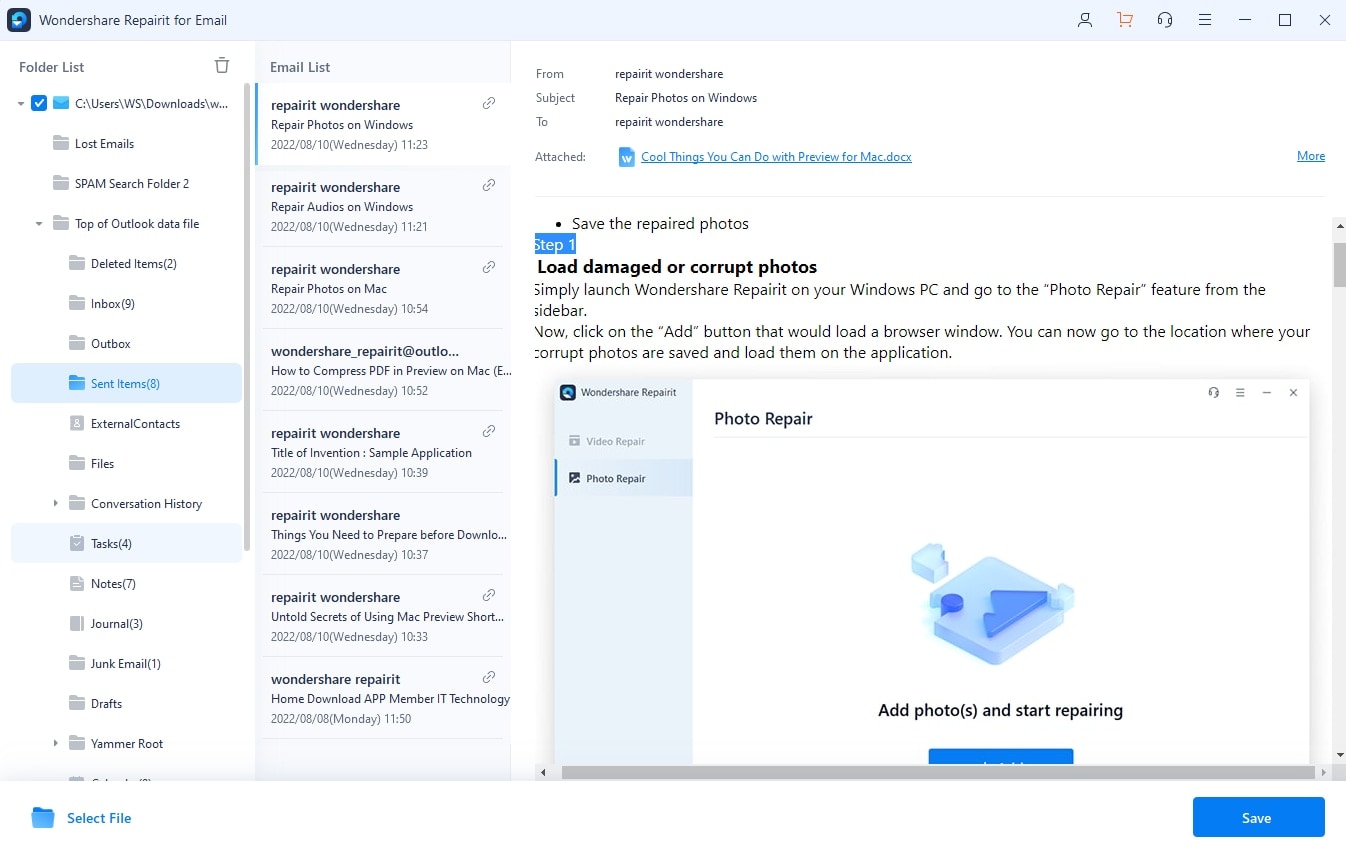
Step 3: Preview the fixed Outlook PST files.
After the repair process finishes, you will find the fixed emails at the left side of the panel. Next, preview the email to check its quality, then, save the email in your desired folder.
The Bottom Line
Microsoft Outlook errors are disturbing. One such error is 'The operation failed.' In this situation, you cannot launch email attachments or send messages using Outlook. Although you can search out the effective solutions for it, we advise you to use a reliable third-party tool.
We have discussed some manual tricks for users looking for a free solution. To get rid of errors of both the Inbox repair tool and Outlook attachment error, we recommend using the PST repair tool from Repairit. This software will repair the major PST corrupted files in no time.


 ChatGPT
 Perplexity
 Google AI Mode
 Grok
Grok
