
 TL;DR:
To resolve Outlook Error 0x80040900—a send/receive failure preventing server connection—users must unblock server ports, adjust account timeout settings, or repair corrupted PST data files.
● Temporarily disable Windows Firewall or antivirus software to ensure email server ports are not blocked, and verify that incoming/outgoing server names, port numbers, SSL certificates, and outgoing server authentication are correctly configured in Outlook Account Settings.
● If the error is triggered specifically when attempting to send large email files, navigate to the Advanced tab within Account Settings and manually increase the server timeout slider to allow extended transfer periods.
● For data file corruption, run the built-in Scanpst.exe tool for basic PST recovery, or use Wondershare Repairit for Email to batch repair both PST and OST files without size limits across Windows (7-11, Server) and macOS (10.11-12).
Ask AI for a summary
 ChatGPT
 Perplexity
 Gemini
 Claude
 Grok
Grok
Fix Outlook Error 0x80040900
Are you not able to send emails across your Outlook email client? With issues in sending and receiving emails, the error 0x80040900 arises. This annoying error must be countered so you can properly connect to the server. Hence, this article introduces some great solutions that can resolve 0x80040900 Outlook errors. It would be best if you looked into the details to send your emails through Outlook easily.
Part 1: What is Outlook Error 0x80040900?
The Outlook Error 0x80040900is one of the most prominent errors users face. While it is known for issues in the server, this error can also occur during transferring emails. As a result, you can neither send nor receive any email across your account. In some instances, it is stated that the issue lies across the account settings of Outlook. With such diverse directions to consider, managing such errors get difficult.
Before we lead into the other details, get to see the complete information shown by the error:
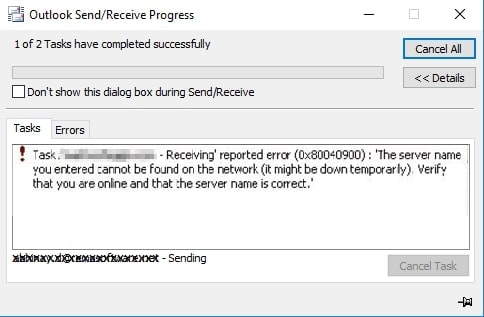
Receiving reported error (0x80040900). – 'The server name you entered cannot be found on the network (it might be down temporarily). Verify that you are online and that the server name is correct.
Such details can prove to be quite helpful in assessing the error. Following this, you should also dissect the symptoms that let you recognize this error. Although the Outlook 0x80040900 error is common, it still represents some critical symptoms. We have set up some symptoms for you to let you figure out if you are among those facing this:
- You are constantly being shown the Error 0x80040900 while using Outlook.
- The computer device may crash or freeze while you encounter this error.
- You may observe the following statement while trying to send or receive emails:
"The server name you entered cannot be found on the network; it might come on a temporary basis.
- The response time of your computer gets prolonged at times.
Part 2: Causes of the Error 0x80040900 Outlook
There are various factors that may lead to the occurrence of Outlook 0x80040900 runtime error. Some of them are as follows:
- Corruption of Windows registry due to installation or uninstallation of Outlook related software.
- Corruption of Windows system files due to malware or virus infection.
- Incorrect installation or corrupted download of MS Outlook software.
- Corruption of Outlook's PST file.
Symptoms of Outlook Send Receive Error
- The system freezes for a while periodically.
- Windows crashes after error 0x80040900.
- Windows becomes sluggish, keyboard and mouse input are slow.
- The error message "The server name you entered cannot be found on the network (it may be temporarily down)" appears.
Error message 0x80040900 may be encountered during setup, during a sudden shutdown or startup of Windows, or due to incorrect installation of the Windows operating system. You need to troubleshoot errors in Microsoft Outlook to resolve send/receive errors.
Part 3: 6 Prominent Solutions to Fix the Outlook Error 0x80040900
We will now provide some solutions to fix the problematic 0x80040900 error. These solutions cover different purposes and causes and can be valuable.
Solution 1: Resolve Internet Connection Issues
As we have discussed, the internet can cause different problems for Outlook users. Since there is no proper connection, users can not interact with the server. This hinders them from sending and receiving emails, which leads to such errors. Thus, you need to confirm the status of your internet connection. Make sure you have smooth internet operating across your device.
Solution 2: Check Firewall and Antivirus Settings
Sometimes, antivirus applications or Windows Firewall can block email servers, causing errors to appear. Therefore, you need to disable firewall settings and turn off antivirus applications to ensure that no email server ports are blocked.
Solution 3: Checking the Outlook Account Settings
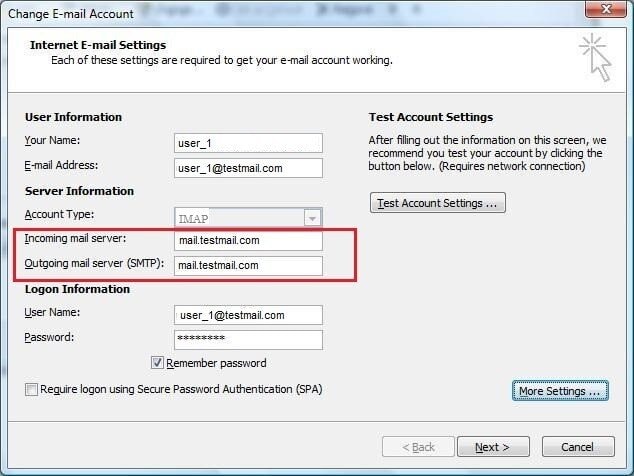
The next important thing you can do is check your Outlook account settings. Some specific details need to be adequately reviewed. It includes the incoming mail server type, name, and port number. The outgoing server name and port number also need checking.
You might also need to provide authentication for the outgoing server. Finally, ensure the use of SSL certificates for the servers. To check all these settings, you need to proceed with these steps:
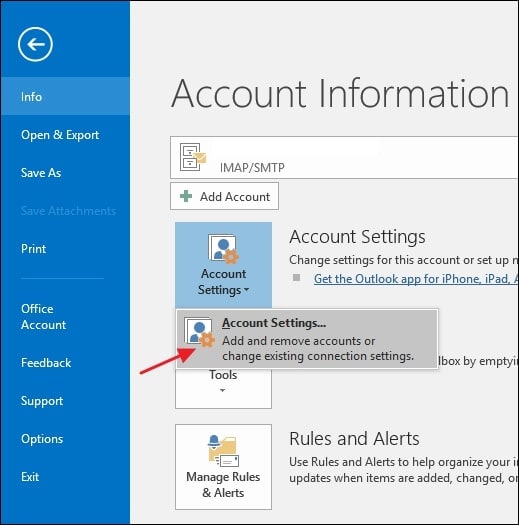
Step 1: Launch Outlook on your Windows computer and lead into the "File" tab.
Next, locate the "Account Settings" button in the "Info" tab. Then, proceed to choose the "Account Settings" option across the drop-down menu.

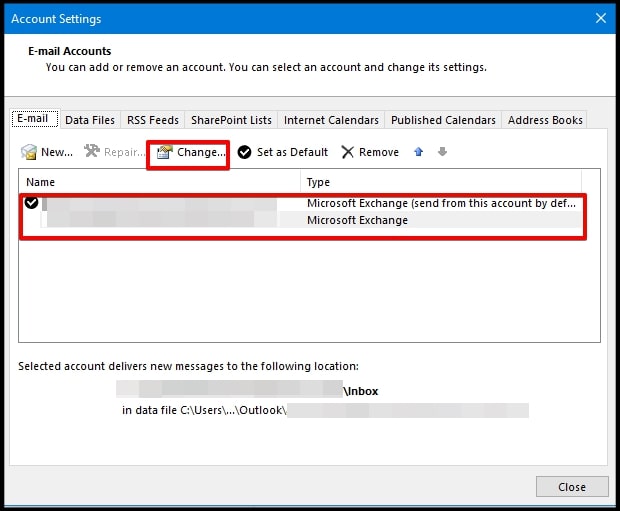
Step 2: On the new dialog box, lead into the "Email" tab and double-click on your account.
You can also select the "Change" button to open its account settings.

Step 3: Check the incoming and outgoing mail server names across the new window.
Next, tap on "More Settings" to direct to a new window.
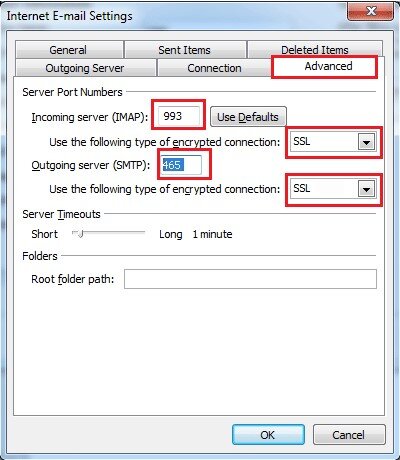
Step 4: Checkmark the authentication option in the "Outgoing Server" section.
Proceed to the "Advanced" tab and verify the port numbers for incoming and outgoing servers. Click "OK" to apply all the changed settings and restart your Outlook.
Solution 4: Changing the Server Timeout Settings
We have stated that large email files may not send due to low server timeout. You need to change this setting to ensure that you can send large files from your Outlook. Increase the server timeout with the help of the following steps:
Step 1: Open Outlook on your computer and proceed to the "File" tab.
Find the "Info" tab and select "Account Settings" in the options. Selecting "Account Settings" from the menu opens the accounts management window.
Step 2: Under the "Email" tab, find your account and select it.
Click on the "Change" button to change the account settings.
Step 3: As a new dialog box opens, click on "More Settings" to lead to further settings.
Go to the "Advanced" tab in the new window. You can easily increase the slider for increasing the server timeout. Once done, click "OK" to change the settings.

Solution 5: Try Using Scanpst.exe
If the problem lies across your PST file, you need to try a repair tool. There are many email repairing tools in the market for this purpose. Why go for them if you have a built-in option that comes with Outlook? Scanpst.exe is a PST repairing tool that features a simple and effective interface. It repairs the PST file for you in no time. To consider using the Scanpst.exe tool, you need to:
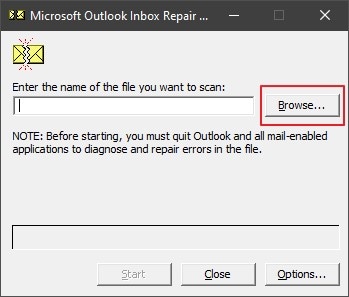
Step 1: Locate the Scanpst.exe across your computer according to your Outlook version.
Launch the tool and click "Browse" to import the corrupted PST.
Step 2: As you click on "Start," the file is scanned, and its issues are recognized.
Once done, click "Repair" to repair the PST file.
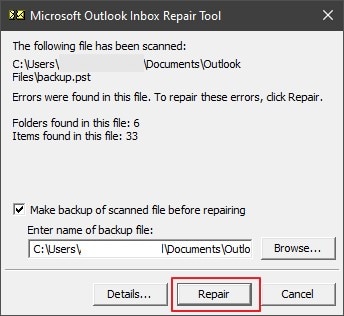
Step 3: You can also set up a location for the PST file backup.
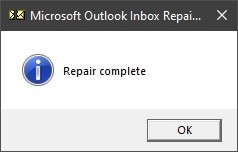
Once the repair is done, a prompt is displayed on the screen.
Solution 6: Use a Professional Outlook Repair Solution
Scanpst.exe is not a great tool that provides you with consistent results. While it lacks in repairing your PST files, its features are not diverse. This is why you need to move to other options. Such is the option of Repairit for Email that repairs your PST files. This email repair tool features options for PST and OST files. Along with that, it is available on both Windows and Mac, which makes it highly compatible.

-
Repair damaged PST & OST Files in Outlook in all Email corruption scenarios, such as hard disk crashes & bad sectors, virus attacks & tojan horse, outlook corruption & malfunctions, improper shutdown procedure, etc.
-
Restore Outlook emails deleted for a long time and extract the email messages, folders, calendars, etc. within seconds.
-
Restore Outlook Emails deleted for a long time with a very high success rate.
-
Repair emails in bathes without size limits and support to preview all of them before saving.
-
Compatible with Windows 7/8/8.1/10/11, Windows Server 2012/2016/2019, and MacOS X 10.11~ MacOS 12 (Monterey).
If you seek to use this tool to repair your corrupt PST file, look ahead to the steps:
Step 1: Launch Repairit for Email.
Make sure to install Wondershare Repairit for Email on your computer. As it installs, launch it and click on "Select File" to import the PST file.

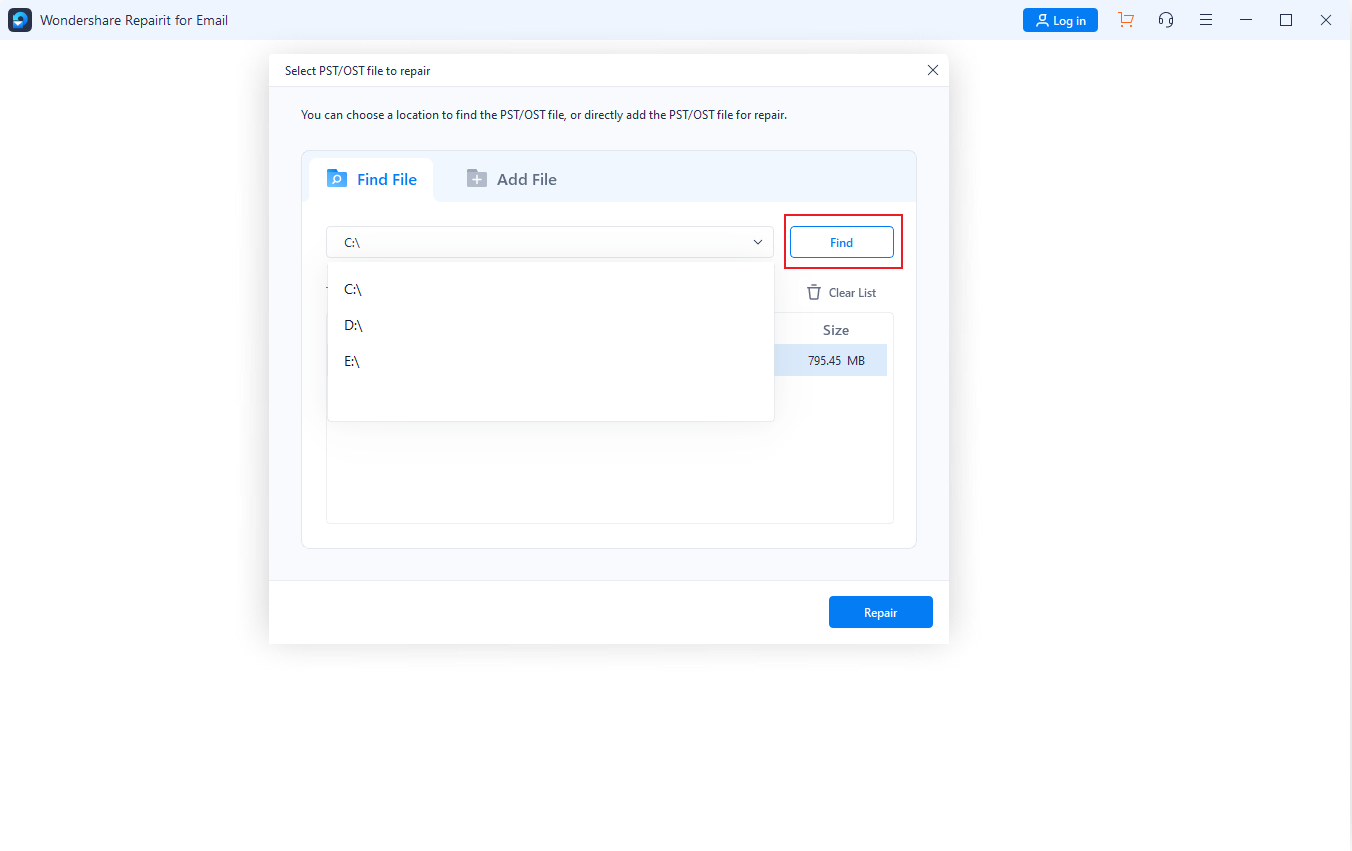
Step 2: Add Corrupted Email File.
Repairit offers you the option of finding and adding the file. Lead to the "Find File" to provide a drive that needs to be checked. You can also use the "Add File" option to import the PST file directly. Once added, click on the "Repair" button to initiate.
Step 3: Repair and Export Results.
The process takes a while to repair, which starts displaying on the preview window. Go through the repaired data and check the information. If satisfied, click "Save" to export all the repaired PST data.

Ending Words
These methods have provided a clear overview of how the 0x80040900 error can be resolved. In addition, you can get accurate results with the help of methods like Wondershare Repairit for Email. Repair all kinds of problems with your account settings and PST files quickly.