
 TL;DR:
Outlook Error 0x8004011d is primarily caused by oversized archived PST files exceeding 5GB or Exchange server synchronization failures, and can be resolved by reducing the file size, repairing corrupt data, or reconfiguring the account profile.
● Reduce an oversized PST file directly within Outlook by navigating to Account Settings, selecting the specific Data File, and executing the Compact Now function.
● Repair corrupted data files by running the built-in Scanpst.exe utility, or utilize Wondershare Repairit for Email to process severely damaged PST and OST files.
● Fix Exchange server communication barriers by enabling Use Cached Exchange Mode through the Control Panel Mail setup, or completely remove and recreate your Outlook profile to force a fresh data sync.
Ask AI for a summary
 ChatGPT
 Perplexity
 Gemini
 Claude
 Grok
Grok
Fix Outlook Error 0x8004011d
Check this guide for the reasons and solutions to fix Outlook error 0x8004011d.
Are you trying to update your Outlook to the latest version? In this feat, you have to do multiple tasks and affirmations. One is to turn your Outlook data successfully into the new Outlook version. You have to archive your email data to shift it across. During this process, you may be unaware of the size of archived data. While you confuse it with the actual mail size, it increases up to 5GBs or more.
When the file is imported across the updated Outlook, the size creates an error. This is referred to as Outlook Error 0x8004011d. Therefore, let's talk about how you got into this error and how to take yourselves out.
Part 1: What are The Possible Error Messages of 0x8004011d?
The Error 0x8004011d appears in different versions and forms. Since the error exists under multiple scenarios, messages have different possibilities. We will look through the possible error messages of this Outlook error:
- "0x8004011d Outlook Not Found."
- "0x8004011d Outlook Access Violation."
- "The File 0x8004011d Outlook is missing."
- "Cannot register 0x8004011d Outlook."
- "Cannot find %PROGFILES64%\WIDCOMM\Bluetooth Software\0x8004011d Outlook."
- "Cannot start Bluetooth Software. A required component is missing: 0x8004011d Outlook. Please install Bluetooth Software again."
- "This application failed to start because 0x8004011d Outlook was not found. Re-installing the application may fix this problem."
- "Task Exchange Server reported error 0X8004011d: The server is not available. Contact your administrator if the condition persists."
With all these messages, you can encounter Error 0x8004011d in these ways. It is best to take notes and know all the remedies involving these problems.

Part 2: Overviewing the Reasons for the Outlook Error 0x8004011d
We will now review the reasons that lead to the Outlook Error 0x8004011d. As this problem is quite absolute and involves the data file, most reasons lead to it. We will still observe these reasons to determine the best solution that suits your case:
- Server connection issues. One of the main reasons for this error is server connection issues. This can be due to an unstable internet connection, server downtime, or network issues that prevent Outlook from communicating with the Exchange server.
- Corrupted Outlook data files. If the Outlook data files are corrupted, it can cause Outlook error 0x8004011D. The corruption can occur due to an improper system shutdown, a malware attack, or a hardware failure.
- Improper Outlook configuration. An incorrectly configured Outlook profile can also trigger the 0x8004011D error. This can occur if the user enters incorrect server details such as the server address, username, or password.
- Corrupted Exchange Server database. In some cases, the Exchange Server database itself can become corrupted, resulting in the 0x8004011D Outlook error. This corruption can be the result of hardware issues, software conflicts, or other factors affecting the server.
- Firewall or antivirus software interference. Security software such as firewalls and antivirus programs can sometimes prevent Outlook from accessing the server, resulting in the 0x8004011D error. These programs may mistakenly identify Outlook's server communication as a potential threat and block it.
- Incomplete or interrupted updates. Sometimes, an incomplete or interrupted update of Outlook or Exchange Server can cause the 0x8004011D error. Installing a new update can change certain settings or introduce conflicts that trigger the error. It is important to make sure that all updates are installed and completed correctly.
- Insufficient system resources. Outlook error 0x8004011D can occur if the user's computer is low on system resources, such as RAM or storage space. Insufficient resources prevent Outlook from running optimally, causing delays or failures in communication with the Exchange Server.
- Problems with the user's mailbox. In some cases, Outlook error 0x8004011D can be related to the user's mailbox on the Exchange Server. For example, if the mailbox has reached its storage limit or is experiencing other problems, it can cause errors when trying to send or receive email messages.
- Cached Exchange Mode issues. Cached Exchange Mode is a feature in Outlook that allows users to work with their mailbox data even when they are offline. However, if there is a problem with the synchronization between the local cache and the server, it may cause the 0x8004011D error
Part 3: Essential Methods of How to Fix Outlook Error 0x8004011d With Ease
We will now look into how you can easily repair Outlook errors like the 0x8004011d. Many methods address the solution to it; thus, we will look into them:
Method 1: Compact or Reduce the Size of PST File
The first appropriate direction to take is to reduce the PST file size. As the size holds the major effect in the Outlook error, this can be quite the solution. For this, you need to follow the steps as advised below:
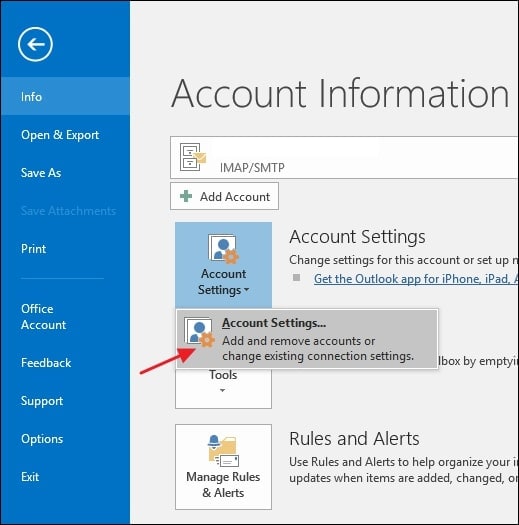
Step 1: Launch Microsoft Outlook on your computer and proceed to the "File" tab.
Click on the "Account Settings" button across the "Info" section. As a drop-down message appears, click on "Account Settings" to continue.
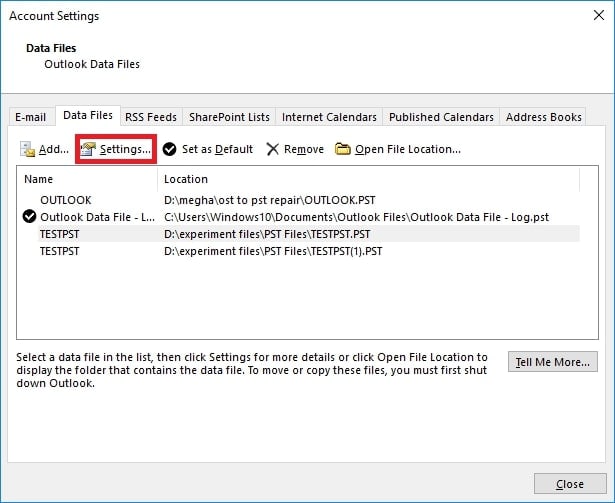
Step 2: A new window containing the account settings will open.
Select "Data Files" across the dialogue box and select the individual PST file. As you choose the file, click on "Settings" to proceed.
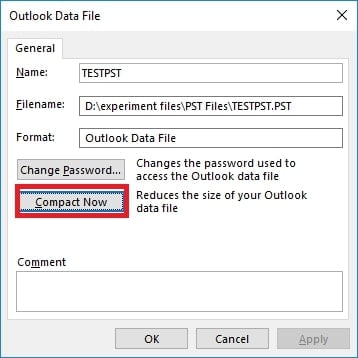
Step 3: You will be led to a new dialogue box with the PST file settings.
As you have selected the file, click "Compact Now" and "OK" to reduce the size.
Method 2: Repairing PST File with Scanpst.exe
If the problem persists, you will require an Outlook repair tool. In addition, you have to resolve the 0x8004011d error across your Outlook to resume operations. Thus, a corrupt PST file may need a proper tool to resolve all prevailing issues.
Whether external or internal problems, everything can be addressed with a tool. Scanpst.exe comes as a dedicated Outlook repairing tool with Outlook. You can access the platform from its location and proceed with repairing files. However, if you are keen to know more about Scanpst.exe, let's look ahead:
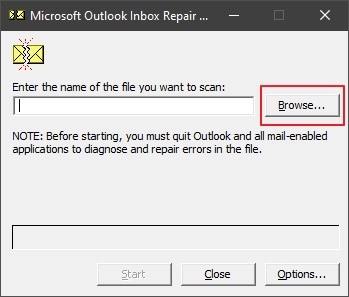
Step 1: Locate Scanpst.exe on your Windows computer and launch it.
As it opens up, click on the "Browse" button to add the PST file.
Step 2: On clicking "Start," the initial scanning of the file starts.
Once the process is covered, click the "Repair" button to execute.
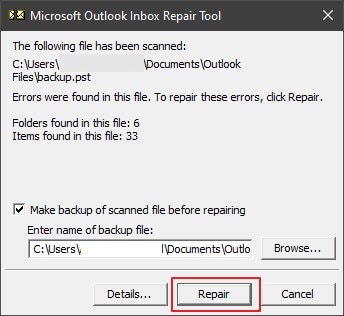
Step 3: You can also set up the location of the backup PST file you wish to keep as a record.
As the file repairs, a message is displayed across the prompt.
Method 3: Using an Outlook Repair Tool
Has Scanpst.exe failed in resolving your Outlook error? In such a case, you need to have a better Outlook repair tool with you. Wondershare Repairit for Email is a great alternative to this tool. While it is compatible with Windows and Mac users, it is a complete repair tool. You can find perfection across the utility of this repair tool.
Another highlighting point of this platform is its ability to repair OST and PST files. With such diversity, you can look for effective results.

-
Repair damaged PST & OST Files in Outlook in all Email corruption scenarios, such as hard disk crashes & bad sectors, virus attacks & tojan horse, outlook corruption & malfunctions, improper shutdown procedure, etc.
-
Restore Outlook emails deleted for a long time and extract the email messages, folders, calendars, etc. within seconds.
-
Restore Outlook Emails deleted for a long time with a very high success rate.
-
Repair emails in bathes without size limits and support to preview all of them before saving.
-
Compatible with Windows 7/8/8.1/10/11, Windows Server 2012/2016/2019, and MacOS X 10.11~ MacOS 12 (Monterey).
If you seek to use this tool to repair Outlook errors, you need to get hold of the steps. Let's check out how you can use one for yourselves:
Step 1: Launch Repairit for Email.
Start with launching Wondershare Repairit for Email on your computer. Click "Select File" to import the PST file as it opens up.

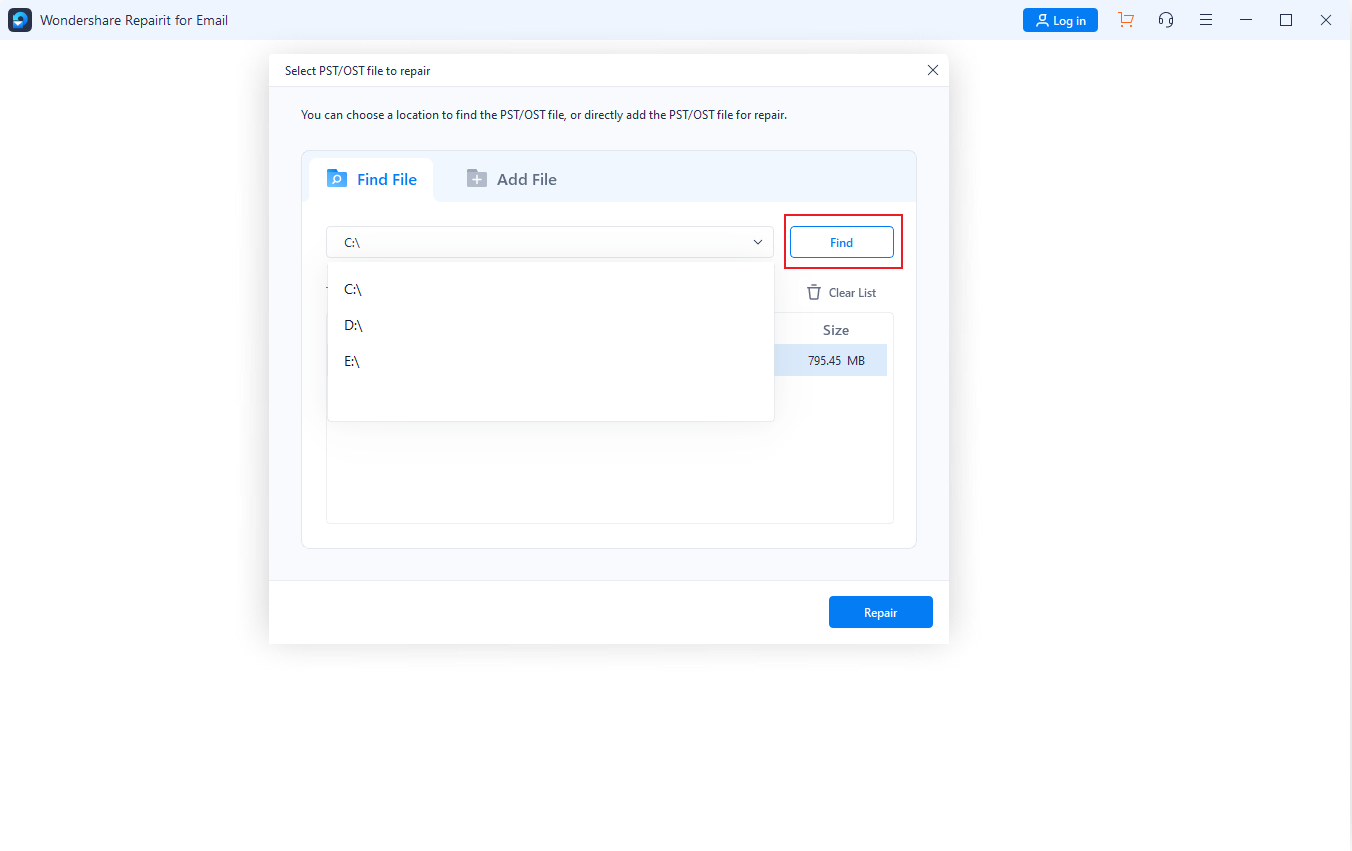
Step 2: Find or Add Corrupt PST.
You can either find or add the file that is to be repaired. Select "Find File" to search the file from a drive. In other cases, you can select "Add File" to browse the file manually. Once added, click on "Repair" to start the process.
Step 3: Repair and Preview PST Before Saving.
As the process concludes, you can preview all the results. Proceed over the categories and find the best results. Finally, select the data and click on "Save" that you look to recover.

Method 4: Execute the Problem with SFC Scan
You can still look for other unorthodox remedies for Outlook Error 0x80040011d. Let's find out how you can recover your Outlook with an SFC scan:
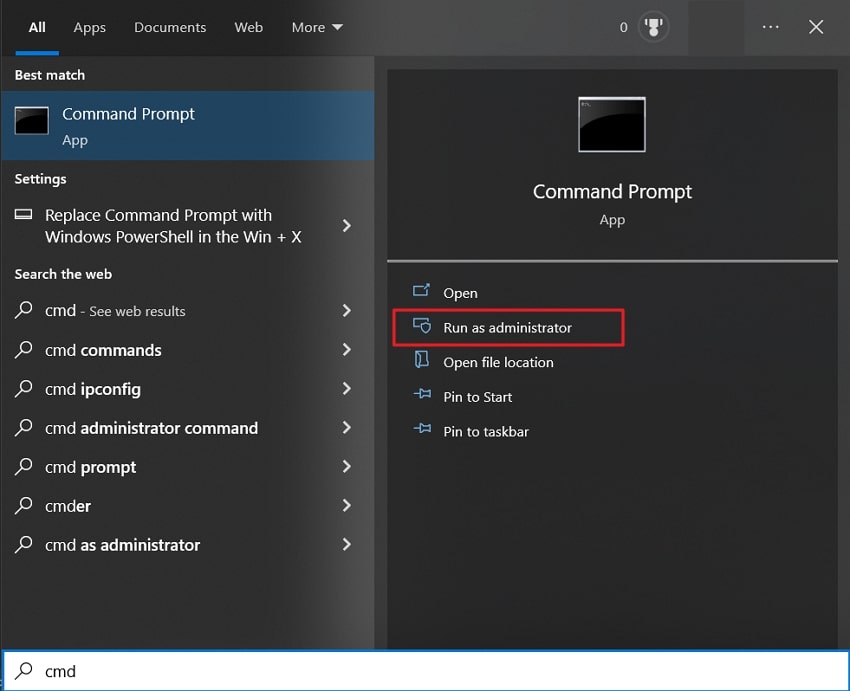
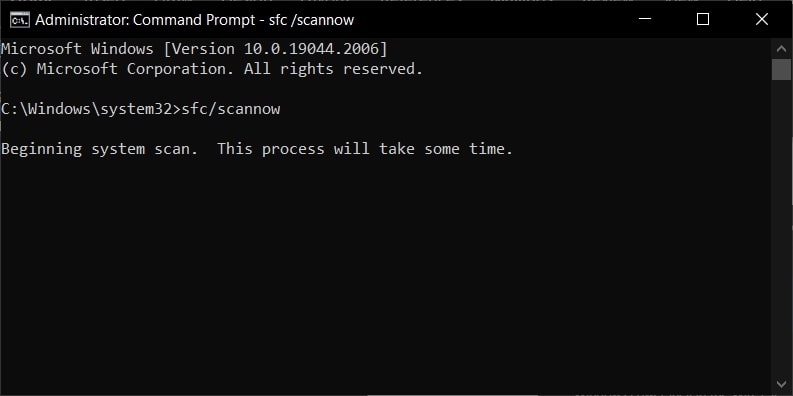
Step 1: You must access the "Search" icon on the taskbar and type "cmd" across it.
As you find "Command Prompt" in the list, you must navigate to the right panel. There, tap on "Run as administrator" to launch CMD as system admin.
Step 2: Following this, write the command "sfc/scannow" and tap "Enter."
The scan will conclude in a while, and all discovered Outlook errors will resolve.
Method 5: Need to Enable Exchange's Cache Mode
While you are facing an Outlook error with an Exchange account, there is another way. You can enable the cache mode of the Exchange to force a normal connection with the Exchange. To execute this, you have to process the following steps in detail:
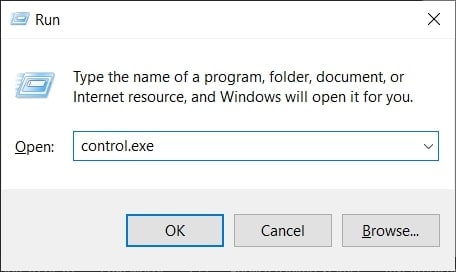
Step 1: Launch Outlook on your computer and use the "Windows + R" shortcut key to open Run.
As the program opens up, type "control.exe." This will open the Control Panel in front of you.
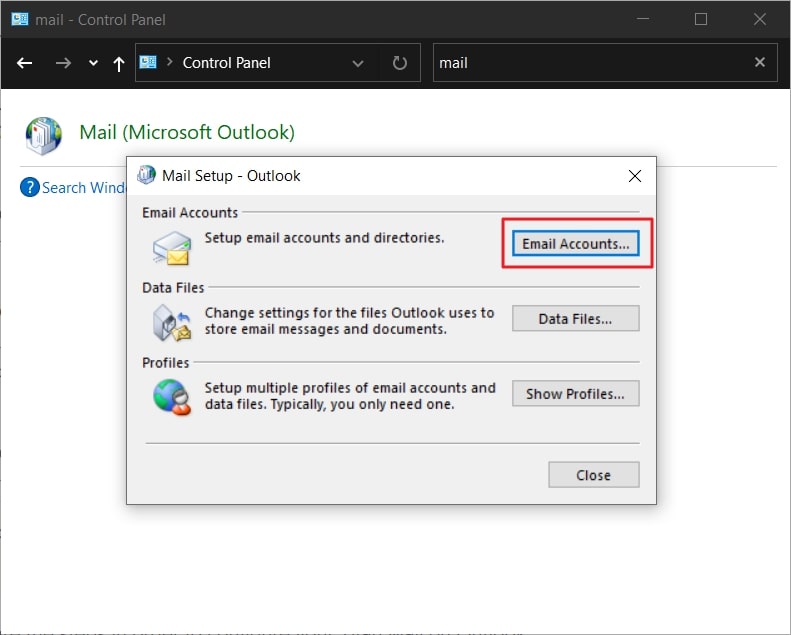
Step 2: In the list of options, search and open "Mail" to access its setup screen.
As you access it, click on "Email Accounts" to proceed.
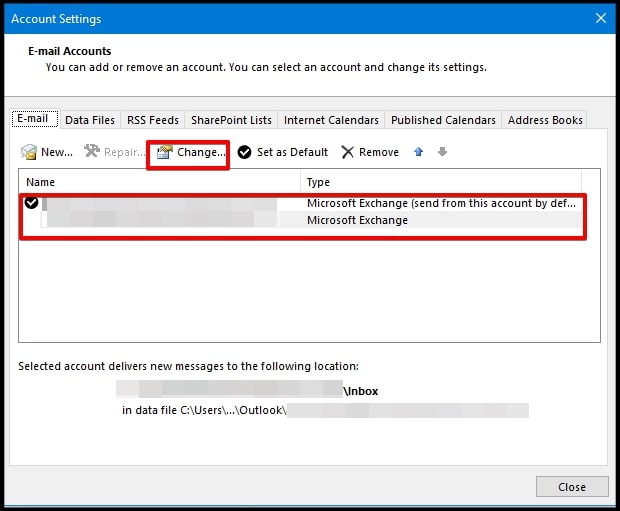
Step 3: As this opens the Account Settings, proceed to the "Email" tab.
Select and double-click the Exchange account to open its settings or click on the "Change" button.
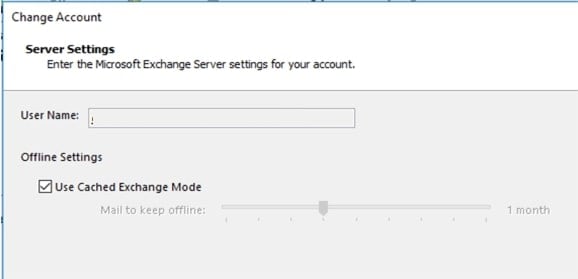
Step 4: On the next screen, you need to find the "Use Cached Exchange Mode" option.
Check mark the option to enable it and restart your Outlook to implement changes.
Method 6: Create a New Outlook Profile
If the problem persists and cannot be resolved, you might need a new Outlook account. While countering this Outlook Error 0x8004011d, you can remove it with a new profile. Once you create a new profile, you can sync it with the previous account. To utilize this process, you need to follow the below steps:
Step 1: Close Outlook completely on your device.
Start the Run program by searching it across the "Search" icon. Next, type in "control.exe" and hit the "Enter" key to launch the Control Panel.

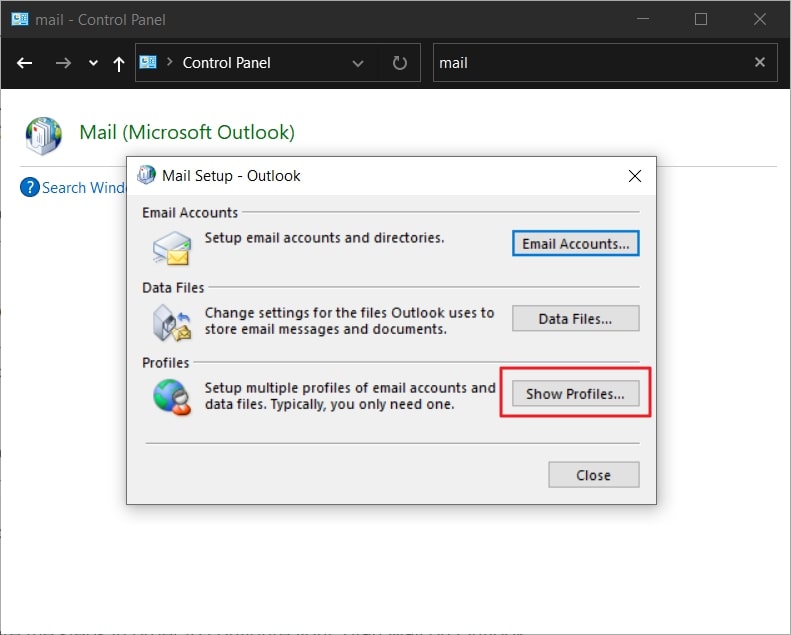
Step 2: Look for the "Mail" option in the list provided on the new screen.
As it opens the Mail Setup, navigate to the "Show Profiles" option.
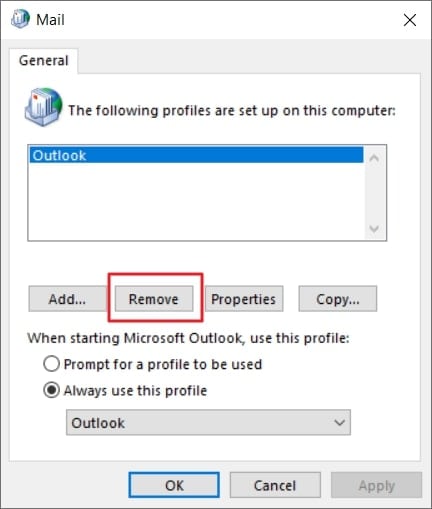
Step 3: As a new window opens, select the current account and click "Remove."
Confirm on receiving a prompt to remove the account.
Step 4: You must restart your Outlook on the computer and re-configure a new profile.
Once created, you can sync it with the previous data of the Outlook account.
Conclusion
This article has been definite over the Outlook error 0x8004011d across email clients. While there could be many reasons, the PST file needs to be adequately managed. Wondershare Repairit - Email Repair provides definite results. It would help if you surely tried it out for perfect results for Outlook files.