

 TL;DR:
Resolve Microsoft Outlook Error 0x800ccc92 by restarting the application, correcting your login credentials, reconfiguring server port settings, reducing oversized data limits, or executing a dedicated PST file repair.
● Reconfigure your mail server connections by setting the incoming IMAP server to port 993 with SSL encryption and the outgoing SMTP server to port 587 with SSL/TLS encryption without Secure Password Authentication.
● Reduce oversized OST and PST files by enabling the 14-day Auto-Archive feature in Outlook 2013 and configuring the advanced options to automatically empty the deleted items folder upon exiting the application.
● Utilize Wondershare Repairit for Email if manual corrections fail to batch repair corrupted data files of any size on operating systems ranging from Windows 7 to 11, Windows Server 2012 to 2019, and macOS 10.11 to 12.
Ask AI for a summary
 ChatGPT
 Perplexity
 Gemini
 Claude
 Grok
Grok
When you are working on your Microsoft Outlook, is the Outlook error 0x800ccc92 restricting your smooth working? The repeated error message seems frustrating to you. Are you searching for ways to fix Microsoft Outlook error 0x800ccc92? If yes, then this post is for you.
In this article, you will learn the various symptoms of this error, why does this occur, and the methods to fix it.
Part 1: Symptoms of Outlook Error 0x800ccc92 Issue
The various symptoms that arise because of Outlook Error 0x800ccc92 are:
- It crashes your active window program
- Your Window becomes slow, with delayed keyboard input and slow-moving cursor
- System freezes periodically for a few seconds
These are some of the symptoms that you can experience because of error 0x800ccc92
Part 2: Why does 0x800ccc92 Error occur?
Every software error that arises has some reason behind it. Here are some of the causes of this error:
- Incorrect user name or password
- Wrong configuration settings
- Oversized PST
- Outlook closed abruptly
- Failure of SMTP or POP3 protocols
- Improper Server and Outlook synchronization
- A virus in PST data
- Synchronization issue between server and mail client
Now you are aware of the possible causes of the 0x800ccc92 Outlook 2007 error. In the next part, you will learn the various methods to fix this error.
Part 3: The Methods to Fix Outlook Error 0x800ccc92
Before trying any manual or automatic methods to fix Outlook error, try closing the Outlook application and restarting it after a few seconds. Check by sending an email, might be user error has resolved.
However, if the error persists, you can solve it with the methods mentioned below:
Method 1: Correct the Name and Password
When you get this error message, you might be in a hurry and mistakenly entered the wrong username and password. Incorrect details lead to the discrepancy in receiving and sending emails.
Recheck the credentials and type the correct entries in the given parameters.
After rechecking, if you find that the username and the password are correct, but still you are getting 0x800ccc92 Outlook 2016 error, move to the next method.
Method 2: Check the Server Settings of Browser
Incorrect server settings can also lead to the error. This makes it necessary to check the server settings. It includes SMTP, IMAP, POP, etc. Re-add your account after checking the settings. Here are the steps that can help you in this process:
Step 1: Open Outlook and tap on the File menu
![]()
Step 2: Click on Account Settings and then Server Settings

Step 3: Check mail settings
Your incoming mail settings:
- User Name: Your email address
- Password: You use to log in to your webmail
- Server: imap.gmail.com
- Port: 993
- Encryption: TLS/SSL
- Secure Password Authentication (SPA): No
After checking everything, click on Outgoing mail.

Step 4: Check your Outgoing mail settings
- Server: smtp.gmail.com
- Port: 587
- Encryption: SSL/TLS
- Secure Password Authentication (SPA): No
- Outgoing server authentication: Yes, same settings as of your incoming server
After checking all, click on "Next."
Step 5: Click on Done

After verifying all the settings, click on "done."
Method 3: Reduce Outlook OST/PST File Size Limit
If your Outlook data file exceeds the set size limit, it can also cause the error. Fix it with the below steps:
1. Setting an Auto- Archive in Outlook 2013
Step 1: Open Outlook and click on "File."
Step 2: Open Outlook Options box and then reach "Advanced options."
Step 3: Reach Auto Archive Settings in the Auto Archive options.
![]()
Step 4: Set AutoArchive options for 14 days, and mark the boxes as shown in the figure.

2. Manually Execute Auto Archive
Step 1: Launch Outlook, select "File" and click on "Cleanup."
Step 2: Click on Archive and select that you need to archive manually.
![]()
3. Fetching the Outlook Archived Folder
Archive items generally do not appear until your existing emails are successfully archived.
Search and view your archived data with the below steps:
Step 1: Open Outlook, reach the File menu, and select "Open and Export."
Step 2: Open Outlook Data File and select the required file, then click on "OK."
The data file that you open is visible in the "Navigation panel." You can see it below the ordinary files. Follow the steps below to open the archived data file.
Step 1: Reach Archive with the below path File -> Cleanup Tools -> Archive
Step 2: See the Archive file and cross-check if any of the information is modified. If modified, you will get the message through Outlook. As the Archive file information is complex, so memorizing it becomes difficult for you.
Step 3: Close Archive data file Righ-click on the archive data file that can be seen in the folder panel. Choose "Close Archive" here.
Note: What if the archive function not working? Fix "Outlook archive not working" here.
4. Clean Up the Deleted Items Folder
If you have unintentionally deleted any of the important messages, restore them before cleaning your deleted items folder.
You can restore it quickly by dragging and dropping the OST or PST data file from your deleted items folder to your desired location.
When you are done with the restoration of the file, clean your deleted items folder with the below steps:
Step 1: Open Advanced Tab with the below path File -> Options -> Advanced
Step 2: Check the box under Start and Exit Outlook. Also, select the option "empty deleted items."
Step 3: When you click on "OK," it will automatically remove your deleted items folder.
Step 4: If you want to get notifications before deletion, click on the "Advanced" and select the checkbox "Prompt before deleting items."
It helps you in getting rid of Outlook error 0x800ccc92.
Method 4. Repair Outlook Data File with Outlook Repair Tool
After trying all the above techniques, if none of the methods worked to resolve the error, then Wondershare Repairit for Email would be the best software to fix this error. The advanced PST repair software will restore all the corrupt PST files with 100% precision and integrity.

-
Repair damaged PST & OST Files in Outlook in all Email corruption scenarios, such as hard disk crashes & bad sectors, virus attacks & tojan horse, outlook corruption & malfunctions, improper shutdown procedure, etc.
-
Restore Outlook emails deleted for a long time and extract the email messages, folders, calendars, etc. within seconds.
-
Restore Outlook Emails deleted for a long time with a very high success rate.
-
Repair emails in bathes without size limits and support to preview all of them before saving.
-
Compatible with Windows 7/8/8.1/10/11, Windows Server 2012/2016/2019, and MacOS X 10.11~ MacOS 12 (Monterey).
The powerful scan engine of the software can repair files of any size and can also extract your deleted contacts and emails in the existing or new Outlook profile. Follow the below-detailed steps to complete the process.
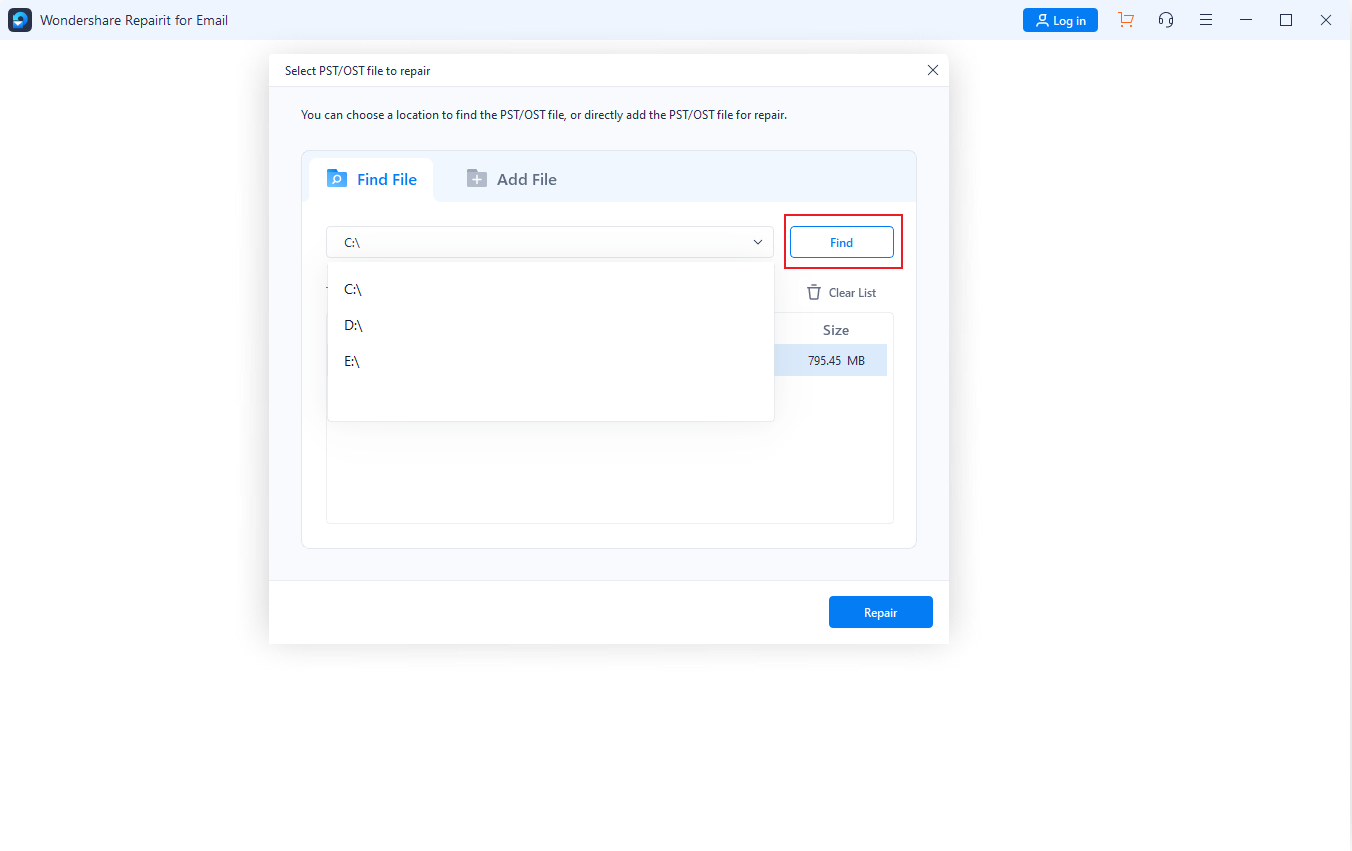
Step 1: Add PST file

Do you know the location of your file? If yes, then click the "Find" option. Then, click the "Repair" button to begin the repair process.
Step 2: Repair the PST file
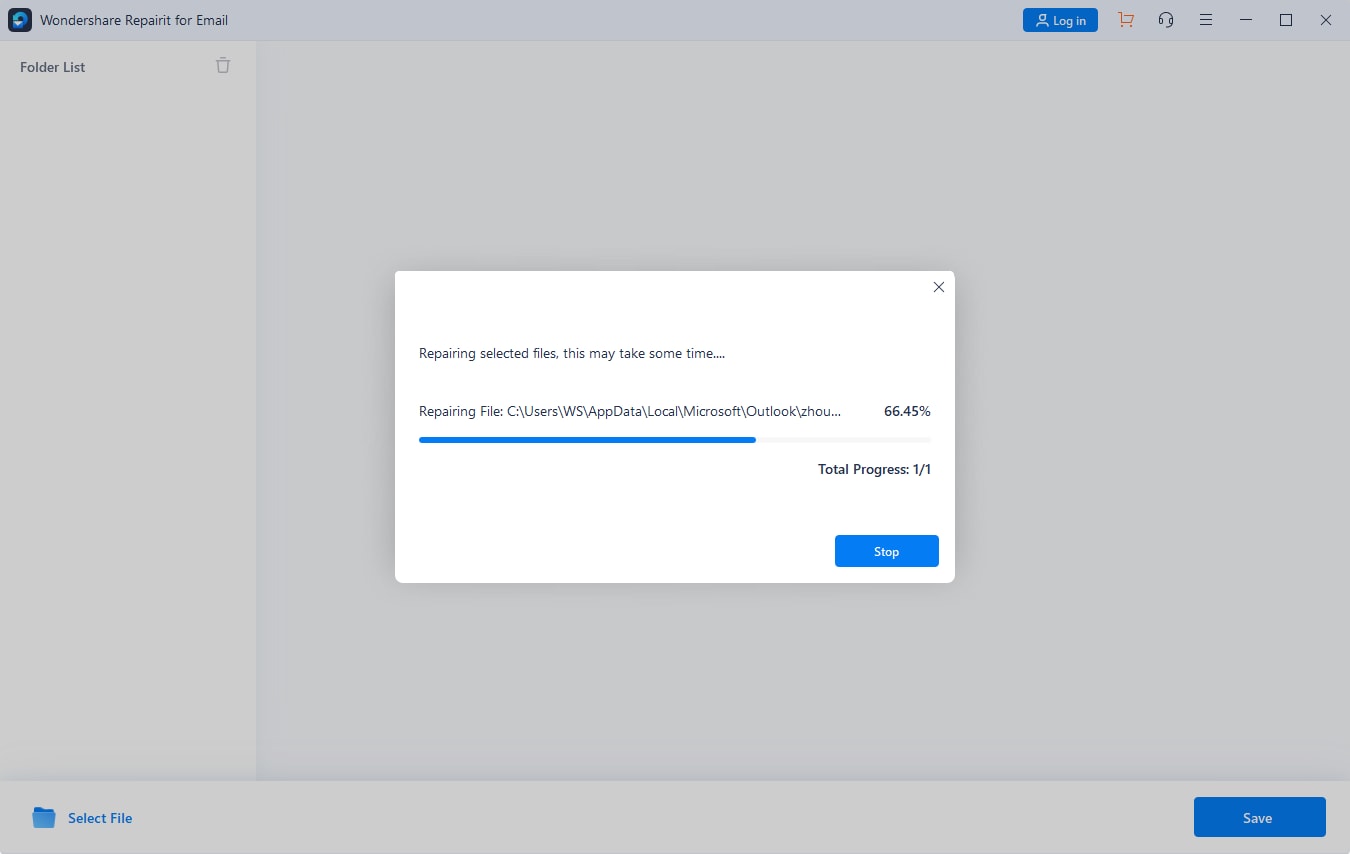
After clicking the "Repair" button, the repairing process will start. You can stop the repair anytime by clicking on the "Stop." Ther progress bar gives you the idea about the total time taken in which the ongoing process will complete. However, the whole time can vary depending upon the corruption level and file size.
Step 3: Preview and save
Preview the recovered files from the side panel of the software after the repairing process finishes. You can preview the fixed file by double-clicking on it. View and confirm, and then click on the "Save" to save the fixed file or data at the needed location.

This completes your repair process. Now you can use your Outlook with getting the error 0x800ccc92.
The Bottom Line
When Outlook error 0x800ccc92 occurs on your screen, it is the result of some wrong Outlook activity or certain other reasons that we have already discussed above. Avoid doing those things to prevent receiving such errors in the future.
However, despite taking adequate measures, if you still receive the Outlook error, then the methods discussed above will help you in getting rid of it.
Of all the above methods, we recommend using Wondershare Repairit for Email. With full integrity and precision, it recovers any data of any size and corruption severity.