
 TL;DR:
Overcome Outlook's inability to block spammers who use spoofing or rotating addresses by bypassing the standard block button and instead enforcing strict Junk Email filters, Safe Sender allowlists, or custom routing rules.
● Before applying new configurations, clear the existing application cache by opening the Windows run prompt, navigating to %LOCALAPPDATA%\Microsoft\Outlook, and deleting the .ost file.
● Navigate to Home > Junk > Junk Email Options to elevate the protection level to High, though you must routinely check the junk folder because this strict threshold can misclassify legitimate messages.
● If standard filters fail against complex phishing, access File > Manage Rules and Alerts to build custom conditions that automatically shift specific incoming emails directly to the junk folder.
Ask AI for a summary
 ChatGPT
 Perplexity
 Gemini
 Claude
 Grok
Grok
Microsoft Outlook features a particular filter that analyzes incoming spam and directs it to the trash folder. If properly set up, that functionality is quite cool. But sometimes Outlook's spam and important emails get mixed up because you receive hundreds of emails daily. So, it is not easy for Outlook to block spam emails. As a result, you face the problem of Outlook block sender not working on your computer. But, fortunately, you can quickly resolve this issue by implementing some methods. Read this post to learn those effective methods to get rid of this problem. So, let's dive deep into it.
Part 1: Why is Outlook Block Sender Not Working?
Before implementing the methods to fix the problem of why Outlook is not blocking emails, it is crucial to analyze the reasons for this problem. So, take a look at the reasons mentioned below:
Reason 1: Spammers do not send emails from the same address twice.
Reason 2: Incorrectly configured spam folder in Outlook client.
Reason 3: Outdated Outlook client software.
Reason 4: Spammers mislead you by following the technique of spoofing. This technique makes emails look to be sent by someone other than who they actually are.
Part 2: How to Fix Outlook Cannot Block Emails?
Now, you are aware of the reasons why Outlook not blocking emails. So, it's time to tackle the problem. In this part, I will explain some advanced methods to solve Outlook not blocking emails.
But first, I would like to recommend you delete your computer's application cache. To do this, open the run prompt by tapping the Windows + R button> input %LOCALAPPDATA%\Microsoft\Outlook. And press Enter>Locate the .ost folder in app data and delete the file.
Then move on to the next step in the solution.
The following are more technical methods to fix the outlook block sender not working issue.
Method 1: Choose the Correct Junk Mail Filter
Outlook is not by default set up to filter out junk mail. The setting procedure must be manually set up. Do you not understand how the pre-configured settings work? Take a peek at the list below.
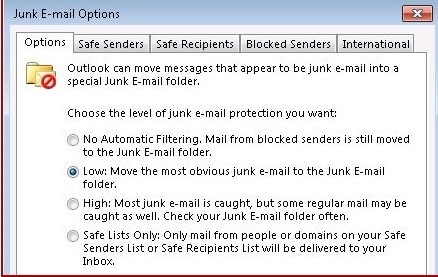
- No Automatic Filtering: If you choose this option, the automated Junk Email Filter will be disabled.
- Low: Only the clearest spam communications are filtered under this option, making it the most forgiving. A low threshold is advised if you receive a significant number of spam emails.
- High: The best method for obtaining the best protection is setting the protection level to High. But it can mistakenly classify genuine messages as junk and move them there. So, if you choose the High level, remember to regularly check your Junk mail folder.
- Safe lists only: If you choose this option, only emails from contacts you've added to your Safe Senders and Safe Recipients lists will arrive in your Inbox.
Choose the filter you want to use to stop spam emails. The chosen strategy can then be used after that.
The steps to change the level of protection for spam folders are as follows:
Step 1: Open Outlook and then select the Home tab.
Step 2: In the top right corner, click the three dots.
Step 3: Go to Junk > Options for Junk Email.
Step 4: Adjust the level from low/high to no automatic filtering.
Step 5: Mark the suggestions starting at the bottom.
Step 6: Apply > OK will complete the process.
Outlook will block spam emails once you have set up these settings.
Method 2: Put Senders into the Safe Sender List
A safe sender list, often known as an allowlist, is a list of senders who can send you emails without being blocked. When you assign a safe sender list to Outlook, it shows the other email addresses in your spam folder.
In a nutshell, a safe sender list is a filter that keeps all other emails out. As a result, I would consider increasing your safe sender list. You never know what crucial message you might miss while blocking spam emails.
To add regular email contacts to a safe sender list, follow these steps:
Step 1: Open Outlook on your device.
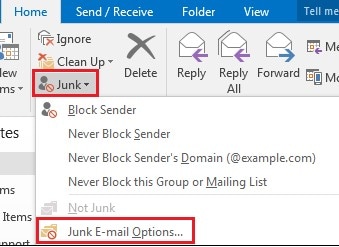
Step 2: Choose the Junk menu under the Home tab. Then point your mouse to it.
Step 3: Select Junk Email Options from the floating menu.
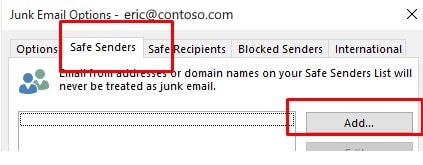
Step 4: Navigate to the safe senders tab.
Then, press Add from the right menu.
Step 5: Add the email addresses you want to receive emails from.
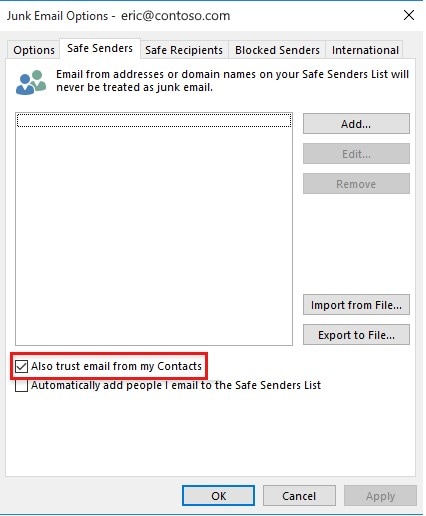
Step 6: Tick the box next to Also trust email from my contacts.
After that, click Apply > ok to finish the transaction.
Method 3: Create a Spam-Prevention Outlook Rule
If none of the previous solutions helped you avoid phishing emails, this one will. The ultimate goal of developing an Outlook rule is to be able to tweak the functionalities as you see fit.
When you create an Outlook rule to avoid spam, the rule's sole purpose is to shift spam emails to the junk folder and delete them. Setting an adequate rule increases the chances of spam emails block tenfold.
The steps for setting up an Outlook rule to fix the problem of Outlook not blocking emails are as follows:
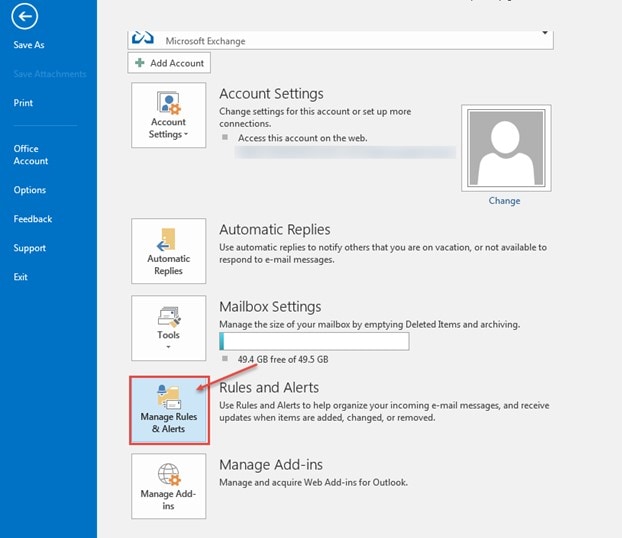
Step 1: Open Outlook and go to the File tab.
Step 2: Choose Manage Rules and Alerts in the main menu.
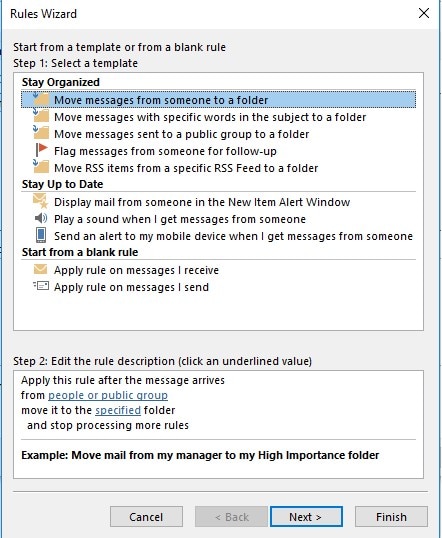
Step 3: Choose the New rule under the emails rule tab.
Step 4: From the Stay Organized tab, select a category. Then, click the next button.
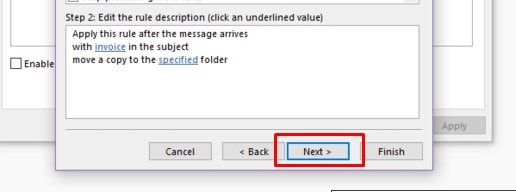
Step 5: Choose the conditions you want to use to deem an email as spam.
Step 6: Tap the specified area from the bottom.
Step 7: Select the Spam folder by clicking Ok in the next window.
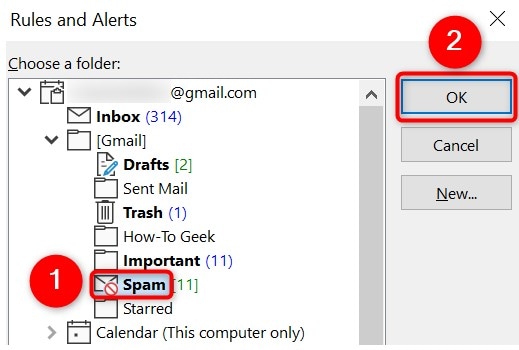
When you close Outlook after creating the rule and reopen it, your junk email filter will once more begin to function.
Part 3: How to Block Emails Step-by-step?
In this part, I will show you how to block emails on Outlook. Outlook permits its users to block emails from selected users. This feature comes in handy for clearing out the spam. Moreover, blocking emails on Outlook is very easy with just a few clicks.
Here is a step-by-step guide on how to block emails on Outlook:
Step 1: Launch Outlook on your computer.
Step 2: Enter your password and a working email address to log into your account.
Step 3: You must now choose the individual email address or the location on Outlook that you want to block.
Step 4: You will see many alternatives directly below the search box after choosing the email.
Deleted, archived, garbage, swept, moved to, classify, and snoozed are the available options.
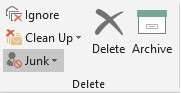
Step 5: Choose junk under the Delete group on the Home tab.
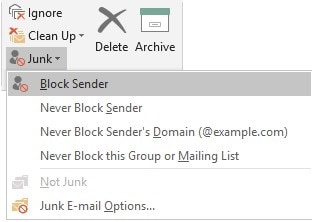
Step 6: Choose the option- Block Sender from the drop-down list.
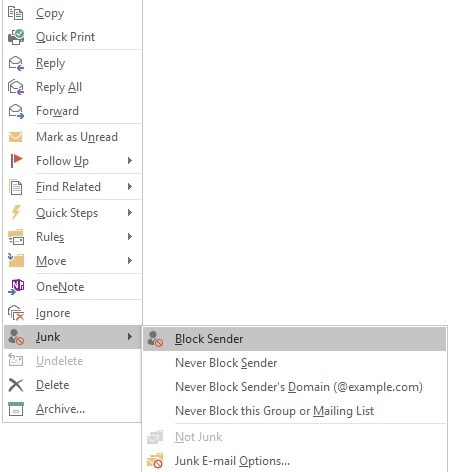
Step 7: Right-click on the chosen email.
Then, choose Junk>Block Sender.
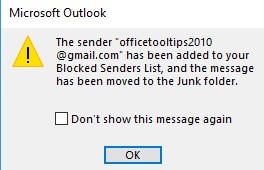
Outlook will show the following message when a sender is blocked:
Bonus Part: What to Do When Email Files Are Corrupt?
Do your emails often get corrupted? If yes, then what do you do? Obviously, you try to fix this problem by implementing different methods. But I have a quick solution to fix this problem. And, that solution is using reliable email repair software.
Luckily, Wondershare Repairit for Email assists a lot when it comes to fixing damaged PST/OST files and restoring data in a new PST file.
Moreover, it repair damaged email files in all Email corruption scenarios. And these email corruptions scenarios can be due to hard disk failures and bad sectors, virus attacks, and so on.
This is all about what Wondershare Repairit For Email. Now, let's discuss how this software repairs corrupted emails on Windows.

-
Repair damaged PST & OST Files in Outlook in all Email corruption scenarios, such as hard disk crashes & bad sectors, virus attacks & tojan horse, outlook corruption & malfunctions, improper shutdown procedure, etc.
-
Restore Outlook Emails deleted for a long time and extract the Email messages, folders, calendars, etc. within seconds.
-
Repair corrupted Emails and restore deleted Emails with a very high success rate.
-
Repair Emails in bathes without size limits and support to preview all of them before saving.
-
Compatible with Windows 7/8/8.1/10/11, Windows Server 2012/2016/2019, and MacOS X 10.11~ MacOS 12 (Monterey).
To discover how to fix your corrupted Outlook file, download Wondershare Repairit For Email. Then, follow the procedures below.
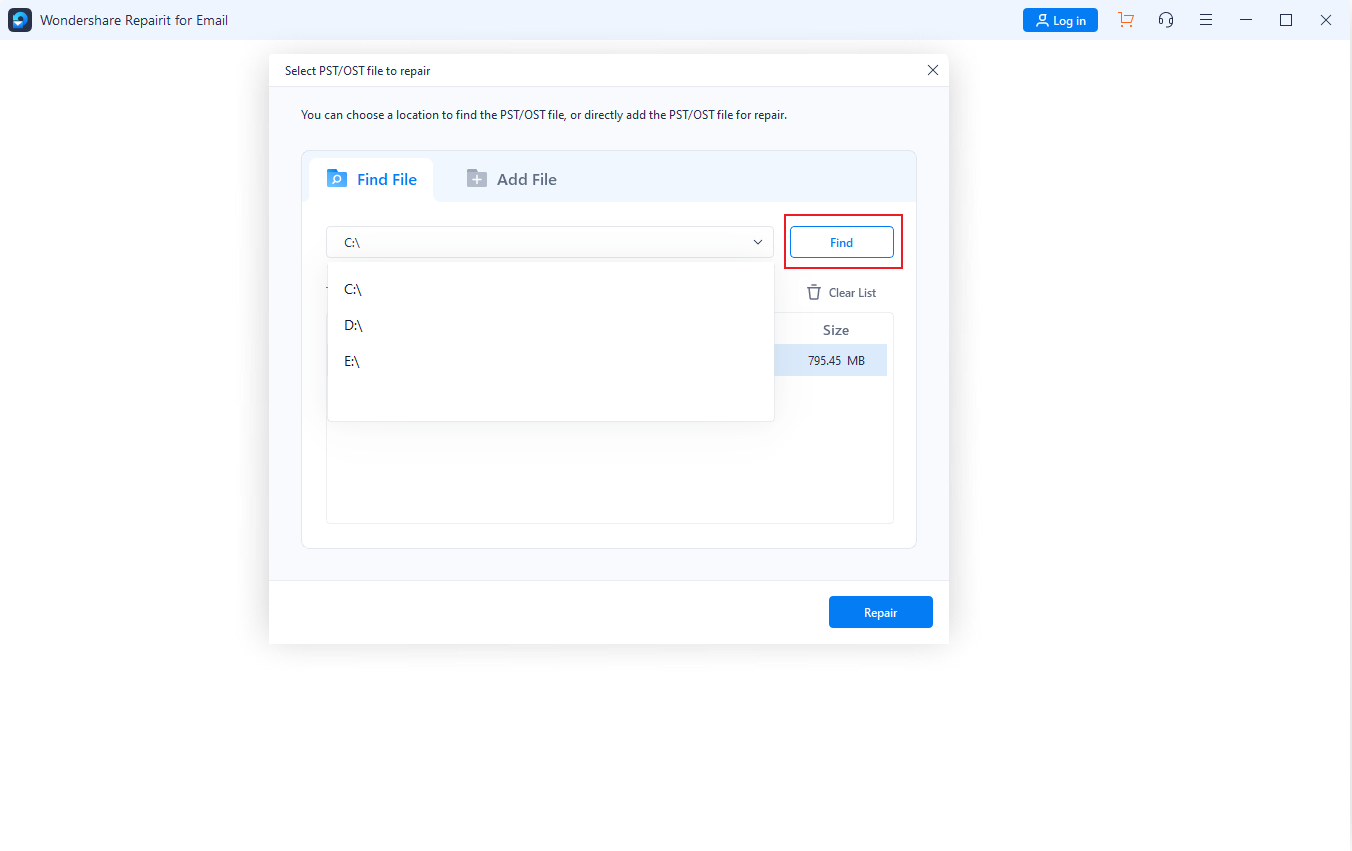
Step 1: Add PST/OST files.
Open Wondershare Repairit For Email. Then, tap the "Select File" option to add the damaged PST/OST files.

Choose the "Repair" button after picking files from a specific location. A single email or a group of emails can be added.
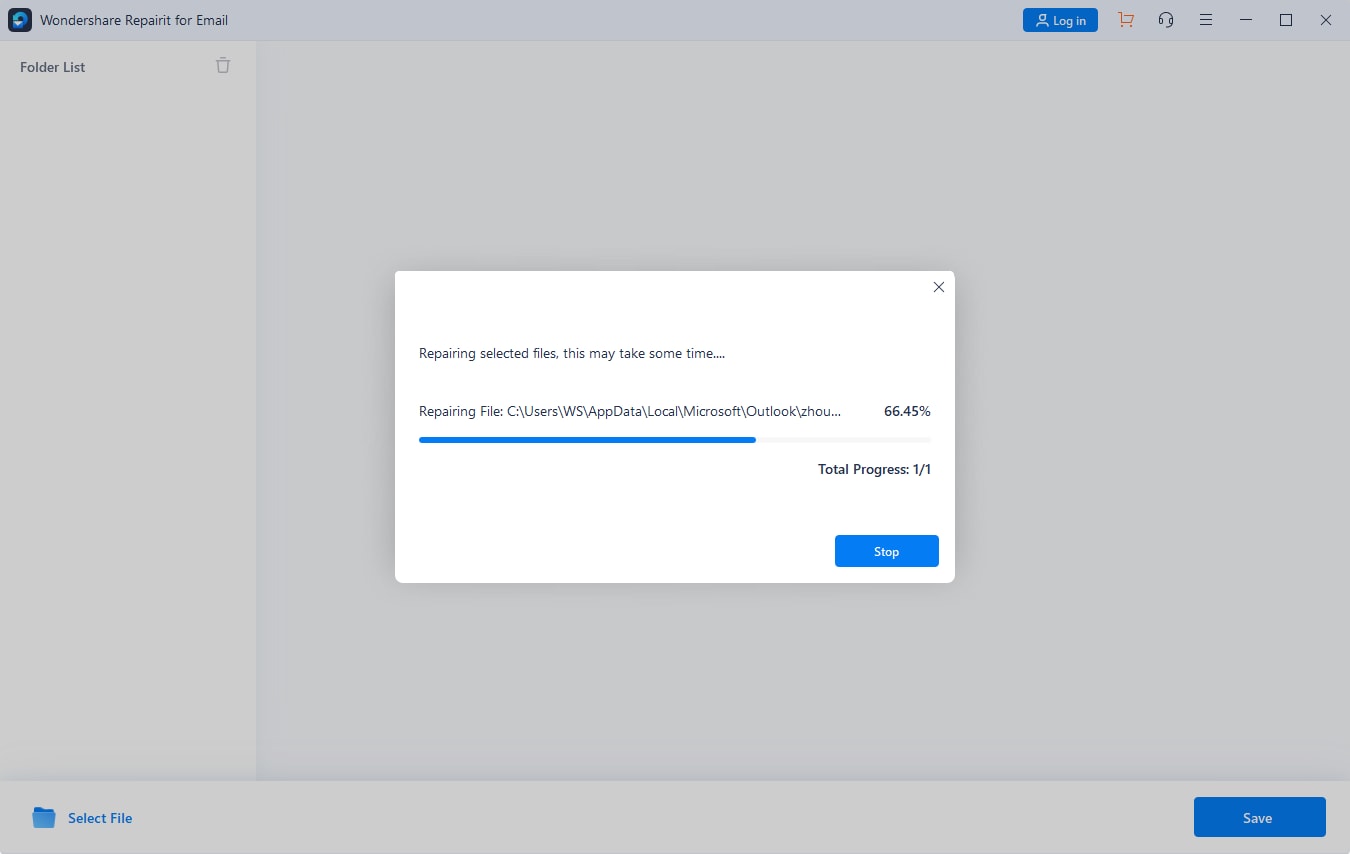
Step 2: Repair the added PST/OST files.
Repairit for Email will instantly restore your damaged PST/OST files in a few minutes.
Step 3: Preview and save the repaired PST/OST files.
Repairit allows you to preview the restored Outlook mailbox data when the repair is successful. The corrected PST/OST file will be saved to your computer when you select what you want to save and click the "Save" button.

This is how you can use this tool to repair your corrupted PST/OST email files.
Conclusion
You are all set! You will be able to resolve this issue after reading our comprehensive instructions on how to fix the Outlook block sender not working. As you can see, this problem occurs for a variety of reasons depending on the triggers and issues present. However, I have outlined a number of easy solutions to fix this scenario to make your job easier. Moreover, to restore your Outlook files to perfect quality if they are corrupted, try Wondershare Repairit for Email.