
 TL;DR:
To remove a primary account in Outlook, you must bypass the system's default restriction by creating a new profile, temporarily setting a PST file as the default data file, or deleting the primary flag in the Registry Editor.
● Creating a new profile using the control mlcfg32.cpl run command is the fastest and most stable approach, but it forces you to start from scratch and lose all previous profile-specific settings.
● You can keep your existing profile settings by adding a local PST file as the default data file, which allows you to remove all secondary and primary Exchange accounts before adding the new desired primary account and setting its OST file as default.
● For profiles with multiple large Exchange mailboxes, deleting the primary flag registry key (001f662b, or 001f6641 for Outlook 2016) prevents lengthy re-syncing, but this Microsoft-unsupported method risks corrupting your entire profile.
Ask AI for a summary
 ChatGPT
 Perplexity
 Gemini
 Claude
 Grok
Grok
Are you struggling to remove your primary account in Microsoft Outlook? This typical bottleneck often happens when you are migrating mailboxes from an on-premises Exchange server to Microsoft 365, yet want to preserve your existing profile settings. Instead of a smooth transition, Outlook halts the process with an error message stating that the primary account cannot be removed.

Intuitively, adding a new email account and assigning a new data file should overwrite the old primary preference—but Outlook's internal framework doesn't work that way. Outlook permanently assigns "Primary" status to the very first account added to a profile. You cannot delete this core account without removing all other Microsoft Exchange accounts from that specific profile first. In this comprehensive guide, we will explore the best practical methods to safely remove or change your Outlook primary account.
Part 1: Various Methods To Remove Outlook Primary Account
When Outlook restricts you from deleting a primary account, the cleanest approach is creating a fresh profile and adding your preferred address first. However, if you want to bypass a full profile rebuild, there are two alternative technical workarounds: altering specific registry keys to clear the primary flag, or introducing a temporary PST file to re-route default data paths.
To help you execute these changes seamlessly, we have outlined the exact step-by-step instructions for each troubleshooting method below. Let's get started:
Method 1: Change the Primary Account by Re-routing the Default Data File
Best for: Users who want to shift primary status to a different account while preserving profile-specific configurations, rules, and layouts. By injecting a temporary Outlook Data File (.pst) and marking it as the default storage path, you break Outlook's account dependency constraint without losing your setup.
Step 1 Close Microsoft Outlook and terminate all associated background dialogues.
Step 2 Press the Windows Key + R to launch the Run dialog, type "control mail" (or "control mlcfg32.cpl"), and hit Enter.

Step 3 Inside the Mail Setup wizard, click on the "Email Accounts..." button.

Step 4 Under the Email tab of the Account Settings window, begin removing your secondary accounts.
Highlight each secondary profile individual account and click the Remove button. Repeat this until only your target primary account remains.

Step 5 Switch over to the Data Files tab, click Add, and create or load a local PST file.
Once the data file is listed in the window, select it and click Set as Default from the top menu.
Note: Outlook's standard default storage directory for local archives is typically located inside your Documents / Outlook Files folder.

Step 6 Close the Account Settings window to commit the changes, then reopen "Email Accounts" from Mail Setup.
Step 7 Click the New... button under the Email tab to add your new account (the one intended to be primary).
Follow the automated setup prompts to connect this mailbox, then close the settings interface.

Step 8 Relaunch Outlook, navigate to Account Settings > Data Files, and reassign your core Exchange (.ost) file as default.
Select your main Exchange account data file from the list and click the Set as default option to restore server-side syncing preferences.
Step 9 Restart Outlook one final time. Your newly integrated account will now be registered as the Primary Profile.
Method 2: Remove the Primary Flag via Windows Registry Editor
Best for: Advanced users managing multiple large Exchange mailboxes. Re-adding numerous accounts can trigger lengthy data synchronization times. Modifying the registry directly strips the primary attribute flag, allowing you to delete the old account instantly without touching secondary structures.
Warning: Direct registry modification is an advanced manual procedure. Back up your parameters before making edits, as wrong value shifts can corrupt your user profile.
Step 1 Completely exit Outlook and any running mail link protocols.
Step 2 Press Windows Key + R, type "regedit" in the open text line, and click OK.
Step 3 In the Registry Editor sidebar, navigate down to the subkey matching your active Outlook software build:
Outlook 2016 / 2019 / Microsoft 365 - HKEY_CURRENT_USER \ Software \ Microsoft \ Office \ 16.0 \ Outlook \ Profiles \ [Your Profile Name]
Outlook 2013 - HKEY_CURRENT_USER \ Software \ Microsoft \ Office \ 15.0 \ Outlook \ Profiles \ [Your Profile Name]
Outlook 2010 - HKEY_CURRENT_USER \ Software \ Microsoft \ Windows NT \ CurrentVersion \ Windows Messaging SubSystem \ Profiles \ [Your Profile Name]
Step 4 Press Ctrl + F to bring up the local search tool. Look for the value "001f662b" (or "001f6641" for Outlook 2016/365).

Step 5 Double-click the located registry entry to review its string properties and confirm identity.
Step 6 Verify that the listed data file path points directly to your target primary email address.
Step 7 Right-click the parent folder key in the left panel hosting that value, and select Delete.
Note that simply clearing the individual string value data is insufficient; you must drop the entire node folder structure containing it to lift the account restriction.
Step 8 Close the Editor and launch Outlook. Your primary account lock is now removed, allowing you to delete the account from Mail Settings.
Method 3: Create a Clean Outlook Messaging Profile
Best for: A quick, foolproof reset when you don't mind resetting custom local views or rules. Creating a clean profile builds a fresh email database structure from scratch, making it the most stable method recommended by IT technicians.
Step 1 Shut down Microsoft Outlook.
Step 2 Open the Run dialogue box (Windows Key + R), type "control mail", and press Enter.

Step 1 Click on the "Show Profiles..." option inside the Mail Setup window.

Step 4 Click the Add... button, type a unique name for your new configuration profile, and click OK.

Step 5 Use the Auto Account Setup wizard to link the email address you want to establish as your new primary account.

Step 6 Return to the root Mail configuration prompt, tick "Always use this profile," and select your new profile name from the drop-down menu.
Step 7 Highlight your outdated legacy profile from the directory index, and click Remove to finalize.
Bonus: How to Repair Accidentally Deleted Emails?
Re-configuring default data files or removing account profile settings can sometimes result in data loss, or you might accidentally delete important business emails. While basic inbox recovery utilities can fetch missing records, recovered offline items often suffer data alignment errors or become unreadable. To repair and recover corrupted mail data files (.pst/.ost) with their full structural hierarchy intact, industry professionals recommend Wondershare Repairit for Email.
Wondershare Repairit for Email is an advanced database restoration tool designed to rebuild damaged Microsoft Outlook data structures on the fly. It supports both Windows and Mac operating systems, features a highly intuitive layout, and allows you to repair large batches of broken or corrupted files simultaneously. Here is how you can restore your mail archive in three simple steps:
Step 1 Import the Damaged Data Files
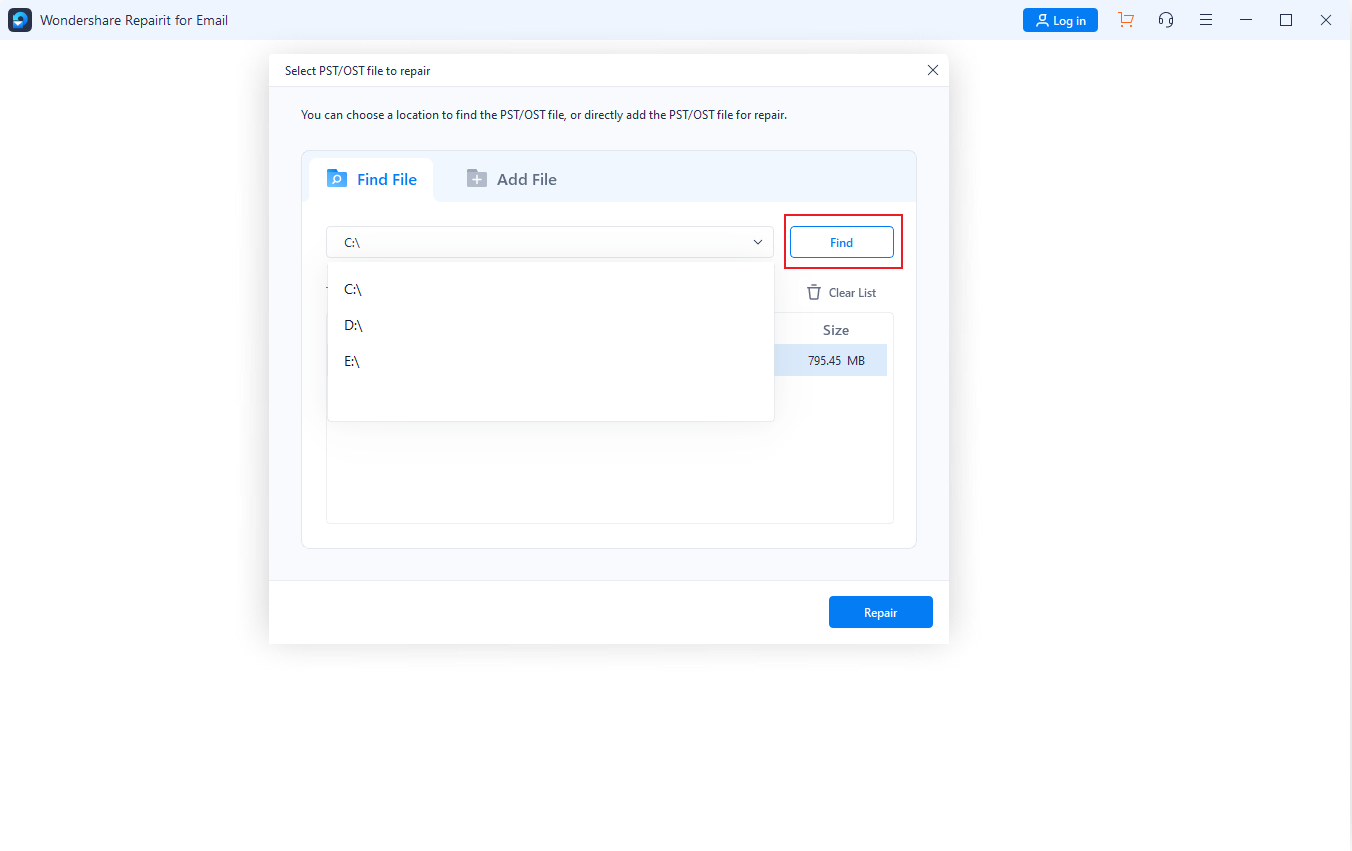
Launch Wondershare Repairit for Email on your computer. On the central dashboard, click the 'Select File' option to load the compromised or broken PST/OST files from your local storage drive.

If you cannot locate your offline Outlook data directories, click the 'Find' button to let the application automatically scan your local system and discover lost storage components.
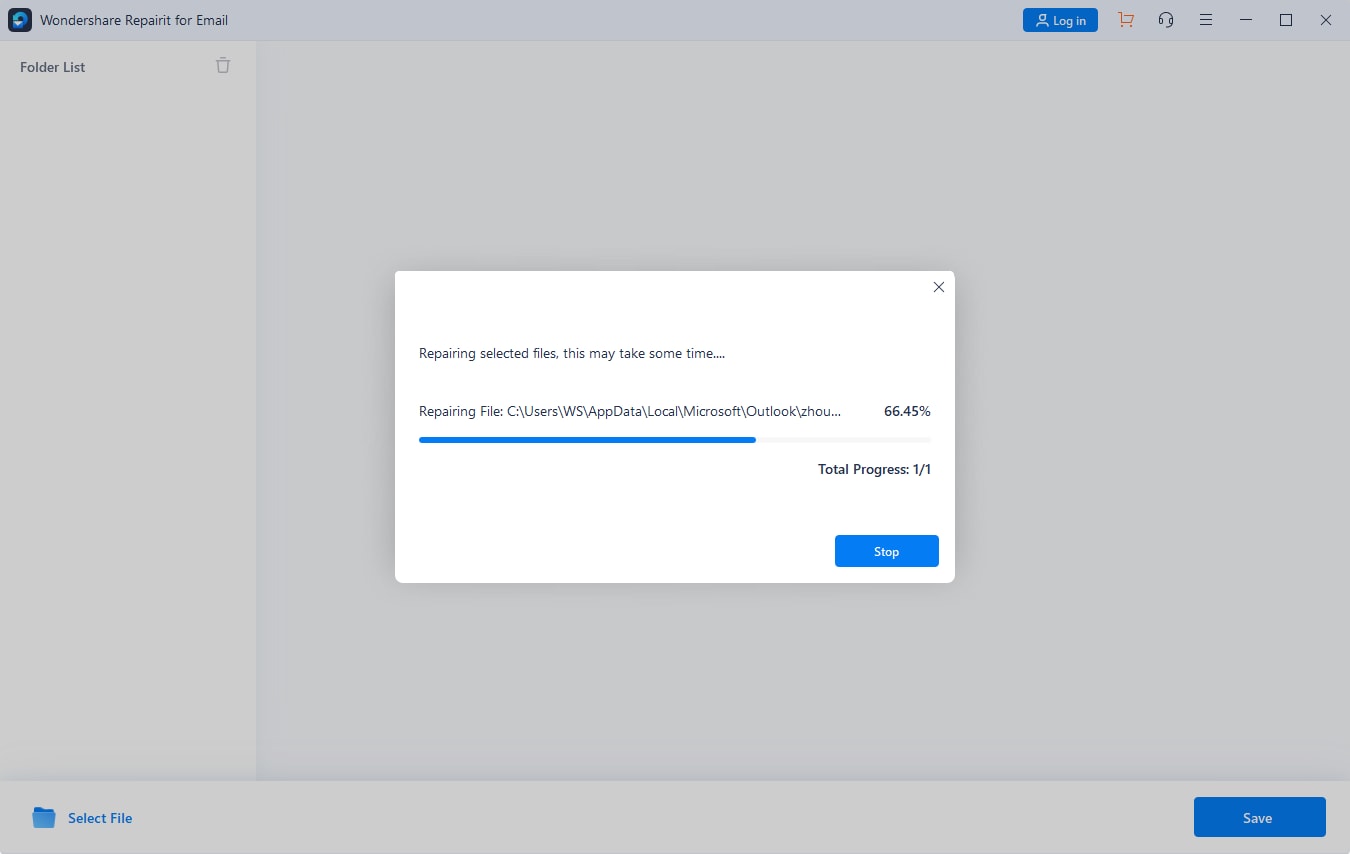
Step 2 Execute the Database Repair Process
Once your target files are loaded into the parsing index list, click the blue 'Repair' button. The recovery engine will automatically restructure file indexes, resolve bad sector allocations, and fix alignment errors within minutes.
Step 3 Preview and Save Your Recovered Items
Once the scan is complete, explore the restored folder directory on the left. You can preview email content, view logs, and recover attachments to verify file integrity before saving the newly fixed files back to your computer.

Conclusion
Managing primary account lockouts in Microsoft Outlook doesn't have to disrupt your workflow. By shifting default storage paths via a temporary PST archive, adjusting the Windows Registry, or setting up a clean user profile, you can easily remove outdated primary accounts and realign your inbox synchronization priorities.
If database restructuring or profile deletions accidentally damage your local mail history, try an advanced diagnostic tool like Wondershare Repairit for Email. It provides an efficient and reliable way to repair corrupted data files and safeguard your critical business communications.