Outlook automatic reply not working is one of the common issues faced by users. It is also known as Microsoft Out Of Office. Outlook allows sharing an automatic response to the sender after receiving the message. It is helpful when the receiver is not present to reply. But sometimes, this functionality does not work properly or stops working.
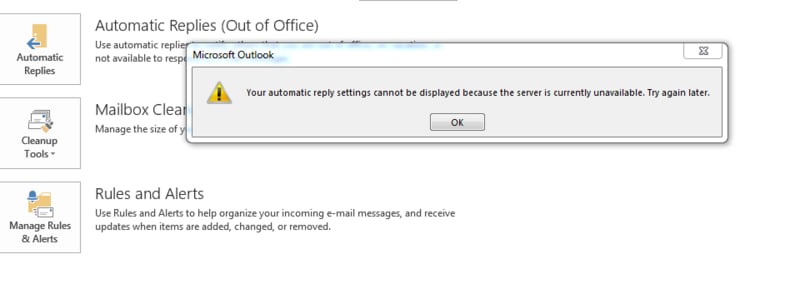
To resolve the problem effectively, there are various solutions available. All you need to do is pick the one that is suitable for you. Keep reading and understand some causes and the best solutions to resolve the issue.
In this article (Click the plus icon to unfold the content)
- Causes For "Outlook Automatic Reply Not Working" Problem
- How to Check My Outlook Automatic Reply is Working?
-
- Solution 1: Configure The OOF Feature
- Solution 2: Delete and Re-enable The OOF Feature
- Solution 3: Increase The Rules Quota
- Solution 4: Filter The Junk Emails Out Of Automatic Replies
- Solution 5: Resolve Outlook Automatic Reply Not Working Outside The Organization
- Solution 6: Fix The Outlook Automatic Replies Once Per Address
Part 1: Causes For "Outlook Automatic Reply Not Working" Problem
The following reasons can be responsible for Outlook Automatic or Microsoft OOF (Out Of Office) not working properly:
Cause 1: The first cause is corruption in the OOF rules templates.
Cause 2: In the Exchange 2019 only, a backlog of mailbox assistants exists.
Cause 3: The setting of Remote Domain is not set to allow OOF messages by default (or specific).
Cause 4: New rules can not be created as the existing OOF rules quota has been exceeded.
Part 2: How to Check My Outlook Automatic Reply is Working?
Suppose you use Microsoft Outlook and do not receive automated replies when you are out of the office; check a few things to ensure the appropriate feature is working.
The foremost thing to do is open Outlook.
Now, go to File>Automatic Replies. You can see three options on the screen:
- Send automatic replies.
- Don't send automatic replies.
- Schedule an automatic reply.
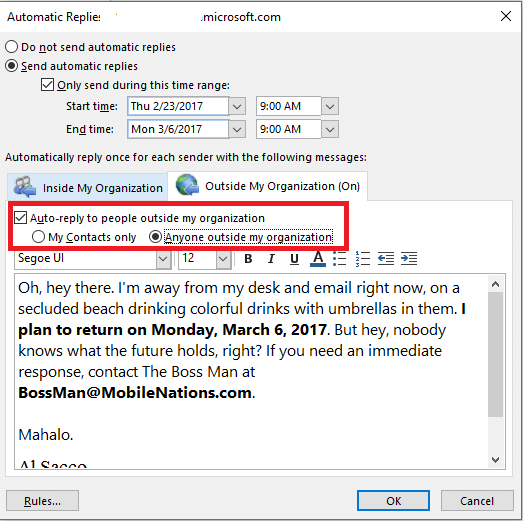
If you can't see the "Automatic Replies" option, it signifies that the feature is turned OFF for your account.
Follow File>Options>Mail to turn it ON.
Now, choose the Send automatic replies check box under the Replies and forwards.
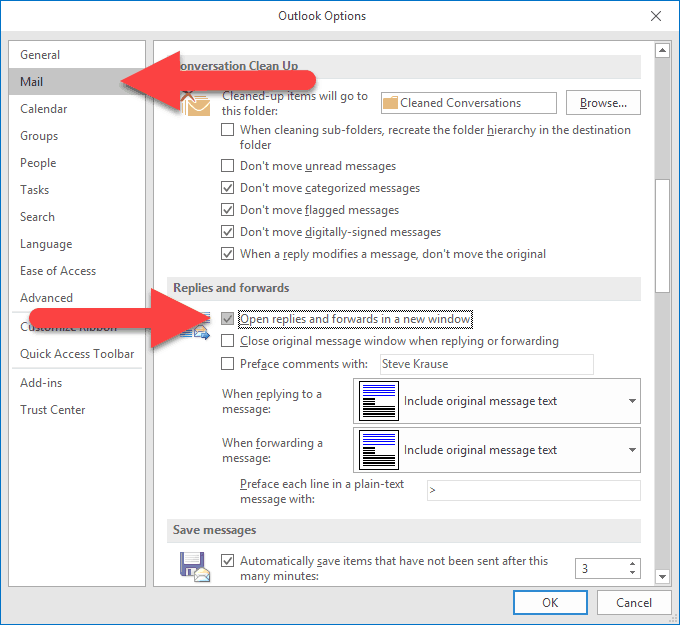
If you have already turned the feature on, but the problem is not solved, continue reading to learn more practical solutions.
Part 3: Various Fixes To Resolve The Outlook Automatic Reply Not Working Issue
After understanding the causes of the problem, we can move towards effective solutions. Check the main fixes below:
Solution 1: Configure The OOF Feature
Follow the Steps below to configure the OOF feature:
Step1 Below, two cmdlets in Windows PowerShell are available. Use either of them:
Set-MailboxAutoReplyConfiguration <identity> -AutoReplyState Disabled
Set-MailboxAutoReplyConfiguration <identity> -AutoReplyState Enabled
Step2 Use MFCMapi to check the PR_00F_STATE value. Follow the below Steps to do this:
StepA Select Session in the main window of MFCMapi. Now, choose Logon and Display Store Table and open the mailbox.
StepB Next, choose the profile you want to access. Further, scroll down to the bottom till you can see the PR_00F_STATE value. (The value has to be TRUE if you enable the OOF feature and FALSE if you disabled it in Windows PowerShell.)
Check the screenshot below:

Step3 Contact Microsoft Support if the PR_00F_STATE value is not expected. The experts can check them for the queued events (Exchange 2010 only).
Solution 2: Delete and Re-enable The OOF Feature
The next solution to fix the Outlook Automatic Reply not working issue is by deleting and re-enabling the OOF feature.
DELETE: Steps To Delete The OOF Rules
Step1 Select Session in the MFCMapi main window. Open the mailbox by choosing the Logon and Display Store Table.
Step2 Now, expand the root container and information store top.
Step3 Delete the OOF rules. Delete by following the below Steps:
METHOD 1: Delete OOF Rules
StepA Right-click the Inbox and choose the Display Rules Table.
StepB If the OOF feature is not enabled, you can see the OOF rule listed in the rules table together. The following rule name can be seen:
MSFT: TDX OOF Rules.
StepC In case the OOF feature is enabled, you can see two different OOF rules listed in the table. The listed rule depends on if the rule is enabled only internally or both internally and externally.
Check the image below as an example:

StepD If the OOF templates are corrupted, they will be listed on the rule table. Other entries can be seen if the user has enabled them.
StepE Right-click on the OOF rules and hit the Delete option. (NOTE: Except for referenced OOF rules, do not delete any other rules.)
StepF Close the windows of the Rules table.
METHOD 2: Delete OOF templates
Follow the next Steps to delete the OOF templates:
StepA Right-click on the Inbox and choose Open Associated Contents Table.
StepB Now, scroll down to the right side and expand the column of the Message Class.
StepC Sort the items by selecting the Message Class column.
StepD Check the items with the Message Class of either of the below values:
IPM.Note.Rules.ExternalOofTemplate.Microsoft
IPM.Note.Rules.OofTemplate.Microsoft
See the example image:

StepE Right-click on the items belonging to any of the two message classes. After choosing the Delete Message. (NOTE: Ensure not to delete the items except referenced ones.)

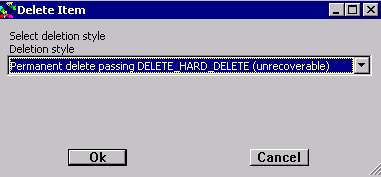
StepF Select Permanent delete passing DELETE_HARD_DELETE (unrecoverable) under Deletion style in the Delete Item dialog box. Then, select OK.
RE-ENABLE: Steps To Re-Enable The OOF Feature
<
Step1 Disable and re-enable the OOF feature. The following commands can help:
Set-MailboxAutoReplyConfiguration \<identity> -AutoReplyState Disabled
Set-MailboxAutoReplyConfiguration \<identity> -AutoReplyState Enabled
Step2 Lastly, check if the OOF feature is working expectedly. Besides, the symptoms are no longer occurring.
Solution 3: Increase The Rules Quota
We have seen that extended rules quota can be the reason for the issue of Outlook Automatic Reply not working. It means both internal and external OOF rules can't be created.
The following Steps can help resolve the issue:
Step1 Determine the size limit for rules in the mailbox. Now, run the below command in the Exchange Management Shell:

Step2 If the size limit is less than 256 kilobytes, run the following command. It will increase the size to 256 kilobytes:

Step3 Due to the caching of quota information in the Information store, up to two hours may be required to update the quota values.
Solution 4: Filter The Junk Emails Out Of Automatic Replies
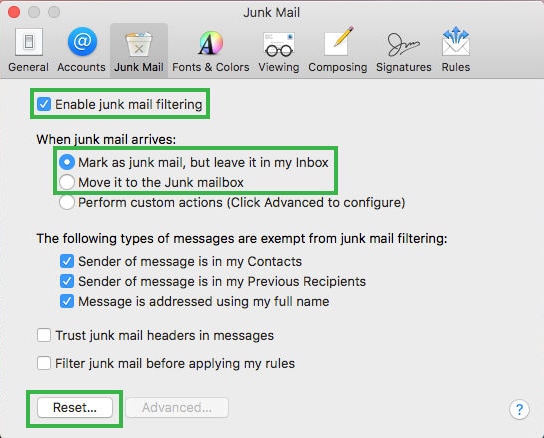
All the suspected spam messages in Microsoft Outlook are stored in the Junk Email folder. It doesn't block messages. Moreover, the folder is saved on the Server and easily accessible from any system.
The Out of Office is also considered an automated message. The Junk Email filter's role is to filter it. It means the messages are present in the Junk Email Folder. Users can access the server's Junk folder and access email messages.
The image below shows the clear options to select and then select Reset:
Solution 5: Resolve Outlook Automatic Reply Not Working Outside The Organization
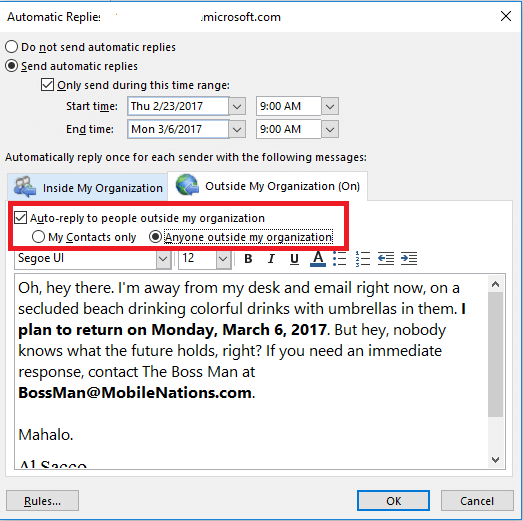
This solution prevents the auto-replies from going to email addresses that do not exist in the environment of organization exchange. The admin has to change the automatic replies settings for not sending replies outside the organization.
Furthermore, you need to automatically check the box to reply to people outside the organization. After changing the settings, Outlook Automatic reply will be capable of communicating with non-members of the organization.
Solution 6: Fix The Outlook Automatic Replies Once Per Address
By default, the assistant responds to each address only once. But sometimes, a user needs to resend the message to all the addresses. Next, the user has to turn OFF the OOF features and turn them on again.
Moreover, the rules of the server side enable the users to respond to all the messages they receive. Hence, end users should consider contacting the Exchange Administrator regarding this.
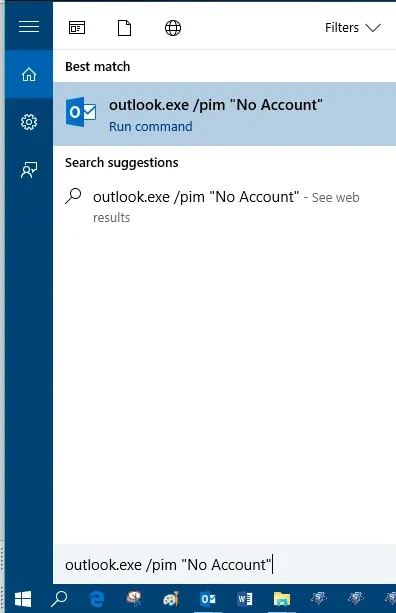
A QUICK COMPARISON OF THE VITAL SOLUTIONS ABOVE & WHEN TO USE THEM
From the above fixes, solutions 3, 4, and 5 are the necessary options to consider. Let's know the difference between them and when to use them to resolve the issue. Solution 3 lets you increase the size limit for the OOF rules. The best time to use this solution is when you can notice the OOF rules are extending.
However, solution 4 is about filtering junk emails. In this solution, you check the Junk Email folder and modify a few settings. Leverage this solution when you are not able to see the emails in your inbox. They might be directed to the Junk Email folder. Furthermore, solution 5 is also effective and deals with the unwanted sending of emails outside the organization.
Part 4. Fix Outlook Automatic Reply Not Working Caused by Corrupt Email Files
When the Automatic Reply feature in Outlook fails to function properly, one potential cause can be corrupted email files. This corruption can occur from unexpected shutdowns, virus attacks, or even software errors, leading to inconsistencies in the email database. As a result, Outlook may struggle to execute certain features, including the Automatic Reply, until these corrupted files are repaired or removed. Users often find themselves needing to utilize inbox repair tools or other specialized software to resolve these issues and restore full functionality to their email applications.
When your Outlook emails get corrupted, you can use a professional tool. We are recommending the most popular and effective Wondershare Repairit for Email.
Wondershare Repairit For Email
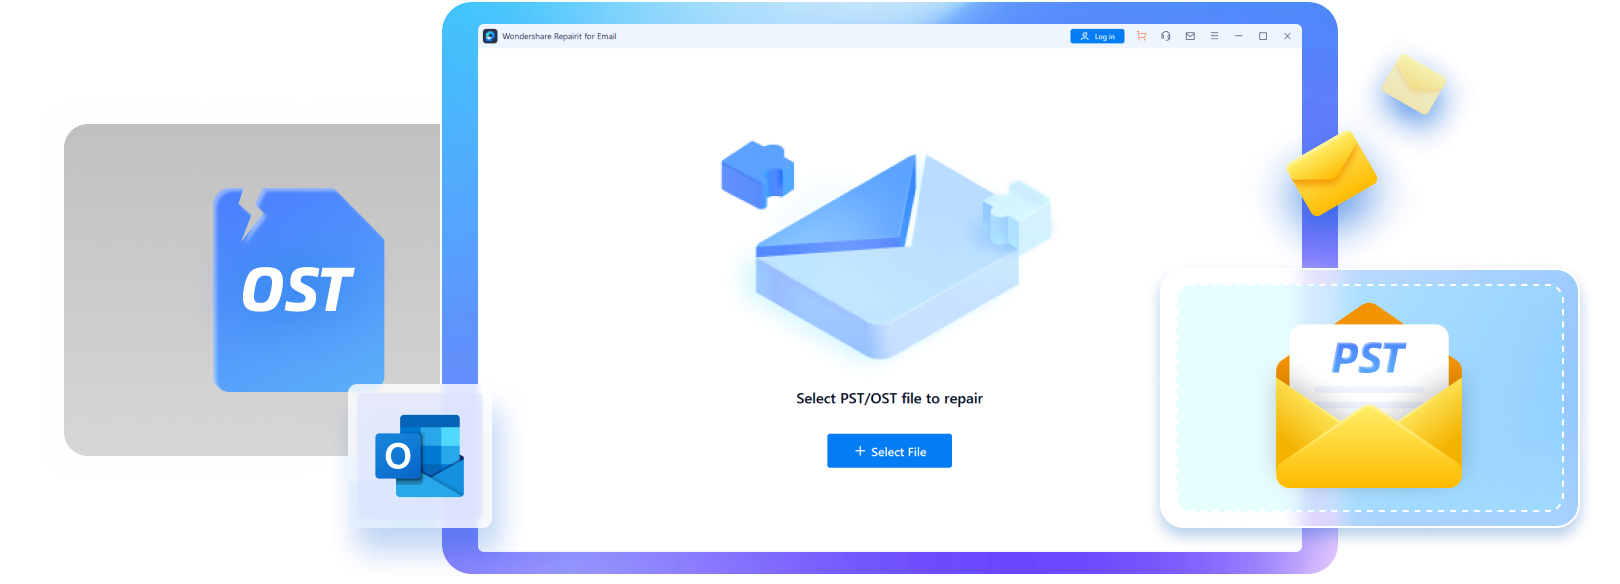
Wondershare Repairit for Email is software compatible with Windows and Mac systems. Email files generally include the OST/PST files that might be corrupted and cause problems. This tool is perfect for fixing the issue with these email files.
Steps to use Repairit for Email (Windows)
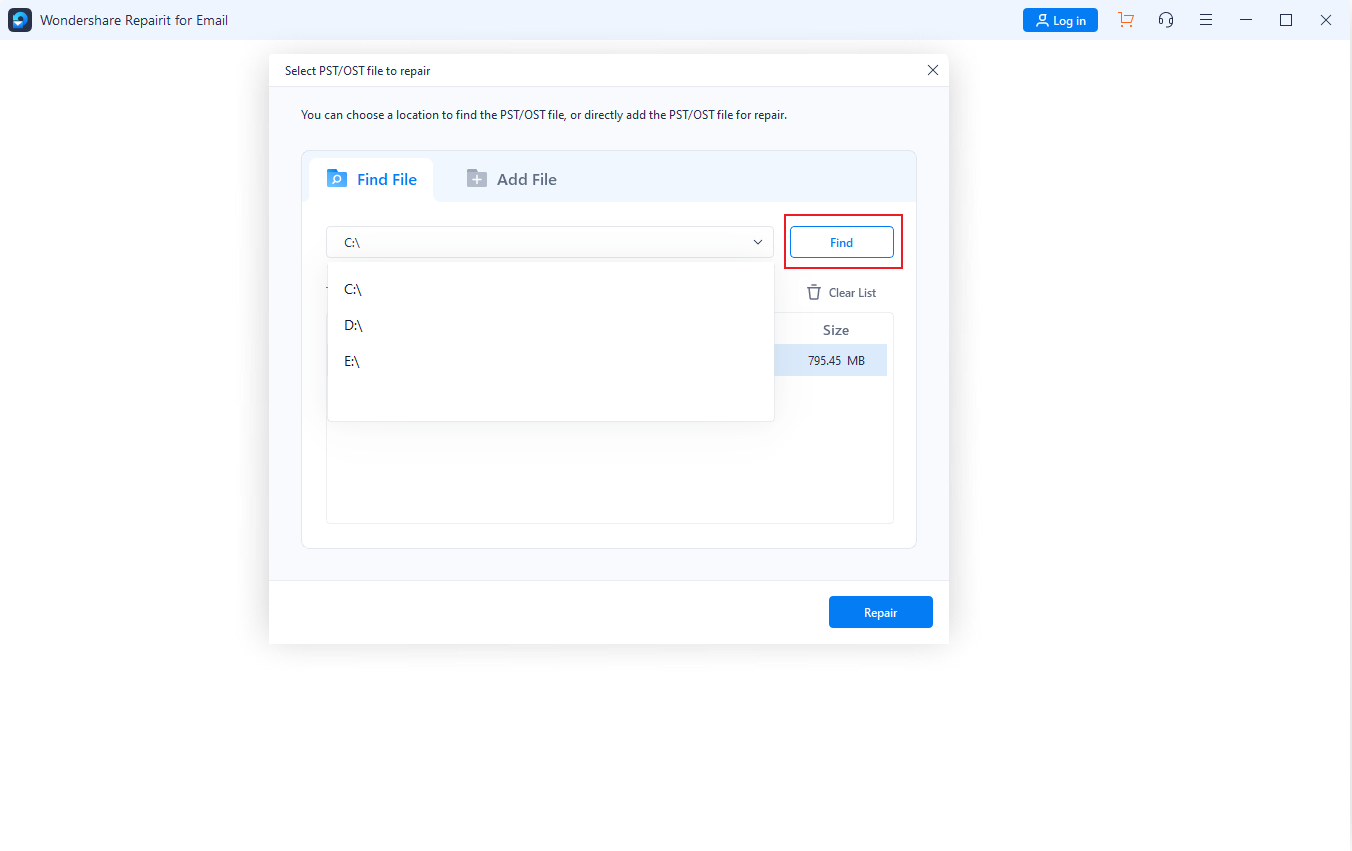
Step1 Upload The Corrupted Email Files
Open the Repairit for Email tool. Choose the damaged PST/OST files to upload by hitting the Select File button.
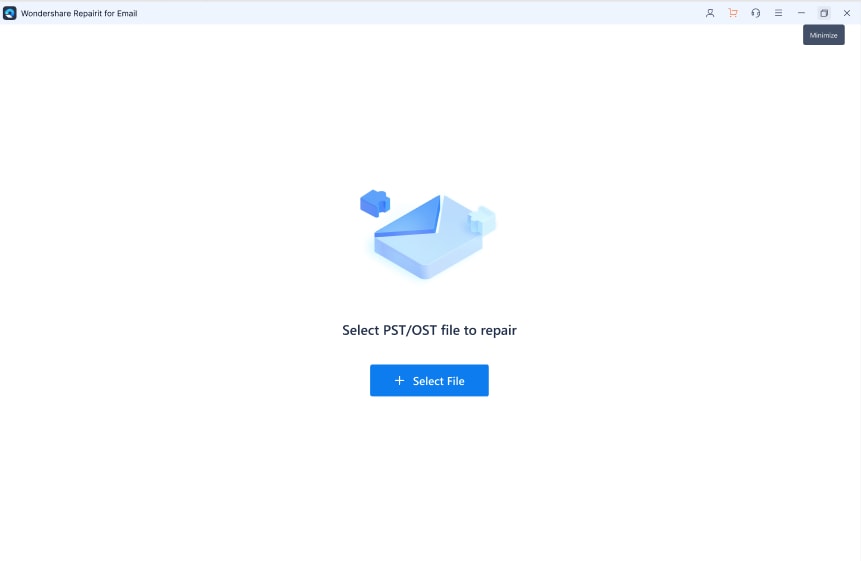
You can see a window for selecting the files from a specific location. Now, click on Find and look for the file in different locations in your system. Besides, hit the Add File button if you already know the file's exact location.
Step2 Start The Repair Process
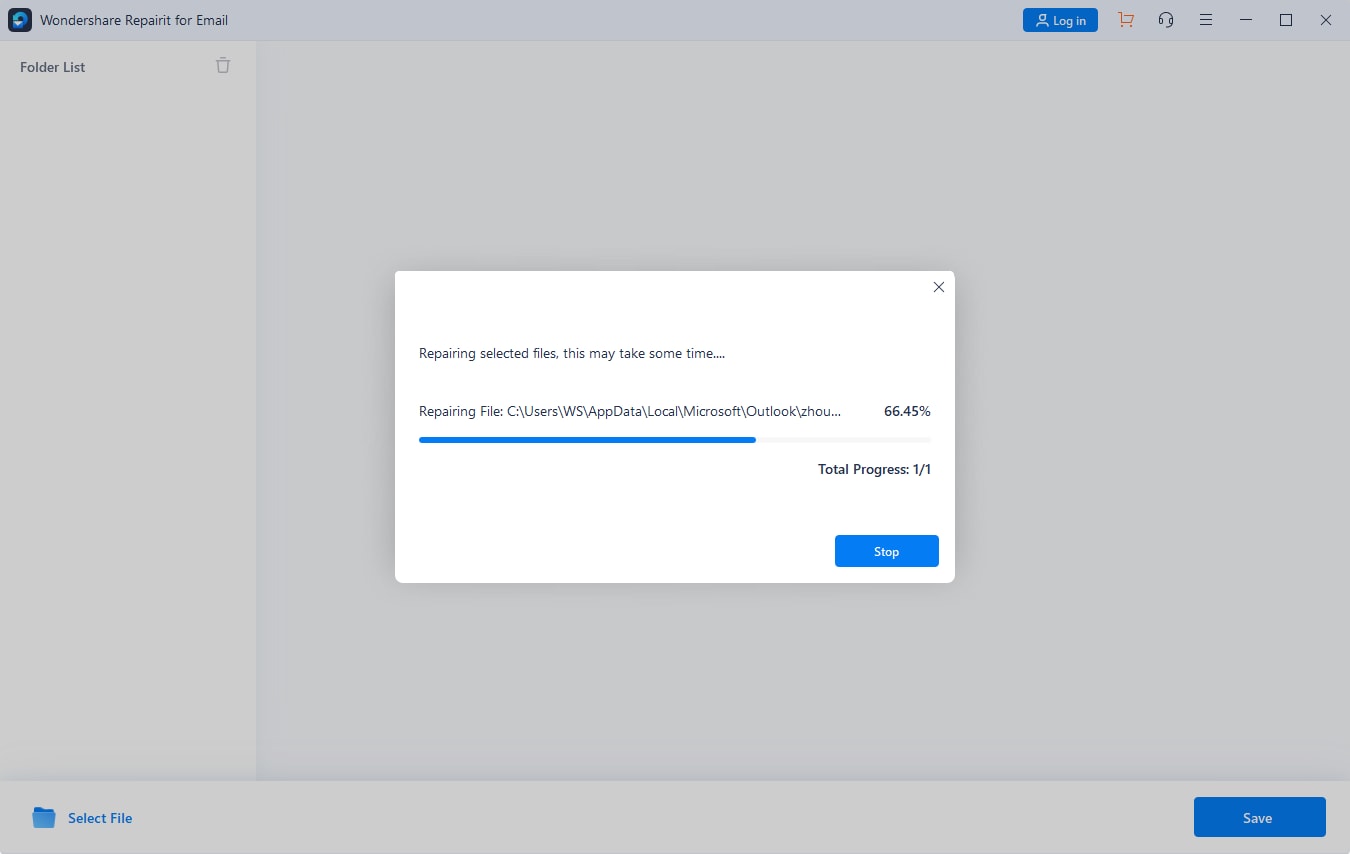
After uploading the corrupted files, hit the Repair button in blue color. The repair process will start and provide the outcome faster.
Step3 Preview & Save The Repaired Files
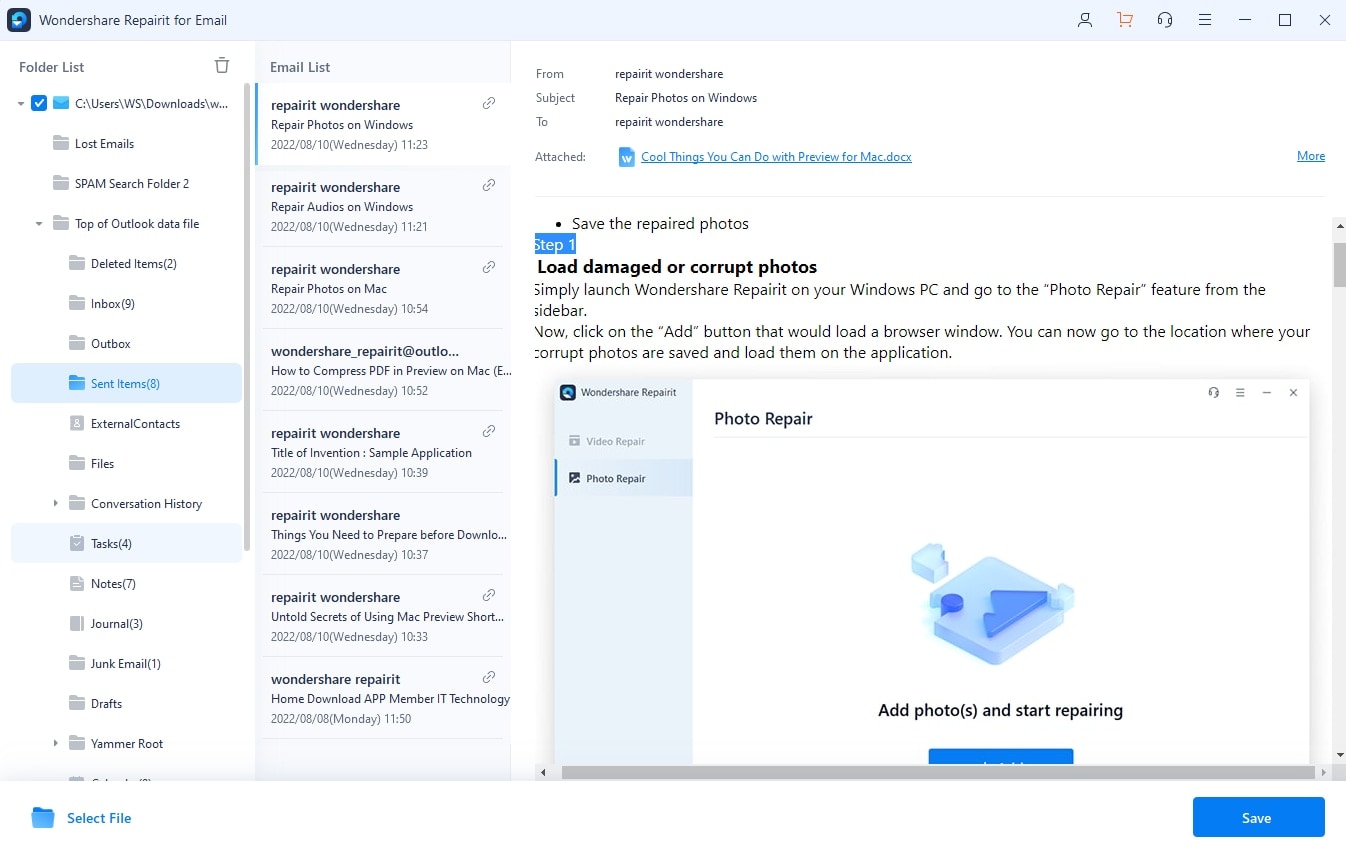
The users can see all the fixed email files on the screen in the left panel. You can first preview the files to see if they are properly repaired. Lastly, save them to the desired location.
Conclusion
Ultimately, the crucial part is to pick the right solution. If you don't know the actual cause, you can try the above-listed solutions one by one. All the solutions are effective. But, if your problem is still not fixed, then trying to repair the emails will be the right choice.
There is a possibility of corrupted email files. In this case, you can use a professional tool to fix the emails. Wondershare Repairit for Email is software that can help you repair files faster.

 ChatGPT
 Perplexity
 Google AI Mode
 Grok
Grok

