Microsoft Outlook is a potent email and personal data management tool that supports many email accounts. Multiple benefits come from using Outlook to manage your webmail accounts. Unlike standalone webmail accounts, Outlook offers a broader range of tools for managing private data. In this article, I will let you know how to sync Outlook with webmail.
So, let's get started!
Part 1: What's the Difference Between Outlook Client and Outlook Web App?
The Outlook Web App (OWA) is your official UW-Platteville email and calendaring account. All campus account holders will have access to the Outlook Web app via a browser from anywhere they have an internet connection. Outlook Web App provides basic email, calendar, contact, and task functionality.
OWA also provides access to OneDrive (storage) and Word, Excel, and PowerPoint Online. Mobile devices can connect to your Office 365 account directly or via the OWA app. The majority of account holders will use Outlook Web App.
However, The Outlook Desktop Client must be installed and linked to your Office 365 account on your computer or laptop. Only the machine on which it is installed has access to the desktop client. If you manage other people's email accounts and calendars, the Outlook Desktop Client benefits you.
Part 2: How to Sync Outlook with Webmail?
This part will teach you the different methods to sync Outlook with webmail.
So, let's start with the first method!
#Method 1: Check your network connection
The Outlook may be unable to synchronize mail items from the OST file to the mailbox on Exchange Server if the network connection is poor. Therefore, check your network connection before proceeding with advanced troubleshooting.
Unplug and reconnect the network cable. Then, reconnect to the WLAN to ensure you can access the internet, and the Exchange Server is operational. Also, check your security software settings, such as antivirus or firewall settings, which may be reason for Outlook sync issues.
Turn off antivirus and firewall protection to see if they prevent Outlook from synchronizing the mailbox. If not, proceed to the following method.
#Method 2: Configuring Outlook settings
The next method is to configure Outlook settings if there is a problem with the Outlook app and web not syncing. The steps are as follows:
Step 1: Launch Outlook.
Step 2: Click 'Next 'on the Welcome screen.
Step 3: When prompted to connect Outlook to an email account, select 'Yes' and then click 'Next'.
Step 4: The Auto Account Setup wizard is launched. Enter your name, email address, and ID password.
Then press the Next button.
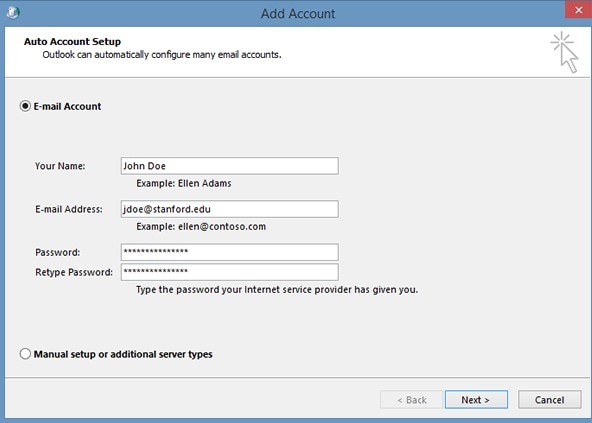
Step 5: Outlook will complete the account setup, which may take several minutes.
Click Finish when you receive confirmation that your account has been successfully configured.
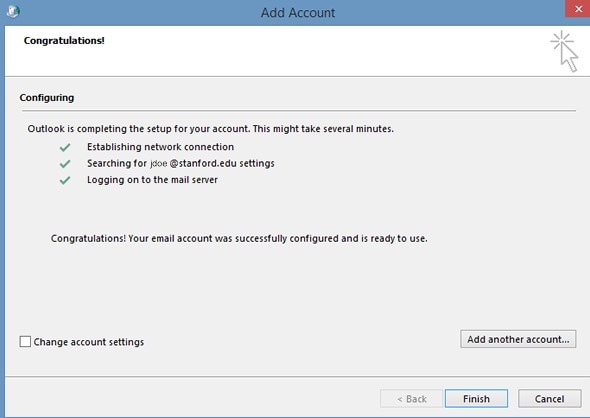
Step 6: Then restart Outlook.
Method 3: Check sync issues
If the previous method does not sync Outlook with webmail, check sync issues. You can check sync issues on Outlook by following the steps mentioned here:
Step 1: In the bottom left corner o your Outlook program, click the three dots.
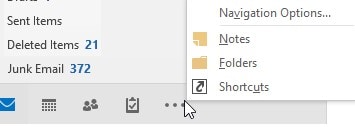
Step 2: To view a list of folders in your account, click Folders.
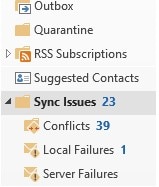
Step 3: To see the Conflicts, Local Failures, and Server Failures folders, scroll to the Sync Issues folder and expand it.
Method 4: Manually synchronize the OST and Exchange Server Mailbox
If there are synchronization issues between outlook and outlook web apps, then you can manually synchronize the OST and Exchange Server Mailbox. You can do this by following the below-mentioned steps:
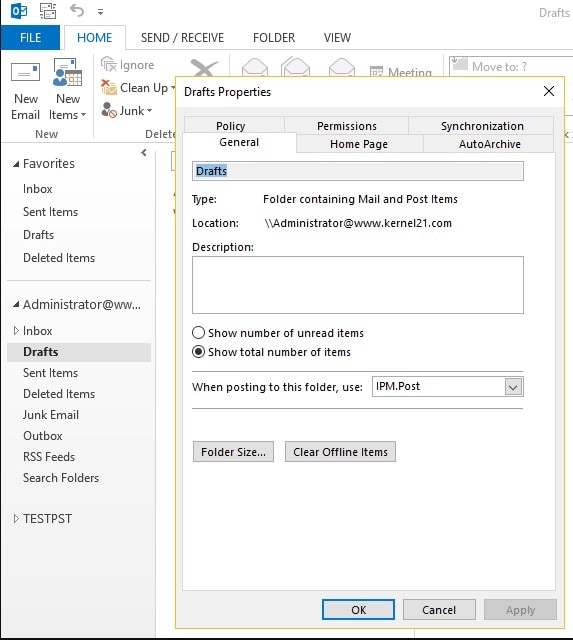
Step 1: Right-click the OST folder, then select Properties.
Step 2: Select Clear Offline Items and then press OK.
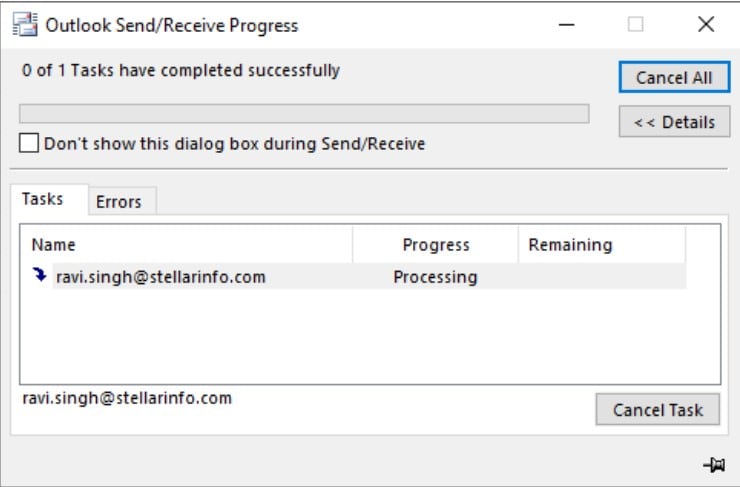
Step 3: Select 'Update Folder' from the 'Send/ Receive' tab.
Method 5: Repair Outlook Data File (OST)
If you are still unable to resolve the synchronization issues between Outlook and Outlook web app, then there is a problem with the OST file. In such cases, all that is required is the repair of the OST file. Fortunately, applications such as <strong>Wondershare Repairit for Email can repair damaged OST files and recover data in a new OST file. This program can assist you in recovering all of your mailbox data, including contacts, emails, tasks, and other items. Is there anything else you want? Validated data can be saved in OST or another format. This tool has also come in handy when my Outlook data files have become corrupted.

Now, let's see some more features of this powerful repair software:

-
Repair damaged PST & OST Files in Outlook in all Email corruption scenarios, such as hard disk crashes & bad sectors, virus attacks & tojan horse, outlook corruption & malfunctions, improper shutdown procedure, etc.
-
Restore Outlook Emails deleted for a long time and extract the Email messages, folders, calendars, etc. within seconds.
-
Repair corrupted Emails and restore deleted Emails with a very high success rate.
-
Repair Emails in bathes without size limits and support to preview all of them before saving.
-
Compatible with Windows 7/8/8.1/10/11, Windows Server 2012/2016/2019, and MacOS X 10.11~ MacOS 12 (Monterey).
Repairit for Email can repair your PST/OST file in three simple steps, no matter how badly it has been damaged. Let's take a closer look at these steps that I have detailed.
First of all, download and install Wondershare Repairit for Email. Then, to learn how to use it to repair your corrupted PST file, complete the following steps:
Step 1: Add the corrupted PST files
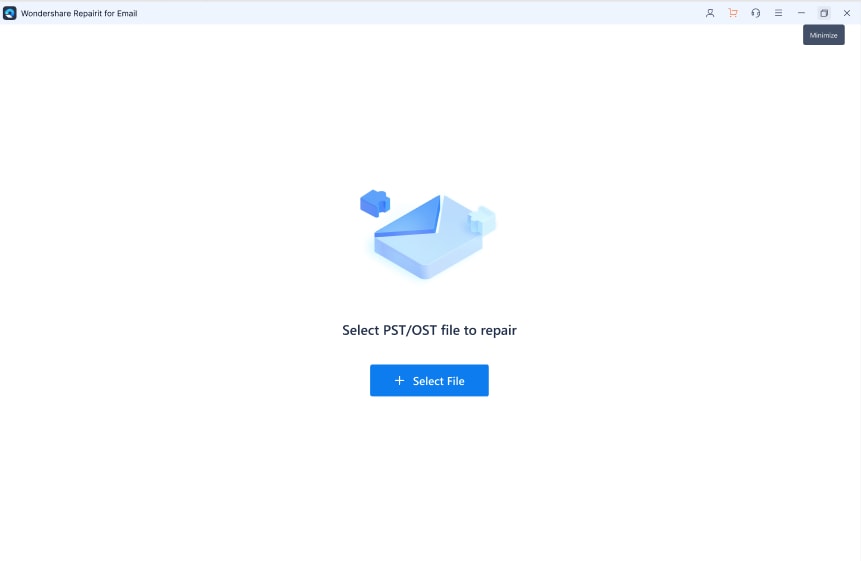
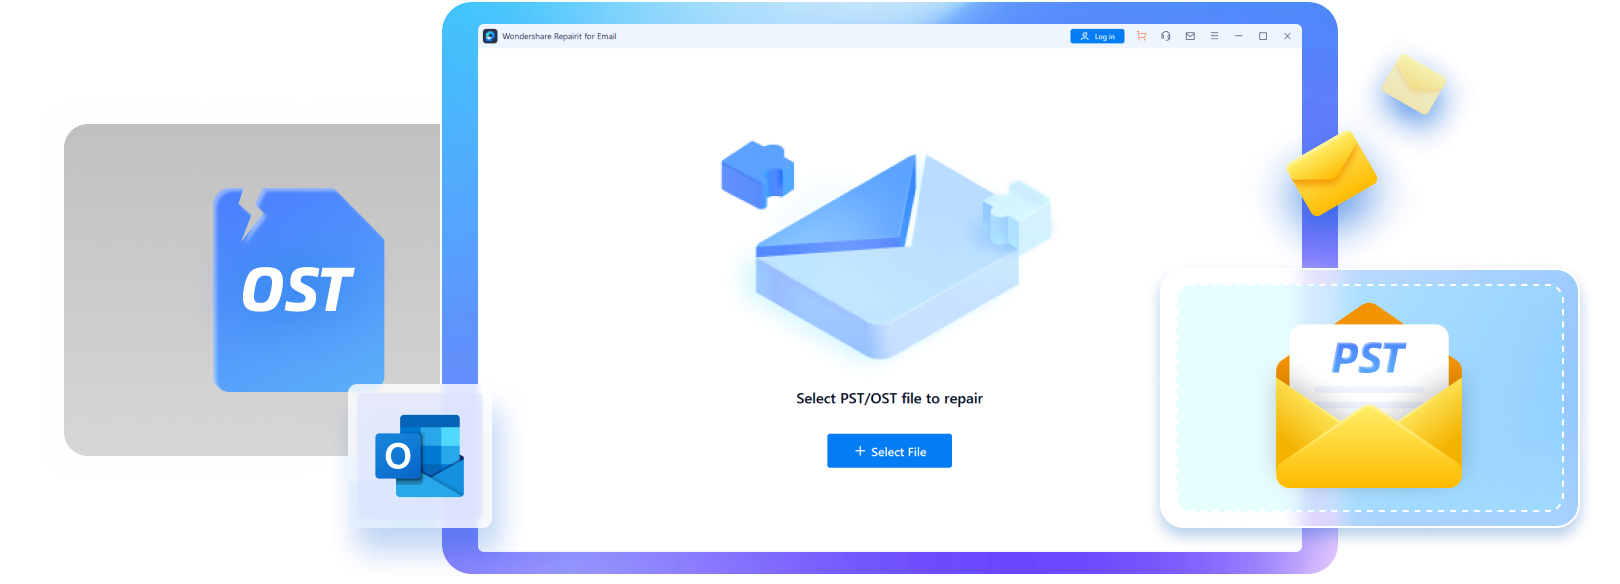
Activate Wondershare Email Repair. Select the "Select File" option to add the corrupted PST files.
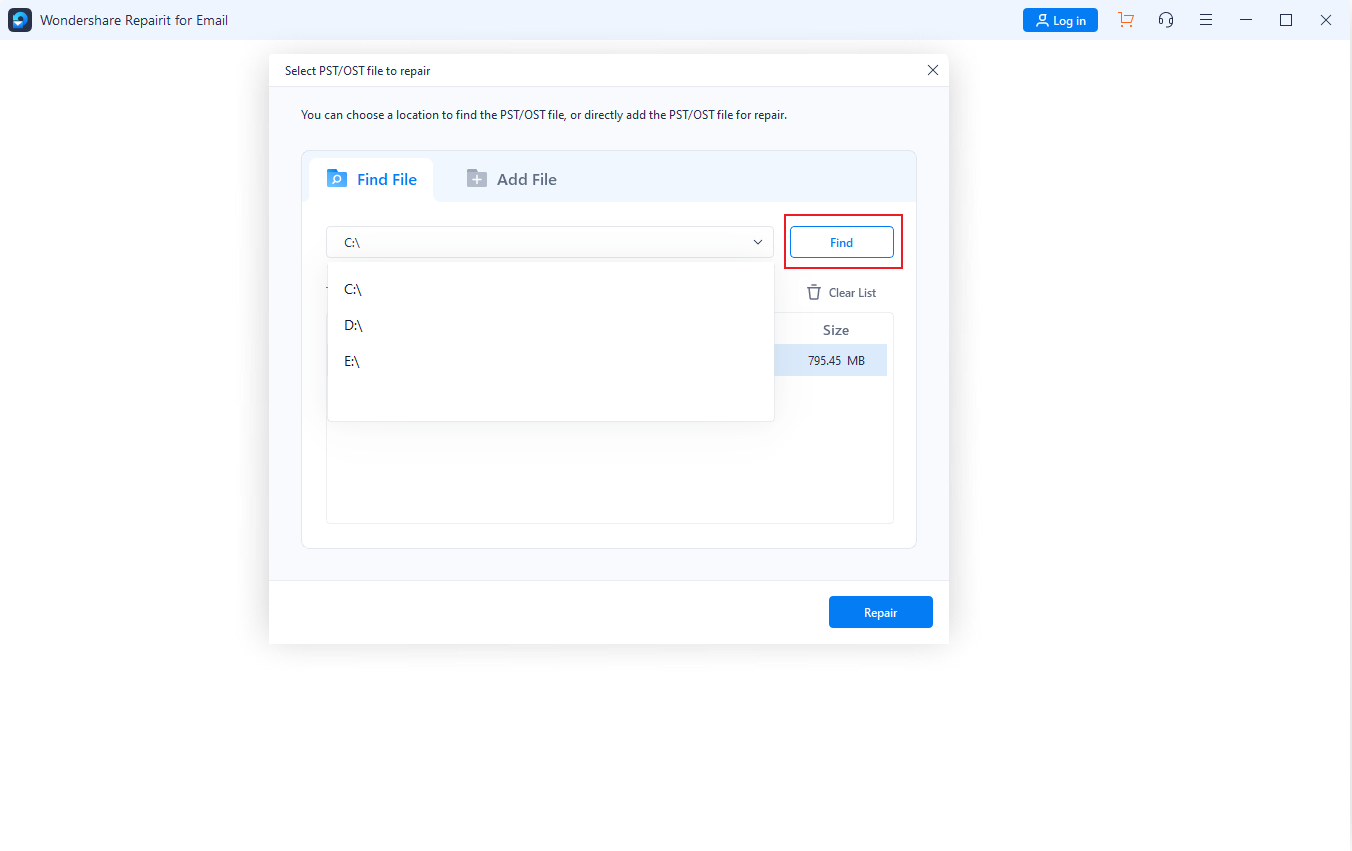
After selecting the files from the desired location, click the "Repair" button. You can enter a single email or a list of emails.
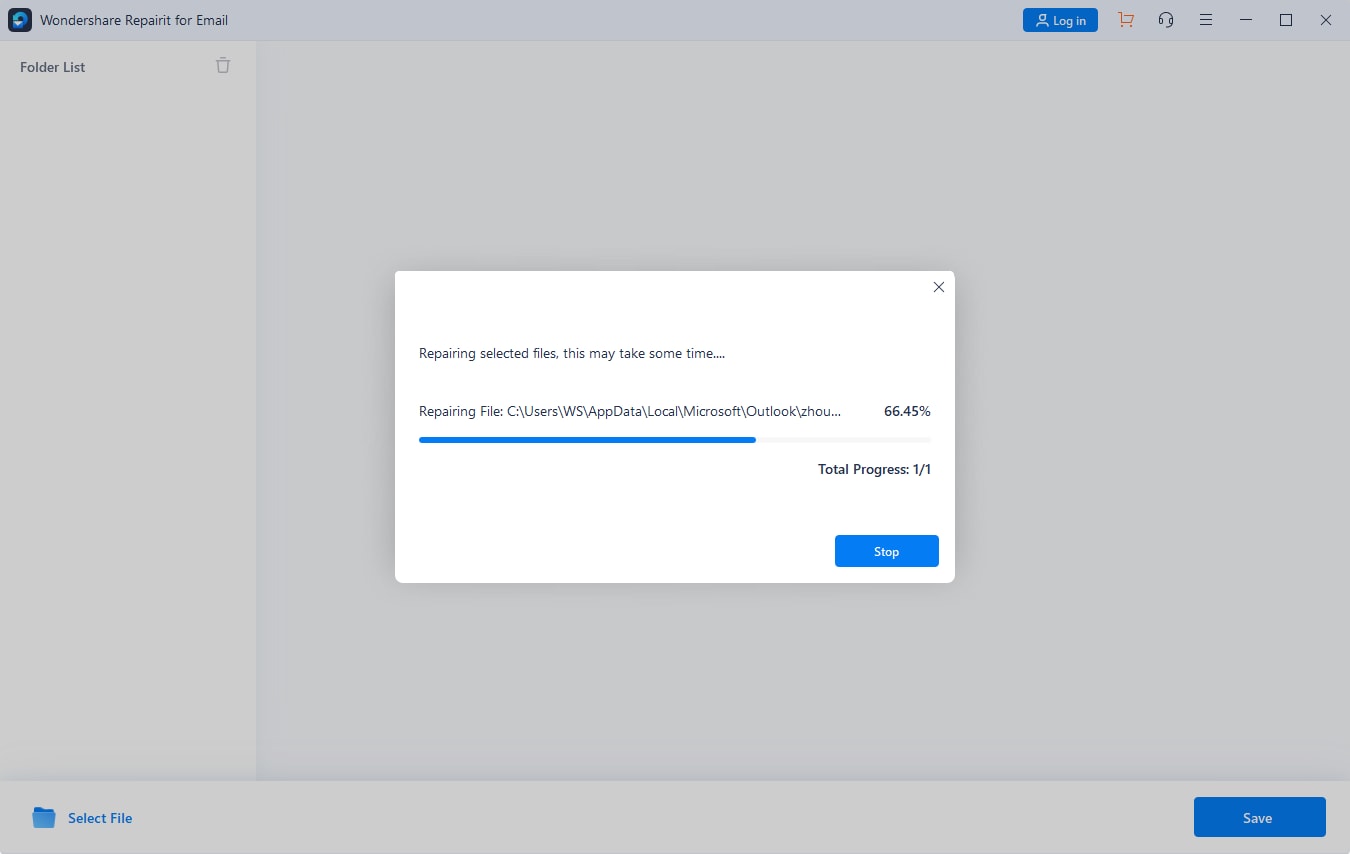
Step 2: Start email repair procedure
Repairit for Email will automatically repair corrupted emails.
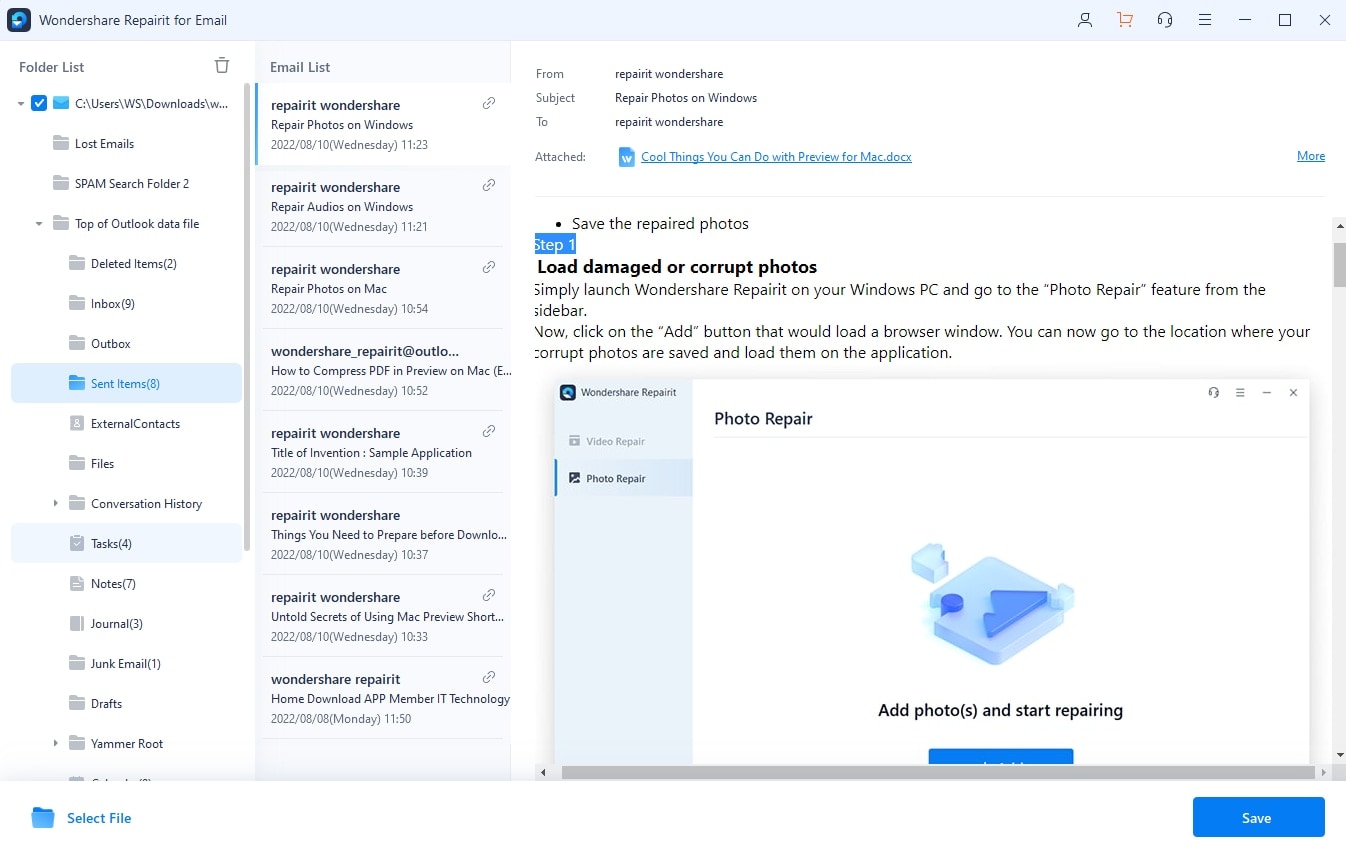
Step 3: Preview and save the repaired emails.
Repairit allows you to preview the repaired Outlook mailbox data after the repair process is complete. Choose what to save, then click the "Save" button to save the repaired PST files to your computer.
So, these are the steps to repair the Outlook Data File (OST). By repairing OST files, you can resolve the problem of outlook app and web not syncing.
Part 3: Tips to Prevent Outlook Sync Issues
Now you know how to sync Outlook with webmail. But it would help if you took some necessary actions to avoid Outlook sync issues. In this part, I will help you by explaining tips to prevent Outlook sync issues. So, let's find the tips here:
#Tip 1: Turn off Cache Exchange Mode
If you use Outlook to access an Office 365 or Exchange Server-based email account, you can turn off Cached Exchange Mode to stop Outlook sync issues.
To do so, follow the below-mentioned steps:
Step 1: Go to File>Account Settings> Account Settings.
Step 2: Click Change after selecting your Office 365 or Exchange email account from the list.
Step 3: Uncheck the Cached Exchange Mode box under Offline Settings.
Step 4: Then click 'Next' and then OK when prompted.
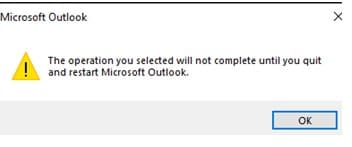
Step 5: Tap on the Finish button. Then, restart Outlook.
#Tip 2: Change the Check Frequency
Stopping synchronization is not always necessary. Assume Outlook is stuck on synchronizing the inbox. This could happen if the system checks for new mail too frequently. The freeze is caused by auto checks that overlap. Adjust the interval for synchronizing inbox to avoid a backlog of send/receive tasks. If you manage multiple accounts, 15 minutes is the ideal amount of time to avoid hanging.
Alternatively, prioritize accounts so that the most important ones are checked first. Use the sending/receiving button to customize the mail setup. It can be found on the Mail Setup tab via Tools Options in 2007 and earlier versions. In later versions, including Outlook 2013, the button is located in the 'Advanced' section of Options, which can be accessed through File.
#Tip 3: Swap out the subscribed folders
You will sync more slowly the more folders you have. Open Outlook and modify the choice if you want to change the IMAP folder settings. You can do this by following the steps described below:
Step 1: Right-click on the mail folder to access the contents.
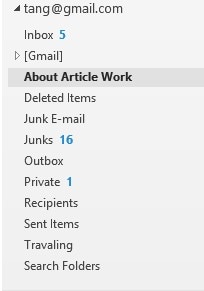
Step 2: Select IMAP folders and click subscriptions in the newly opened dialog box.

Step 3: You can specify unwanted subscriptions by clicking the Query button.
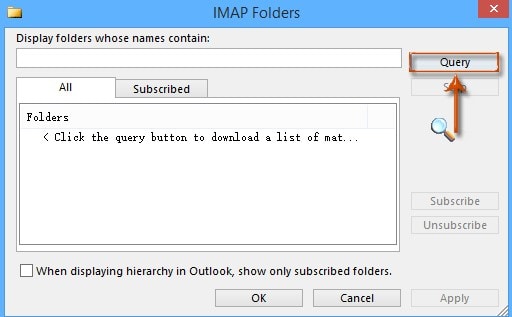
Step 4: Click on it to disconnect and unsubscribe from a folder.
A warning about items that cannot be removed from the selection may appear at this point.
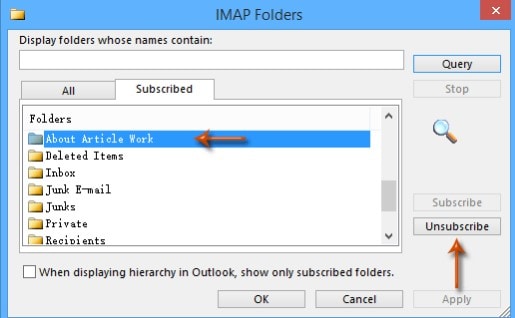
Step 5: Click OK. The folder will now be deleted.
Step 6: Go to the 'All' tab to confirm that you are still a subscriber to the required folders, such as drafts and inbox.
Your chosen folders will all be synchronized with the exchange server.
Step 7: The Outlook synchronizing hierarchy must now be changed.
Step 8: To stop it from only displaying your subscribed folders, uncheck the box. Accept the changes at last.
Conclusion
That's it!! This is how to sync Outlook with webmail and the 3 tips to prevent Outlook sync issues. I hope you would have understood everything I have mentioned in this article.
Additionally, if you are experiencing sync issues with webmail due to corrupted OST files, then use Wondershare Repairit for Email. Once try this reliable software and get back your important emails without worrying about the quality of emails.

 ChatGPT
 Perplexity
 Google AI Mode
 Grok
Grok
