

 TL;DR:
Resolve the Outlook 365 and 2016 AutoComplete malfunction by verifying the feature is checked in Mail Options, emptying the cache, resetting the RoamCache directory, or launching in Safe Mode.
● Emptying the Auto-Complete List via settings or renaming the RoamCache folder fixes internal glitches but permanently deletes all previously saved email addresses from your suggestions.
● Users on a Microsoft Exchange Server account must temporarily disable the Use Cached Exchange Mode setting before accessing the %LOCALDATA%\Microsoft\Outlook directory to rename the RoamCache folder.
● When standard fixes fail, creating a new default Outlook profile or utilizing Wondershare Repairit for Email to repair corrupted PST and OST files can resolve underlying data malfunctions.
Ask AI for a summary
 ChatGPT
 Perplexity
 Gemini
 Claude
 Grok
Grok
Many working professionals wish to resolve the "outlook autocomplete not working" problem. If you are one of them, you can immediately put an end to your hunt for a solution to this problem.

Users may have encountered issues where the autocomplete function works inside one Outlook session but disappears when you close it. In this post, you'll go through a few ways experts have discovered over the years to address the Outlook autocomplete not working issue.
Part 1: Purpose of AutoComplete In an Email
Sending many emails might be difficult if you write the recipient's complete email address every time. It may add to the difficulty if you come across someone with a long email address or a unique username.
However, Microsoft Outlook 365 includes an Autocomplete tool that will automatically complete and fill up the contact list for you. The Autocomplete or autofill tool will suggest and populate email addresses from your contact list as you write the letters.
According to numerous users, there appears to be a problem with the Autocomplete feature not working properly.
Part 2: Methods to fix the Outlook AutoComplete Not Working problem
You may try the methods below to address the Autocomplete not working properly in Outlook 2016 or messed up the issue on your Outlook:
Method 1: Check if the Autocomplete setting is enabled
The first step in attempting to resolve this issue is to enable the Autocomplete option. You can do this by following the methods below:
Step 1: Start Microsoft Outlook and go to File > Options.
Step 2: In the Outlook Options wizard, navigate to the Mail Tab.

Step 3: Now, scroll down to the Send Messages section.
And make sure that the checkbox called "Use AutoComplete" List to suggest names when typing in the To, CC, and BCC lines" is enabled. If not, enable it.
Step 4: Click on the OK Button.
Method 2: Rename the RoamCache folder
Renaming the RoamCache folder is another way you might try. It will reset autocomplete. Therefore any saved addresses in the autocomplete list will be lost.
Check if you're using a Microsoft Exchange Server account or anything else.
Open Outlook > File > Info > Account Settings.

Check the Type to see if it is Microsoft Exchange or anything else. If the type is Microsoft Exchange, follow the procedures below:
Step 1: Go to File > Info and then Account Settings.
Select the Microsoft Exchange Server account. Then, click on the Change button.

Step 2: Click the More Settings button in the next dialogue box, then uncheck the Use Cached Exchange Mode checkbox.
Then, click the OK button to quit the Outlook application.

Step 3: Now, press the Windows+R key to open the Run dialogue box and enter the below command in it:
%LOCALDATA%\Microsoft\Outlook

Step 4: In the opened directory, you will see a folder named RoamCache.
Rename this folder as old_RoamCache.

Step 5: Restart the Microsoft Outlook application.
Step 6: Now, you have to enable the Use Cached Exchange Mode checkbox that you previously disabled.
Refer to the above Step (1) and Step (2) to do that.
Step 7: Finally, again restart Outlook and see if the autocomplete starts working again.
Method 3: Empty the AutoComplete Cache
Users must erase the Autocomplete cache to resolve the "Outlook autocomplete not functioning" issue. Follow the steps outlined below:
Step 1: In Outlook Window, click the File menu.

Step 2: From the File menu, click the Options button.

Step 3: In the Options, click the Mail tab and scroll down to the Send Message Section.

Step 4: Click the Empty Auto-Complete List button.
Step 5: A confirmation box will appear; click Yes.
The Auto-Complete list will be completely erased.

After finishing this process, restart Outlook and check if the names are still there.
Method 4: Run Outlook in Safe Mode
Safe mode allows you to determine whether a hardware driver causes the problem. It simplifies and expedites the troubleshooting procedure. To activate safe mode:
Step 1: On the Taskbar, click the Search button.
Step 2: Type Run into the search box and hit Enter.
Step 3: Enter Outlook.exe/safe and press the OK button.

If this does not work, open the outlook file using the full path:
C:\Program Files\Microsoft Office\OfficeVersionNumber and verify whether the auto-complete function is working properly.
Method 5: Create a new profile
If no other option works, try establishing a new Outlook profile and seeing if the Autocomplete feature works again. This also resolves difficulties with Outlook in general.
To create a new profile:
Step 1: Go to File > Account Settings > Manage Profiles.
This will open the Manage profiles dialogue directly.

Step 2: In the dialogue box, Click "Show Profile," then click "Add," type a profile name and click Ok.


Step 3: Enter the email account and click "Next."
Step 4: Set the newly created profile as the default email profile.
Then, restart the outlook.
After completing the phases, determine whether the problem has been resolved. If not, try the next option.
Bonus: Professional Tool to Resolve Corrupted Outlook Emails
Repairit For Email
Sometimes, Outlook-related issues may be caused by corrupted emails. Therefore, you need a handy and effetive email repair tool to fix them. Wondershare's Repairit for Email is such a good choice. It is the industry's only Outlook repair tool and outperforms the competition by supporting both PST and OST file formats. The fixing technique is quick and easy.

-
Repair damaged PST & OST Files in Outlook in all Email corruption scenarios, such as hard disk crashes & bad sectors, virus attacks & tojan horse, outlook corruption & malfunctions, improper shutdown procedure, etc.
-
Restore Outlook Emails deleted for a long time and extract the Email messages, folders, calendars, etc. within seconds.
-
Repair corrupted Emails and restore deleted Emails with a very high success rate.
-
Repair Emails in bathes without size limits and support to preview all of them before saving.
-
Compatible with Windows 7/8/8.1/10/11, Windows Server 2012/2016/2019, and MacOS X 10.11~ MacOS 12 (Monterey).
To use Wondershare Repairit for Windows, follow these steps:
Step 1: Upload the file you want to repair.
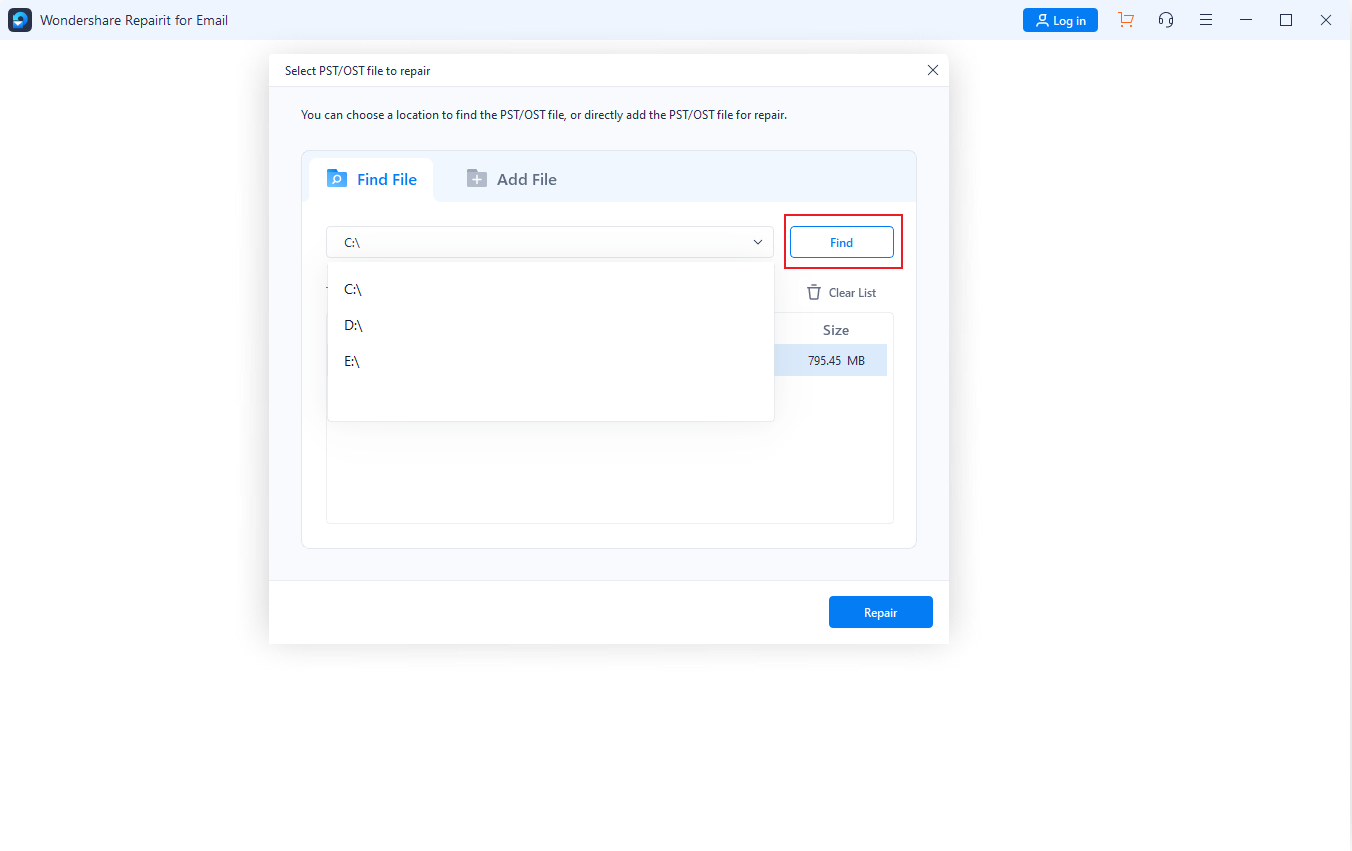
Start the application on your Windows PC. On the interface, select the Select File option. Corrupt emails can now be uploaded. Select one or more emails; the final decision is yours.

After selecting a file, a popup will appear, prompting you to pick files from several places. You can enter a single email or a list of emails. By choosing "Find," you may search for corrupt emails in various locations or directly choose the Email if you know where it is.
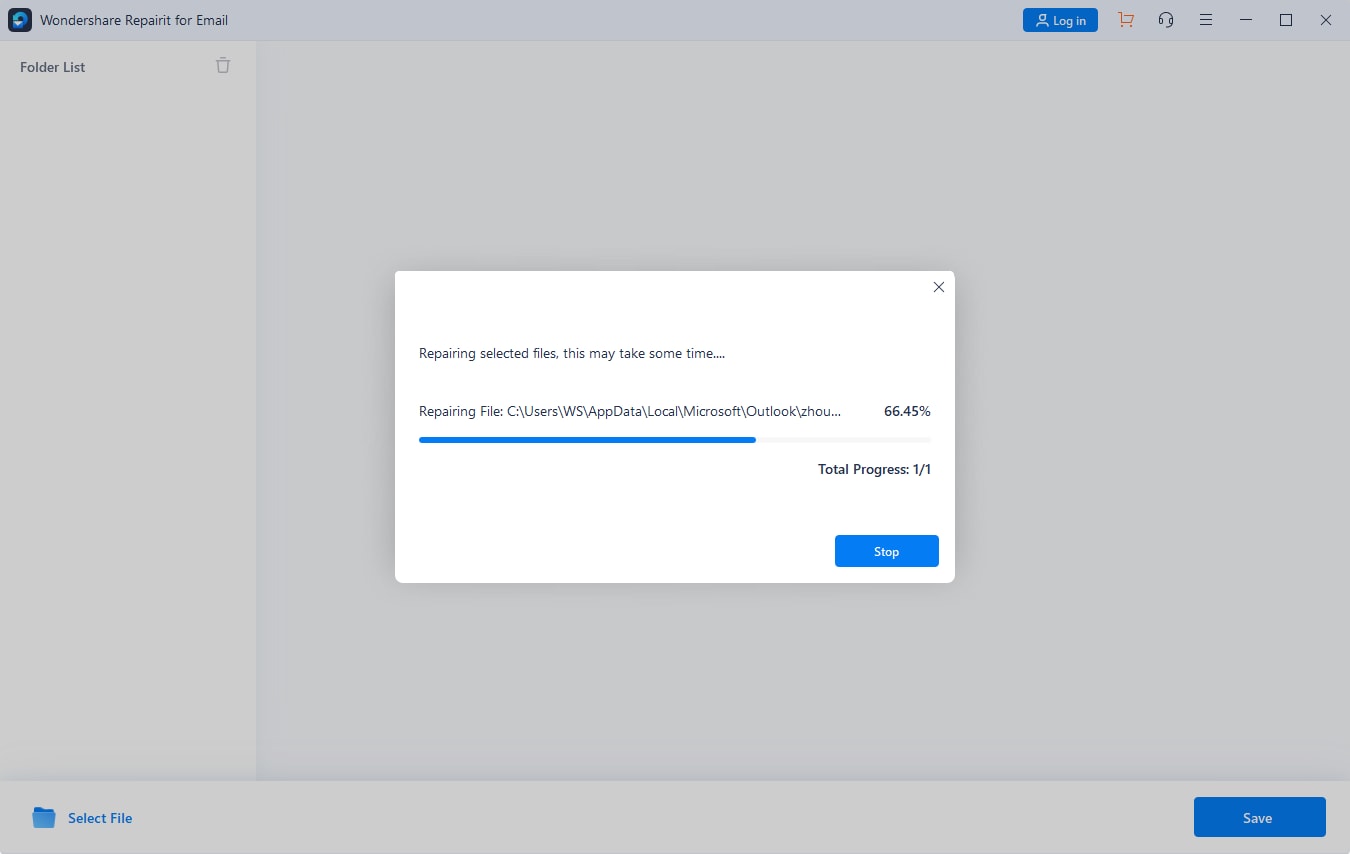
Step 2: Start repairing the uploaded files.
After you've inserted the emails, click the blue "Repair" button. In seconds, Repairit will quickly recover your corrupt emails for Email.
Step 3: Preview and save the fixed emails.
After finishing the repair procedure, all fixed emails will be displayed on the left panel. Double-click an email file to preview its contents and save it to a selected location.

Conclusion
To summarize, the above are the five solutions for resolving the Outlook Autocomplete problem on your device. These are several workarounds for Outlook's AutoComplete not working problem. As a result, the "To" box shows email addresses once again. The above article mentioned both manual and professional methods for this. On the other hand, users can use any of them to do these duties.
However, if you are experiencing the same problem, you may use a professional solution such as Wondershare Repairit for Email. This allows you to troubleshoot several email difficulties on Windows and Mac in various settings.