

 TL;DR:
Resolve the Microsoft Outlook "cannot create pst file the path is too long" error by using the Registry Editor to define a shorter default save path or by repairing corrupted data files.
● Create an Expandable String Value named ForcePSTPath under the USER\Software\Microsoft\Office\16.0\Outlook registry key (use 15.0 for Outlook 2013 or 14.0 for Outlook 2010) and input a new, shorter folder location.
● The registry modification only applies to newly created email accounts, meaning existing .pst files must be manually relocated in Windows Explorer and re-linked when Outlook prompts that the data file is missing.
● If the error stems from data corruption or internal bugs triggered by the Simplified Account Creation Wizard, resolving it requires repairing the inaccessible PST or OST files using recovery software like Wondershare Repairit for Email.
Ask AI for a summary
 ChatGPT
 Perplexity
 Gemini
 Claude
 Grok
Grok
How to Fix Cannot Create PST File the Path Is Too Long?
Microsoft Outlook users know that they are allowed to use multiple accounts. If you also use this software, you might also use your Exchange, Gmail, Office 365, or Yahoo account. Therefore, you are able to manage different client emails with a single interface.
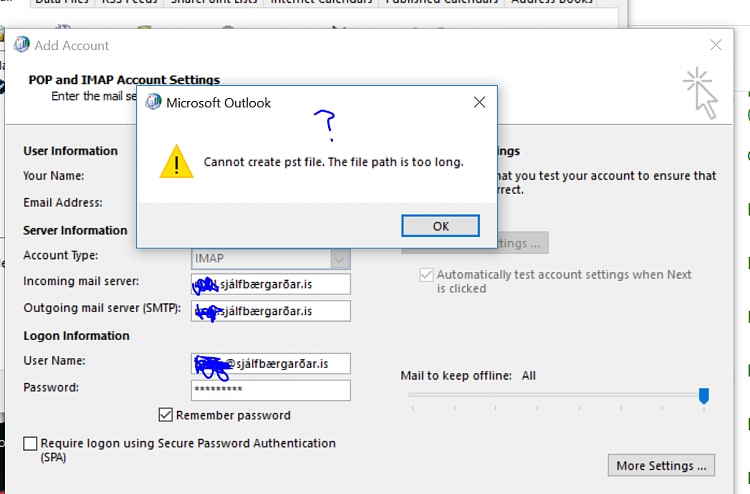
What if you encounter errors while doing your work? One of the most common errors that can occur is ‘cannot create pst file the path is too long.’
You might find it difficult to tackle this repeating error. So, we have prepared this article to help you resolve this problem. Every method we have mentioned below is effective. Besides, you can check which you feel is easy to use. Let’s get into more and know everything to fix this error.
Part 1: What Will Cause Cannot Create PST File the Path Is Too Long?
Users of Outlook are pretty familiar with this error, and as a result, people have identified various potential circumstances that may have caused occurrences of this problem.
- Adding Gmail Account In Outlook: Adding a Gmail account to Outlook seems to be one of the circumstances under which this problem can occur. The precise reason for this is still unknown; however, it could have something to do with the security settings available in Gmail.
- Bug in Outlook: An error within Outlook itself is often the source of this problem. You are unable to add an email account using the Add account option because of the problem.
- Simplified Account Creation Wizard: This is a fairly recent addition to Microsoft Outlook and is known as the Simplified Account Creation Wizard. When a new feature is added to a program, there is a greater potential for the application to have mistakes and defects.
Part 2: How to Fix Cannot Create PST File the Path Is Too Long?
Are you facing the ‘cannot save file path too long’ error again and again? You need a permanent solution for this problem. If you are searching for ‘how do I fix a file path that is too long,’ don’t worry. This guide is specially made for you. Follow the below-mentioned procedures and see which works best for you.
1. Change Default Location for Outlook Data File
Step 1: Press the Window+R keys on your keyboard.
And right-click the lower-left corner to display the menu, and then select Run on it.
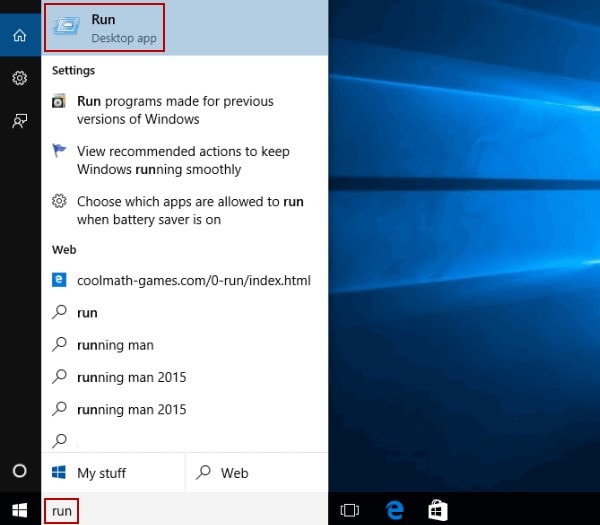
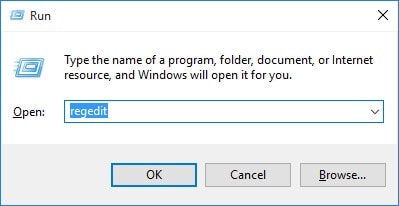
The run box will appear, type ‘regedit’ and click on the ‘OK’ button.
Step 2: Navigate to one of the following keys, depending on your Outlook version, when the Registry Editor opens.
Here, our User name is ‘HKEY_CURRENT_USER’, you can choose accordingly.
Outlook 2016:
USER\Software\Microsoft\Office\16.0\Outlook
Outlook 2013:
USER\Software\Microsoft\Office\15.0\Outlook
Outlook 2010:
USER\Software\Microsoft\Office\14.0\Outlook
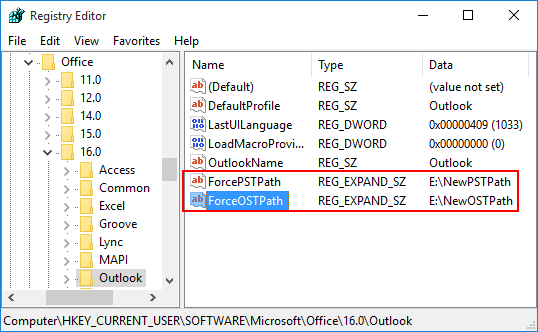
Step 3: Right-click on the blank area (anywhere) on the pane's right side, choose New, and then select Expandable String Value.
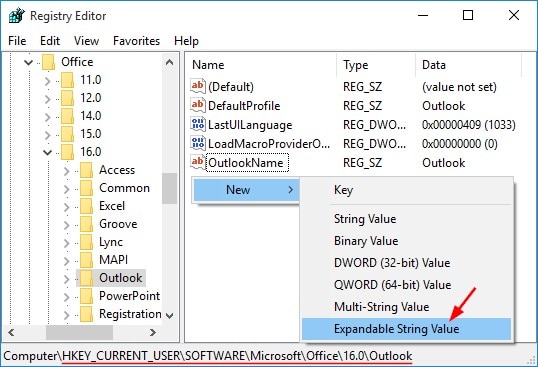
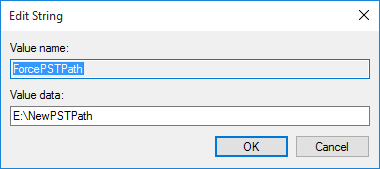
Step 4: Double-click on the newly created value and name it ForcePSTPath.
A prompt box will appear, enter the new default location for the PST file for the Outlook new profile, and then select OK.
Note: Create an expandable string value and enter the value ForceOSTPath to alter the default location folder for .ost files created by exchange accounts.
Step 5: Now close the Registry Editor tab and relaunch Microsoft Outlook.
From now whenever you make a new email account, Outlook will now create a new PST file in the newly selected default location.
Note: Existing .pst files will not be affected by this method. Follow these steps to change their location:
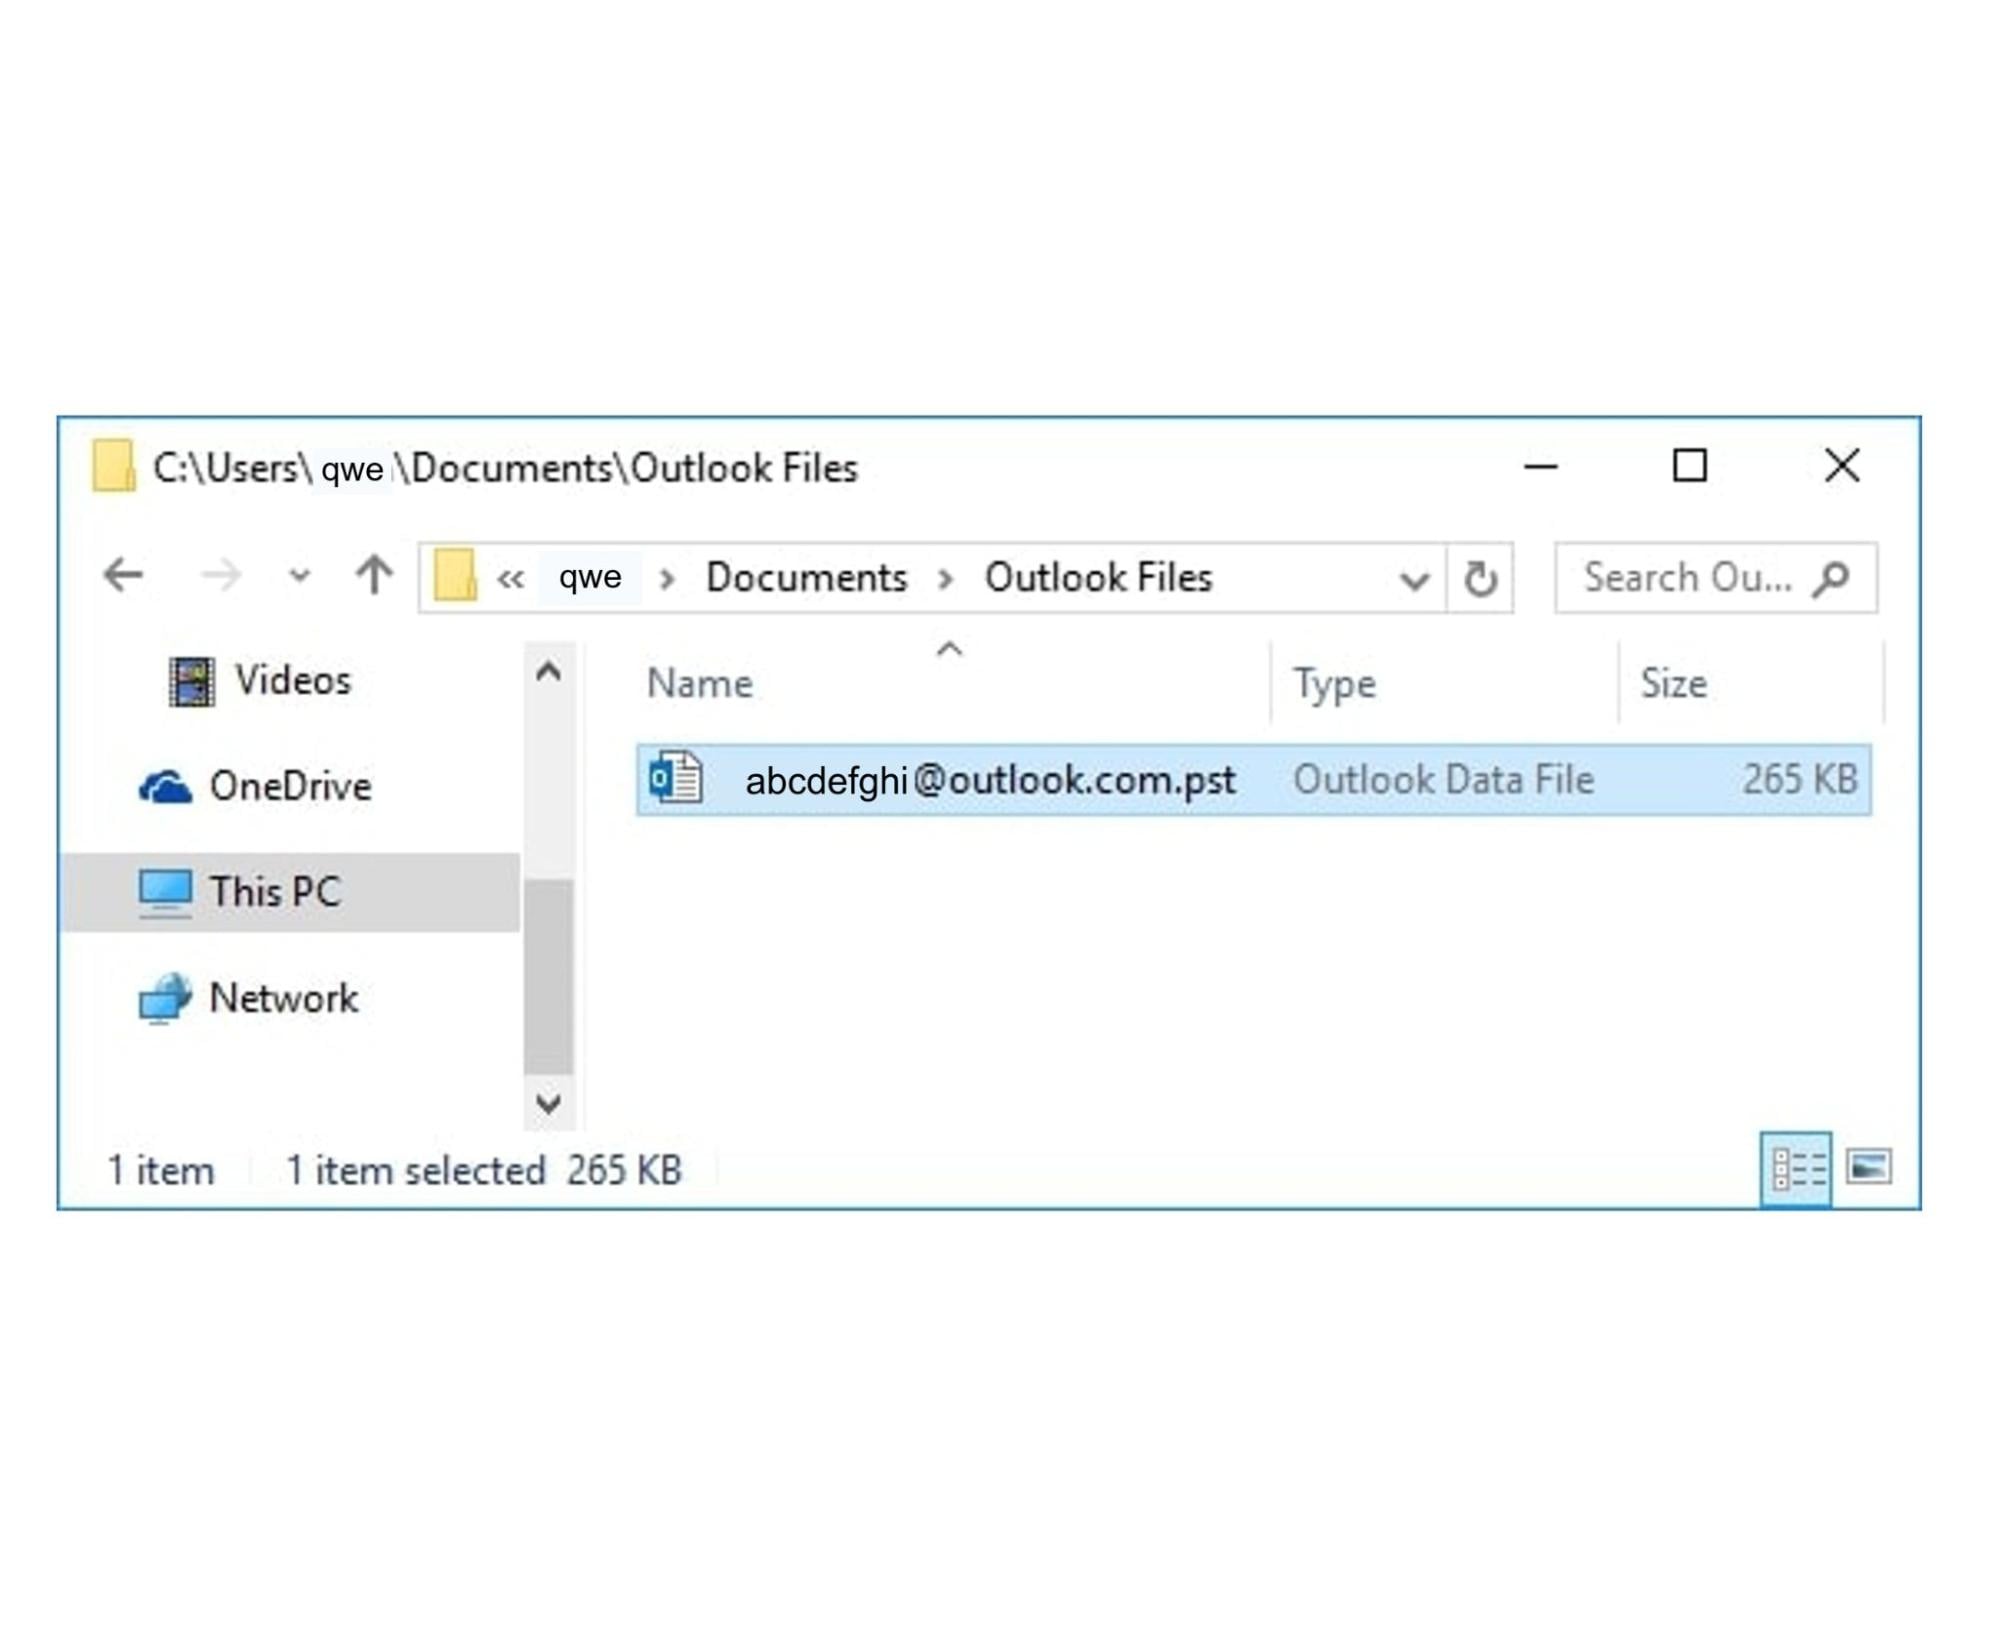
Step 1: Exit the Outlook programme. Locate and copy your .pst file to a new location in Windows Explorer.
Step 2: Restart Outlook.
An error message appears informing you that an Outlook Data File (.pst) could not be found. Select OK.
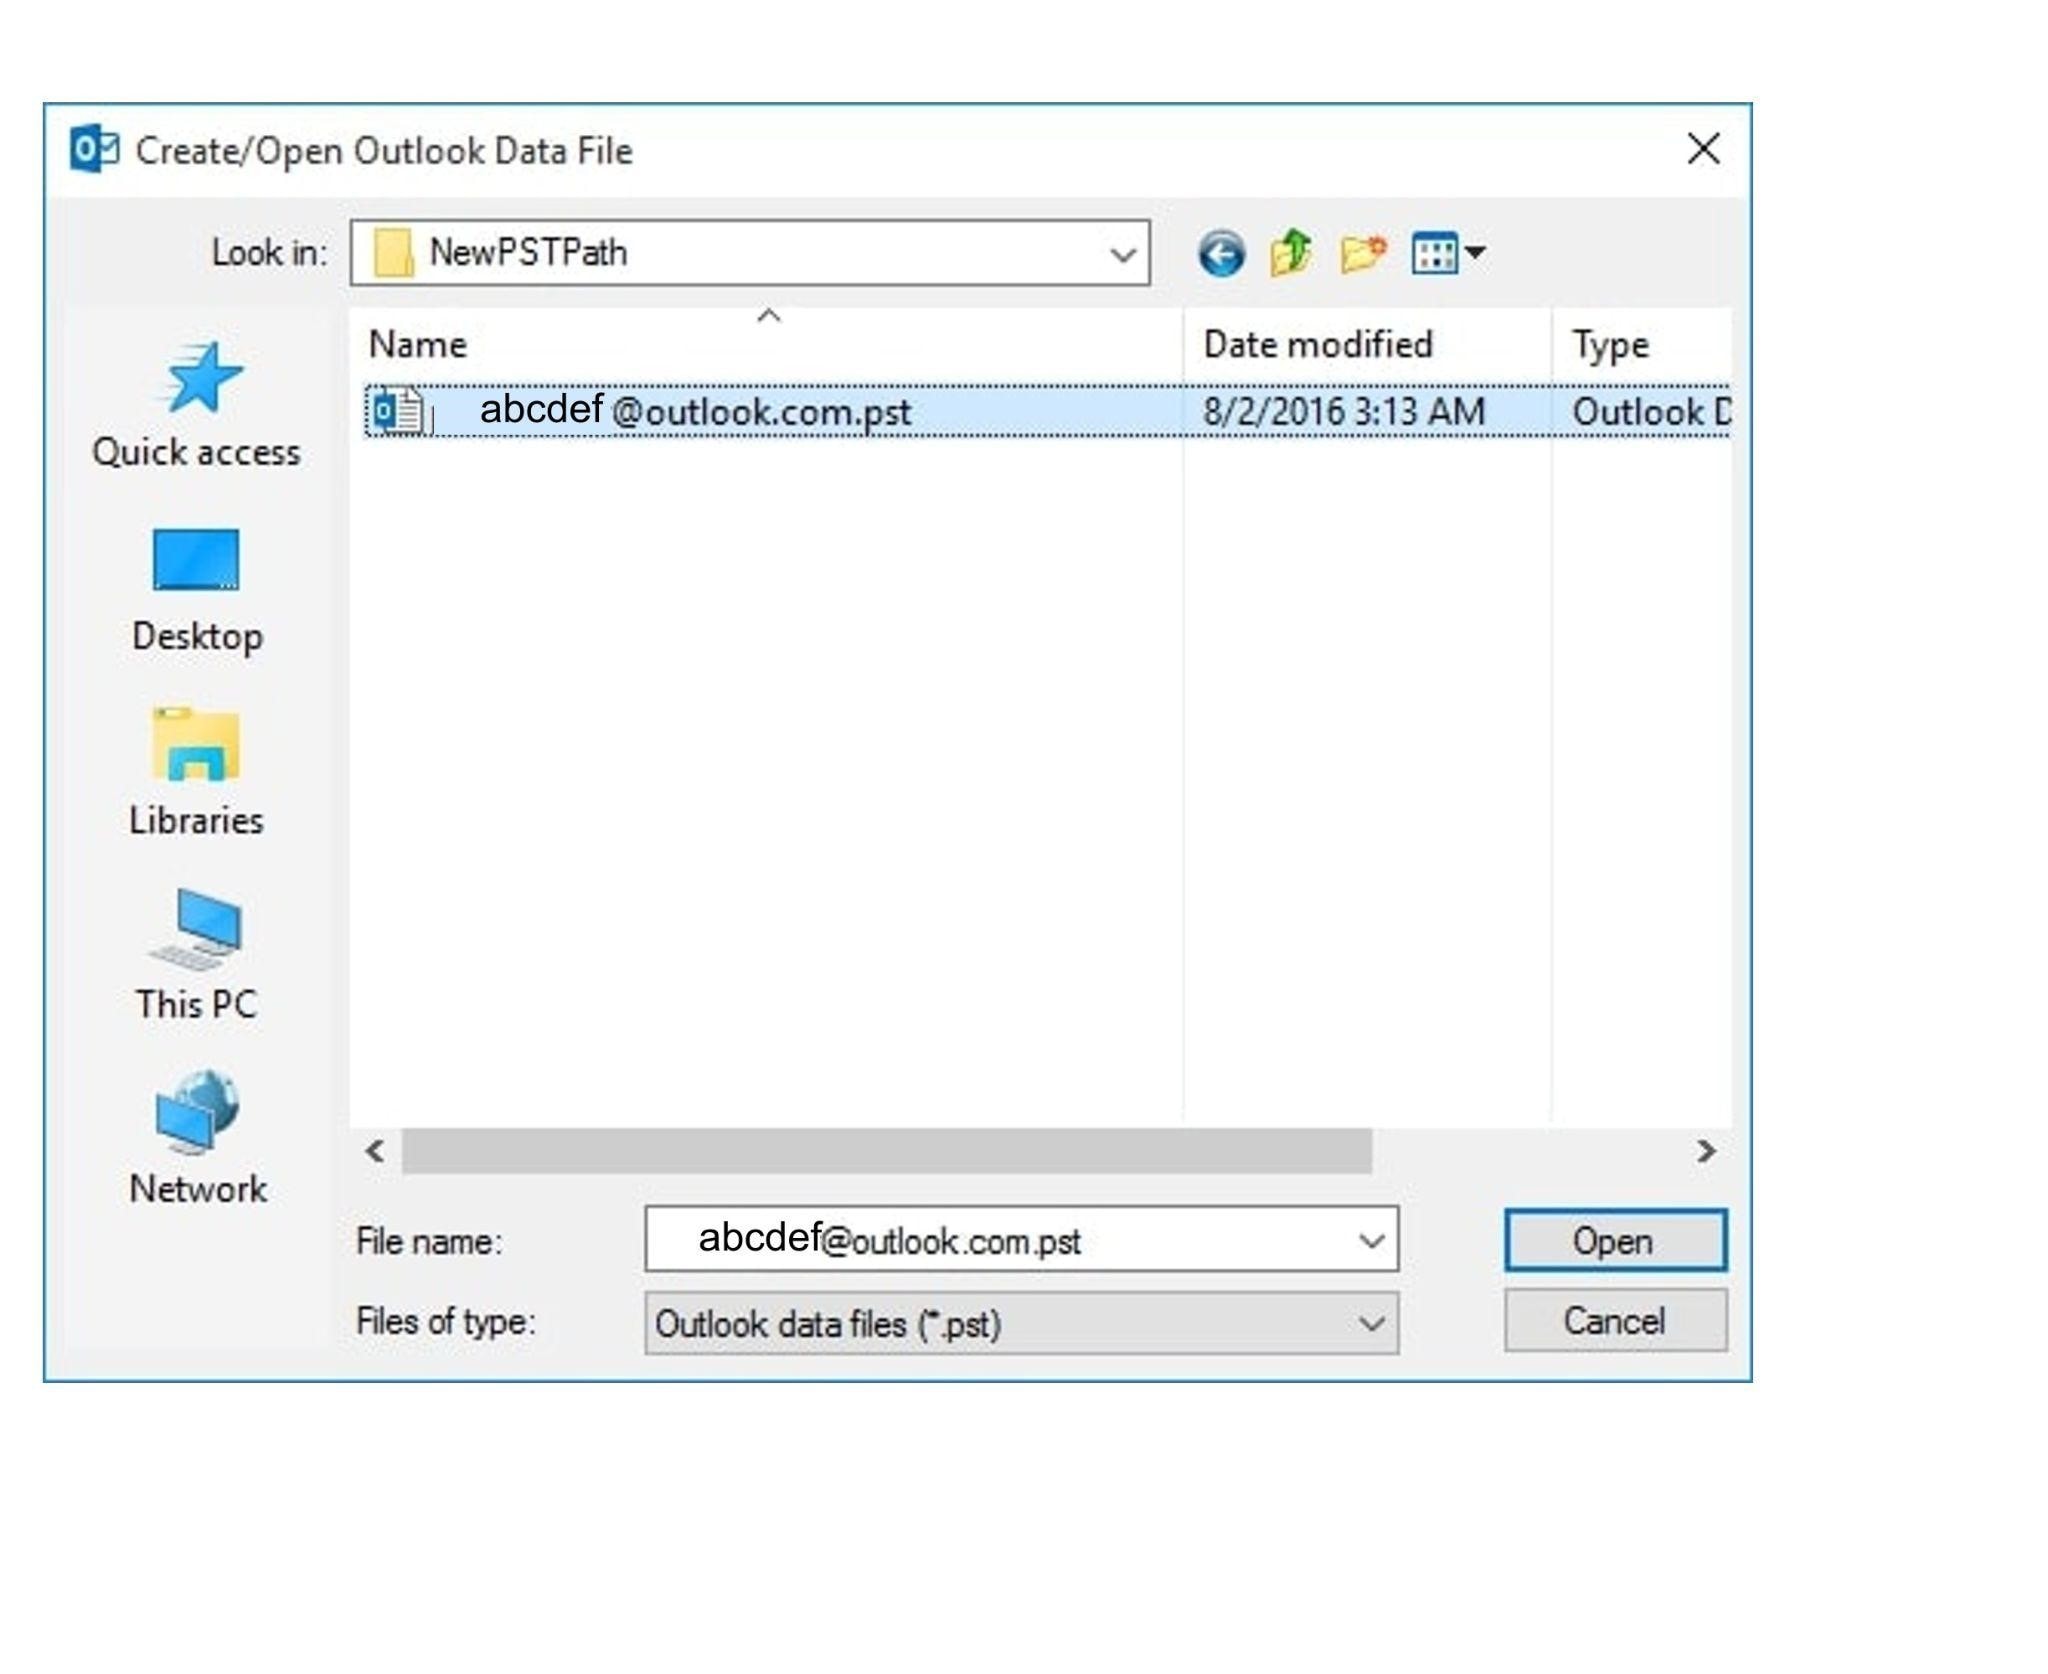
Step 3: The Create or Open Outlook Data File prompt box will appear.
Navigate to the new location, select the moved Outlook Data File (.pst), and then click Open.
Step 4: When you see a warning message, simply click OK to dismiss it.
You have now successfully relocated your existing pst file to a new location.

2. Try Repairing the PST Files
If you are still encountering the ‘cannot save file path too long’ error, there must be problems with the pst files. You should then focus on repairing the pst files. One of the easiest and most effective ways to repair pst files is using a tool.
Wondershare Repairit for Email is a top-notch software used for fixing Outlook email-related errors. Though this is an ideal tool to repair Outlook email issues, I can’t guarantee you get a 100% resolution for this problem, but if PST/OST files are corrupted, you’ll get desired results.
Why do I recommend this tool? Here’re the reasons.
Repairit for email is an exclusive tool that helps in recovering deleted emails, supports PST and OST formats, Windows and Mac systems, and options for previewing before saving emails. Here are some of the features that make Repairit for email best, among others:

-
Repair damaged PST & OST Files in Outlook in all Email corruption scenarios, such as hard disk crashes & bad sectors, virus attacks & tojan horse, outlook corruption & malfunctions, improper shutdown procedure, etc.
-
Restore Outlook Emails deleted for a long time and extract the Email messages, folders, calendars, etc. within seconds.
-
Repair corrupted Emails and restore deleted Emails with a very high success rate.
-
Repair Emails in bathes without size limits and support to preview all of them before saving.
-
Compatible with Windows 7/8/8.1/10/11, Windows Server 2012/2016/2019, and MacOS X 10.11~ MacOS 12 (Monterey).
Quick 3-Step Process To Repair Corrupted Emails:
No matter how bad your emails are corrupted or damaged, Repairit for Email can repair them in just 3 steps:
Step 1: Add PST/OST files that are corrupted or inaccessible.
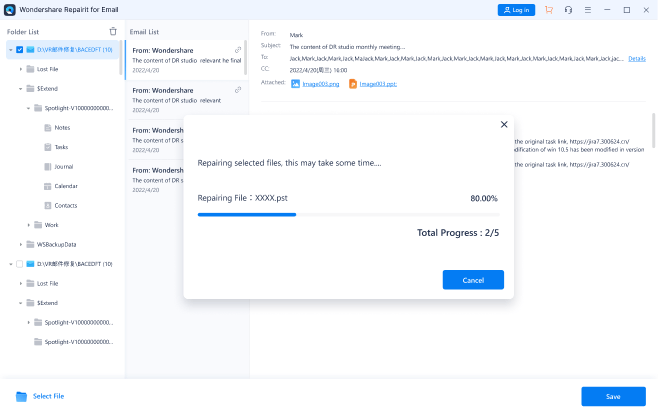
Step 2: Click the Repair button to start repairing corrupted files.
Step 3: Preview repaired files and select desired location to save.

Part 3: How to Create a PST File in Outlook?
Personal Storage Table (PST) files are the offline files that include the items of an email account. This file can keep all information controlled using the Outlook client. Nevertheless, if you intend to make one for yourself, you must configure a few settings.
This section will focus on the free methods that describe how to create a PST file in Microsoft Outlook. Consider the following approaches for properly creating a PST file from scratch:
Method 1: Use Outlook Cleanup Tool To Move Mails To PST File
The first technique that can be considered for creating a PST Outlook file is utilising the platform-wide Cleanup Tool. To follow the procedures for this procedure, you must consider the following information:
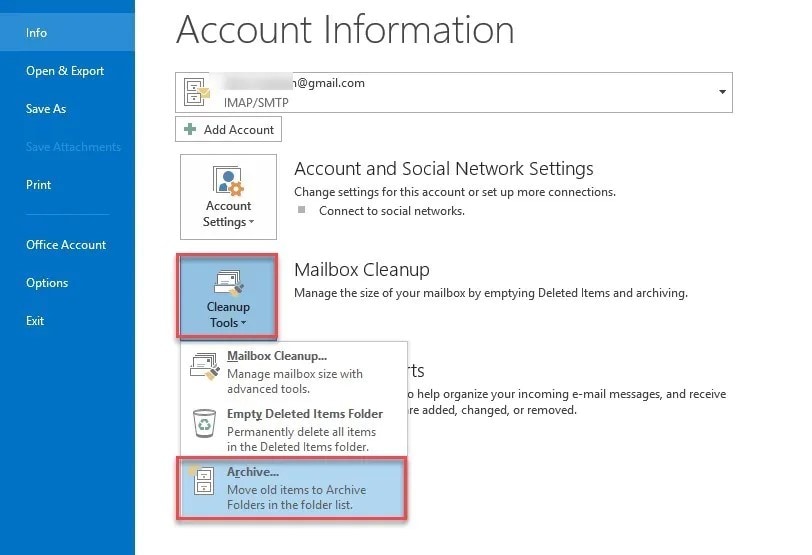
Step 1: Launch Microsoft Outlook and navigate to the ‘File’ tab of the application's interface.
Search for ‘Info’ in the left-hand navigation pane. Then, pick ‘Archive’ from the drop-down menu of the ‘Cleanup Tools’ option.
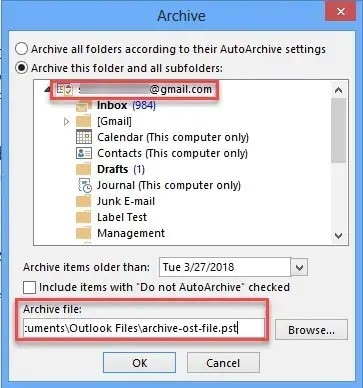
Step 2: This will prompt a new window. You must pick all the files and folders you desire to migrate to the PST file.
Click ‘Browse’ to specify the location of the PST file after choosing all of the necessary objects for this purpose. Once you've configured all of the default Outlook PST settings, click ‘OK.’
Step 3: The PST file is stored in the place you specify during the procedure.
This is how to produce a PST Outlook file using the Cleanup Tool successfully.
Method 2: Directly Export Mailbox
Direct exporting is another simple and effective method for producing a PST file from scratch. You must export the entire mailbox to a PST file using one of the available choices. If you wish to learn how to generate a PST file in Outlook, you must take the following steps:
Step 1: Launch Microsoft Outlook on your computer and confirm that the correct email account is selected.
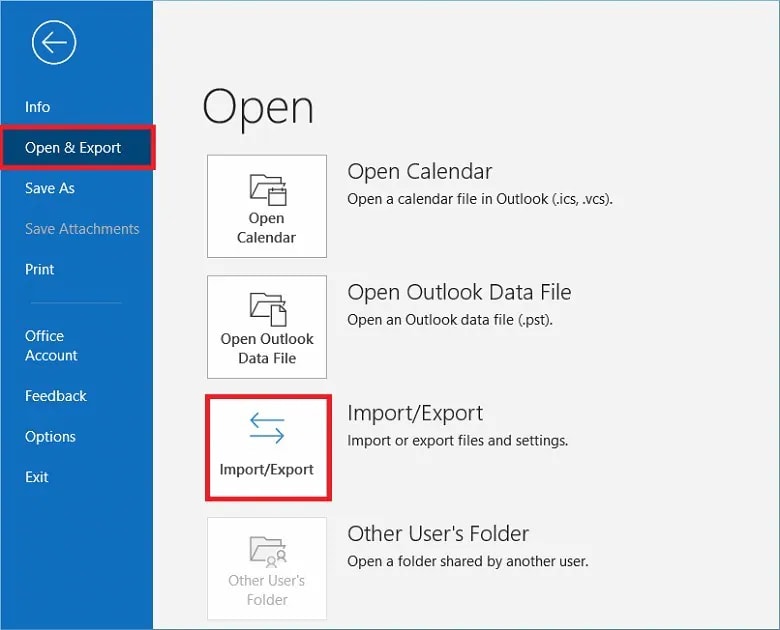
To enter the new area, click the tab labeled ‘Files.’ Go to the ‘Open & Export’ section and select ‘Import & Export’ from the options provided.
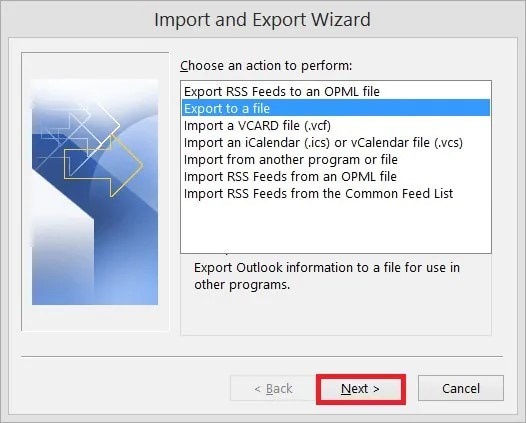
Step 2: A new window pops up. Select ‘Export to a file’ from the list and click ‘Next.’
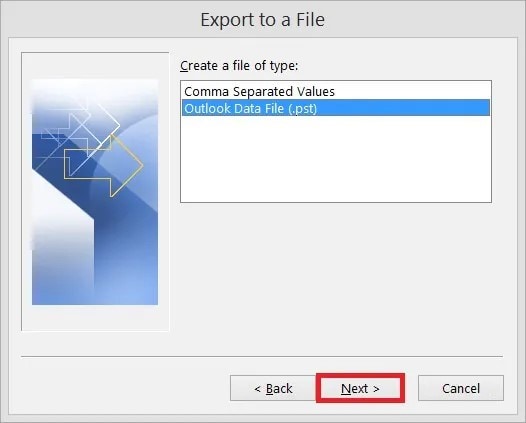
Step 3: Select ‘Outlook Data File (.pst)’ from the available options on the subsequent screen.
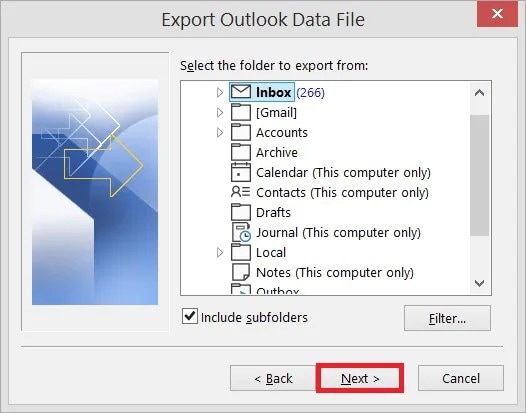
Step 4: Determine whatever files and folders you want to export to your PST file. After selecting, click ‘Next.’
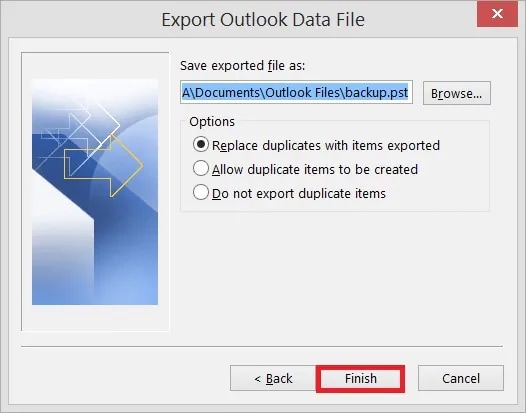
Step 5: The last option for creating a PST file requires you to set the file's location on your computer.
Navigate to the location and choose a suitable alternative for the duplicate items in your Outlook account. To end the process of creating a new PST file, click ‘Finish.’
Method 3: Enabling Auto-Archiving Option On Outlook
If you are looking for proven methods that explain how to easily create PST files, Auto-Archiving is a great option. This method saves everything from the OST file across Exchange into a PST file.
Archiving is thought to be the best way to save older messages and emails in a separate PST file, saving space across the email account. Follow the steps below to learn more about how to create a PST file in Outlook:
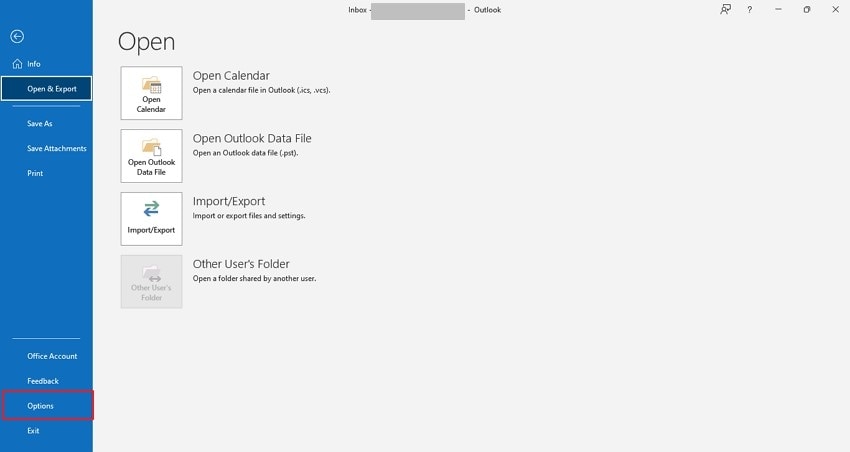
Step 1: Open Outlook on your PC and go to the ‘File’ tab.
To access the settings for your Outlook account, locate the ‘Options’ area in the left pane.
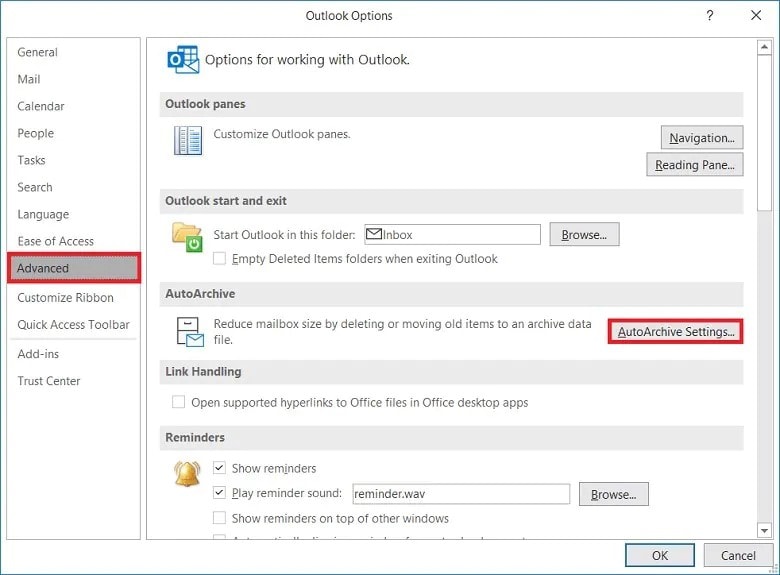
Step 2: As soon as a new window appears, look to the left of the window for the ‘Advanced’ area.
After finding it, select ‘AutoArchive Settings.’

Conclusion
This guide is ideal for those who are looking for an answer to ‘how do I fix a file path that is too long.’ Here are different methods, and each step is clearly defined and explained.
You can use Wondershare Repairit for Email to get rid of Outlook problems. We hope this guide has helped you resolve the ‘cannot create pst file the path is too long’ error.