

 TL;DR:
To resolve Outlook email forwarding failures, properly configure automated message routing via the Rules and Alerts menu or repair corrupted underlying data files that block message transfers.
● Configure auto-forwarding in Outlook Desktop by navigating to Rules then Manage Rules and Alerts, creating a blank rule for received messages, and selecting the option to forward or redirect to specific people or public groups.
● Fix unreadable or damaged PST and OST files causing forwarding errors using Wondershare Repairit for Email, which recovers corrupted local data without size limits across Windows 7 to 11, Windows Server, and macOS 10.11 to 12.
● Halt active email forwarding immediately without deleting your configuration by returning to the Manage Rules and Alerts menu and unchecking the box next to the active routing rule.
Ask AI for a summary
 ChatGPT
 Perplexity
 Gemini
 Claude
 Grok
Grok
Is your Outlook forwarding not working? With the help of forwarding, an email message can be sent from one email address to another. To automate the forwarding procedure, Outlook has simple set-it-and-forget-it options.

This article will show you how to forward emails from your Outlook account. Outlook.com may automatically transfer incoming messages to another email account (at Outlook.com or elsewhere). Set it up to forward all incoming emails. Alternatively, utilize message rules to ensure that only email messages that meet particular criteria are forwarded. This article's instructions apply to Outlook on the web.
Part 1: What Is Email Forwarding in Outlook?
Email forwarding in Outlook enables you to resend or forward an email message sent from one email address to another. This service may also be used to automatically route emails from a specific email address to a different destination.
As a result, you may direct emails from clients to your selected address. It becomes necessary when you are unable to manage emails at the office. Many users face outlook email forwarding not working issues. To fix this issue, keep on reading this article.
Part 2: How Can You Enable Forwarding in Outlook?
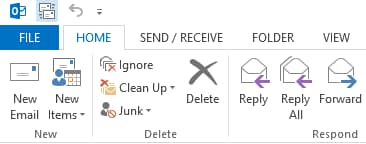
Step 1. Go to the File.
At the upper left of your screen, select File.
Step 2. Launch the Rules and Alerts dialogue box.
At the bottom of the Account Information menu, click the Manage Rules & Alerts option.

Step 3. Make a new rule.
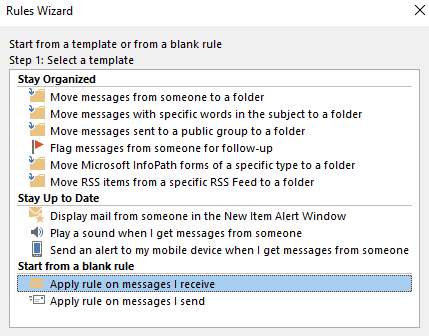
Select the New Rule... option.

Step 4. Use the rule on all messages.
Choose 'Apply the rule to communications I receive' and then press Next. On the next screen, do not choose any choices and then click Next.
Select Yes when asked if you want the rule to apply to every message you receive.

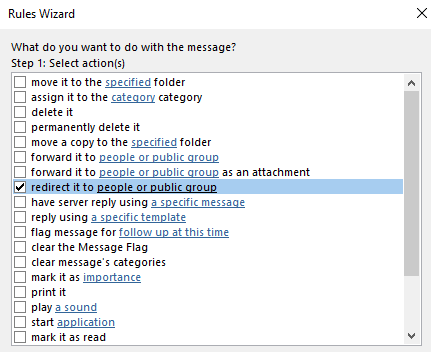
Step 5. Set who to forward your mail to.
Determine who will get your letter by checking the box next to redirect it to persons or public groups. This sends a copy of the message to another user while maintaining a copy in your Inbox.
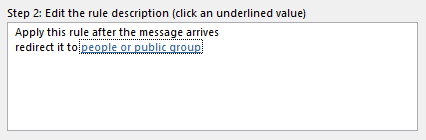
Under Step 2, Click the 'people or public group' link and choose the user from the address list to forward. Click Next.
Click Next if you do not want to add exceptions to the rule (i.e., all mail will be sent).
Step 6. Make the forwarding rule active.
Give your rule a name, and then press the Finish button. The rule is now enabled. Select OK.

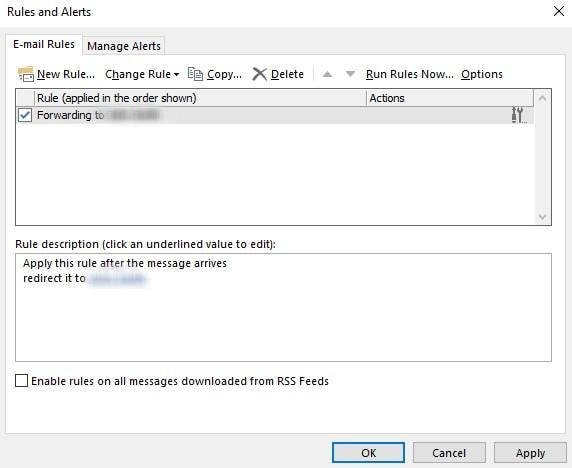
Step 7. Disabling forwarding.
From the File menu, select Manage Rules & Alerts. Uncheck the box next to the forwarding rule in the list of rules and click OK.
Part 3: Forward Emails in Outlook Desktop Automatically
First, we'll review how to use Outlook's desktop edition to auto-forward emails. To do so, follow these steps to establish a rule:
Step 1: Launch Outlook.
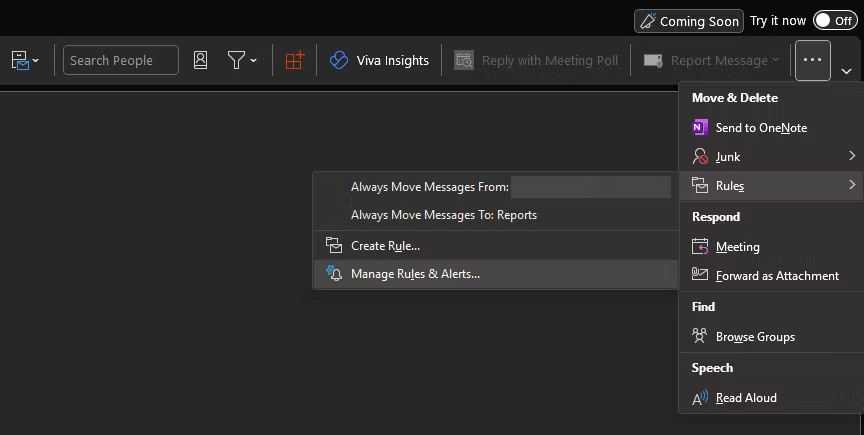
If you're using the thin Simplified Ribbon, go to Rules > Manage Rules & Alerts. Go by clicking the three-dot button on the far right of the Ribbon. Locate the Move section and select Rules > Manage Rules & Alerts if you're using the bigger Classic Ribbon.
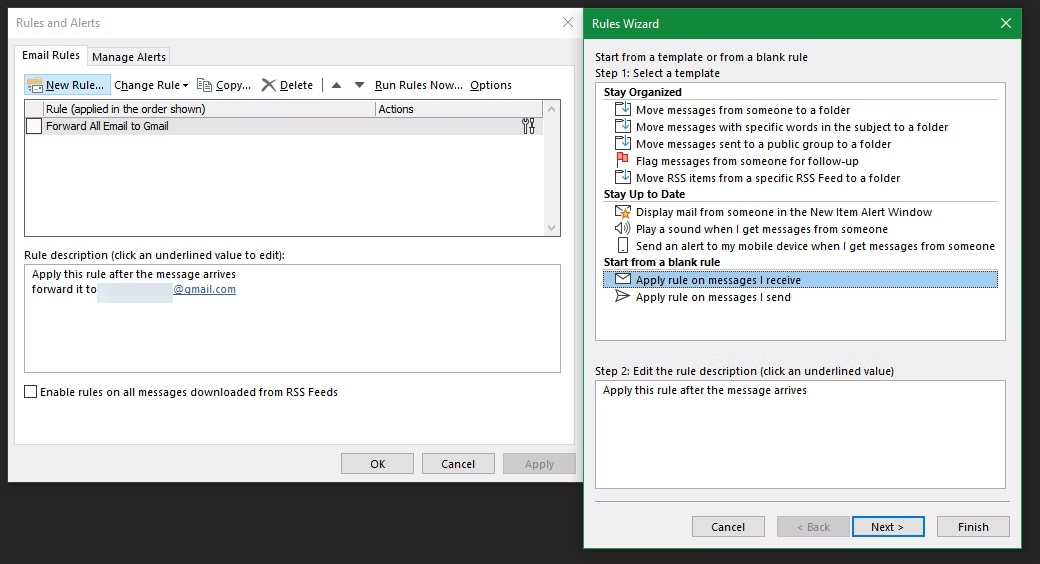
Step 2: Click New Rule in the resulting window.
Step 3: Choose Apply rule on messages I receive in Start from blank rule section. Click Next.
Step 4: Choose the criteria for the kind of messages you wish to send.
If you wish to forward all emails, leave the boxes on this page empty. If you receive a dialogue box warning that this rule will apply to all communications, click Next.
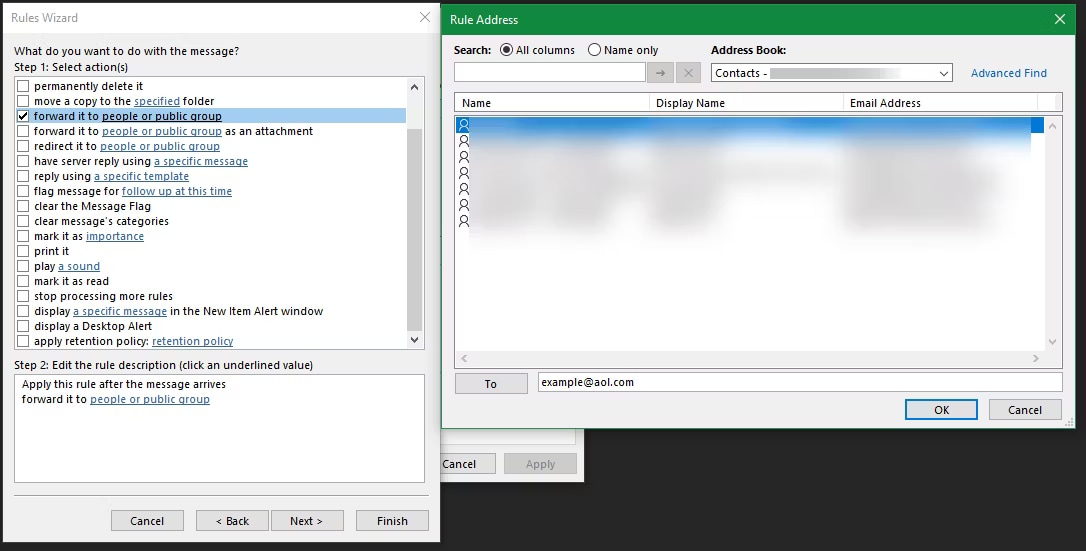
Step 5: Select Forward it to persons or public groups in Step 1 of the following window.
(Alternatively, you may forward it as an attachment to persons or public groups.) Then, in Step 2, select People or Public Group from the drop-down menu.
Step 6: Enter an email address in the To box at the bottom of the Rule Address box to forward all emails to that address.
Instead of inputting addresses manually, you can pick addresses from your contacts in the upper field. You can enter as many addresses as you like. When finished, click OK, then Next on the Rules Wizard box.
Step 7: Following that, you may specify which emails you wish to exclude from this filter.
You don't have to do anything, but you may filter emails from specific senders or messages containing specific terms, for example. When you're finished, click Next.
Step 8: Finally, give your rule a name so it can be easily found in the future.
Then, check the box next to Turn on this rule and click Finish. See the Run this rule immediately on messages already in the "Inbox" box. You may do so if you also wish to forward the matching emails to your Inbox.
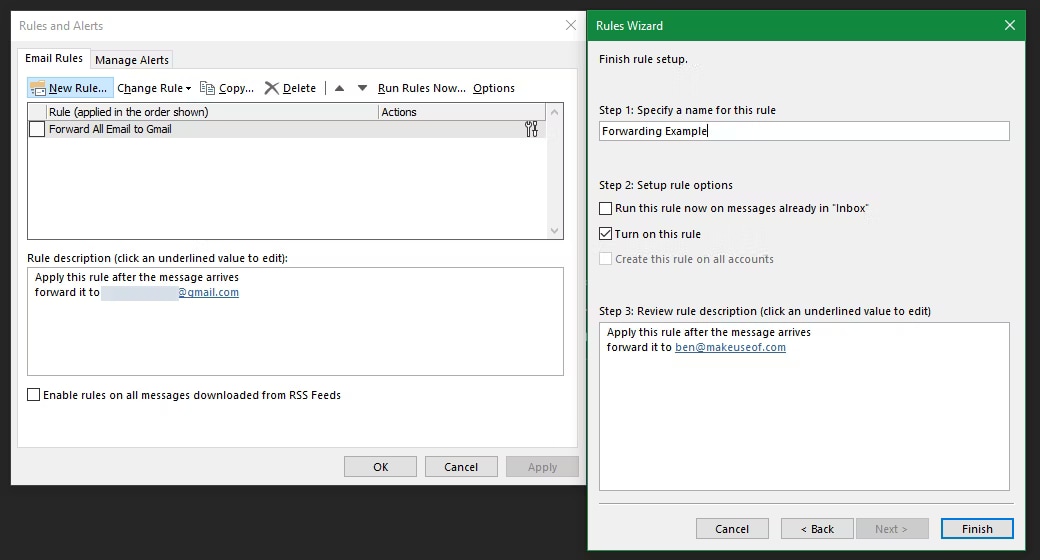
You have completed the process of forwarding your Outlook emails to Gmail (or any other email address). Every email you receive (or just those that match the criteria you provide, if any) will be sent to the address you choose.
To stop Outlook emails from being forwarded, return to the Home page and select Rules > Manage Rules & Alerts. Now, uncheck the box next to the rule you wish to disable. You can enable or disable forwarding at any moment by toggling this option.
Part 4: Make Sure Your OST/PST files Are Not Damaged
Have you tried opening your Outlook file but failed? This indicates that your PST has been corrupted, and you'll be unable to read your emails. A third-party repair program can be used to address PST corruption issues. Here I recommend Repairit for Email.
Wondershare Repairit for Email is a high-quality repair program that allows you to restore broken PST files of any size. Repairit for Email is an Outlook repair application that beats the competition by supporting both PST and OST file types.

-
Repair damaged PST & OST Files in Outlook in all Email corruption scenarios, such as hard disk crashes & bad sectors, virus attacks & tojan horse, outlook corruption & malfunctions, improper shutdown procedure, etc.
-
Restore Outlook Emails deleted for a long time and extract the Email messages, folders, calendars, etc. within seconds.
-
Repair corrupted Emails and restore deleted Emails with a very high success rate.
-
Repair Emails in bathes without size limits and support to preview all of them before saving.
-
Compatible with Windows 7/8/8.1/10/11, Windows Server 2012/2016/2019, and MacOS X 10.11~ MacOS 12 (Monterey).
This application allows you to recover and preview mended emails before saving them. Furthermore, it is one of the few repair programs that can be used on both Mac and Windows machines. It also attempted to offer answers to numerous email corruption scenarios.
Repairit for Email restores badly damaged PST files in three simple stages. So, let's go through the steps.
Step 1: Launch Outlook and import Outlook PST files.
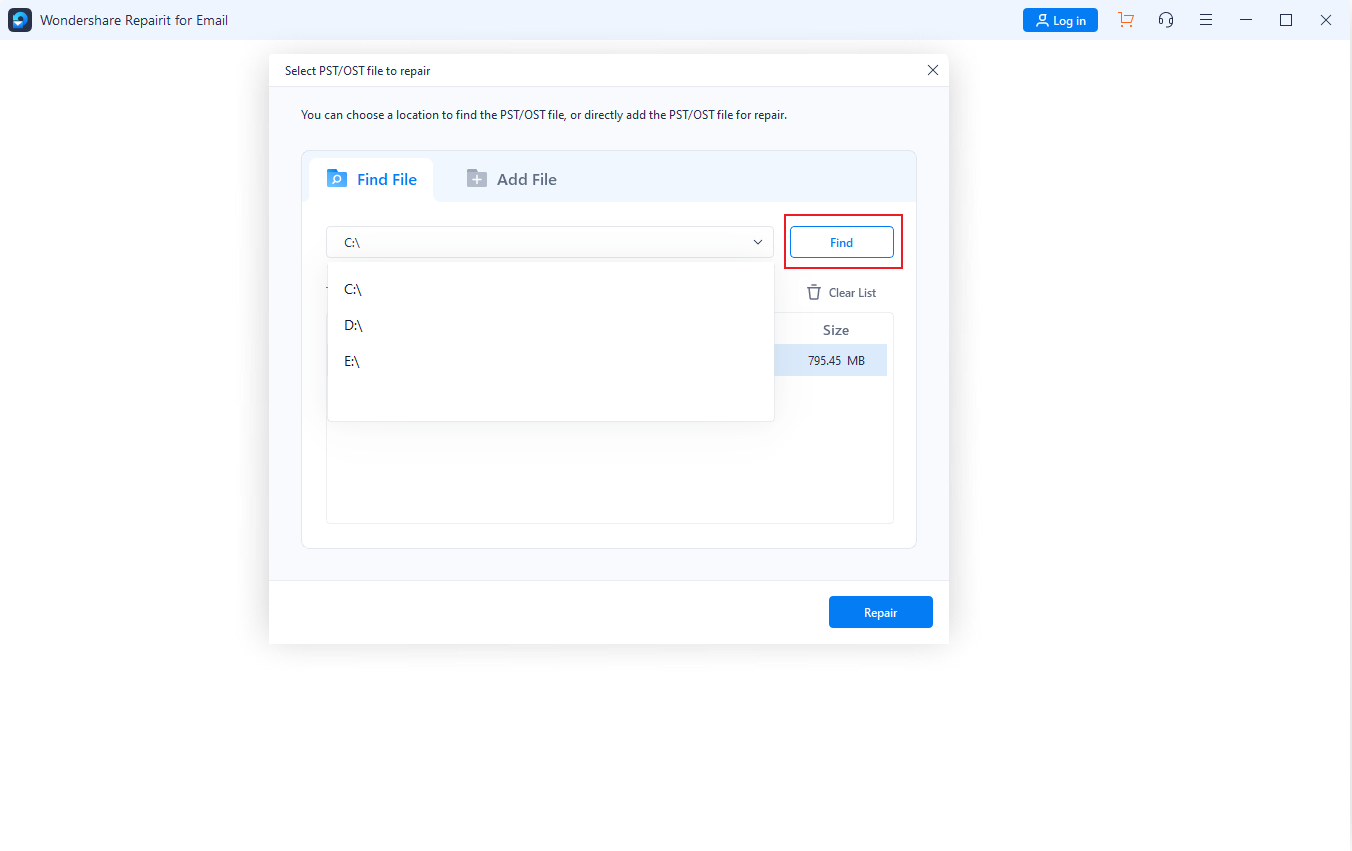
When you run this tool, you will see the Repairit for Email interface, with options to pick PST or OST emails. Then, click "Select File" to begin uploading the damaged emails.

Start the program, navigate to the email repair area, and then add PST files.
To upload the corrupted PST files, click the "Find" option.
Step 2: Begin Outlook Repair.
To begin the repair procedure, click the "Repair" button.
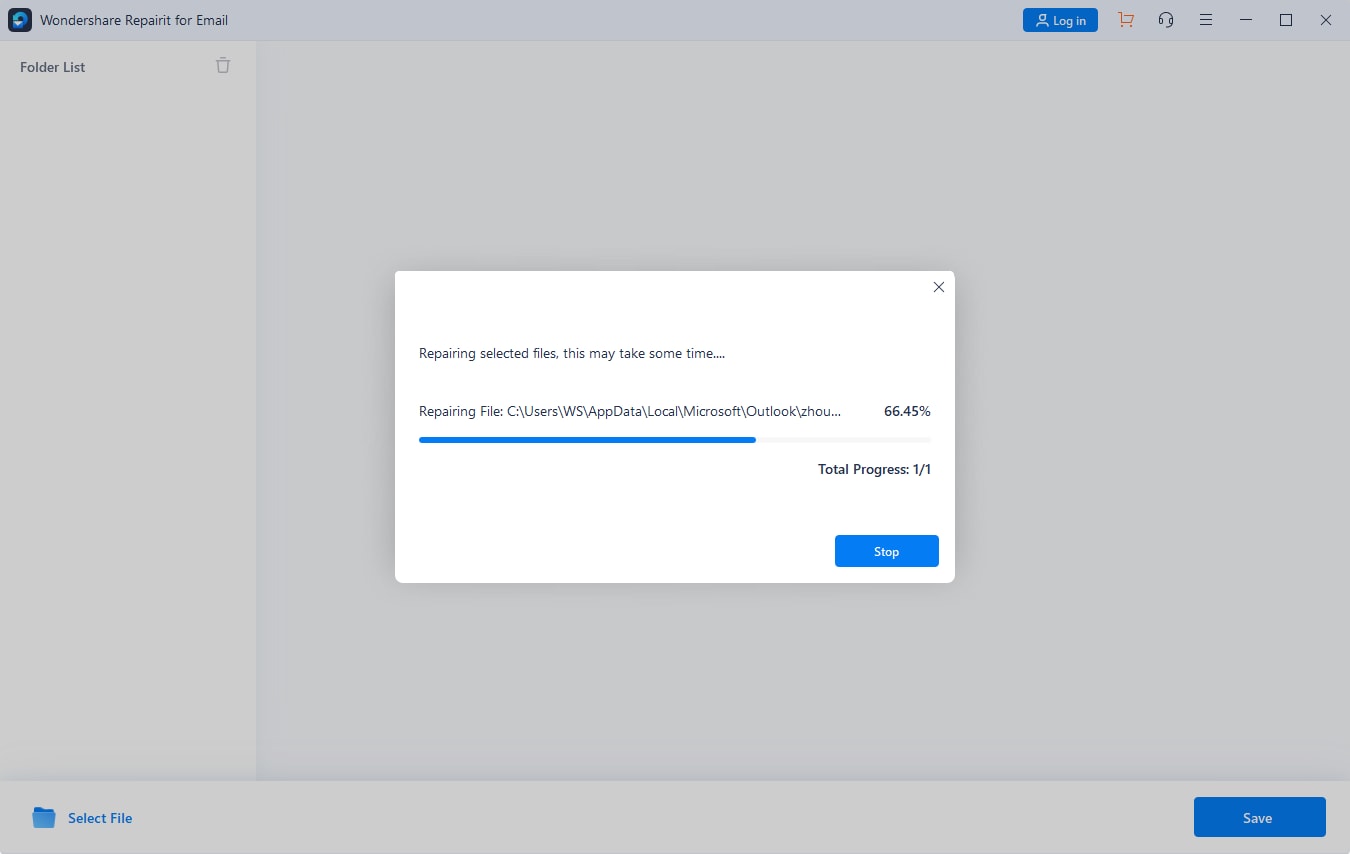
It will take a few minutes to finish, but you can keep track of the process on the Wondershare Repairit window.
Step 3: Examine and save the Outlook corrected files.
When the repair is finished, the pane displays the corrected Outlook PST data. You may examine all information and save them locally by clicking the "Save" button.

Part 5: Frequently Asked Questions
-
Q1. In Outlook, how do I archive emails?
-
A1: To manually archive emails in Outlook, click on File > Info > Tools > Clean Up Old Items. Choose Archive this folder and all subfolders, then go to the folder containing the contents you wish to save. Choose your archive date range and click OK.
-
Q2. In Outlook, how can I remove several emails?
-
A2: To remove numerous emails in a folder in Outlook, use Ctrl+A to select all the messages > Delete. To delete a group of messages, pick the first message > Shift > scroll to the final message > Delete.
-
Q3. How can I do an email search in Outlook?
-
A3: Enter your search word in the search field above the Outlook ribbon. Select All Mailboxes, Current Mailbox, Current Folder, Subfolder, or All Outlook Items to define search locations. Choose factors like To, From, Subject, and Unread to refine search results further.
Conclusion
Because of the level of competitiveness in the industry, email forwarding has become important. Businesses must employ creative strategies to remain competitive. One method is to provide high-quality customer service. If your outlook 365 forwarding rule is not working, you can try out this method to fix things.
If your emails are corrupted and damaged, you can use Wondershare Repairit to fix your files. It is a powerful tool that can recover and repair your emails quickly and efficiently.