Finding it difficult to get email because Outlook 365 autodiscover is not working? Many Outlook users reported problems while configuring their Exchange Mailboxes on their domain. Occasionally, the problem does not manifest itself, but the Outlook mail account becomes corrupted and cannot be configured. This usually occurs when your Autodiscover record is a problem.
Part 1: What is Autodiscover not working?
Autodiscover is a Microsoft-exclusive feature that connects Outlook to Microsoft's Exchange Server. When users sign up and use Outlook 2007 or later, the application automatically connects their profile to Microsoft Exchange's server. Granting them access to Exchange's offline contact directory, shared calendar, shared task management, and so on.
It effectively connects Outlook, which serves as a mail client, to Exchange, which serves as a mail server. Exchange's mail server properties allow it to have a dedicated resources management network, which allows it to link and sync important directories and entries all at once.
If Autodiscover becomes faulty or ceases to function, the link between Outlook and Exchange is severed. This results in the inability to read the information on the network, access shared files and mailboxes, and so on.
So, if you're experiencing any of these symptoms, such as being unable to sync with clients or peers via your Outlook account. Here's what you can do to resolve the problem.
Part 2: Possible causes of the Outlook Autodiscover not working issue
- The email address you're using for Auto Account Setup needs to be corrected.
- The updates required for Exchange Online (Office 365) must be installed on your MS Outlook version.
- Some critical attributes, such as Proxy Address, Display Name, Mail Nickname, and Mail, are not configured in on-premises Active Directory.
- The CNAME record is either incorrectly configured or does not exist.
Aside from these errors, you may experience a variety of symptoms related to the autodiscover problem - Outlook will not connect to the mailbox.
- The public folders are inaccessible.
- Auto-mapping does not work within a shared mailbox.
- It is not possible to share an invitation.
- Problems with calendar entries.
Part 3: Fixes to Start Outlook Autodiscover Work Again
Fix 1: Change entries in Registry Editor
If the first method fails, users can try this one. If you know how to use registry editing, it is a powerful and effective way to fix problems.
Follow the steps below to resolve the outlook 365 autodiscover using the registry fix:
Step 1 Hold down the "Windows" and "R" keys at the same time.
Step 2 In the window, type "regedit."
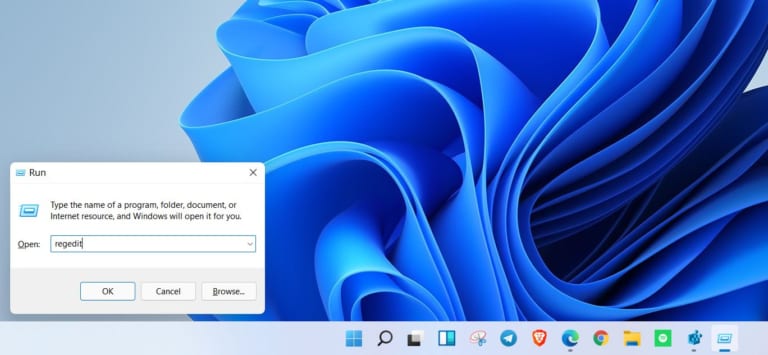
Step 3 Before proceeding, make a backup copy of the Registry by: File>>Export>> Back up your data.
Step 4 Paste "HKEY CURRENT USER/Software/Microsoft/Office/16.0/Outlook" into the address bar.
Step 5 Users will find the "Autodiscover" head below the "Outlook" head.
Step 6 Right-click on the right pane and NEW>>DWORD (32-bit) Value and name it "PreferLocalXML".
Step 7 Double-click the new "PreferLocalXML" and change its Value data: to "1".
Step 8 Create more DWORDS with the given names and set them to the value:
- ExcludeHttpRedirect - set to 0
- ExcludeHttpsAutodiscoverDomain - set to 1
- ExcludeHttpsRootDomain - set to 1
- ExcludeScpLookup - set to 1
- ExcludeSrvLookup - set to 1
- ExcludeSrvRecord - set to 1
Step 9 Restart the system after closing the register.
Following the steps below will assist you in creating a duplicate of the Autodiscover function that would otherwise be missing or corrupted.
Make certain that the given values are copied and entered exactly as they are.
Fix 2: Repair the Navigation Pane configuration File
Step 1 Press Windows+R to open the Run Dialog.
Step 2 Enter the following command and press OK.
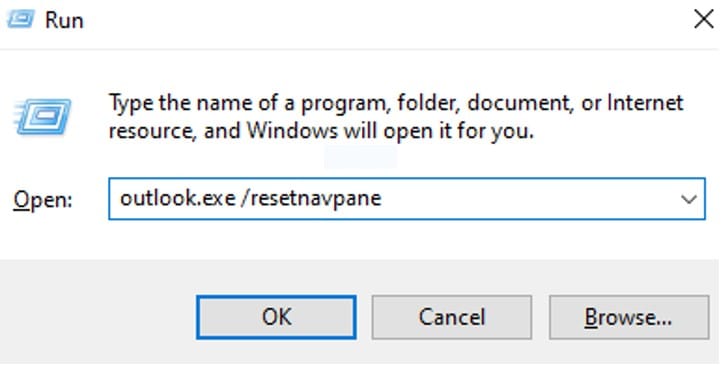
This should repair the Navigation pane configuration file. If you are still seeing the error,
Step 3 To open Windows Explorer, press Windows+E simultaneously.
Step 4 In the address bar at the top, enter the following address and press Enter.
Step 5 Look for it in the Outlook folder.
XML file and then delete it.

Open Outlook to see if the problem has been resolved.
Fix 3: Run Outlook without any Add-Ins
This problem is sometimes caused by certain Add-Ins. To troubleshoot, run Outlook without any add-ins.
Step 1 Press Windows+r on the keyboard at the same time to open the Run Dialog.
Step 2 In the Run dialogue, type outlook.exe /safe and press OK.
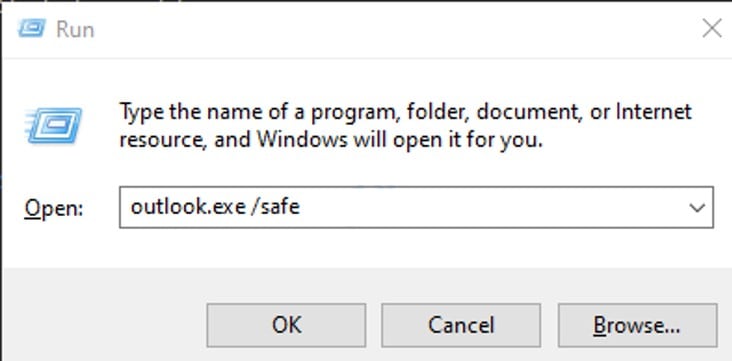
Step 3 Outlook now launches in safe mode, with all Add-Ins disabled.
If the error is not displayed, it means that the problem is caused by an Add-on.
Step 4 Select the File menu item, as shown below.

Step 5 In the resulting window, click Options.
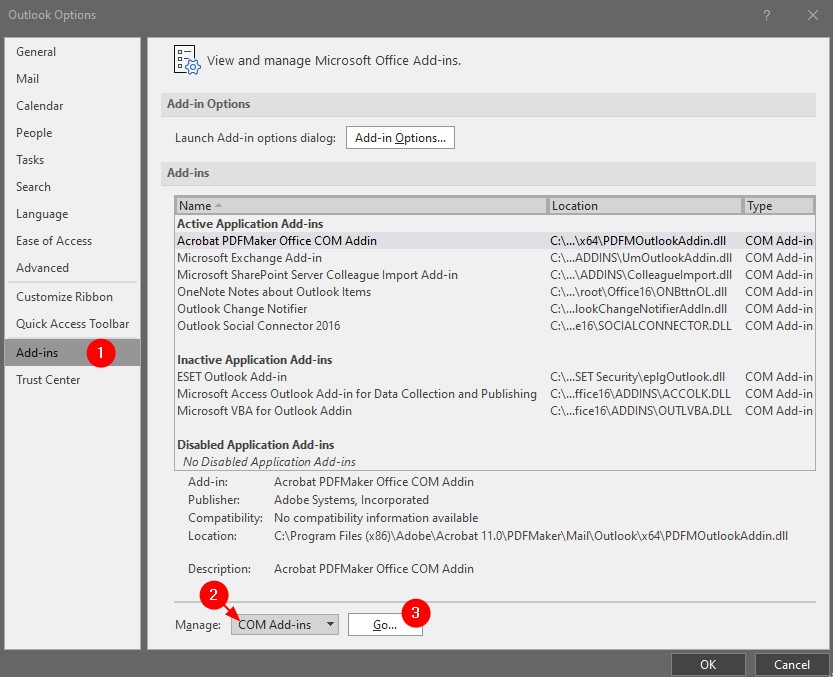
Step 6 From the left-hand side menu in the Outlook Options window, select Add-ins.
Step 7 Select COM Add-ins from the drop-down menu at the bottom of the window and press the Go button.
Step 8 Uncheck all of the plugins listed below and click OK.
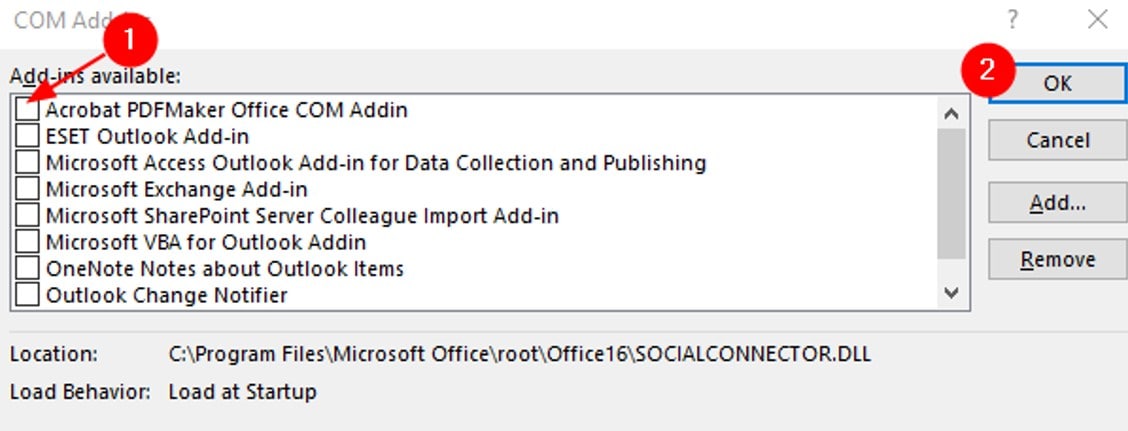
Step 9 Now, enable one add-in at a time to determine which one is causing the issue.
Step 10 Once the add-in has been identified, take the appropriate action.
Fix 4: Quick Repair of MS Office Application
Step 1 Press Windows+r at the same time.
Step 2 Type appwiz.cpl into the Run window and press Enter.
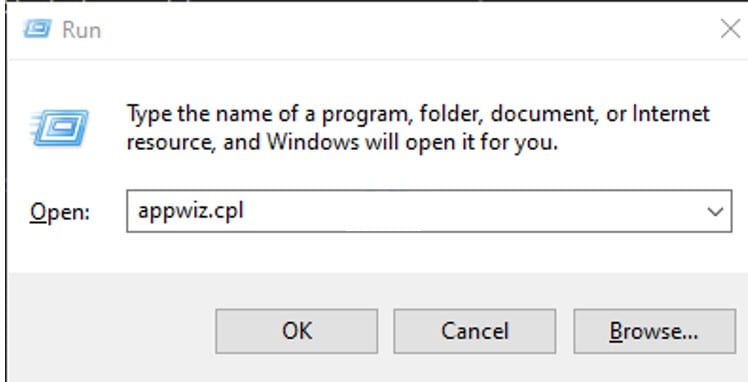
Step 3 In the newly opened Program and Features window, look for Microsoft Office Suite or Microsoft 365.
Right-click it and select Change.
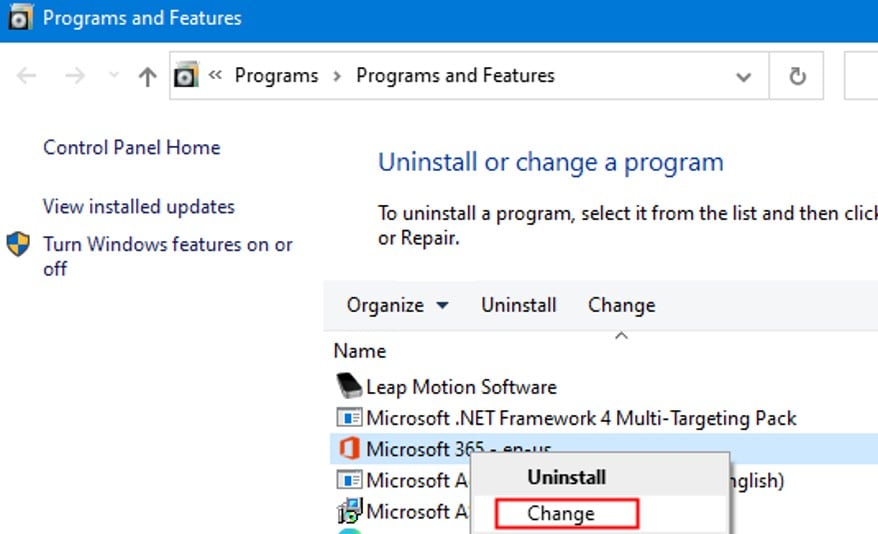
Step 4 If the UAC prompts you for permission, select Yes.
Step 5 Select Quick Repair in the resulting window.
Step 6 Select the Repair option.
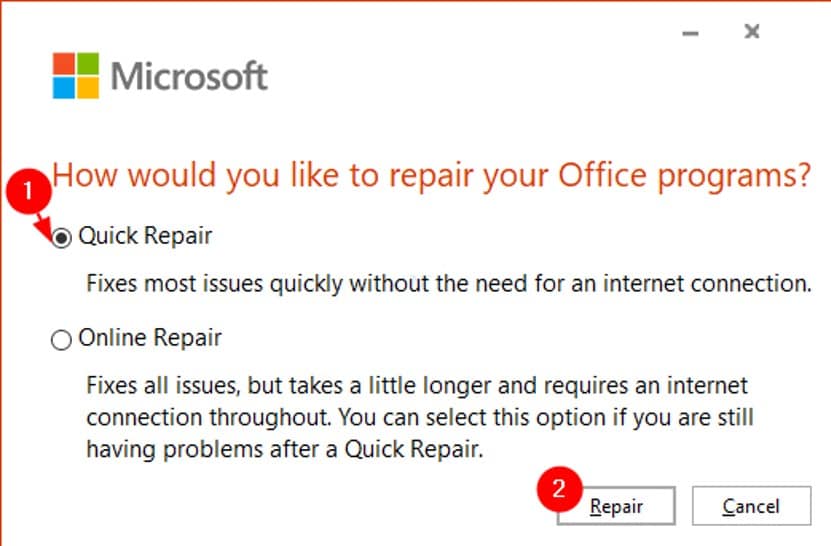
Step 7 Follow the on-screen instructions to repair the Office programs.
Step 8 If a corrupted Outlook application causes the problem, this fix will resolve it.
Step 9 Restart the application to see if the problem has been resolved.
Step 10 If the error persists, select Online Repair and click on Repair.
Check that your internet connection is operational.
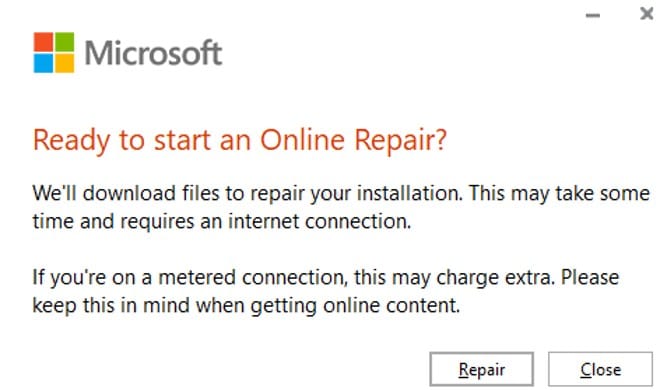
Step 11 Select Repair from the Ready to Begin an Online Repair Dialog.
Fix 5: Repair the .pst or .ost file
When MS Outlook connects to the internet, the contents of this file are updated. This file is in charge of displaying existing emails in MS Outlook when the system is offline. When this file becomes corrupted, synchronization problems are unavoidable. Repairing emails can also resolve outlook auto discovery, not working issues.
There are many ways to fix your emails. But there is a simple and easiest way to fix your emails Wondershare Repairit for Email. It is a powerful and secure program that restores Outlook files without altering their original content. It painstakingly parses faulty email data structures to repair any damaged sections. Download from the below official buttons.
A Step-by-step guide for using Repairit for Email
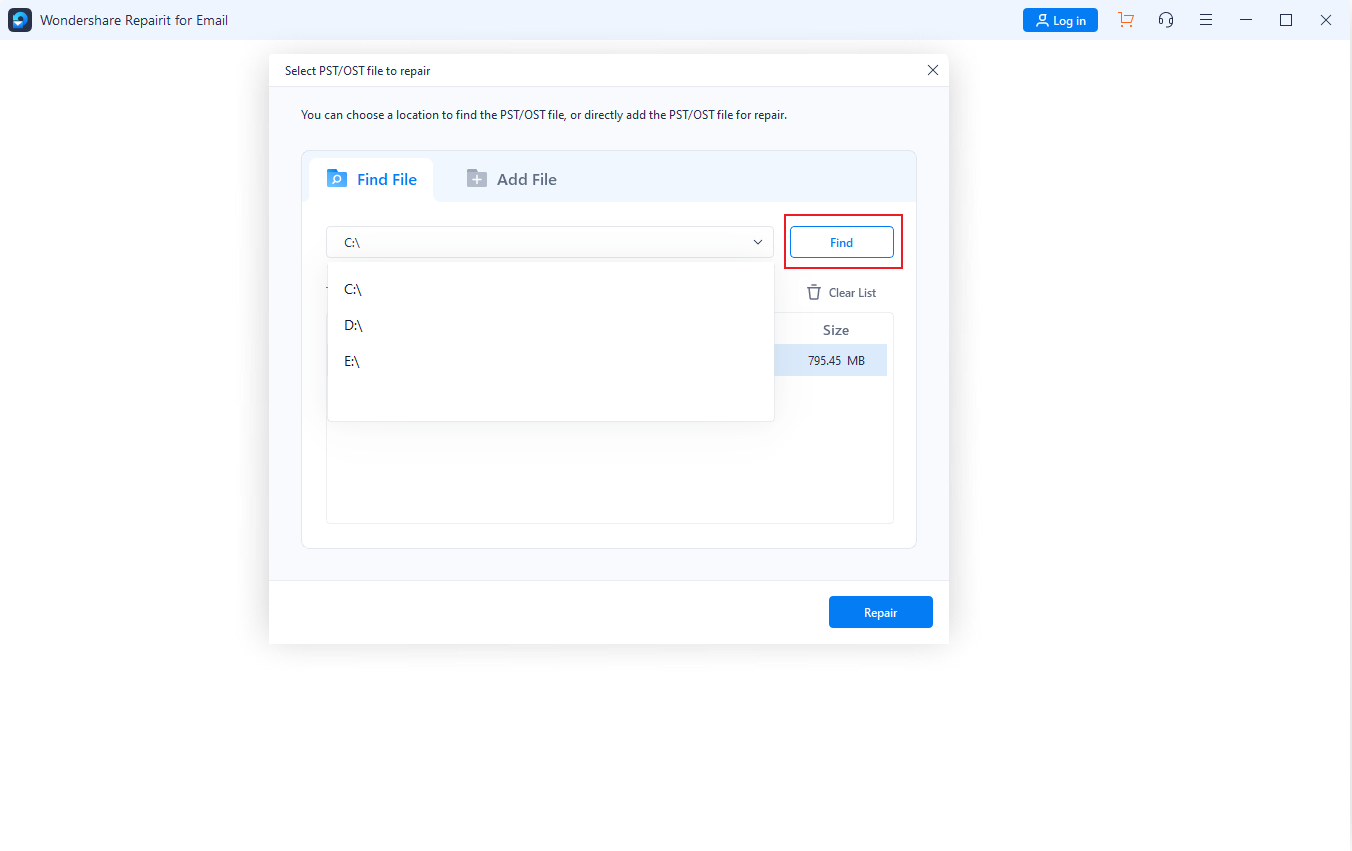
Step 1 Select And Upload The File
First of all, click on the ‘Select File’ options. Then the interface will open where you can select the emails to repair them.
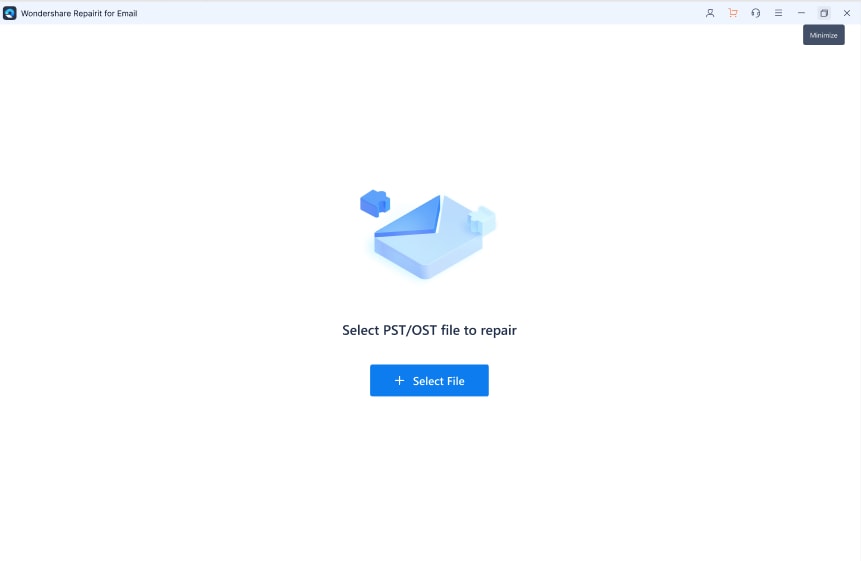
There is also an option to ‘Find’, in case you want particular files to be repaired. You can select a single and multiple files for repairing the emails.
Step 2 Start The Repair Process
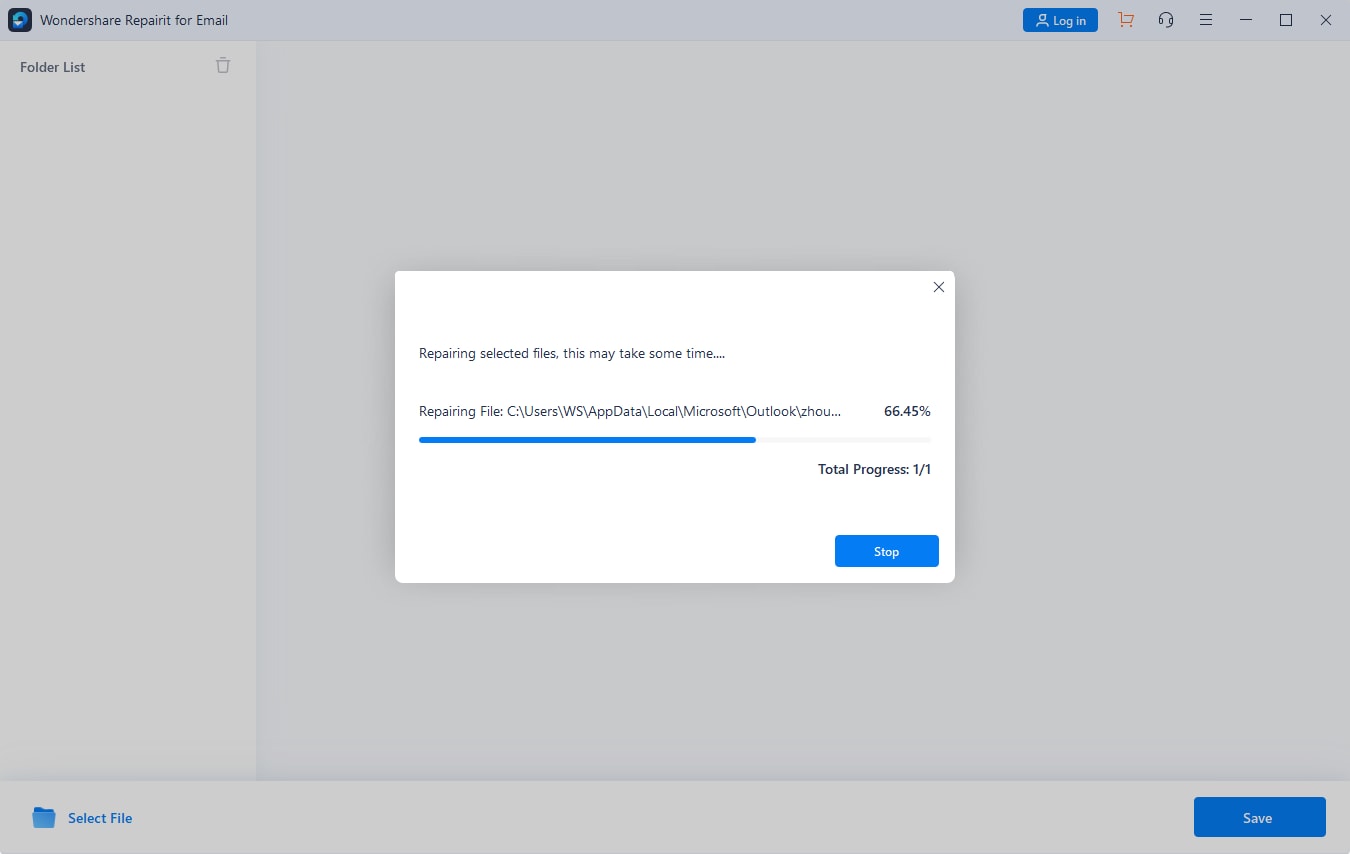
After selecting the emails you need to repair, you can click on the ‘Repair’ button. This will start the email repairing process.
Step 3 Preview And Save The File
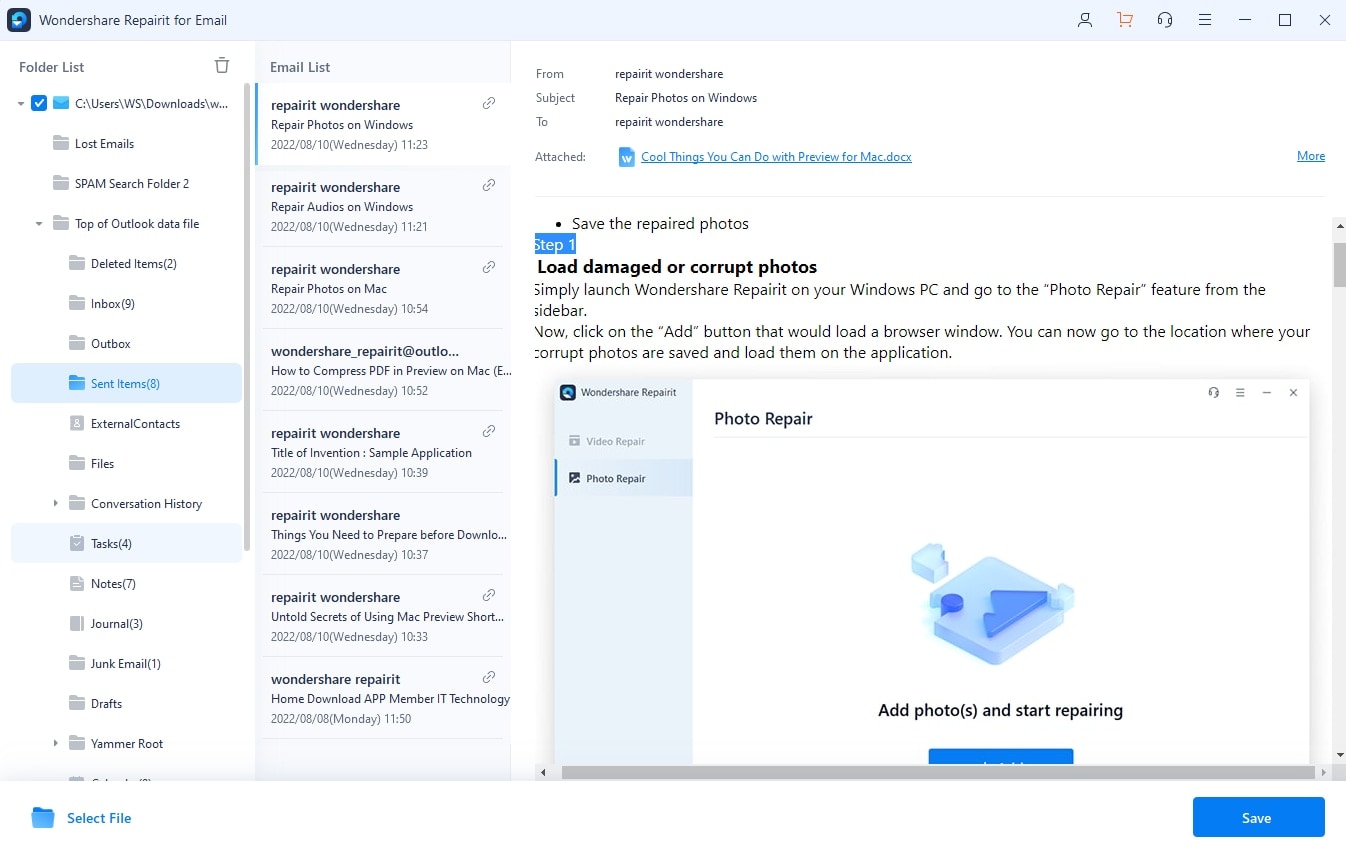
After the emails are repaired, you have the option to preview them. Once you have reviewed the emails you have repaired, you can save them in your systems.
Conclusion
Microsoft 365 is a powerful suite, and Outlook is a vital and dependable tool for meticulously managing your email, contacts, and other appointments. These are some ways to resolve if your outlook auto discovery is not working. You can try the above ways to fix the issue.
To fix your OST and PST files, Wondershare Repairit can help you fix your emails. It is a great tool that can fix your email with just a few clicks. So if you have damaged emails and want to fix them, you can use this tool.

 ChatGPT
 Perplexity
 Google AI Mode
 Grok
Grok
