People enjoy the digital era because it allows them to connect easily. Up-to-date systems replaced earlier modes of communication, and the same is true for Email and Outlook. However, several users have reported the problem of Outlook search not working on Mac.
Are you also facing such an issue? If yes, then no need to get worried. I have come up with this article that will explain to you some effective fixes to solve the issue of the Mac Os Outlook search not working.
Part 1: Causes of Outlook Search Not Working on Mac
The issue of Outlook search on Mac not working is very common. There is a wide range of causes behind this issue. So, let's see the reasons in this part.
Cause 1: Spotlight indexing is insufficient for Outlook search to function.
Cause 2: Your Mac's profile or User Data Folder is not in the correct location.
Cause 3: Mac's Spotlight is corrupted.
Cause 4: Spotlight on the Mac has added your Outlook profile or identity to the Privacy tab, which prevents indexing in a specific location.
Cause 5: Special characters in your profile stop Spotlight from indexing your Outlook search results.
Now, you know the causes why the problem of search not working in Outlook Mac happens. So, in the following next part, I will explain some fixes to resolve this problem.
Part 2: How to Fix Macbook Outlook Search Not Working?
When the Macbook Outlook search is not working, the fixes listed below should help you. So, let's dive into the fixes!
#Fix 1: Remove the Outlook Profile from Spotlight Privacy
The first thing you can do to fix Outlook search not working on Mac (Monterey) is to remove the Outlook profile from Spotlight privacy. The detailed steps are here:
Step 1: Go to the System Preferences app on your Mac from the Dock, Launchpad, or Applications Folder.

Step 2: Select Spotlight from the System Preferences menu.
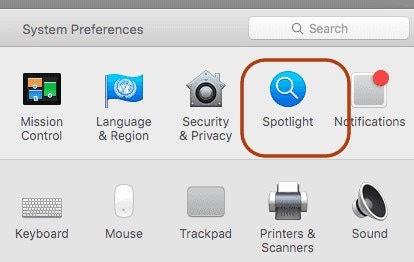
Step 3: On the following screen, select the Privacy tab.
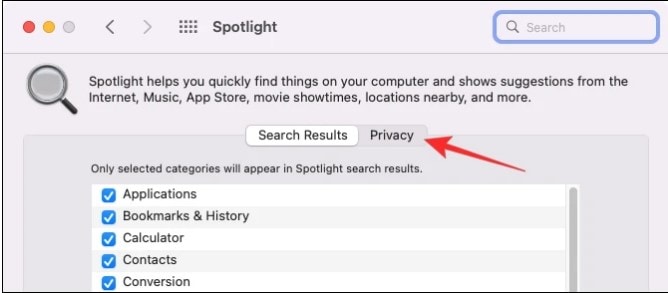
Step 4: Look for a "Main Profile" directory in this folder.
If such names contain a directory, your Mac may be stopping Outlook search from using Spotlight to provide results.
To resolve this, navigate to the "Main Profile" directory or any other Outlook folder you can find in the Privacy tab. And then click the '-' icon to the right to remove it.
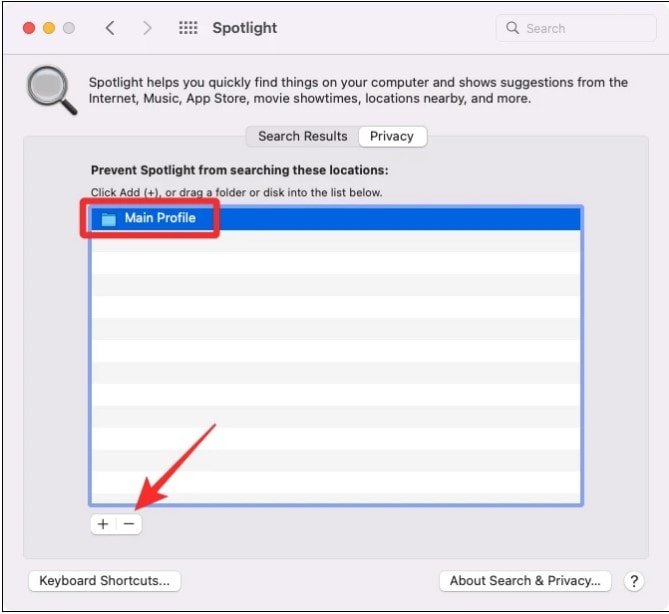
Step 5: This should remove your Outlook profile from this section.
And your Mac should now be able to search within Outlook.
#Fix 2: Change special characters from your profile name
If your profile name contains a special character, MS Outlook will be unable to search for content within your account. Check and remove special characters from an Outlook profile name using these steps:
Step 1: Locate the Outlook Profile Manager on your Mac.
To do so, launch the Finder app. And, then navigate to the Applications folder to find the Microsoft Outlook app.
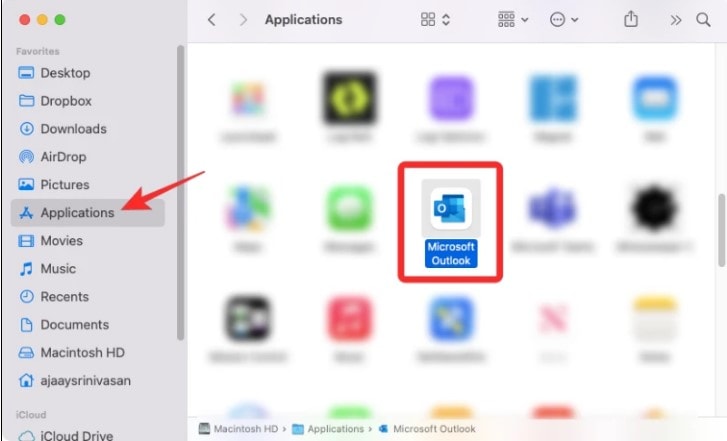
Step 2: Control-click or right-click on the Microsoft Outlook app.
Then, select Show Package Contents.
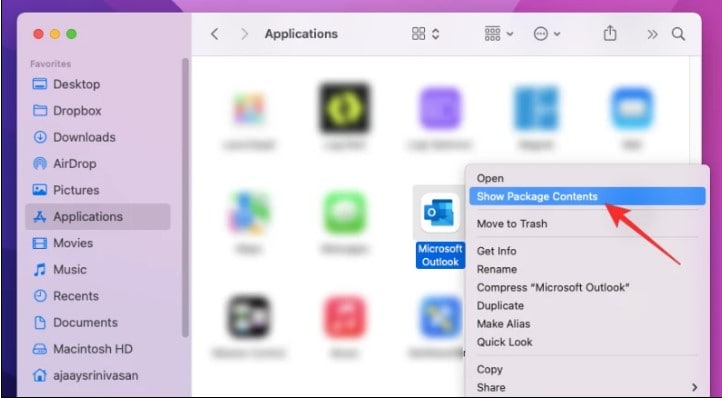
Step 3: This should display the Contents folder.
To proceed, double-click this folder.
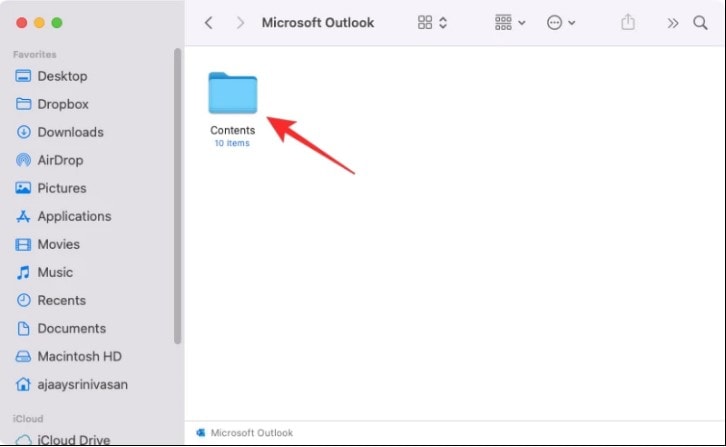
Step 4: Double-click the SharedSupport folder in this window.
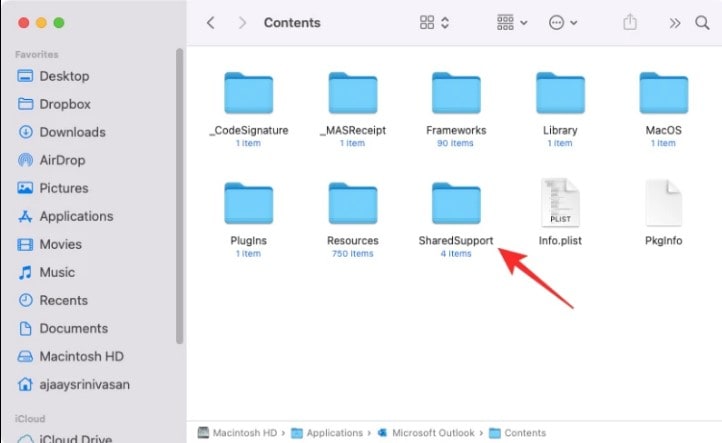
Step 5: Open the Outlook Profile Manager application on the next screen.
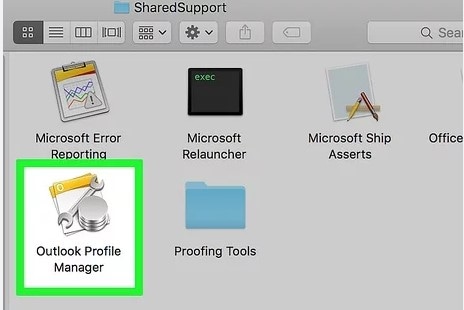
Step 6: You should see a list of profiles you have loaded into the Microsoft Outlook app inside Outlook Profile Manager.
In the 'Profile Name' section, see if the profile you are using has a special character in its name. Next, press the Enter key on your keyboard to edit this name. And then remove special characters from it.
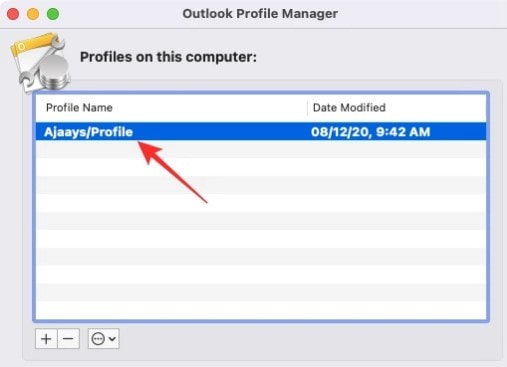
Step 7: Remove the special character from the profile name and press the Enter key to confirm the changes.
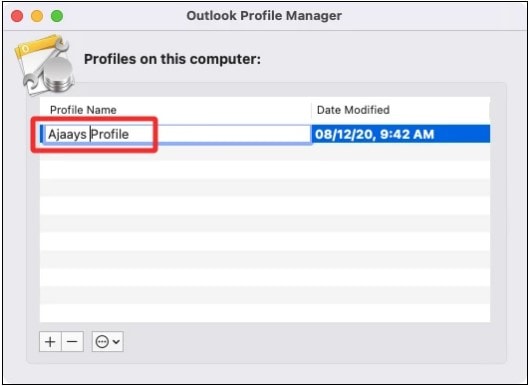
After that, close the Outlook Profile Manager and check if Outlook for Mac searches are not working. If it is still not working, try the next method.
#Fix 3: Check and install software updates
Another method to fix Outlook search on Mac not working is checking and installing software updates. So, to do this, follow the below-mentioned steps:
Step 1: Go to System Preferences > Software Update to update your Mac.
Follow the onscreen instructions if an update is available.
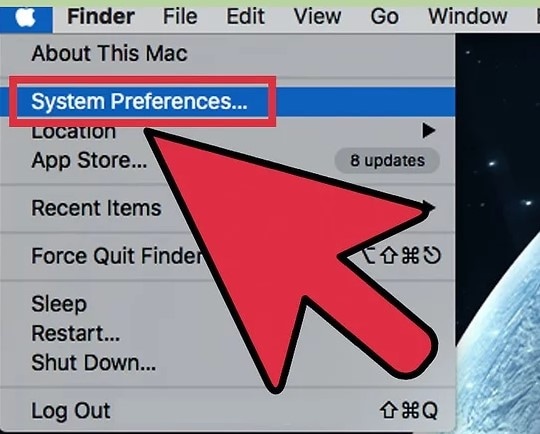
Step 2: Go to the Help menu to update Outlook and select Check for updates.
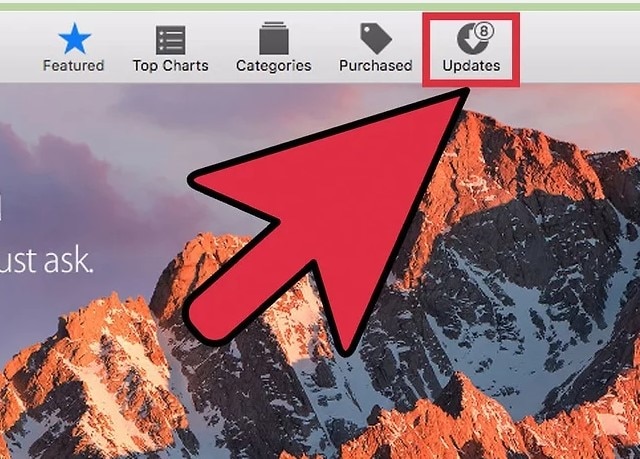
If you downloaded Outlook from the Mac App Store, go to the App Store.
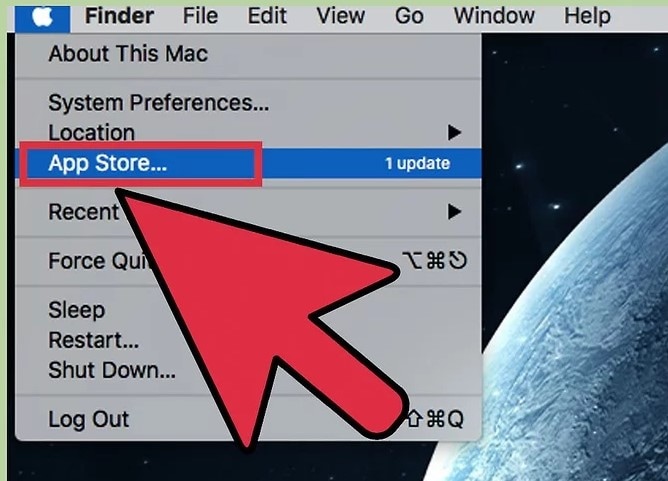
Step 3: Next, choose updates to update the Outlook app.
#Fix 4: Reinstall Outlook
The next method to fix Outlook Mac search not working is reinstalling Outlook. Steps are here to do it:
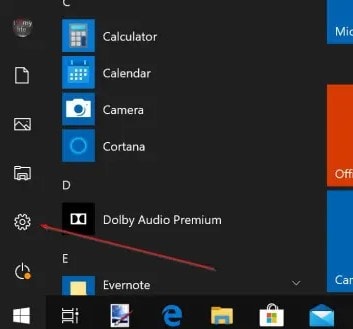
Step 1: Select Settings from the Start menu to open Windows Settings.
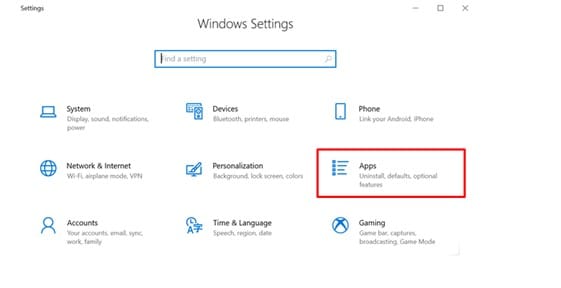
Step 2: Select Apps from the Windows Settings menu.
Step 3: Select Microsoft Office Desktop Apps from the list.
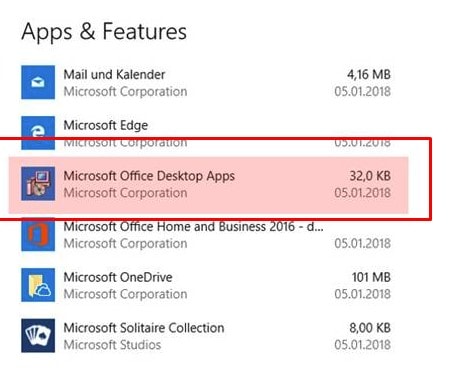
Step 4: Uninstall should be selected.
Reinstall the Office Suite from the Windows App Store once completed.

#Fix 5: Check Outlook Profile data location
Outlook cannot search for the items in your profile if your user data is not in the correct location. So, to check Outlook profile data location, follow the steps:
Step 1: Click on a space on your Mac desktop.
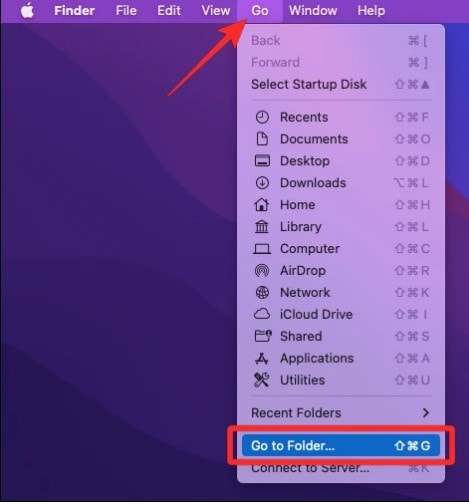
Step 2: Select the Go tool from the Menu bar to see if your profile/identity data is in the correct location.
Step 3: Select Go to Folder from the drop-down menu that appears.
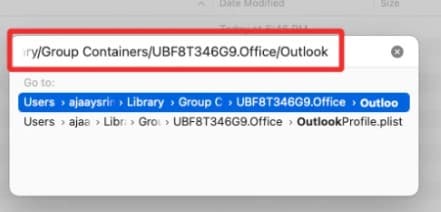
Step 4: Paste this directory address –
/Library/Group Containers/UBF8T346G9.Office/Outlook) into the tiny window that appears. And press the Enter key.
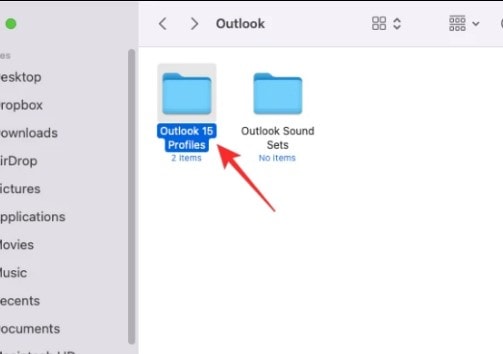
Step 5: This should open the Outlook folder and display the user data saved on your Mac.
Double-click on the Outlook 15 Profiles folder.
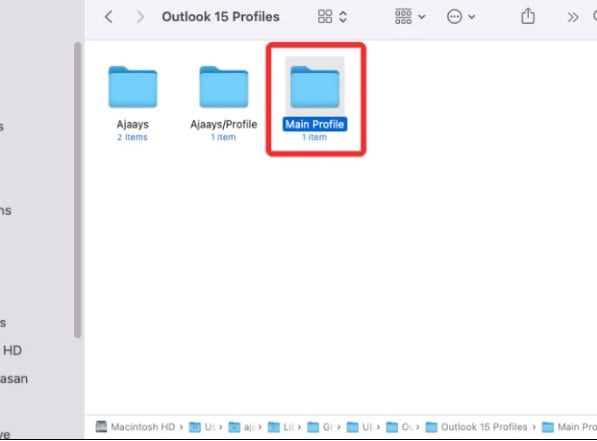
Step 6: Next, see if your current profile is visible and matches the profile name from Method #1 in Outlook Profile Manager.
If not, locate the Outlook profile's name on your Mac and copy its contents into the Outlook 15 Profiles folder.
#Fix 6: Manually re-index the Outlook database
If none of the previous steps work, you can try re-indexing your Outlook database to restore access to the search function. To do so, launch the Terminal app on your Mac and type the command below.
mdimport-L
Look for an entry that looks like "Microsoft Outlook Spotlight Importer.mdimporter" in the list of indexes that appears. You must re-index your Outlook database if there are many entries with the same name.
Enter the following command into the Terminal window and press Enter.

In the command above, you must replace
- <user_name> with the username of your Mac
- <my_profile _name> should be replaced with the name of your Outlook profile.
Spotlight should begin re-indexing your Outlook database. And once completed, you should be able to use the application's search functionality.
Bonus: How to Repair Outlook PST or OST Files?
Are you trying to repair your corrupted PST files but cannot fix them with an inbox repair tool? Then I have a bonus for you. Use Wondershare Repairit for Email.

Wondershare Repairit for Email is an all-in-one repair tool. This software repairs corrupted PST/OST files in all email corruption scenarios. And email corruption scenarios can include anything from virus attacks to bad sectors to hard disk failures. In addition, this software restores and repairs deleted emails with no size restrictions.

-
Repair damaged PST & OST Files in Outlook in all Email corruption scenarios, such as hard disk crashes & bad sectors, virus attacks & tojan horse, outlook corruption & malfunctions, improper shutdown procedure, etc.
-
Restore Outlook Emails deleted for a long time and extract the Email messages, folders, calendars, etc. within seconds.
-
Repair corrupted Emails and restore deleted Emails with a very high success rate.
-
Repair Emails in bathes without size limits and support to preview all of them before saving.
-
Compatible with Windows 7/8/8.1/10/11, Windows Server 2012/2016/2019, and MacOS X 10.11~ MacOS 12 (Monterey).
Let's look at how Wondershare Repairit for Email can repair severely corrupted PST files.
To begin, download Wondershare Repairit for Email and follow the steps below:
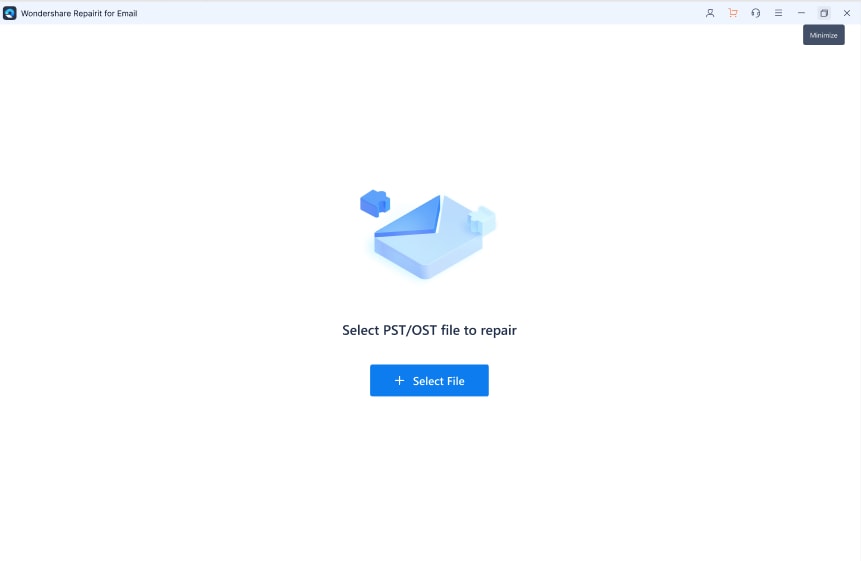
Step 1: Add corrupted PST/OST files
Begin using Wondershare Repairit for Email. Then, click the "Select File" button to add the corrupted PST/OST files.
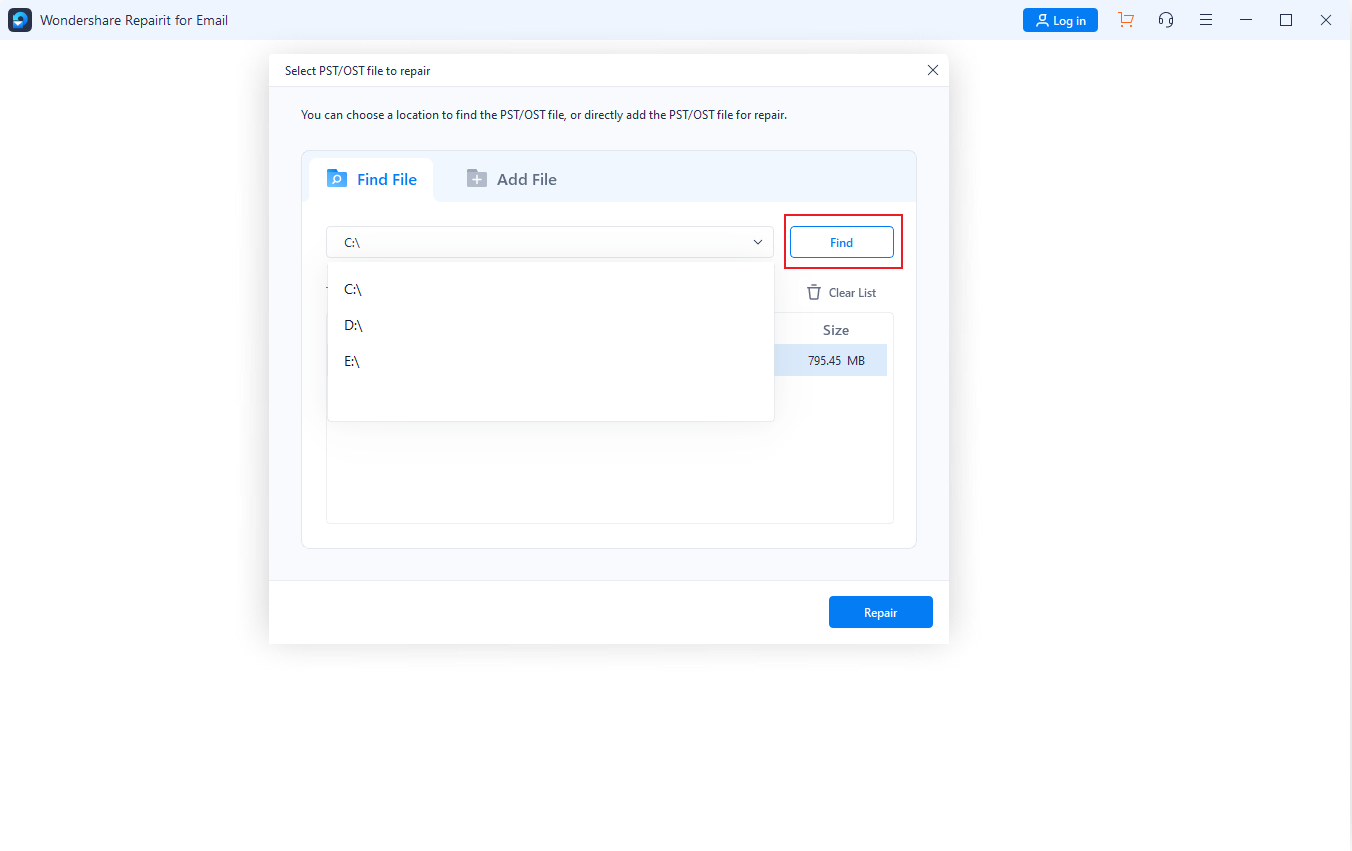
Select files from the desired location by clicking the "Find" button, then click the "Repair" button. You can enter a single email or a list of emails.
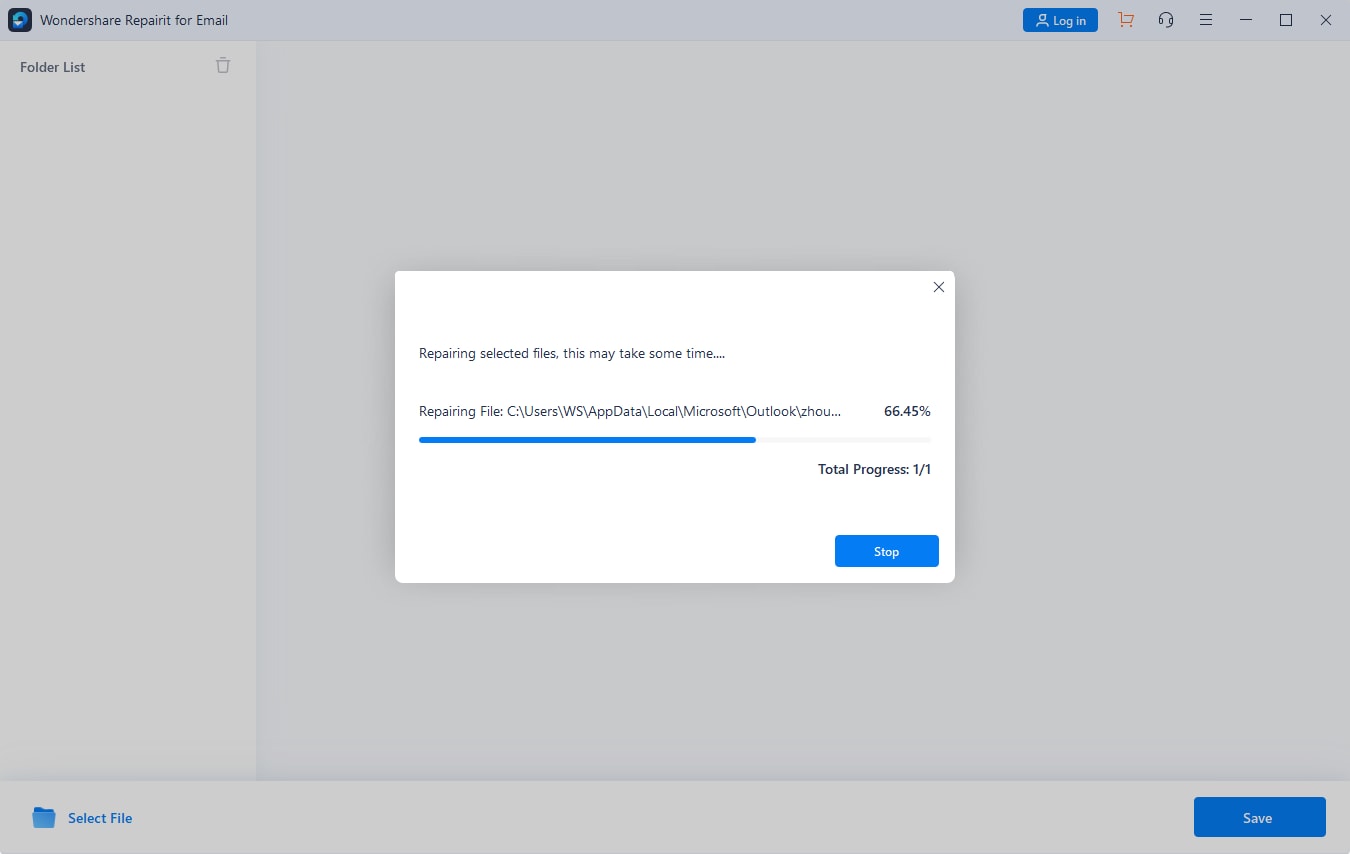
Step 2: Repair the corrupted PST files
Repairit for Email will repair your damaged PST/OST files automatically. Just give it some time.
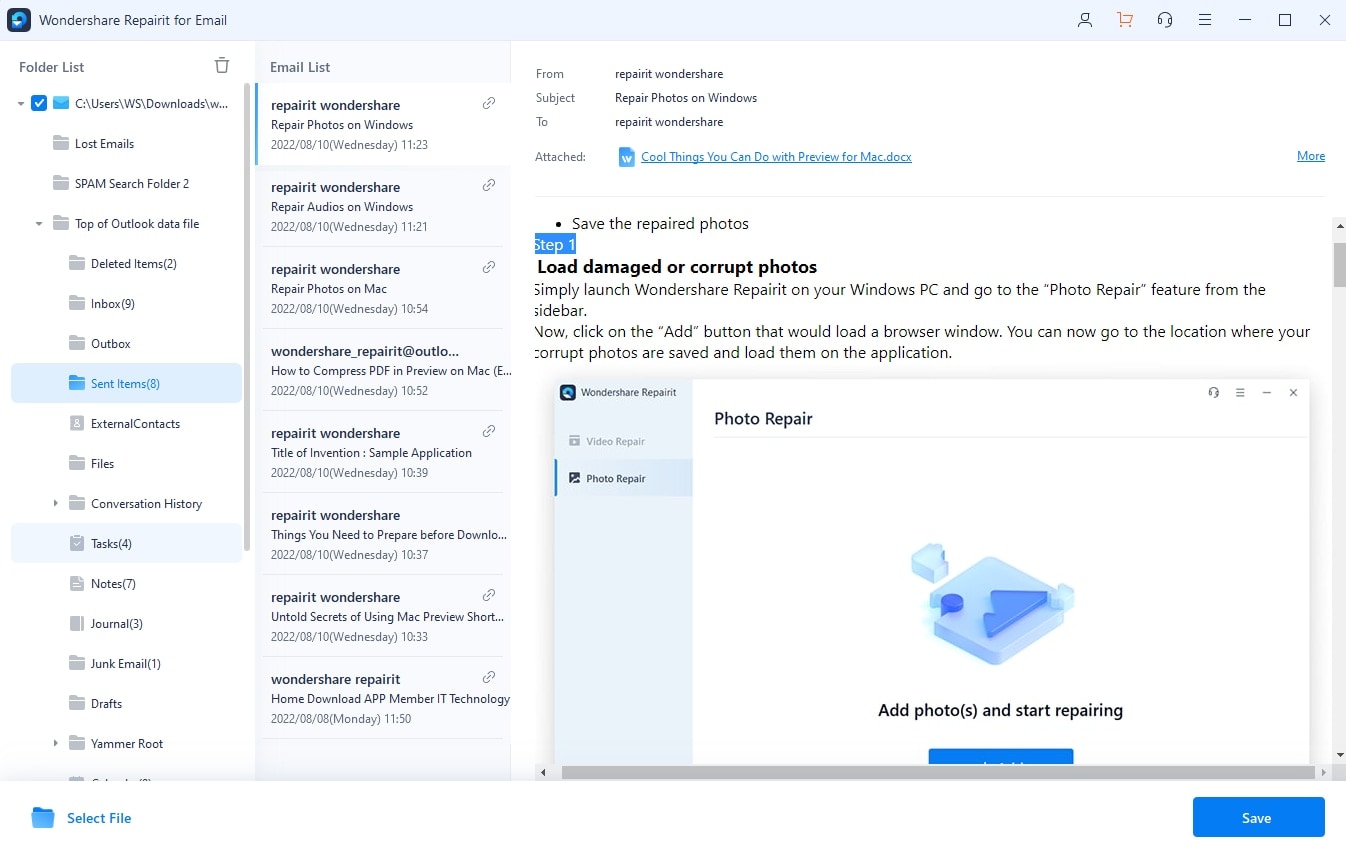
Step 3: Preview and save fixed emails
After completing the repair process, all repaired emails will be displayed on the left panel. Double-click on an email file to preview it and then select a location to save it.
Conclusion
So these were the solutions to the problem of Outlook Search Not Working on Mac. As a solution, I hope this helps! Moreover, if you are looking for the best repair software, then using Wondershare Repairit for Email is recommendable. So take a trial of it once and get back your important emails.


 ChatGPT
 Perplexity
 Google AI Mode
 Grok
Grok
