
 TL;DR:
You can fix corrupted Adobe Audition audio files natively by running the Diagnostics tool located under the Effects tab, or utilize third-party utilities if the internal repair fails.
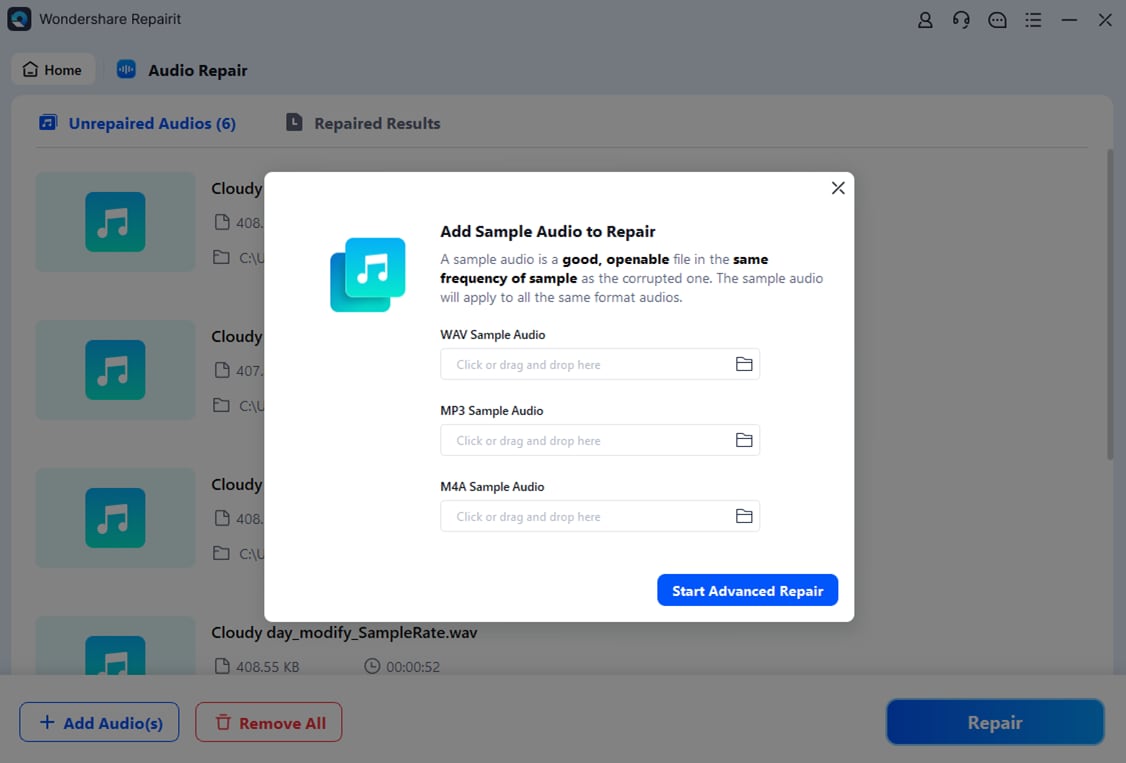
● Wondershare Repairit requires importing a functional sample audio file to serve as a reference alongside the corrupted file before initiating the repair process.
● If direct repair fails, Wondershare Recoverit provides a fallback option to recover the file by running a hard drive scan on the specific location where the audio was originally stored.
● To prevent future file loss, automate backups by mapping your Adobe Audition folders using the Google Drive desktop application preferences or Wondershare UBackit.
Ask AI for a summary
 ChatGPT
 Perplexity
 Gemini
 Claude
 Grok
Grok
Adobe Audition is an explicit tool that is used to manage audios of all kinds. While featuring many progressive features, there are certain chances that audio files get corrupted due to some uncertain error in the software.
Along with troubleshooting the error, users look for solutions that can help them restore the corrupted audio file. This article shall articulate different ways that can be used to manage the corrupted file from Adobe Audition.
Part 1: Methods to Repair the Corrupted Audio from Adobe Audition
There are multiple methods available to repair a corrupted audio file. To understand the best methods among the rest, this part focuses on two of the unique and simple methods to repair corrupt audio from Adobe Audition.
Manual Method: Repair Files with Adobe Audition
If you have no access to other tools that helps in repairing files that have been corrupted, Adobe Audition can provide you with the necessary features to fix corrupted files across the platform. With the right set of tools available to repair an audio file, Adobe Audition can be utilized by the user under the following step-by-step guide displayed below. This process is far simpler and quicker than you can ever consider:
Step 1: Open the problematic audio file across Adobe Audition and access the “Effects” tab.
Step 2: Following this, you need to select the option of “Diagnostics” in the drop-down menu to detect and repair the issue with ease

Automatic Method: Wondershare Repairit to Repair Corrupted Audio File
For explicit experience, users can consider working with an automatic tool that provides them with a feasible environment for repairing a corrupted file in the system. Wondershare Repairit provides users with the option of operating the platform in the best way possible, allowing the users to repair videos, photos, and audio files easily.
As you look into the technique of repairing a corrupt audio file across Repairit, you will find the tool to be quite basic and simple to use.
As it believes in covering the process under the one-click feature and quick functionality, Repairit is the best option that you can find in the market at the moment. To look into the process that explains how to repair corrupt audio from Adobe Audition, go through the steps provided below:
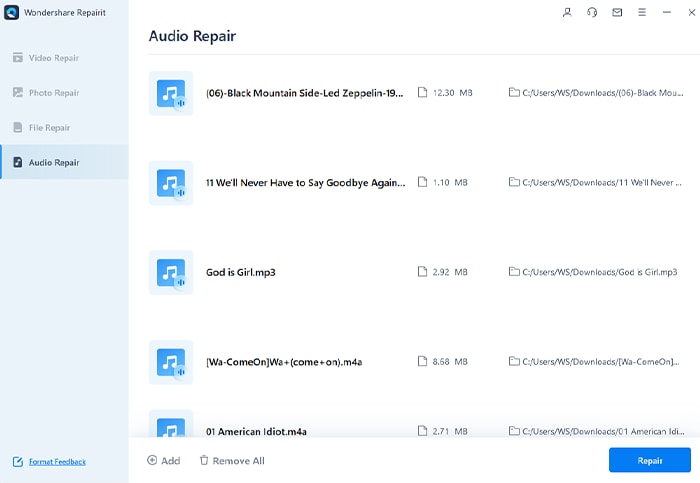
Step 1: Open Repairit and Click Audio Repair Feature
Open Wondershare Repairit after installing it across your device successfully. Proceed to the “Audio Repair” section in the left-hand panel of the window.

Step 2: Import Corrupted File and Sample File
You need to import the audio file of Adobe Audition that is to be repaired. Locate it from the computer and add it across the platform. Add a corresponding audio file that can be used as a reference, and click on "Repair" to start the process.
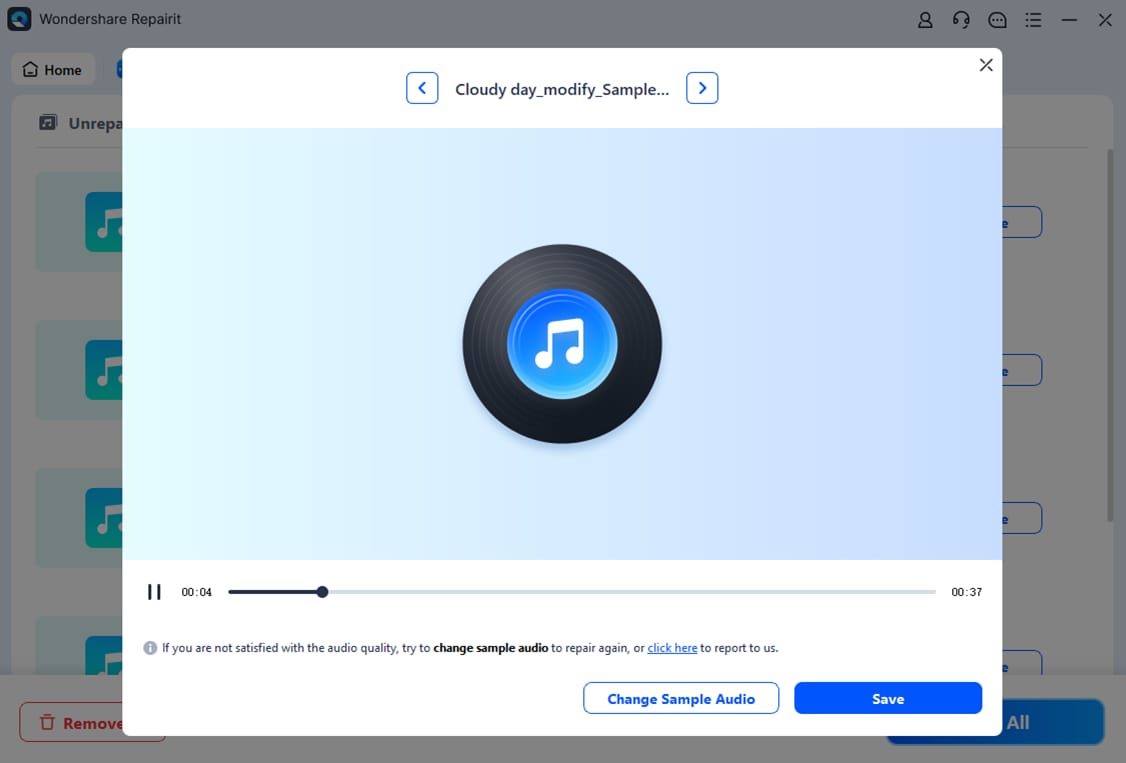
Step 3: Preview and Save Audio File
As the file is repaired, you can preview it across your screen to check if it is repaired properly. Click on “Save” to save the repaired audio file.
Here is a video tutorial guide to show you how to repair corrupted audio files in seconds:
Part 2: How to Recover the Corrupted Audio from Adobe Audition?
The second that you can consider out of all cases to make something of the corrupted audio file from Adobe Audition is to recover it. There are not many processes available offering such solutions; however, you need to interact with the right form of a solution in this case. There are many third-party applications offering the services to recover corrupt audio from Adobe Audition.
Wondershare Recoverit stands tall among the best data recovery software in the market.
There are many reasons for it. From being easy to use to being efficient with its interface, Wondershare Recoverit provides a cognitive experience for its users to recover corrupted files. With the support of 1000+ file formats and 2000+ storage devices in recovering data, it provides an exceptional recovery rate, even under serious circumstances.
Following these exceptional features, users can easily recover corrupt audio from Adobe Audition, thanks to the different recovery scenarios provided to the users. This platform is trusted by many users throughout the world, which makes it a good offer for recovering the corrupted audio file. To understand how you are going to process it, go through the simple guide provided below:
Step 1: Launch Tool and Select Drive
Open Wondershare Recoverit on your computer and proceed by selecting a location across your computer. As you are aware of the location of the corrupted audio file, you need to select the corresponding drive in the process. Make sure that the “Hard Drives and Locations” tab is selected on the side of the window.

Step 2: Start Scanning Drive
After selecting the drive, you need to click on "Start" to initiate the scanning process. The scan takes a while, and all files related to the drive that is being searched are shown on the front of the window.

Step 3: Preview and Export Audio File
Once the scan concludes, go through the list that has been recovered and find the corrupted audio file from Adobe Audition. Select a certain file and click on "Recover" to recover it on your computer successfully.

Part 3: Back Up Your Audio Files from Adobe Audition
What can be the best option to save your files from getting lost or corrupted? The answer has always been backing up the content across your device. To save the audio file from getting lost across your computer, it is best to employ some techniques that can back up the data across your computer. This part shall help you understand the methods explaining how to back up the audio on your computer.
Manual Method: Back-Up Audio Files to Google Drive
The first technique that can be considered in the process is backing up the data across a cloud platform. Users can back up their audio files across Google Drive, a cognitive platform that features a unique interface that helps users to manage their data easily. Google Drive can be the perfect option for you to back up your data across the internet that is being managed across Adobe Audition. To understand how you’re going to do it, go through the steps shown below:
Step 1: You need to download the official application of Google Drive for desktop across your computer. Install the tool and proceed to log into the platform with your account.

Step 2: Proceed to click on the "Gear" icon and select "Preferences" from the drop-down menu that appears on the screen. You will be directed to a new window where you need to select "Add Folder" from the "My Computer" section. Select the folder that contains the audio files from Adobe Audition.

Step 3: You will be prompted to the new set of options on the screen. Select the 'Sync with Google Drive' option and click on "Done" to back up your audio files across Google Drive.

Automatic Method: Use Wondershare UBackit for Backing Up Audio Files
If you are in search of more reliable software that offers you the option of backing up your files regardless of the conditions that are on your front, Wondershare UBackit provides you with the optimal options. Since you wish to understand how to back up the audio on your computer, this reliable software will help you back up everything that is present across your device.
The tool is accompanied by many smart lookup tools and an interface that seems to be the perfect thing for any user to understand. As you look through the simple technique of backing files by UBackit, the following step-by-step guide explains to you perfectly how to back up the files easily:
Step 1: Open UBackit and Access Backup Tool
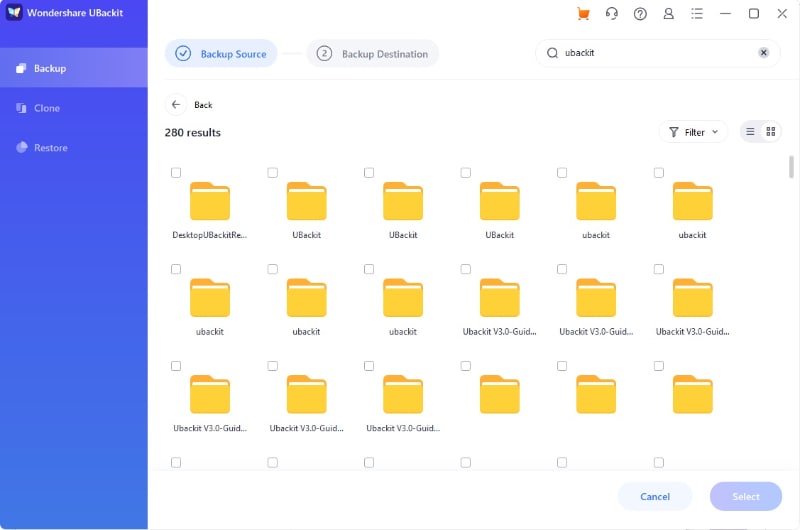
Download and install Wondershare UBackit on your computer and launch the tool. Click on the "Create New" button with the "Backup & Restore" section opened. Select "File Backup" in the options that you are provided.

Step 2: Select Files to Backup
You can easily search and navigate through the window that appears on the screen to add the files across the platform. The tool provides users with the opportunity to search files or use filters according to their desires.
Step 3: Set Location and Conclude
Once the files have been selected, set up a target location where the backup is to be stored, and click on "Backup" to conclude the process.

Closing Words
This article has helped users understand the different processes that are involved in securing the audio files that are managed across Adobe Audition. From managing the files that are corrupted by recovering them using the right tool or repairing them with the perfect platform available, this article has helped users understand the dynamics of the procedures. Along with that, it has also made known to the users the necessity of backing up data to save them from such mess.