Fix Sound Enhancement Windows 10 Missing
Check the solutions to fix the "sound enhancement Windows 10 missing" problem and fix corrupted audio with Repairit - Audio Repair with clicks.
Windows 10 includes sound enhancements that allow users to enjoy a better sound experience. You can find these under the sound enhancement tab including virtual room, bass boot, etc. Unfortunately, many users are reporting sound enhancement Windows 10 missing. If you're also dealing with the same issue, I have got you covered. With the months of investigation, I am able to list down some potential solutions to fix it. So, without further ado, let's try them!
Part 1: How Does Audio Enhancement Work on Windows 10?
Audio enhancement is also known as sound enhancement on windows 10. This tab allows controlling various sound settings on windows 10, such as room creation, bass boost, and more. These changes improve the sound quality of speakers and headphones. And I believe nothing is better than enjoying great music with sound enhancements. What do you think?

Regardless, many users are reporting audio enhancements windows 10 missing issues. It occurs when the user frequently updates from the previous version of windows. As a result, most users find the missing enhancement tab during or after the update. Besides, there are many reasons for missing the enhancement tab.
Now, let's jump into solutions to fix the audio enhancement windows 10 missing on your computer.
Part 2: Let's Fix Sound Enhancement Windows 10 Missing
Here I have mentioned two methods, common and tech-savvy. Remember all the given methods have the potential to fix the issue immediately. Let's begin!
1. Common Methods
In this section, I will discuss only common methods that can fix the issues, no matter what laptop you have. Try the given methods and follow the given step-by-step guide to complete the process.
👉 Check your hardware
Sometimes there is a hardware issue; to check if it is a fault, follow the given steps.
Step 1: Press the Windows key + R to launch the run command.
Step 2: Next, enter control here and tap on the ok button.

Step 3: Next, you will see the control panel window is open. Then, click on add devices option.

Step 4: Choose the audio device and click on the next button.

Step 5: Restart your computer to resolve all glitches.
👉 Reinstall/update the audio drivers
If the above solution doesn't pay you value, reinstalling and updating the audio drivers can work. Here's how you can do this.
Step 1: Go to your device manufacturer's website.
Step 2: Choose your device model on the screen and jump to the driver section.

Step 3: Navigate the audio driver and click on the download button.

This process is complex for some users, but you should understand this properly to make proper use of it. However, if you don't understand, then do the following.
Device manager >> Microsoft AC adapter >> update driver

👉 Enabling audio-related services
If you cannot perform audio drivers update, don't worry. Enabling audio-related services can fix the sound enhancement windows 10 missing issue. Here's how you can do this.
Step 1: Press the Windows key + R to launch the windows services.
Step 2: Enter services.msc and click on the OK button.

Step 3: Navigate windows audio and open it with a double click.

Step 4: Change the startup type option to automatic and save the changes.

👉 Change the sound card vendor settings
Step 1: Press Windows + R button to open the run command and enter control.

Step 2: Choose the sound card vendor settings.
Then, select the microphone option and choose the settings as per your choice.

Now, go back and see if sound enhancements windows 10 missing or enabled.
2. Method for users using Realtek Audio (Card/Drivers)
This method applies to users with Realtek audio drivers on their computers. Here's how you can replace them with high-definition audio device drivers.
Step 1: Press Windows + X and choose device manager from the list.

Step 2: Search the sound, video, and game controllers option.

Step 3: Navigate for “Realtek high definition audio” from the list of audio drivers.
Then, right-click on it and select disable.

Step 4: Right-click on the Realtek high definition audio option.
Then, select Update Driver Software.
Step 5: Select “My Computer” for driver software.

Step 6: Next, choose “Let me pick from a list of device drivers on my computer.”
The window will display and ask you to select the driver you want to install for the device.

Step 7: Here, you will find the list of drivers. Choose a high-definition audio device and then press the next button.

Step 8: Next, you must confirm by pressing the yes button. And if you ask to reboot, tap on yes.

Congratulations! You have successfully replaced the Realtek audio drivers with high-definition audio drivers. Now, check if the audio enhancements Windows 10 missing error is solved.
3. Method for users using Conexant SmartAudio
Follow the given steps, if you have Conexant SmartAudio drivers.
Step 1: Press Windows Key + X and choose the control panel from the list.
Step 2: Tap on Uninstall Programs that link under Programs.

Step 3: Complete all the on-screen instructions to complete the installation.
Step 4: Restart the device and see if the audio enhancement windows 10 missing are back on the computer.
Pro-tip: if the issue is with audio files, then the Wondershare Repairit tool can help you recover all files. This worked for many cases like audio, video, and files.
Part 3: Audio Files Can't be Opened? Here's the Fix
If you have issues with audio files, like a corrupt file or one that causes an error when opening, here is the fix. Before jumping into the solution, let me clear one thing, corrupt audio files have various reasons:
- An unexpected computer shutdown
- Software error
- Improper audio download
Well, don't worry! The Wondershare Repairit Audio Repair can help you solve the issues. This free online audio repair tool gives instant repair in no time. In addition, it works under three steps: add files, repair files, and save files.
Now you might think of why I am recommending this tool.
The simple reason is it works error-free, fast, and delivers quality results over other repair tools available on the market. Currently, it is available for a free trial. If you don't deem my words, try it yourself!
Despite these, there are many advantages of Wondershare Repairit.

Wondershare Repairit - Audio Repair

-
Repair damaged audio with all levels of corruption, such as audio not working, clipping audio, humming audio, rumbling audio, sibilant audio, out-of-sync audio, etc.
-
Repair audio files of diverse formats, including MP3, M4A, FLAC, AAC, WAV, etc.
-
Repair damaged or corrupted audio from multiple devices: portable voice recorder, recording software, shooting apparatus, SD cards, phones, hard drives, USB flash drives, etc.
-
Support Windows 11/10/8/7/Vista, Windows Server 2003/2008/2012/2016/2019/2022, and MacOS 10.13~MacOS 15.
Here's how you can repair audio files on Windows with Wondershare Repairit.
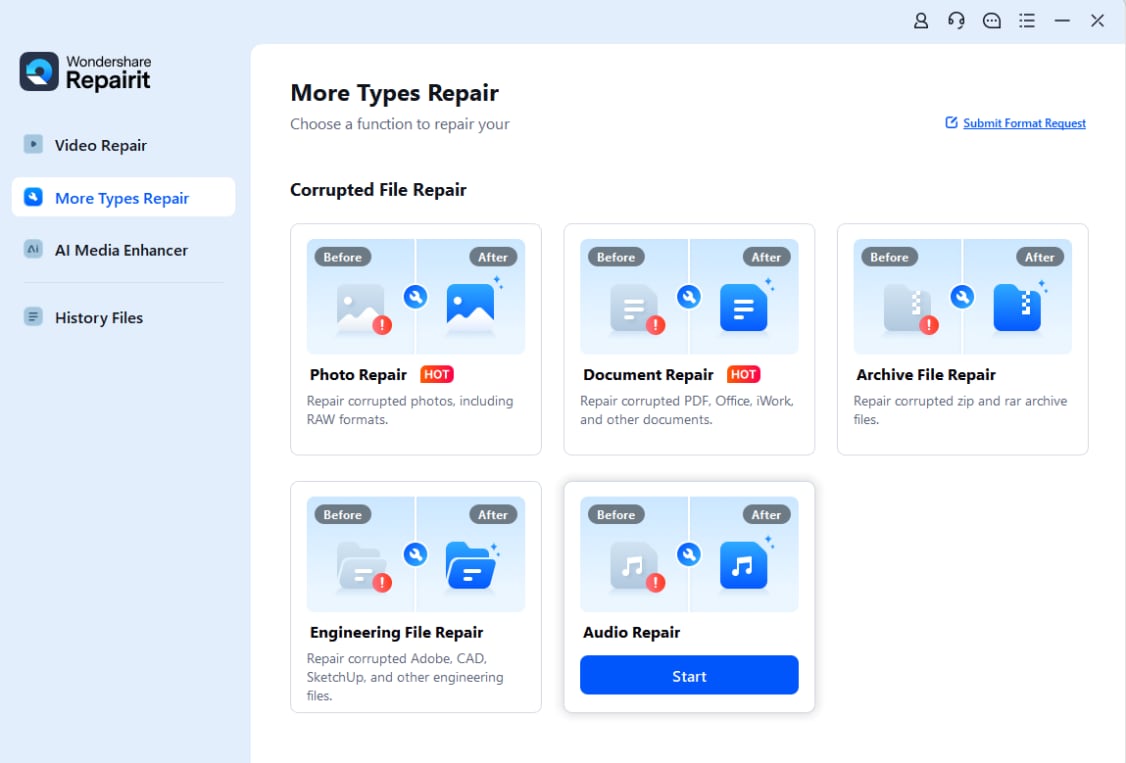
Step 1: Launch Wondershare Repairit on your computer and choose more types of repair.
Next, click on Audio Repair and the "+Add" button to upload the formats of the audio files.
After uploading your files, Repairit will show you each detail of the audio files.

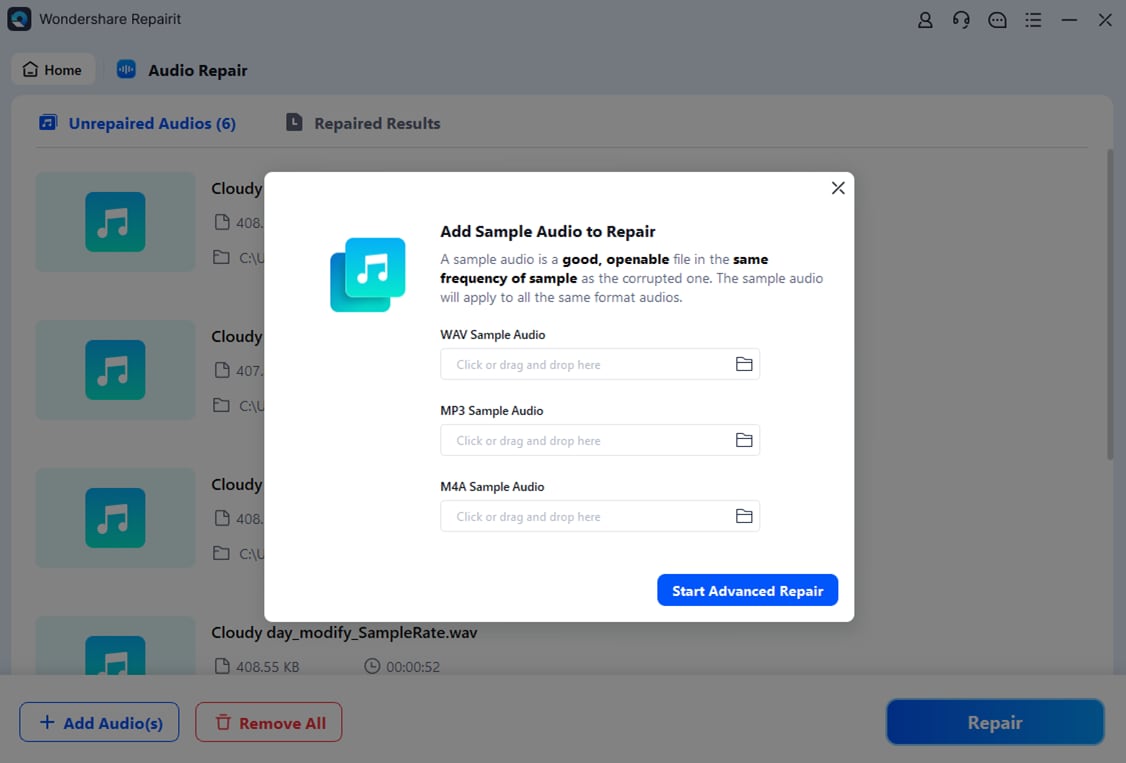
Step 2: In this step, click on start repair audio files.
This window tells you to add sample audio files with an audio format like corrupted audio files. So, the sample audio file will apply to all audio files.
Step 3: The repairing process will take a few minutes to give you output.
When the process finishes, you will get an option to preview the changes. This means you have the power to preview the audio file before saving it on your device.
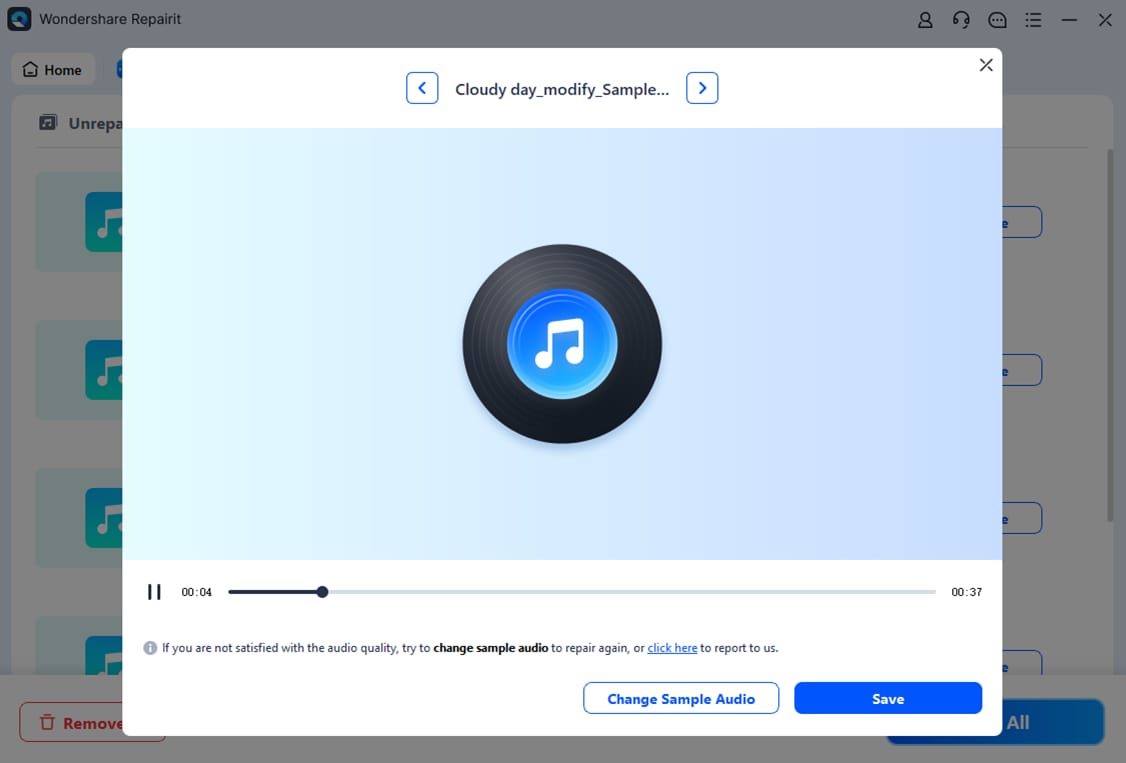
After previewing the preview files, save them on your device if you think these are okay. Please wait for a few seconds.
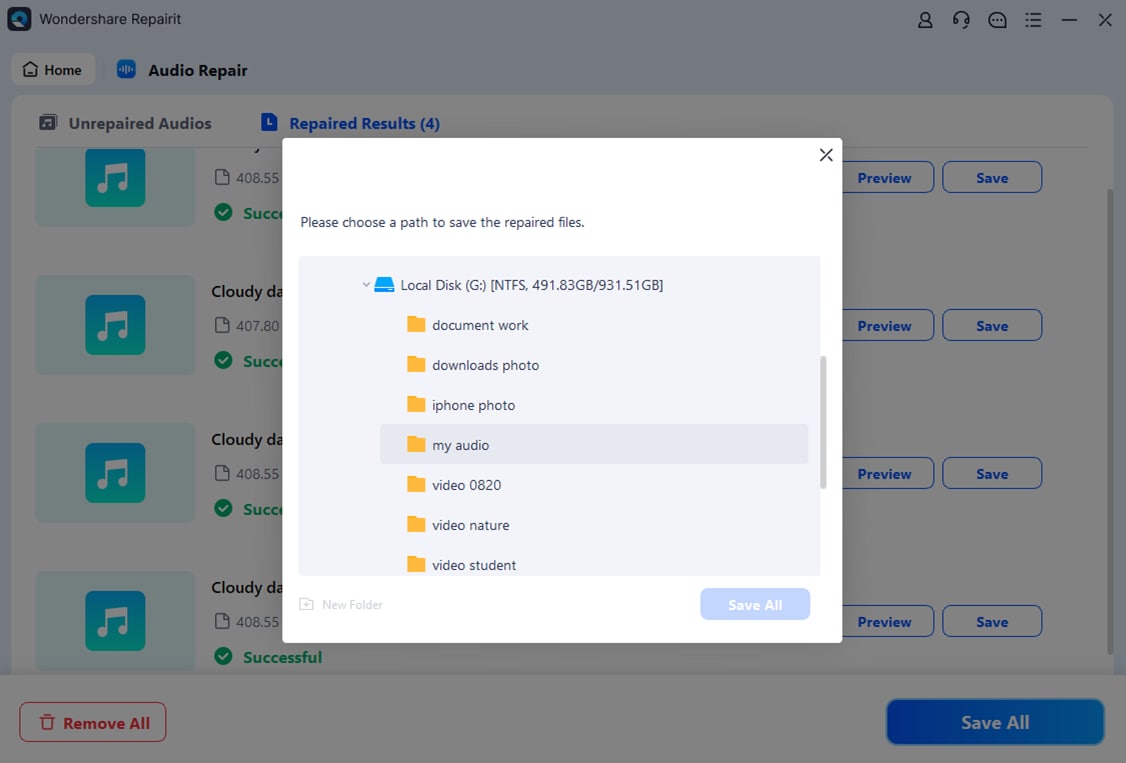
When the files saved, you will get a pop-up like this-
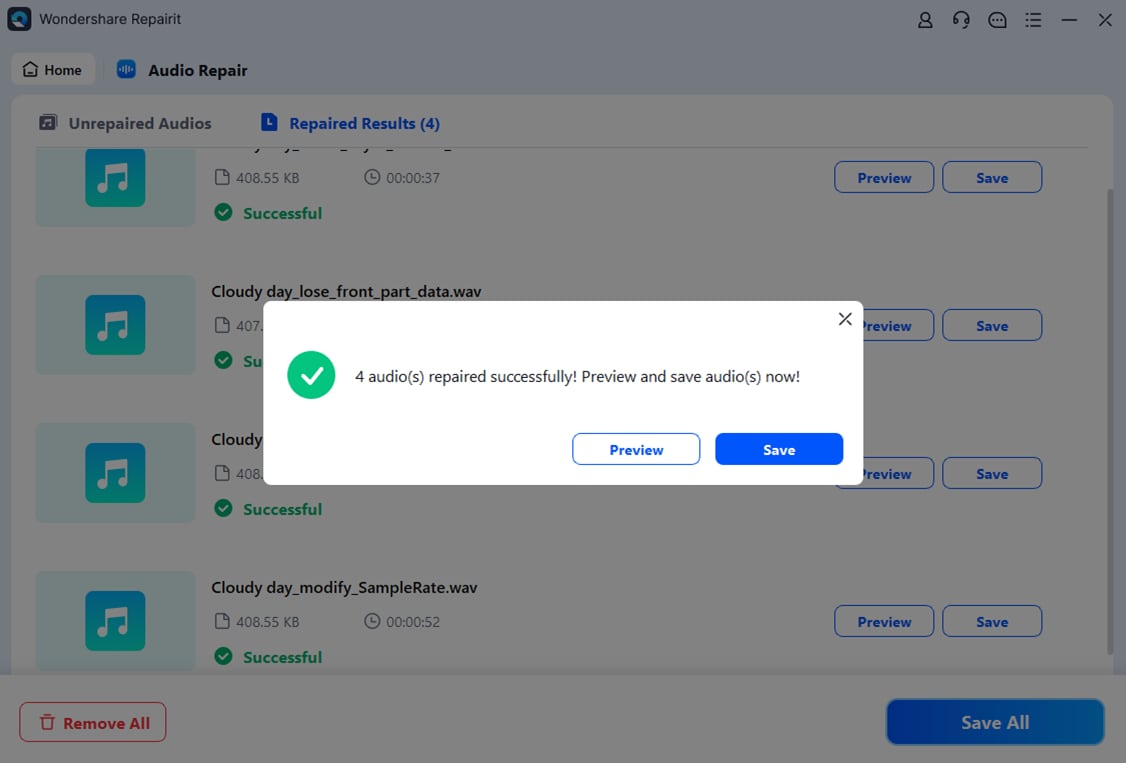
So, in this way, the Wondershare Repairit tool works and repairs audio files on Windows. Keep in mind that it also works on Mac. Try this and get the best results!
Conclusion
When you face sound enhancements windows 10 missing issue, you cannot enjoy the quality of sound. However, outdated audio drivers or audio-related services are a significant issue. Therefore, the first step you need to perform is updating audio drivers.
You can move to another fixed shared above if these won't work. I hope this post will help you solve the issue. Use Wondershare Repairit Audio Repair to recover corrupted files, if you have any. Visit the official site and start your free trial. There you can better understand how good it is.
* Some of the above codec formats may need to be supported by the system.
People Also Ask
-
How do I enable audio enhancements in Windows 10?
To enable audio enhancements in Windows 10, right-click the sound icon, select Playback Devices, choose your active device, then go to Properties > Enhancements. From there, you can enable features such as bass boost, loudness equalization, and virtual surround. -
Why are Windows 10 audio enhancements missing?
Audio enhancements in Windows 10 can go missing after a system update, driver corruption, or using incompatible audio drivers. Updating or reinstalling your sound driver and checking Windows updates usually restores the Enhancements tab. -
What if enabling sound enhancements does not fix the problem?
If enabling sound enhancements doesn’t resolve the issue, the problem may lie in corrupted audio files or deeper driver conflicts. In such cases, using a professional tool like Wondershare Repairit can help repair damaged or corrupted audio files and restore playback quality.


 ChatGPT
 Perplexity
 Google AI Mode
 Grok
Grok
