
 TL;DR:
You can recover deleted audio from a Sony Voice Recorder by restoring existing backups or scanning the device with Wondershare Recoverit, and fix unplayable files using Wondershare Repairit.
● Connect the recorder to your computer via a USB cable and keep it securely connected throughout the Wondershare Recoverit scanning process to avoid interrupting the data retrieval.
● Repairing corrupted audio with Wondershare Repairit strictly requires uploading a working sample audio file that shares the exact same source and format as the damaged recording.
Ask AI for a summary
 ChatGPT
 Perplexity
 Gemini
 Claude
 Grok
Grok
It is an ideal choice for those who frequently use the voice recording feature, either for their video creating passion or profession.
While this device is designed with lots of advanced features, the files stored in it are not fully immune to damage and corruption.
Various users have complained about the distorted or damaged audio file stored in the digital voice recorder Sony, which further creates trouble for them.
Are you one of those individuals who accidentally lost a file and now looking for a solution? Worry not and keep scrolling the page to find the simple yet effective method to repair audio from your favorite Sony recorder. So, let the tour begins.
Part 1: What Are Some Major Using Scenarios of Voice Recorder?
Before we delve into the solutions to recover and repair audio files, let's first check if you are also in these common scenarios where you might use the Sony Voice Recorder.

1. Meetings
It's no denying that meetings are the best place to use voice recorders. With this, you can easily record the key information, which is critical to both efficient workflow and service delivery. Writing notes might be distracting; hence, take out your recorder and make the conversion accessible whenever you want.
2. Interviews
Unless you are ultra-speedy, it might be challenging to write down everything someone says. That's where the sony voice recorder comes into the role. Turn the recording feature on and listen to the complete interview again whenever you desire.
3. Foreign language training
It is extremely challenging to learn a foreign language; hence, it is advised to polish up your skills every day by playback the recording. Sony voice recorder helps you take note of tone, pronunciation, and transitions between sentences.
4. Lectures
Gone are the days when students used to make notes of what the teacher is saying in the classroom as now is the time when voice recorders are doing a great job. Record lectures for free to jot down the crucial points, and assures nothing is missing.
Part 2: Main Features of Sony Voice Recorder
Here, we have compiled the major features of the digital voice recorder Sony that make it worth adding to your collection.

✔ Lightweight and thin
Sony voice recorders are extremely light in weight and feature a sleek design so you can carry them anywhere you want without putting much burden.
✔ Superior quality
Sony voice recorders record sounds and voices with superior clarity. It reduces background noise with the Auto Voice Recording feature. The recorder optimizes audio capture settings for vocal frequencies.
✔ Auto Music Recording
This feature mainly optimizes audio capture setting for music frequencies, while reducing the impact of recording mistakes.
✔ Time Jump
A new feature added to the Sony Voice Recorder, Time Jump refers to the long-range skipping, so you can easily find the important sections without having to listen to the entire audio file.
✔ Excellent battery backup
It's no denying the Sony recorders offer excellent battery backups so you can use them for the whole day long without having to find charging points now and then.
✔ Multiple Language Support
Sony entertains a wide range of users from all around the world, hence offering multiple language support to ease all of them, including English, Spanish, Italian, German, Korean, Chinese, and many more.
Part 3: Effective Ways to Recover Lost Audio from Sony Voice Recorder
Have you mistakenly deleted your audio file or lost it unknowingly? There's no need to freak out as we have a solution for you. Below are mentioned some practical methods to recover your lost audio file without putting much effort. Opt for any of them and get the file within the least possible time.

Method 1: Recover from Backup
If you have a digital voice recorder from Sony, you may need to recover your audio files. This is because Sony often backs up your recordings to an external hard drive. If your digital voice recorder is lost or damaged, you may need to restore your recordings from the backup. There are several steps you'll need to take to do this.
- First, you'll need to find the backup file. It may be on your computer, in the cloud, or on a removable drive.
- Next, you'll need to install the appropriate software to access the file.
- Finally, you'll need to recover the audio files from the backup.
Method 2: Recover By Using Professional Software
While recovering from data backup works most of the time, using professional software is always recommended for guaranteed results. One such tool you can opt for is Wondershare Recoverit. This third-party app is widely known for its high success rate and intuitive interface. It allows you to retrieve anything, right from photos, videos, and audio to recorded files within a few clicks.
Here's the step-by-step guide to using the Wondershare Recoverit.
Step 1: Select a Location
- First of all, you have to connect the Sony Voice Recorder to your device via a USB cable and then launch the software.
- Choose the Sony Voice Recorder from the list of available devices and tap on the Start button to commence the scanning process.

Step 2: Scan the Sony Voice Recorder
- In this step, you have to wait until the scanning is finished. Wondershare Recoverit will scan your device fully to list all the data you have lost mistakenly or unknowingly.

- It may take a while to complete the process. Till then, you have to wait patiently and do not disconnect the recorder while the process is going on.
Step 3: Preview and Recover
- A pop-up message will be generated on the screen once the scanning process is completed. Now, you can easily preview the files and select the audio you want to recover.

- Click on the Recover button and export the files to your preferred location.
Part 4: Recovered Audio Cannot Open? Try Wondershare Repairit
So, you have recovered the lost audio from Sony Voice Recorder but what if it doesn't play? Sometimes, a file gets corrupted or damaged either during the recovery process or when it gets lost. But don't freak out as we have a solution for you.

Try using the Wondershare Repairit tool and make your audio files playable again. Here's the step-by-step procedure.
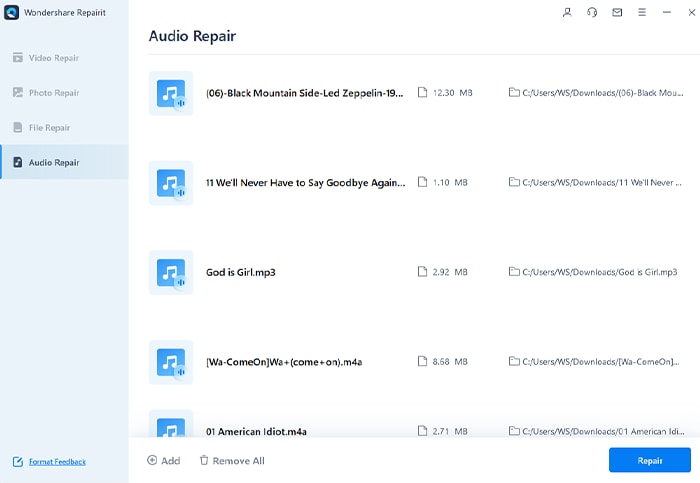
Step 1: Add Corrupted Files
- To begin the process, first, you need to download and install the Repairit on your system. Launch the tool and go to the audio repair section.
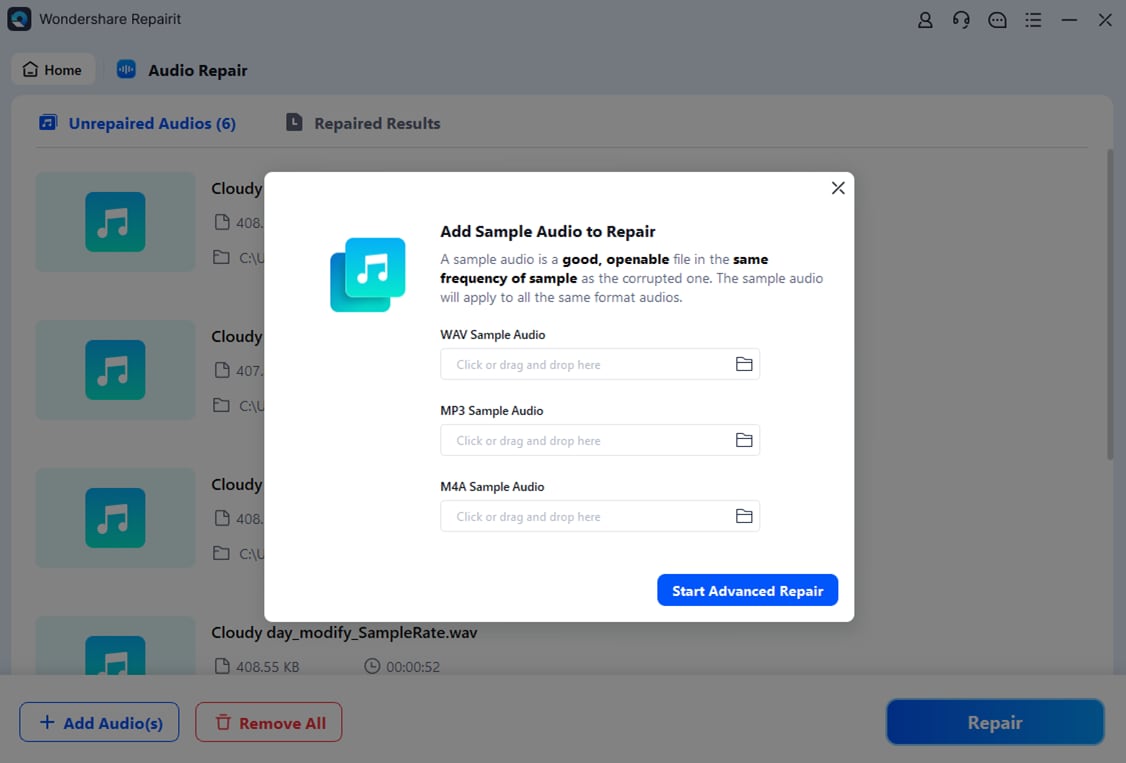
- Add the corrupted and sample audio files and make sure that sample audios must be of the same source and in the same format as the corrupted file.
Step 2: Repair Files
- Once the files are uploaded to the tool, click on the Repair option and wait for a while until it completes the process.
- The progress will display on the screen.
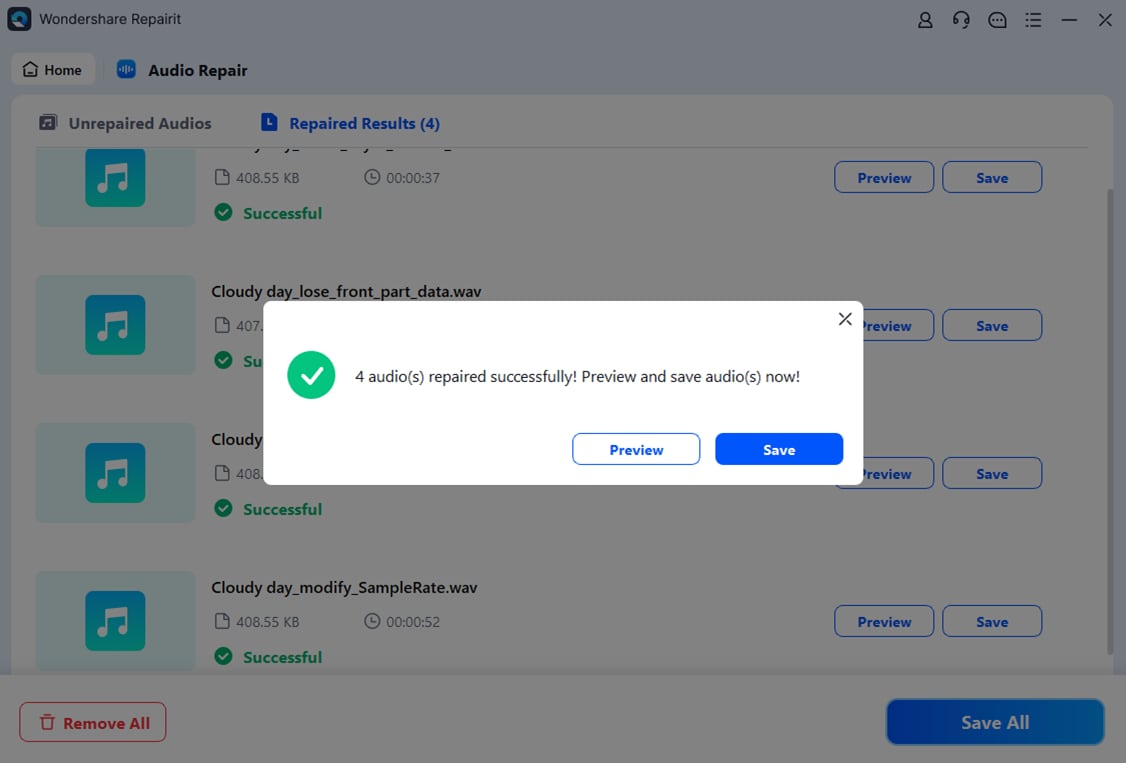
Step 3: Preview and Save
- Tap on the preview button located next to the file and check the final result.
- Click on the Save option to export the repaired audio file to your preferred location.
Conclusion
If your Sony voice recorder is having some audio issues, you may be able to fix them yourself. This guide showed you how to repair audio from a Sony voice recorder using simple tools and common methods. By following these steps, you should be able to get your voice recorder back up and running in no time.
You can either use the backup method to recover the lost file or opt for the third-party tool like Wondershare Recoverit for guaranteed results. So get started!