
 TL;DR:
⚡ Quick Fix: Fix Windows Audio Service Access Denied
Run Audio Troubleshooter: Use the Windows Playing Audio troubleshooter to scan sound service errors, apply basic fixes, and restart your PC.
Reset Audio Service Login: Open Windows Audio in Services, switch the Log On account to NT AUTHORITY\LocalService, apply the change, and start the service again.
Repair System Permissions: Run SFC and DISM to fix damaged system files, then adjust MMDevices registry permissions if the audio service still shows access denied.
Repair Damaged Audio Files: If Windows sound service issues leave MP3, WAV, AAC, FLAC, or M4A files corrupted or unplayable, repair the audio files before replacing them.
Ask AI for a summary
 ChatGPT
 Perplexity
 Gemini
 Claude
 Grok
Grok
Fix "Windows Audio Service Access Denied"
Check why the Windows audio service access is denied, the solutions, and how to fix the problem, as well as fix corrupted/damaged Windows audio files with Repairit Audio Repair with clicks.
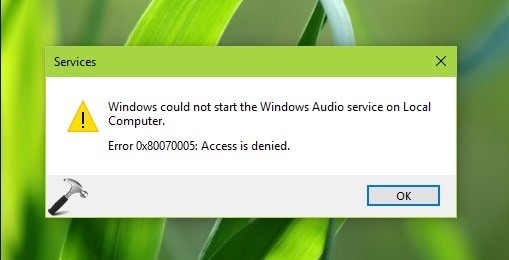
Windows audio services are often set to automatic by default. It means that Windows Audio always starts when you boot the computer. But some users complain that Windows does not start automatically. They often encounter a problem "Windows could not start Windows audio services on local computer" when attempting to start the Windows audio service.
Are you also experiencing a similar problem? If yes, continue reading to find solutions in the following part.
Let's get started.

Part 1: What Will Happen If Windows Couldn't Start Audio Service on Local PC?
Think about being "in the mood" when Windows could not start the Audio Service on local computer and you are unable to listen to anything on your computer. Wouldn't that be disappointing and annoying?
Yes, you would get frustrated because you will not have any audio on your system. You will not be able to hear anything when watching videos or doing something else. And this happens when the audio service does not have enough permissions to run on your computer.
Part 2: How to Fix Windows Couldn't Start the Audio Service Issue?
The computer that generates this error often has third-party antivirus installed. Most of the time, the antivirus software identifies the file as a virus and restricts it. It also has the impact of infecting the related services.
I will discuss some methods in this section that will help you to fix this problem.
Try These Methods
Method 1: Run sound troubleshooter
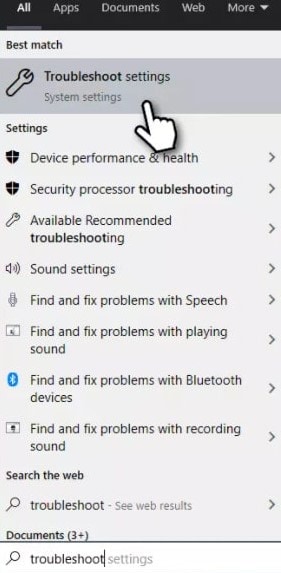
The built-in troubleshooter can help you to fix this problem. As shown here.
Step 1: Start by using Windows search to look for troubleshooting.
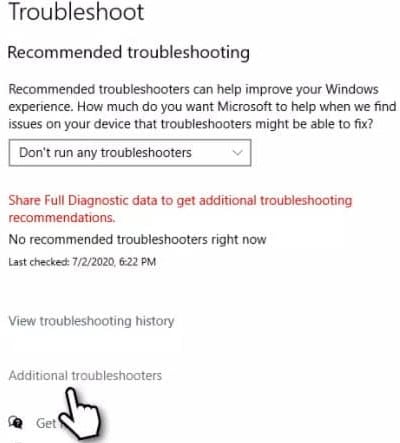
Step 2: Select the Additional Troubleshooter Option.
Step 3: Select Playing Audio. Select Run troubleshooter. Wait for the scan to finish.
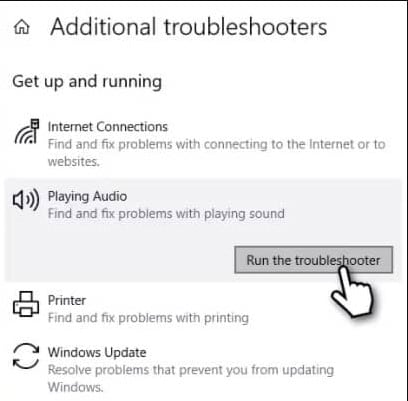
After doing that, restart your computer to implement the fixes.
Method 2: Reconfigure Windows Audio Log On Settings
- Press Win + R, type services.msc, and hit Enter to launch the system services console.
- Locate Windows Audio, right-click it, and open its Properties window.
- Navigate to the Log On tab and switch the authorization token from 'Local System Account' to This account.
- Type NT AUTHORITY\LocalService, clear the password fields, click Apply, and click Start to verify activation.

Method 3: Run SFC or DISM
You might encounter the Windows audio service access denied error when your system files are damaged.
You can fix this problem by running SFC or DISM. Here is how you can do this:
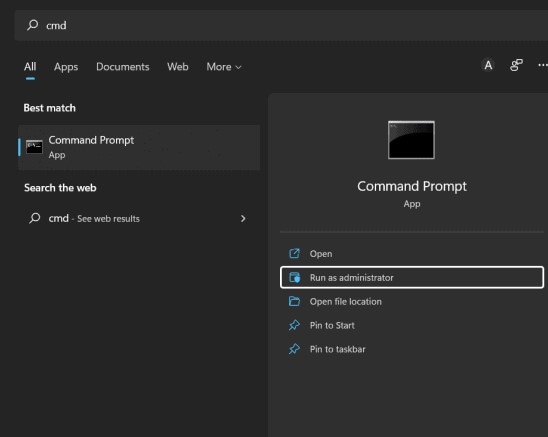
Step 1: Enter CMD into the Windows search box.
Step 2: Right-click on Command Prompt. Then, choose Run as administrator.
Step 3: Type sfc/scannow. And, then press Enter. Let the scan finish.
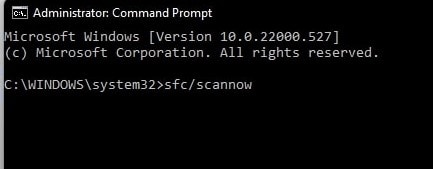
Step 4: After scanning, Windows will warn of any integrity violations it discovers.
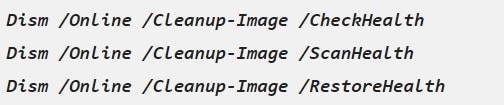
Step 5: If SFC is unable to correct errors, Paste the following commands.
Following each command, hit Enter.
Method 4: Change audio registry permissions
Improper permissions on your user account may stop you from accessing the audio registry. You will need to grant your user account complete control of the audio registry if this happens.
Here are the steps you must carefully follow.
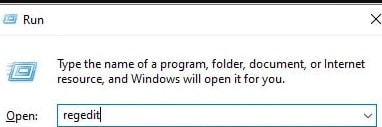
Step 1: Access the Run dialog box by pressing Windows Key+R.
Step 2: Type regedit in the dialog box labeled Run. Hit Enter.
Press Yes to accept the User Access Control screen.
Step 3: A window titled Windows Registry will open. Then, visit:
HKEY_LOCAL_MACHINE\SOFTWARE\Microsoft\Windows\CurrentVersion\MMDevices
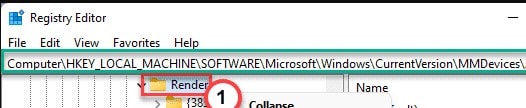
After that, copy it. Then, paste it into the Windows registry address bar.
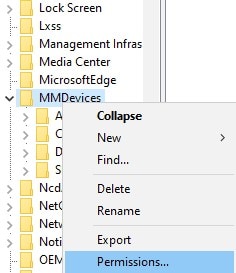
Step 4: You will see the MMDevices folder. Do a right-click on it. Select Permissions after that.
Step 5: In this situation, you must grant everyone Full Control access.
You need to add permissions first. Select Add from the menu.
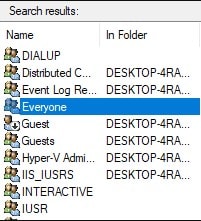
Step 6: After that, select Advanced. Then, click the Find now button.
Step 7: The computer will display a list of all users and groups.
Choose Everyone from the list. And, then press Ok.
Step 8: In the Permissions window's Group or user names, select Everyone.
Allow Full Control by selecting the checkbox next to Allow.
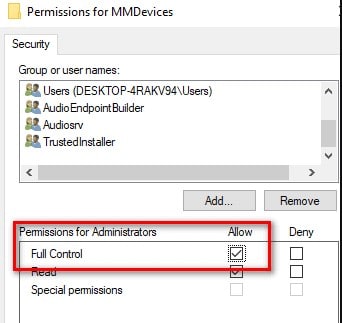
Step 9: Hit Apply. Then, press OK.
Step 10: At last, shut the Windows Registry window. Look for the services menu item under the Start menu.
Step 11: Move the Windows Audio service. Restarting it allows you to test it.
Part 3: How to Fix Windows Audio Files Damaged Problem?
These days, corrupted file issues are a common occurrence. You can take the help of many browser software tools to make it simple to repair their files. Here I recommend you to use Wondershare Repairit – Audio Repair.
Moreover, there are so many features that set Wondershare Repairit apart from other audio repair tools. With this tool, you can quickly repair the original file, regardless of the source from which it was downloaded.

Wondershare Repairit - Audio Repair
 Security Verified. Over 7,302,189 people have downloaded it.
-
Repair damaged audios with all levels of corruption, such as audio not working, clipping audio, humming audio, rumbling audio, sibilant audio, out-of-sync audio, etc.
-
Repair audios of diverse formats, including MP3, M4A, FLAC, AAC, WAV, etc.
-
Repair damaged or corrupted audio from multiple devices: portable voice recorder, recording software, shooting apparatus, SD cards, phones, hard drives, USB flash drives, etc.
-
Support Windows 11/10/8/7/Vista, Windows Server 2003/2008/2012/2016/2019/2022, and MacOS 10.13~MacOS 15.
I personally use this tool whenever I want to repair any broken audios, videos, photos, and files on my computer. And you know it only takes a few minutes to fix the corrupted files.
Now, let's see how you can fix Windows Audio Files corrupted problem by using Repairit Audio Repair.
You can do this task by following three steps.
- Upload your damaged audio files
- Start the repairing process
- Stream the repaired videos and save them
Let's discuss these three steps in detail.
Step 1: Upload your damaged audio files.
Start Wondershare Repairit on your PC. Then, select "More Types Repair" from the sidebar, then, click "Audio Repair".
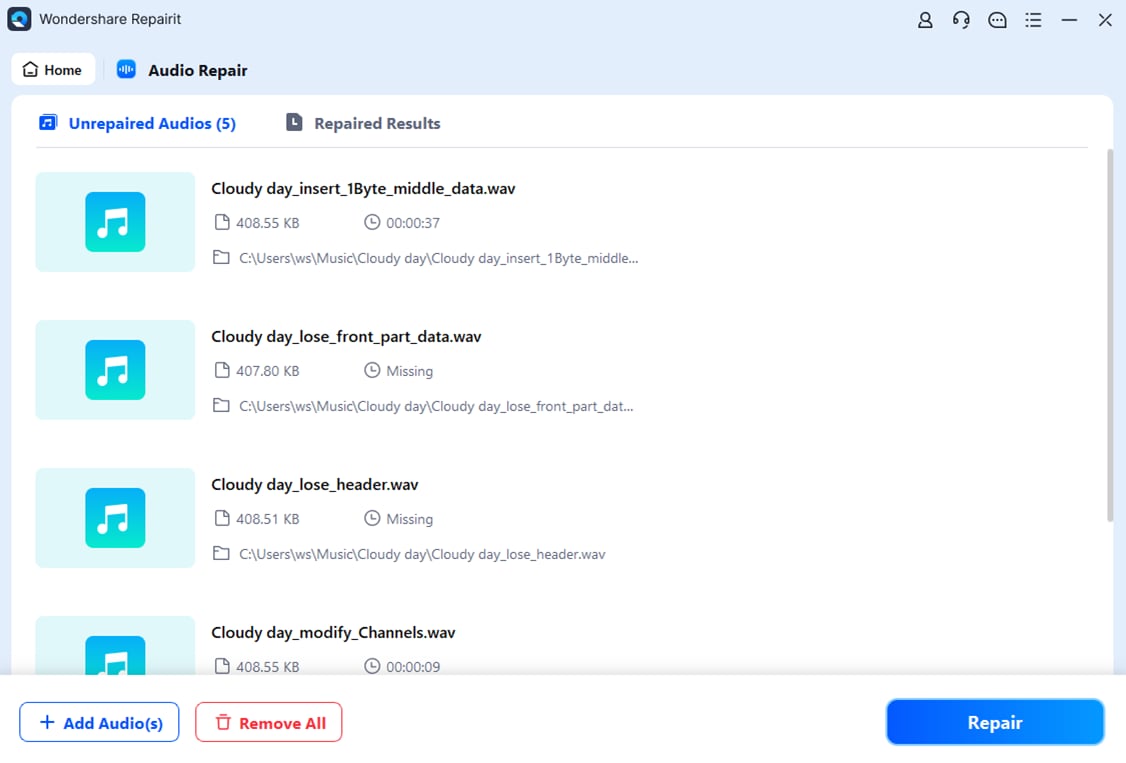
To upload your damaged files, click the "Add" button. MP3, MFA, FLAC, AAC, and WAV are just a few of the audio formats that Repairit supports. It also enables fixing audio file formats.

After that, the interface of Repairit will display the details of each audio.
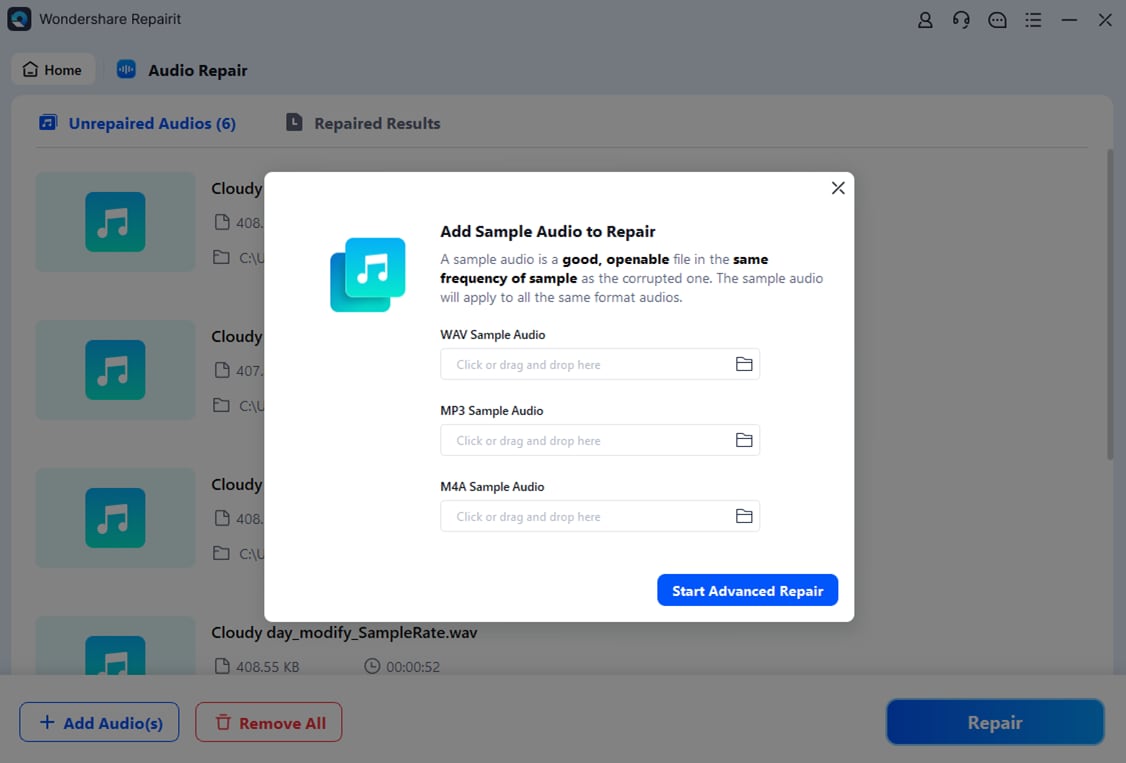
Step 2: Start the repairing process.
To start the repairing process, click the "Repair" button. You will view a window. Add good sample audios with the same audio format as the damaged audios. The sample audio will be applicable to all audio of the same format.
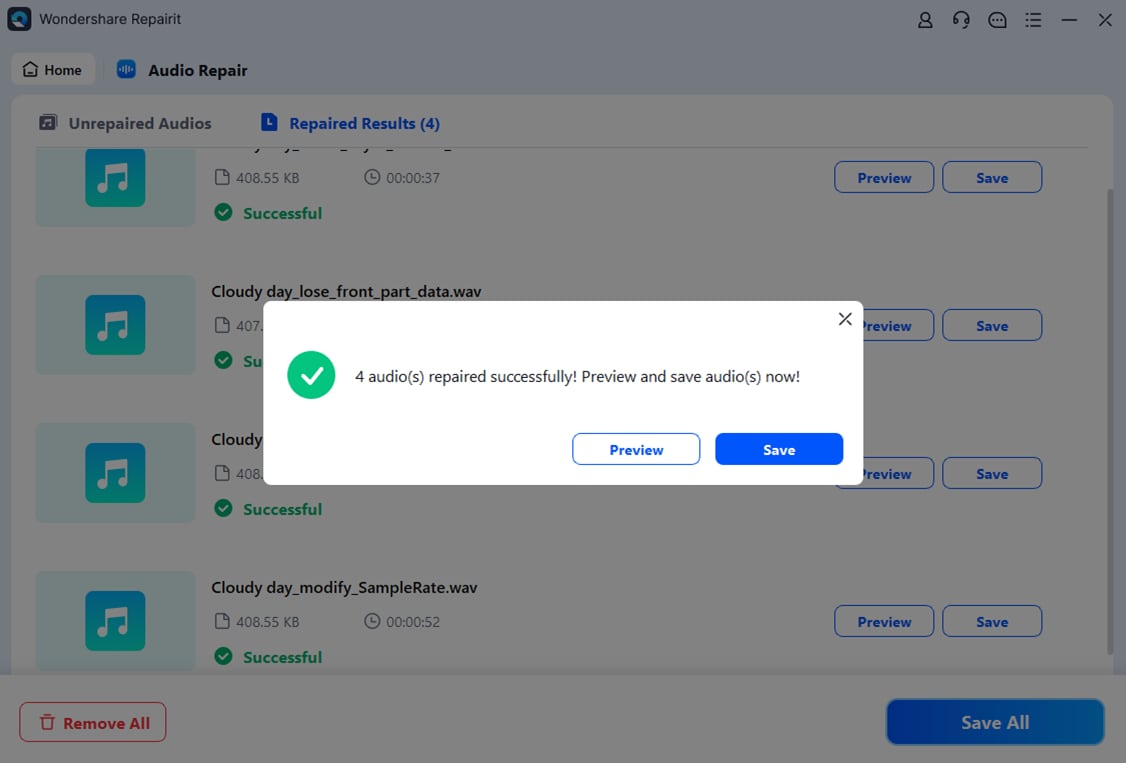
Step 3: Stream the repaired videos and save them.
When you complete the repairing process, you will see the result of each audio. You can check the audio quality by clicking the "Preview" button. You can do this only when the status of your audio files is "Completed". This status denotes that you have got the fixed audio files.

If the repaired audio satisfies you, hit the "Save" button. Then, choose a path to save the recovered audio files.
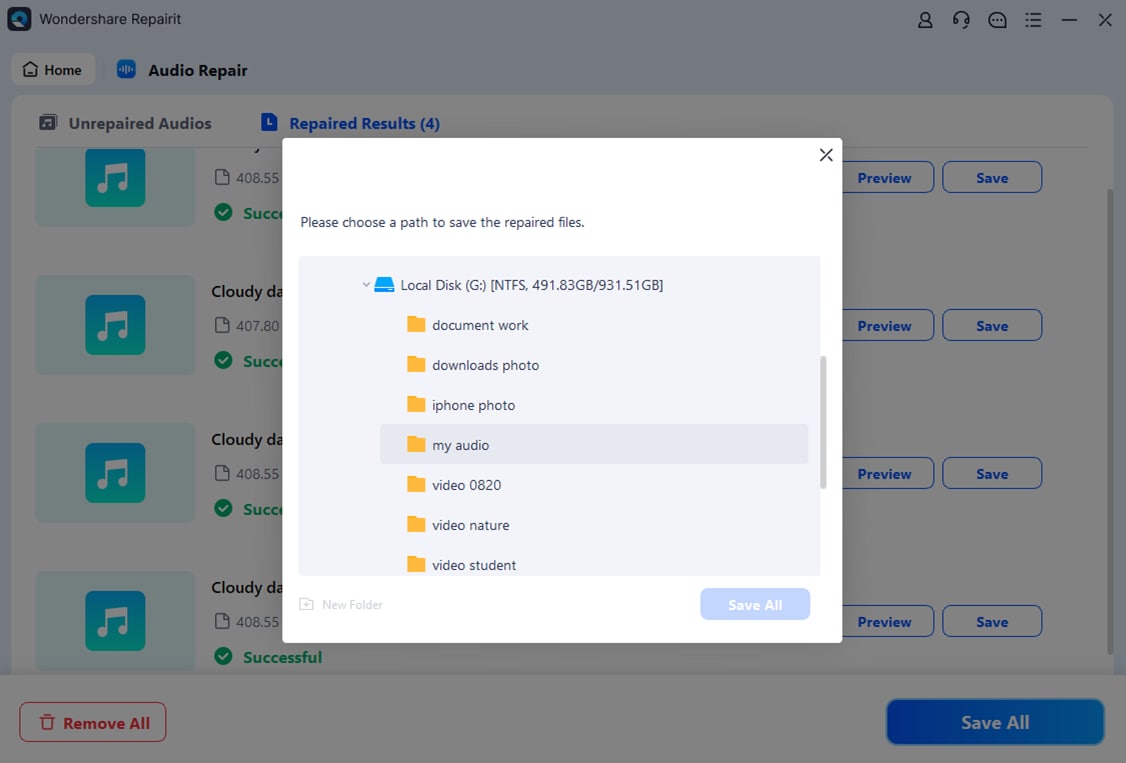
Now, wait for a few seconds to save the fixed audio files.
In this way, this tool can save your audio to the chosen location on your Windows PC. Now go to the selected location where you have saved your repaired audio files. And use them without any hassle.
Conclusion
So that's it. I hope you have understood how you can fix the "Windows could not start Windows Audio Service on local computer" error. You just follow the methods mentioned above and get the repaired audio files. And If you want to repair your corrupted audio files then use Wondershare Repairit. It is the best file recovery tool that will help you to repair your damaged files without loss of quality or content. You definitely won't be stuck if you use it for fixing your corrupted files.
* Some of the above codec formats may need to be supported by the system.
People Also Ask
-
Why does it say 'Windows could not start the Windows Audio Service on Local Computer'?
This usually happens due to permission issues, corrupted system files, or disabled audio dependencies. Checking the Windows Audio service properties and enabling related services (like RPC and Windows Audio Endpoint Builder) often fixes the error. -
How do I fix the 'Cannot start Windows Audio Service Access Denied' error?
You can fix this by running Windows Services as an administrator, checking group policy restrictions, and resetting audio-related registry permissions. If system files are damaged, using the built-in SFC and DISM commands can help repair them. -
Can Repairit fix corrupted audio files when the Windows Audio Service won't start?
Yes. If your Windows cannot start the audio service and some audio files are already corrupted or unplayable, Wondershare Repairit can repair damaged audio files easily. It restores broken sound files without needing the Windows service to run properly.