
 TL;DR:
The "Realtek audio console not working" error on Windows 10 and 11 is typically caused by outdated or corrupted drivers following system updates, and can be resolved by executing a clean driver reinstallation or repairing the software via the Programs and Features menu.
● To bypass interface loading issues, you can directly access and launch the software by navigating to the C:\Program Files\Realtek\Audio\HDA directory and executing the Realtek Audio manager.exe file.
● When troubleshooting via the devmgmt.msc command, uninstalling the sound controller requires manually clicking "scan for hardware devices" afterward to trigger the automatic reinstallation of the missing Realtek drivers.
● If the playback failure stems from corrupted audio files rather than the console itself, repairing them with Wondershare Repairit requires uploading a working reference sound sample of the exact same format as a strict prerequisite.
Ask AI for a summary
 ChatGPT
 Perplexity
 Gemini
 Claude
 Grok
Grok
Fix Realtek Audio Console Not Working
Check the solutions to fix the "Realtek audio console not working" problem and fix corrupted audio files with Repairit Audio Repair with clicks.
Realtek Audio Manager provides a wide range of options for changing sound settings. However, if you cannot open them, your efforts will be zero. Many users have reported a "Realtek audio console not working" error on Windows. If you're also one of them, then don't feel bad. You can resolve this error by performing the tested solutions. The reason for the Realtek audio console not opening is outdated or corrupted drivers. Today, I bring you an easy guide that helps you understand what the Realtek audio console is, why it is not working, and so on. Let's dive into it!

Part 1: What Is Realtek Audio Console?
Realtek audio console is an amazing interface that adjusts audio device settings and effects. It assists in selecting the sound system audio setup and independently adjusting the level for each speaker.
However, there are many cases when the "Realtek audio console not working." This can occur anytime, and the reason after this is corrupted drivers. Users who recently updated Windows 11 or bought a new system are victims of this. But this is not specific.
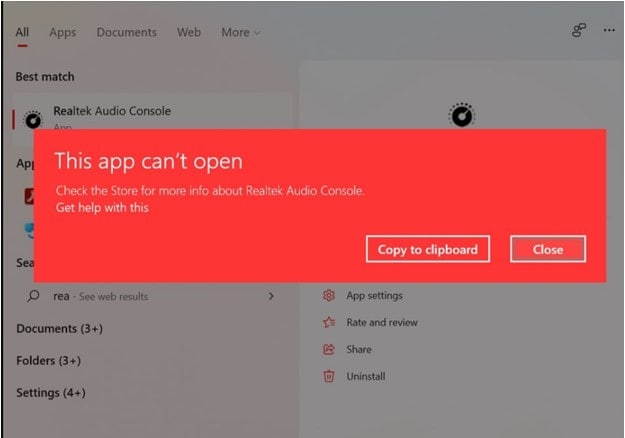
Remember, it won't appear in the control panel or the task manager. If you need to see this error, go to the Realtek audio manager location. Then, double-click on the file, and you will get the message as shown in the image below.
Part 2: What will cause Realtek audio console not working?
The outdated or improper installed drivers generally cause the Realtek audio console not opening. Some users have reported this error message after updating Windows 11 or buying the new system. However, the causes are not specific. Thus, I have shared top fixes that are valid for all victims. So, keep reading!
Note: When you troubleshoot the Realtek audio driver, the error message you will receive is not specific. You can find this error message as follows:
The Realtek audio console isn't working or opening.
The Realtek audio console does not appear to be loaded.
Rtkngui64 will not open.
This system does not support the Realtek audio console.
These frequently appear due to Windows updates, driver issues, or other reasons. So, pay attention to each and try your solution accordingly.
You can't miss: Realtek Audio Console Download: Get It on Windows 10 & 11 Easily
Part 3: How To Fix Realtek Audio Console Not Working Issue?
If you have recently updated Windows 11 or there is an issue with drivers. Follow the given solutions, and fix the Realtek HD audio manager not opening.
Method 1: Check if Realtek HD Audio Manager is Available
Realtek audio manager is available in the list of installed programs. Many users have reported that they are unable to access it. But you can easily access the installation directory and create a shortcut to the software EXE file. To do this, follow the given step-by-step guide.
Step 1: Press Windows + E to open the file explorer.
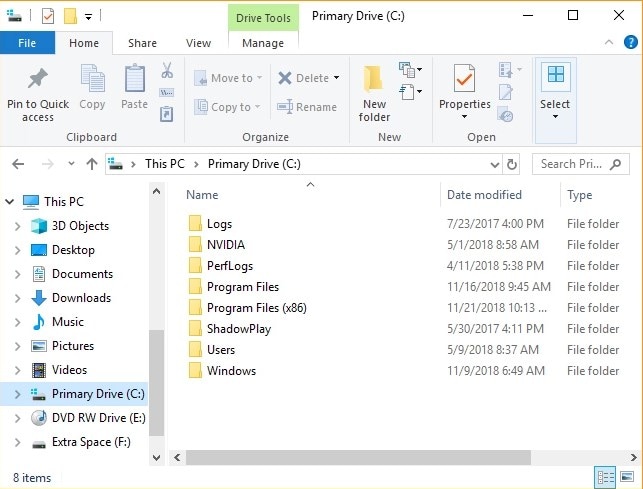
Step 2: Select Drive C, then program files, and then Realtek.
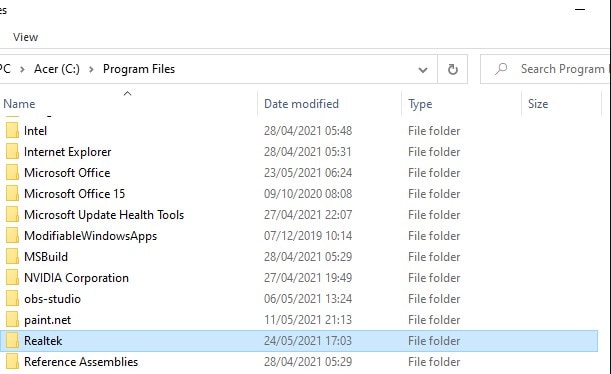
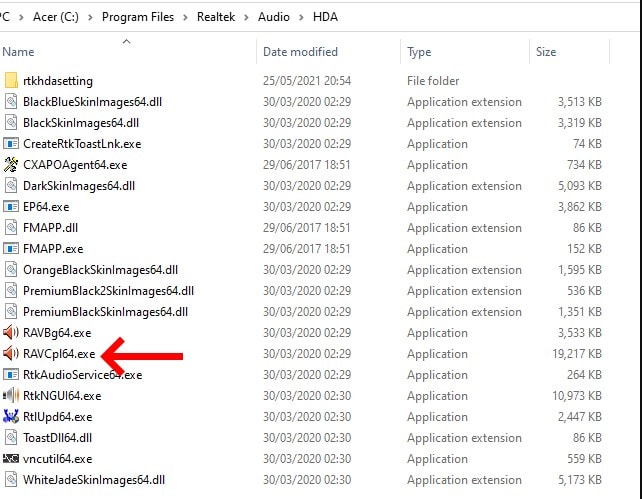
Step 3: In the Realtek folder, choose audio then HDA.
Step 4: Navigate to HAD and double-click on the Realtek Audio manager.exe file.
Step 5: Create the shortcut for the Realtek file by just right-clicking on the option and selecting create a shortcut option.
Method 2: Uninstall and reinstall Realtek audio driver
This fix can help if you have faulty drivers installed on your system. Here is how you can uninstall and reinstall the driver.
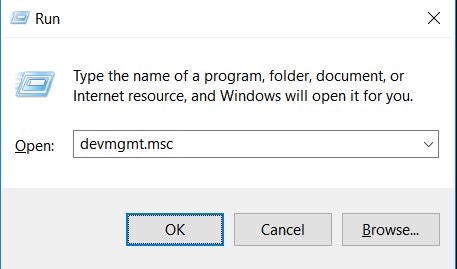
Step 1: Press the Windows + R key combination to launch the run command.
Step 2: Enter devmgmt.msc.

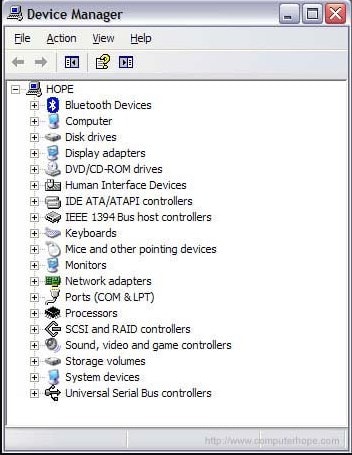
Step 3: Navigate the sound, game, and video controller options.
Then, right-click on Realtek audio manager and select uninstall option.
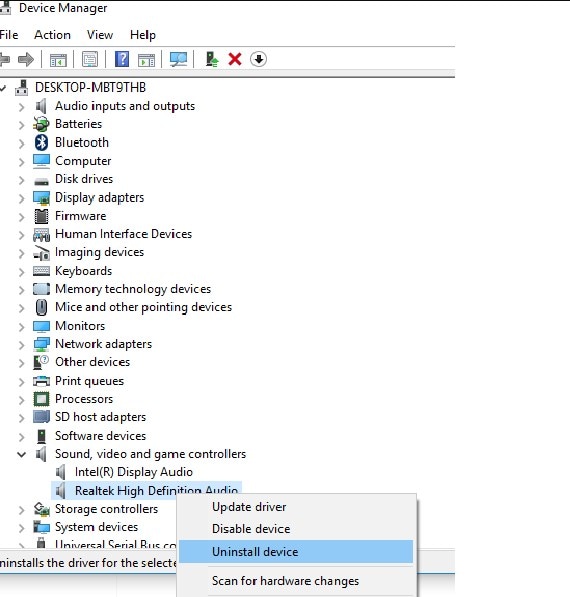
Step 4: When the Realtek audio driver is uninstalled, click on the action button at the top of the window.
Then, choose scan for hardware devices.
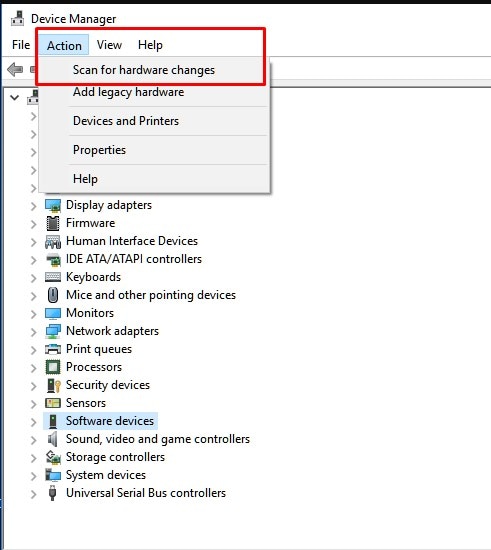
This step will automatically reinstall missing drivers. Thus, you will resolve the "Realtek HD audio manager not opening" error. If the problem is not solved, then move to method 3.
Method 3: Update Drivers
If there are pending driver updates, it will restrict you from enjoying the better sound. So, update the audio drivers and solve this problem.
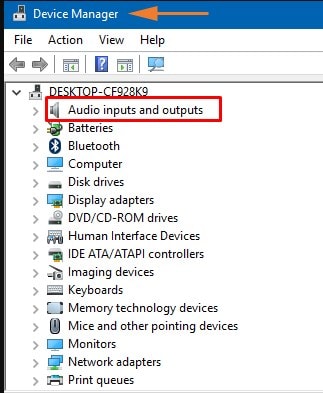
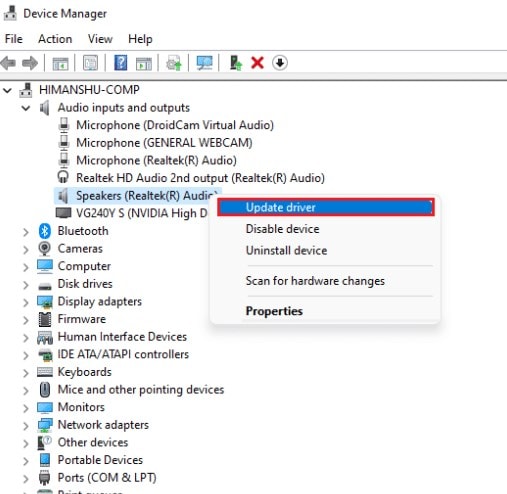
Step 1: Go to the taskbar and type Device Manager in the search bar.
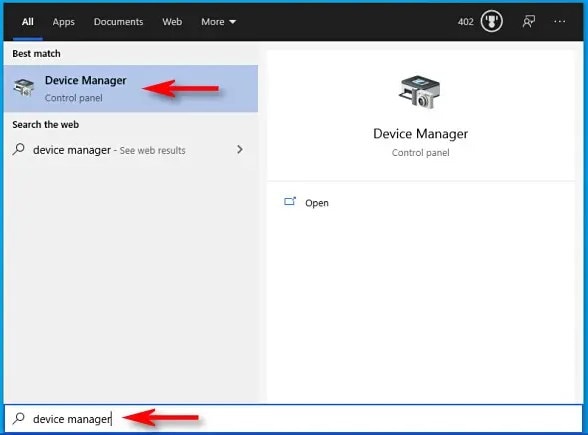
Step 2: Open the device manager and click on inputs and outputs to view the installed drivers.
Step 3: Right-click on the Realtek audio driver and choose the "update driver" option.
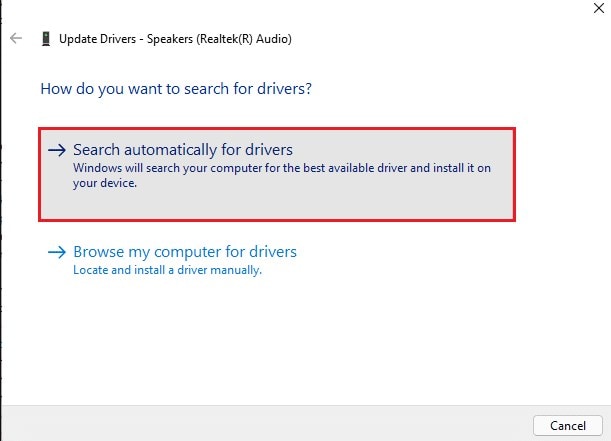
Step 4: If you cannot operate this option, click on search automatically for drivers to download.
This will update the drivers automatically.
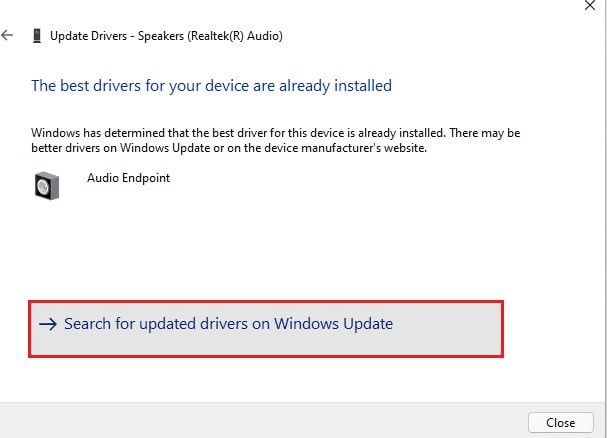
Step 5: If your driver is already updated, this will send you a message, "The best drivers for your device are already installed."
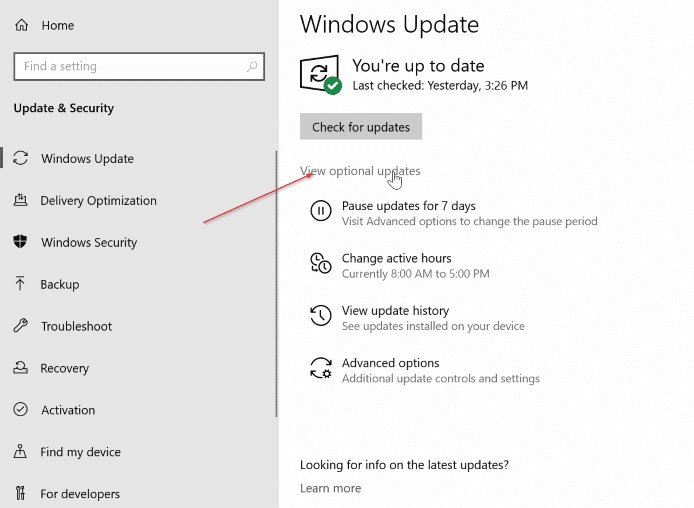
Step 6: Click on search for updated drivers on the windows update option.
Step 7: Next, choose the advanced options from the right side of the update window's menu.
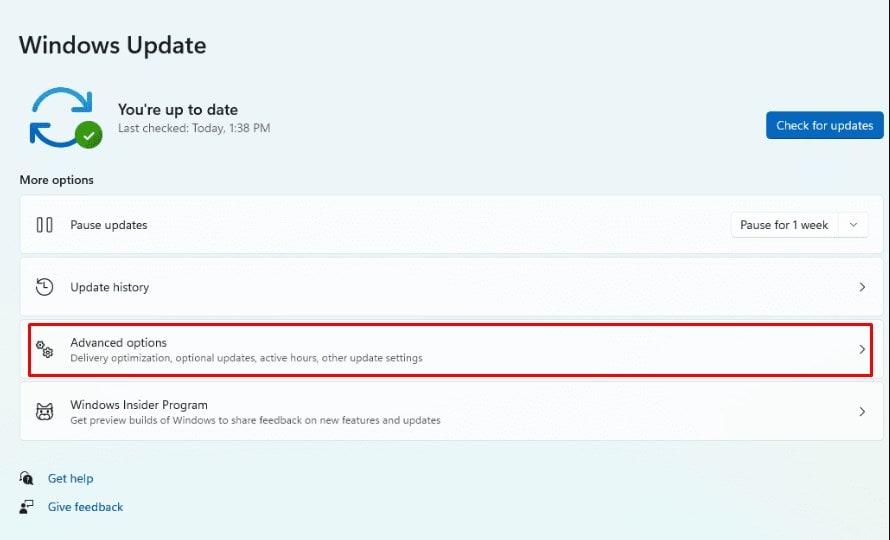
Step 8: Tap on optional updates. If an update is available, it will be listed under this category.
Step 9: Look for the audio driver updates. If you find it, click on the download & install option.
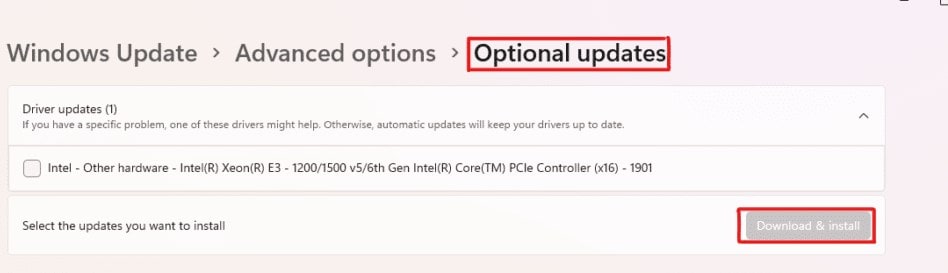
Step 10: Restart your system.
Method 4: Rollback drivers
Below is the easy step-by-step guide to rollback drivers.
Step 1: Enter Windows + R key and type decmgmt.msc.
Step 2: Double-click on the sound, video, and game controller options.
Step 3: Double-click on the driver of your sound card and choose properties.
Make sure your driver tab is open until you select it.
Step 4: Follow the on-screen details by clicking on the rollback drivers option.
Note: If the rollback driver's option grey out, you won't be able to use it again. Then, you are left with only the reinstall driver's option.
Method 5: Repair Realtek Audio Manager
The error "Realtek audio console not working" can be resolved by repairing the Realtek audio manager. Follow these steps to fix it.
Step 1: Launch the control panel and go to the programs category.

Step 2: Choose programs and features. This will show you all the features included in the system.
Navigate Realtek high definition audio driver from the drop-down list.
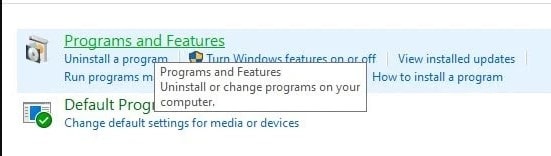
Step 3: Right-click on the Realtek option and choose to uninstall/change from the list.

Step 4: Go to repair audio drivers and click the repair button.
Step 5: Follow the on-screen details to complete the procedure.
I hope this has resolved your issue. If it is not, then move to the following method.
Method 6: Use Third-Party Software
Using third-party software can also help you remove the issue. With DriverFix, you can solve this matter since it will discover, download, and install the correct driver version on your Windows PC.
Method 7: Update Windows system
Updating Windows system can also ease your problem and improve your experience. To check for updates, follow the given steps.
Step 1: Press Windows + S and type updates. Then, check for updates.
Step 2: Click on "check for updates" option in the windows update box.

Step 3: To eliminate all issues, install all the updates available to you.
Restart your computer and see if the error is resolved.
Part 4: How to Fix Corrupt Audio Files on Your PC?
You must be wondering why I am sharing this in the middle of the article. Well, that's a bonus for you. Yes! If you're still here and reading my post, it's time to give you a magical tool that repairs all corrupted files on your PC.
Wondershare Repairit is designed for those seeking a permanent solution for recovering files. There is no doubt that you will have various tools to save and protect your files, but Repairit is the best.
Based on my experience, Wondershare Repairit Audio Repair will offer you awesome results you can't expect from others. Although, it is a three-step process that includes adding, repairing, and saving.
Doesn't it sound worthy? If you're ready to use this tool, check out the steps to use it for Windows.

Wondershare Repairit - Audio Repair
 Security Verified. Over 7,302,189 people have downloaded it.
-
Repair damaged audios with all levels of corruption, such as audio not working, clipping audio, humming audio, rumbling audio, sibilant audio, out-of-sync audio, etc.
-
Repair audios of diverse formats, including MP3, M4A, FLAC, AAC, WAV, etc.
-
Repair damaged or corrupted audio from multiple devices: portable voice recorder, recording software, shooting apparatus, SD cards, phones, hard drives, USB flash drives, etc.
-
Support Windows 11/10/8/7/Vista, Windows Server 2003/2008/2012/2016/2019/2022, and MacOS 10.13~MacOS 15.
Repair Audio files on Windows with Wondershare Repairit
Repairit can repair corrupted and damaged audio within clicks. Here's how you can repair audio files.
Step 1: Launch Wondershare Repairit on windows, and click on the more types repair option.
Then, click on Audio Repair , and +Add to upload corrupted files.

After uploading files, Repairit will show the information of each audio file, including name, path, etc.
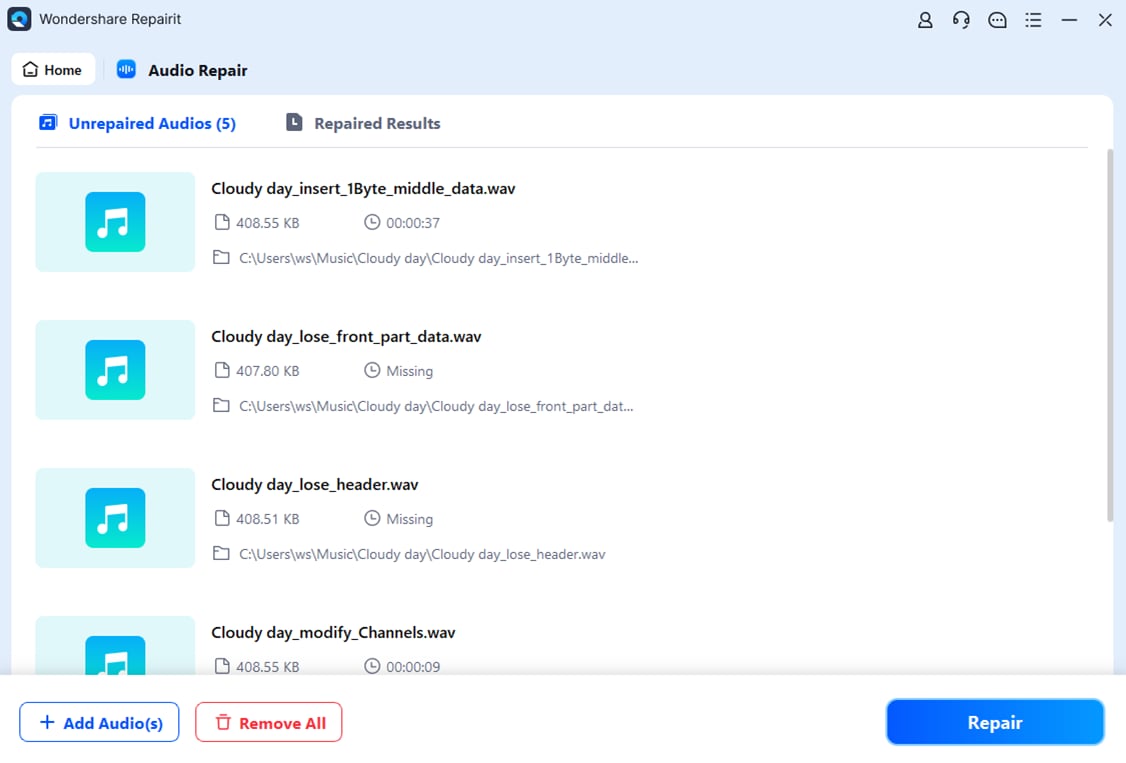
Step 2: To start the audio repair procedure, click the "Repair" button.
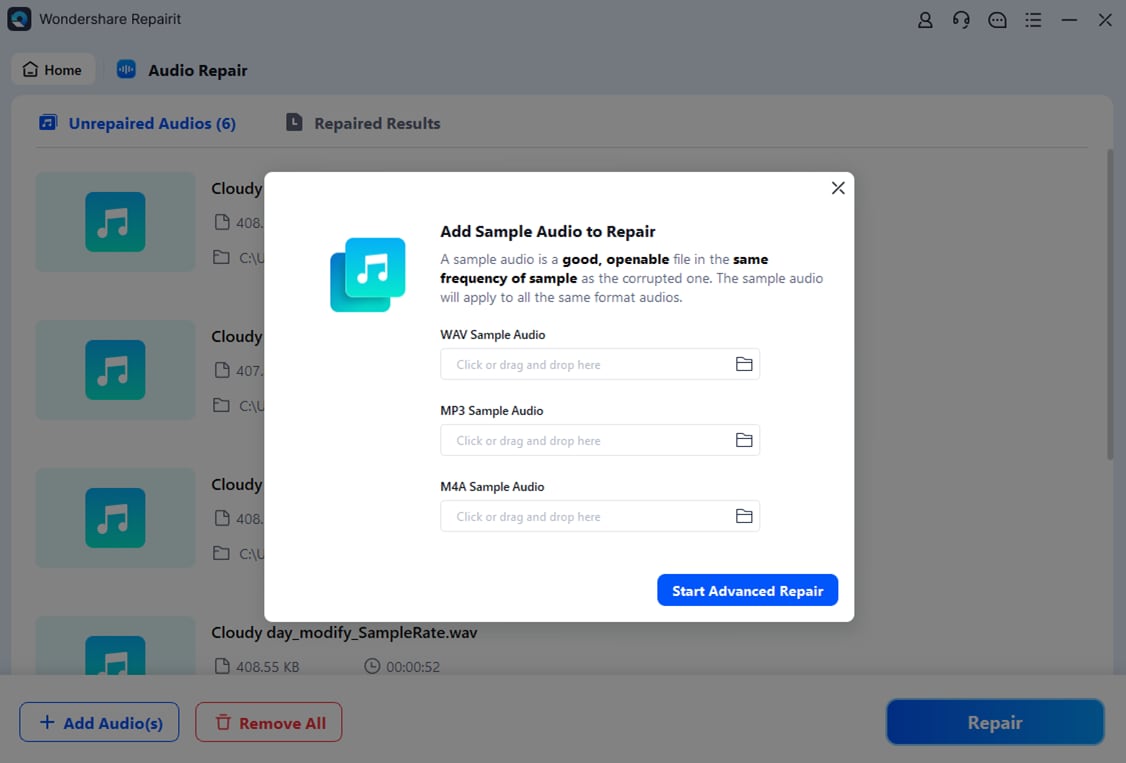
You can add sound samples with the same audio format as the corrupted ones. Then, a window notifies you that the sample audio will affect all audio of the same format.
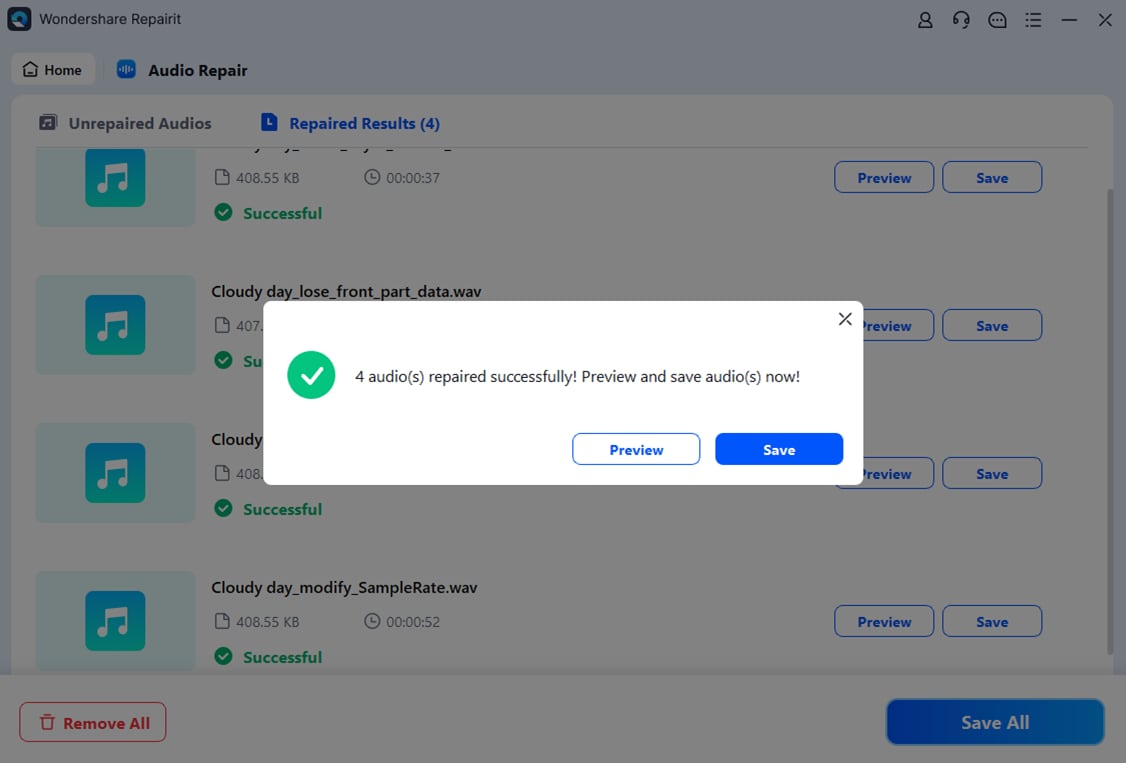
Step 3: After the repairing process, Repairit will show you "completed" status and the "preview" option.
This helps you scan audio files before saving them on another path.
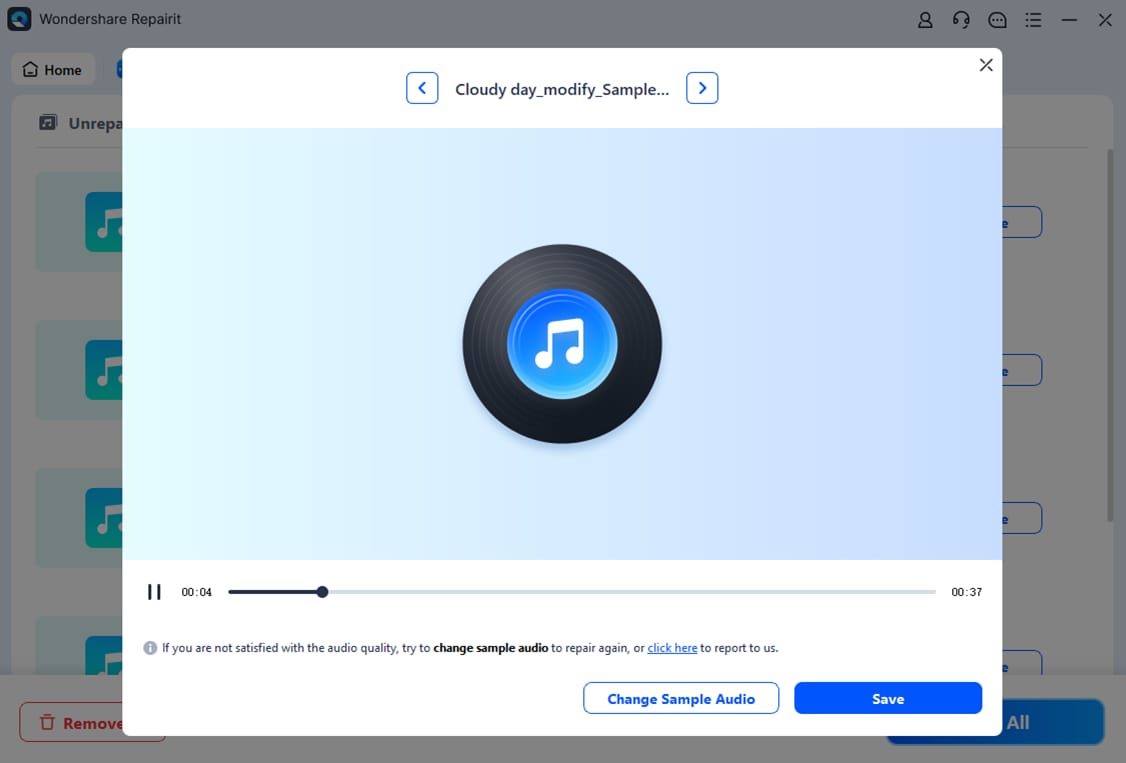
If you're okay with quality, then save it to another path.
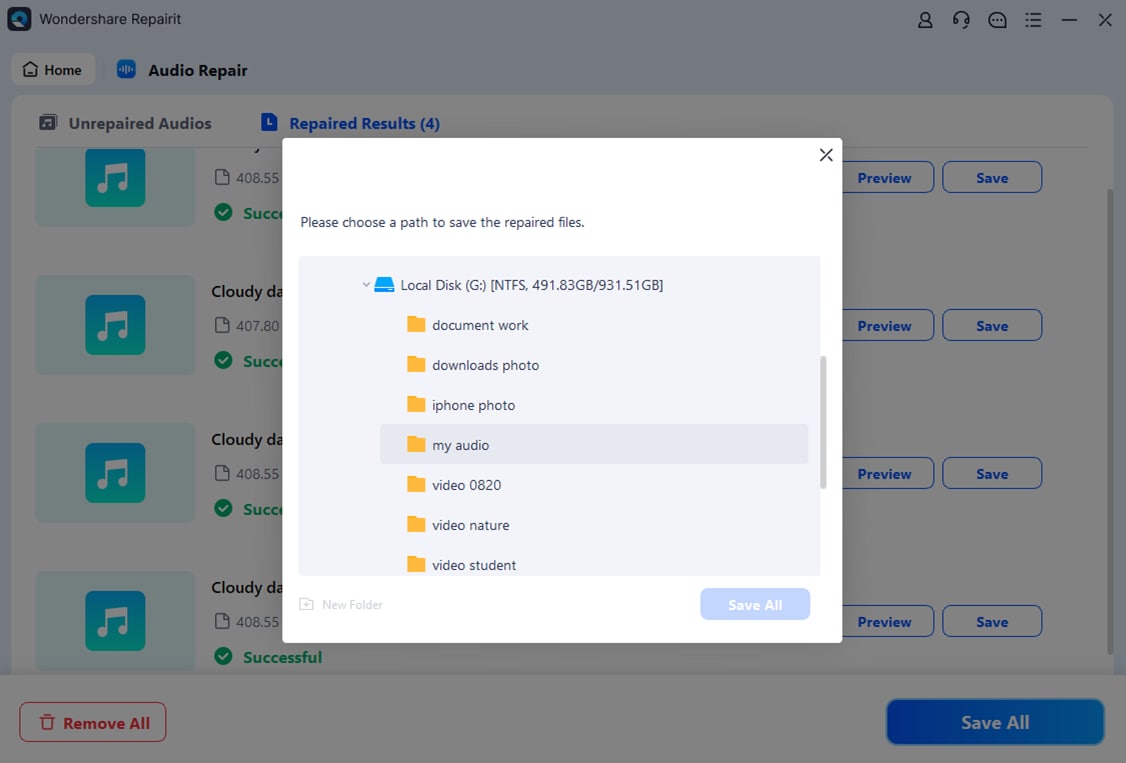
Now, wait for a few seconds, and you will see a message "saved successfully."
Conclusion
Congratulations! You've successfully learned the solutions for fixing the "Realtek audio console not opening" error. I hope my given solutions will fix your problem and you will enjoy the sound quality like you did. However, I have also suggested you try the Wondershare Repairit Audio Repair tool for repairing audio, video, and documents. Right now, it is available on a free trial, so give it a try today!
* Some of the above codec formats may need to be supported by the system.
People Also Ask
-
Why is my Realtek audio console not opening on Windows 10/11?
If the Realtek audio console is not opening or stuck loading, it’s usually due to a missing or outdated Realtek audio driver. Reinstalling the Realtek HD audio driver or updating Windows can often fix this issue. -
How can I fix Realtek HD audio manager not opening?
To fix Realtek HD audio manager not opening, try reinstalling the Realtek driver, enabling the audio service, or checking if the software is compatible with your system. If the console doesn’t support your machine, download the latest version from Realtek’s official site. -
Can I repair corrupted audio files if Realtek audio console doesn't work?
Yes. If Realtek audio console doesn’t open or fails to play sound, the issue may lie in corrupted audio files. In this case, you can use Wondershare Repairit to repair corrupted audio files and restore them to playable condition without losing quality.