

 TL;DR:
⚡ Quick Fix: Fix Generic Audio Driver Detected
Resolve the generic audio driver detected error on Windows 11/10/7/8 instantly with these 3 steps:
● Update or Reinstall Drivers: Open Device Manager, right-click your audio device under sound controllers, and select Update driver. If the error persists, click Uninstall device and reboot your PC to reinstall it.● Adjust Audio Services & Enhancements: Run services.msc via Win+R and set Windows Audio to Automatic. Then, open Control Panel sound properties and check Disable all enhancements to prevent driver clashes.
● Repair Unplayable Audio Files: If system glitches corrupted your media files, use Wondershare Repairit to quickly fix broken MP3, M4A, FLAC, AAC, and WAV files (.amr unsupported).
Ask AI for a summary
 ChatGPT
 Perplexity
 Gemini
 Claude
 Grok
Grok
Recently, users are getting "generic audio driver detected" error on their screen. Software clashes, windows glitches, and missing drivers are some causes of this issue. In this article, I have come up with a complete guide, including what a generic audio driver is, its causes, and fixes. Let's go!
Part 1: What is Generic Audio Driver
Generic audio driver is an error message that a troubleshooter displays when your computer has an issue with the audio or sound system. Drivers are important for computers to run graphic cards and sound systems correctly. If they get wrong, users are unable to listen to audio files. So, a generic audio driver is also a type of driver that pop-ups when it needs updates or fixes due to software issues.
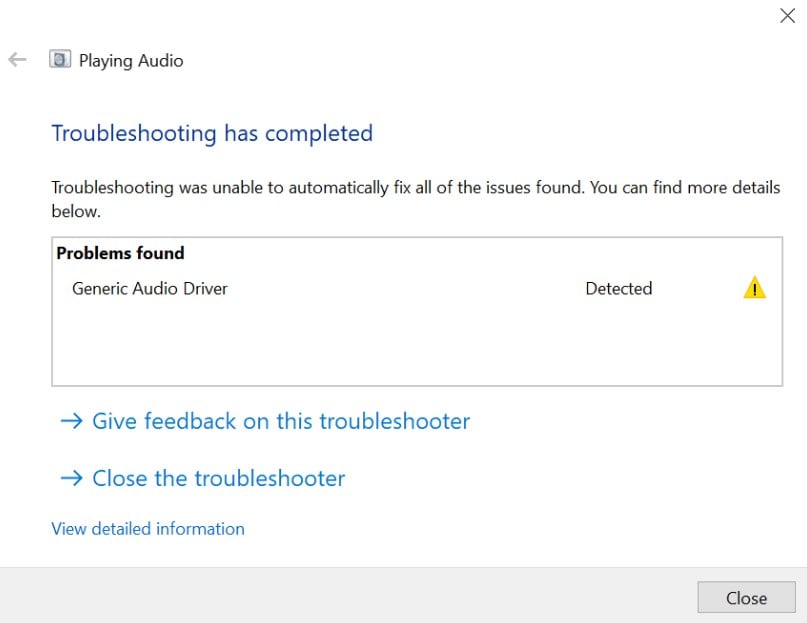
Generic audio driver error looks like this-
Part 2: What Does Generic Audio Driver Detected Mean?
If a computer system detects a generic audio driver problem, it means there is a significant issue in the audio system. When you check the audio system error, it states generic audio driver not fixed message.
A generic audio driver problem is often tough to notice since it seems unrelenting. Therefore, I decided to share this short guide so you can easily find the solutions of this error. However, you're requested to perform each fix simultaneously. This can help you better understand the error and their fixes.
Part 3: How to Fix Generic Audio Driver Detected?
Troubleshooting is one of the most acceptable ways to detect a problem. If your PC is stating, "generic audio driver not fixed" pop-up, try the following solutions. Keep in mind, the given methods are tested and good to go with windows 11/10/8.
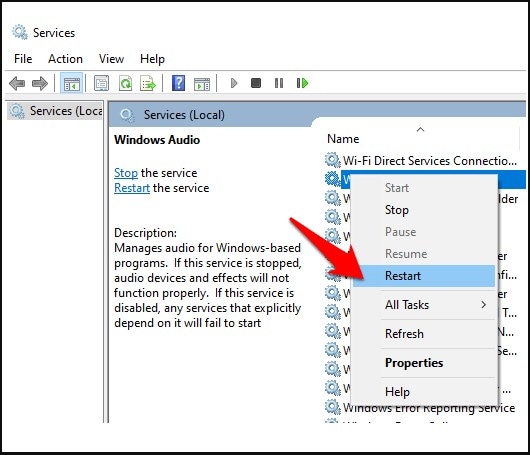
Fix 1: Enable the Audio Services
Disabled audio service is one of the major causes of an error "generic audio driver" message. Therefore, before catching up other generic audio driver fixes, try this method. Here's how you can perform this-
Step 1: Launch the Run dialog box by pressing Windows + R key combination.
Step 2: Enter "services.msc" in the box and press the ok button.

Step 3: Next, navigate Windows audio terminal generator and check whether the status is running or not.
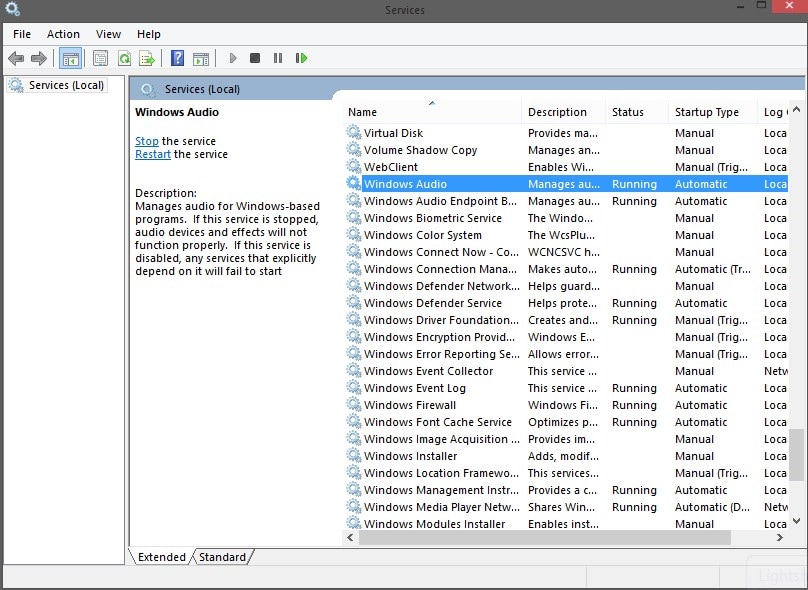
If it is not, right-click on each option and select start. Then, go to properties.
Step 4: Now, change the startup type to "Automatic."

Lastly, click on the Apply button to save the changes. Now, check if the audio services are running. In case, the problem remains the same, move to Fix 2.
Fix 2: Update the Audio drivers
Updating the audio driver is also one of the best generic audio driver fixes. Here's how you can do this.
Step 1: Go to the taskbar and open the device manager on your computer screen.
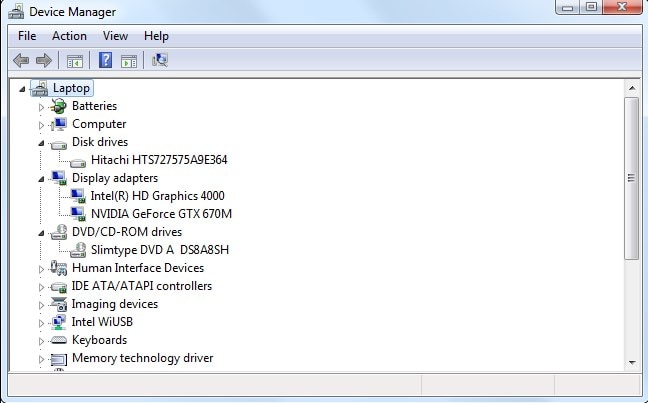
Step 2: Select the driver you need to update. Right-click on the driver and choose update.
Remember, you need to follow the same process for all drivers that comprise faults.
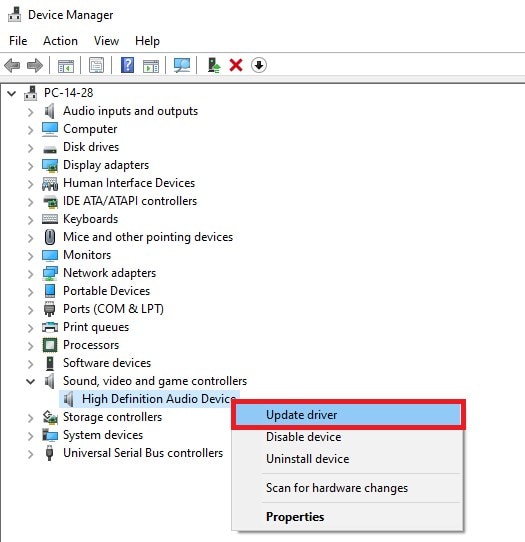
Step 3: Restart your PC.
I hope the problems found generic audio driver is resolved. Yet, if it is not, then try fix 3.
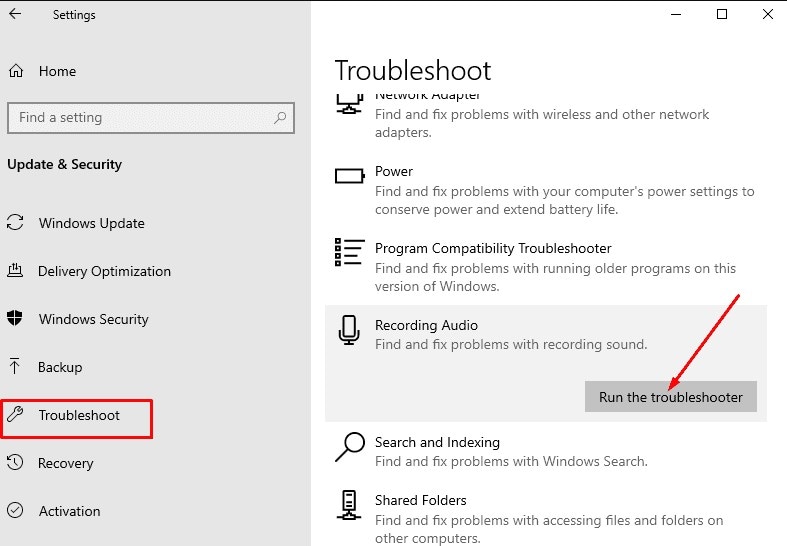
Fix 3: Run Audio Troubleshooter
Running audio troubleshooter might fix the issue automatically. Here's how you can do this.
Step 1: Search audio troubleshooter in the search box from taskbar.
Step 2: Choose "find and fix the problems with playing sound" from the results of the taskbar to start the troubleshooter.
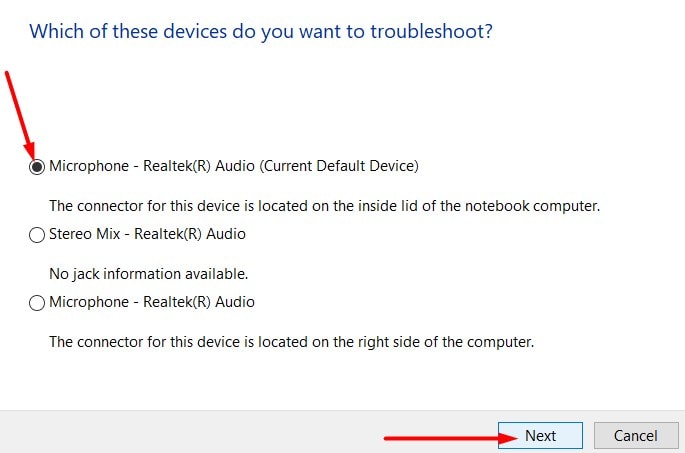
Step 3: Next, choose the device you want to troubleshoot, and then continue through the troubleshooter.
So, have your problems found generic audio driver solved? No? Try fix 4!
Fix 4: Reinstall Audio Drivers
The "Generic audio driver not fixed" error can cause due to outdated drivers or some faulty issues. So, reinstalling audio drivers can help you. Here's how you can do this:
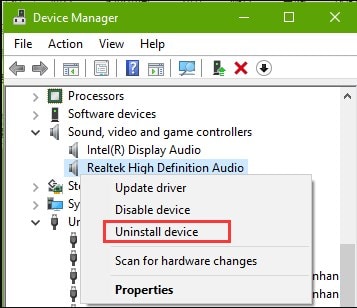
Step 1: Launch the device manager.
Step 2: Locate sound, video, and game controllers. Then, Double-click on it.
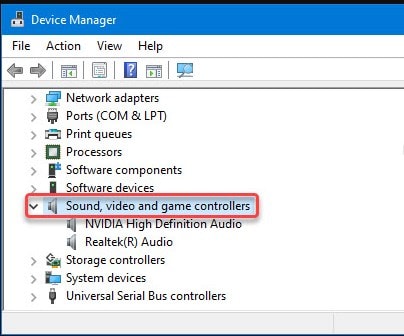
Step 3: Click on Realtek audio and choose to uninstall the device.
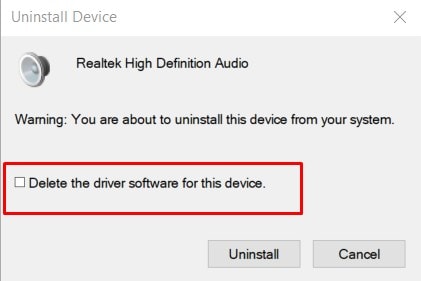
Step 4: A warning message will pop up. So, tick the box and press "uninstall" button.
Step 5: Reboot your computer and reinstall the driver again to enjoy the smooth workflow.
If it doesn't work for you, move to the following method.
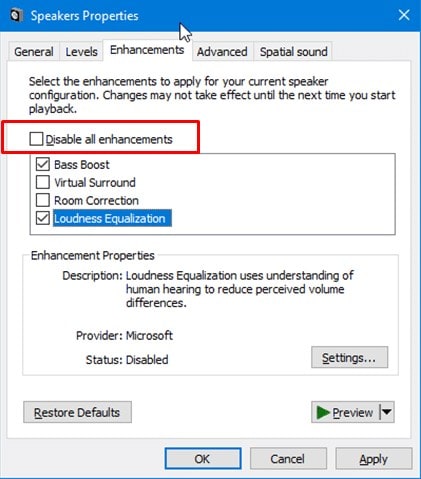
Fix 5: Turn off Audio Enhancements
Audio enhancements improve sound quality and give you full-on entertainment. Unfortunately, it sometimes creates an issue with the audio device and sends an error generic audio driver detected dell. Follow the given steps to disable sound enhancements.
Step 1:Press Windows + R and enter the control in the box.
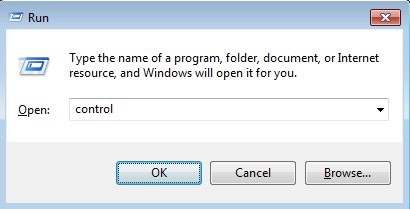
Step 2: The control panel window appears on the screen.
Next, navigate the sound isolation and click on it. Then, choose properties.
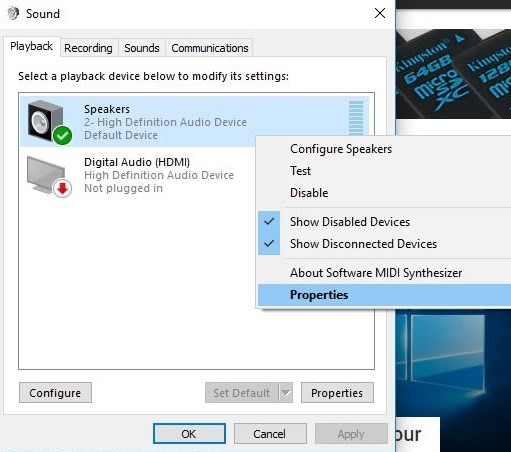
Step 3: Under the properties option, choose enhancements and click on the turn off all enhancements checkbox.
Then, click on the ok button and save the changes.
More related articles:
How to Repair an Xbox 360 Disc Drive Safely and Effectively
How to Fix Corrupt Disk Steam Issues Step-by-Step
Unsupported File Type in Google Drive? Fix Preview & Upload Errors (Desktop & iPhone)
Part 4: How to Fix Audio Files No Sound on Windows 10/7/8?
In this section, I am giving you a little reward.
If you want to repair corrupted audio, video, and doc files in windows 10/7/8, I am introducing an outstanding repair tool.
No doubt, you will find a range of repair tools online. But finding the best repair tool is quite challenging. Hopefully, it is not for you. Wondershare RepairitWondershare Repairit is one of the best audio file repair tools that repair files of various formats. Additionally, it repairs videos and other documents that are infected with the virus.

-
Repair damaged audios with all levels of corruption, such as audio not working, clipping audio, humming audio, rumbling audio, sibilant audio, out-of-sync audio, etc.
-
Repair audios of diverse formats, including MP3, M4A, FLAC, AAC, WAV, etc.
-
Repair damaged or corrupted audios from mutiple devices: portable voice recorder, recording software, shooting apparatus, SD cards, phones, hard drives, USB flash drives, etc.
-
Compatible with Windows PC, Mac OS, and supports PC to mobile transferring/sharing.
I am recommending Wondershare Repairit because I use it whenever I lose my files or there is a downloading error. It is a fantastic tool that comprises only three click process and consumes a few minutes.
What do you think? Is this valid for yours?
If you find it good, here is the complete guide, "how to repair audio files on Windows 11/10/7/8?"
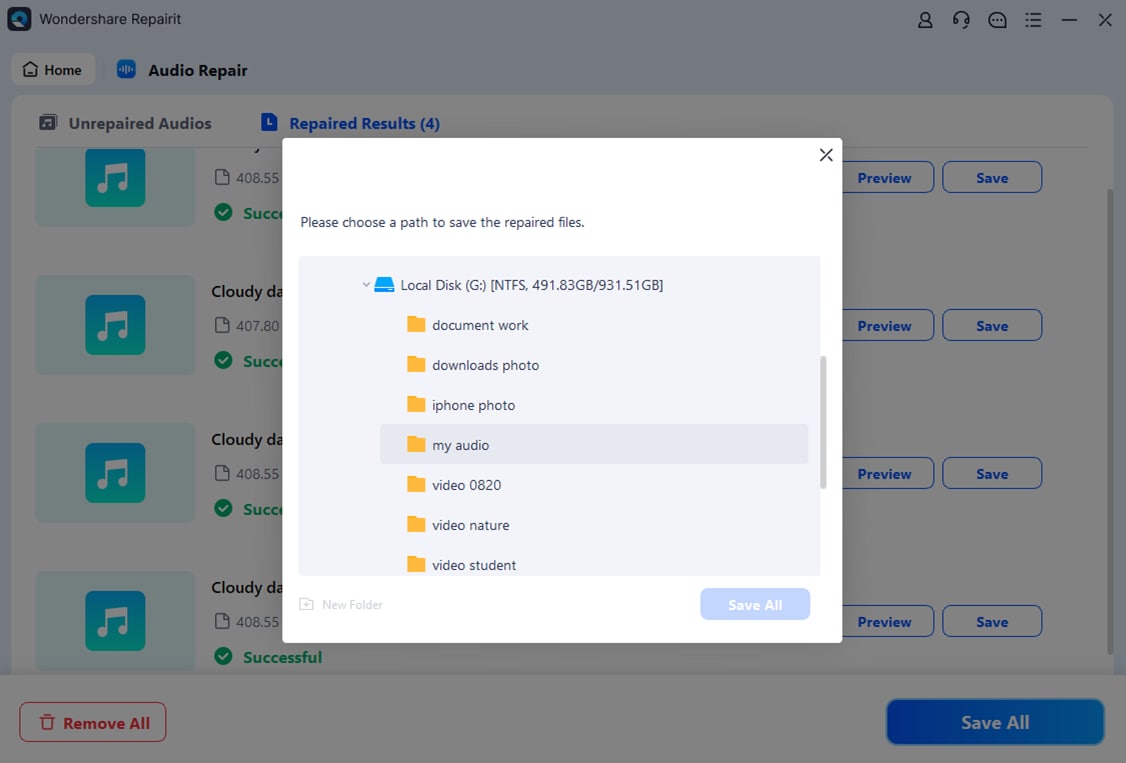
Step 1: First, download the Wondershare Repairit on windows from the official website.
Step 2: After downloading Wondershare Repairit, launch the tool on windows.
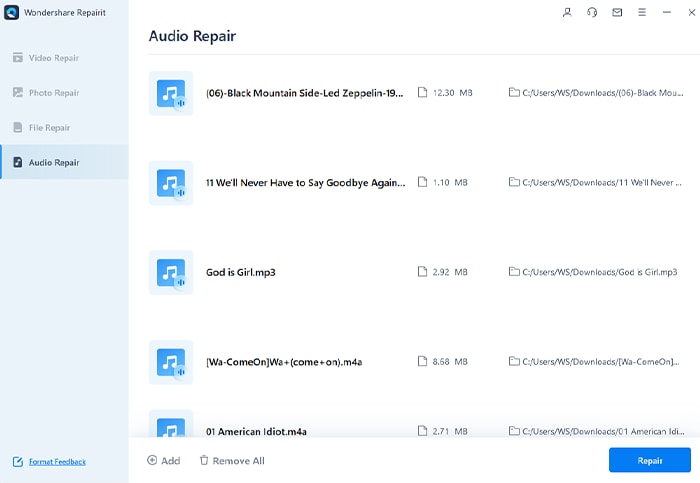
Then, click on the audio repair option from the "More Types Repair" section. Next, tap the "add" button to add corrupt audio files on the Repairit tool. Remember, it supports various formats, excluding .amr.

Once you have uploaded the files, Repairit will show complete status, including file name, type, and path. See the given image.
Step 3: Now, click on the repair button to start the repairing process.
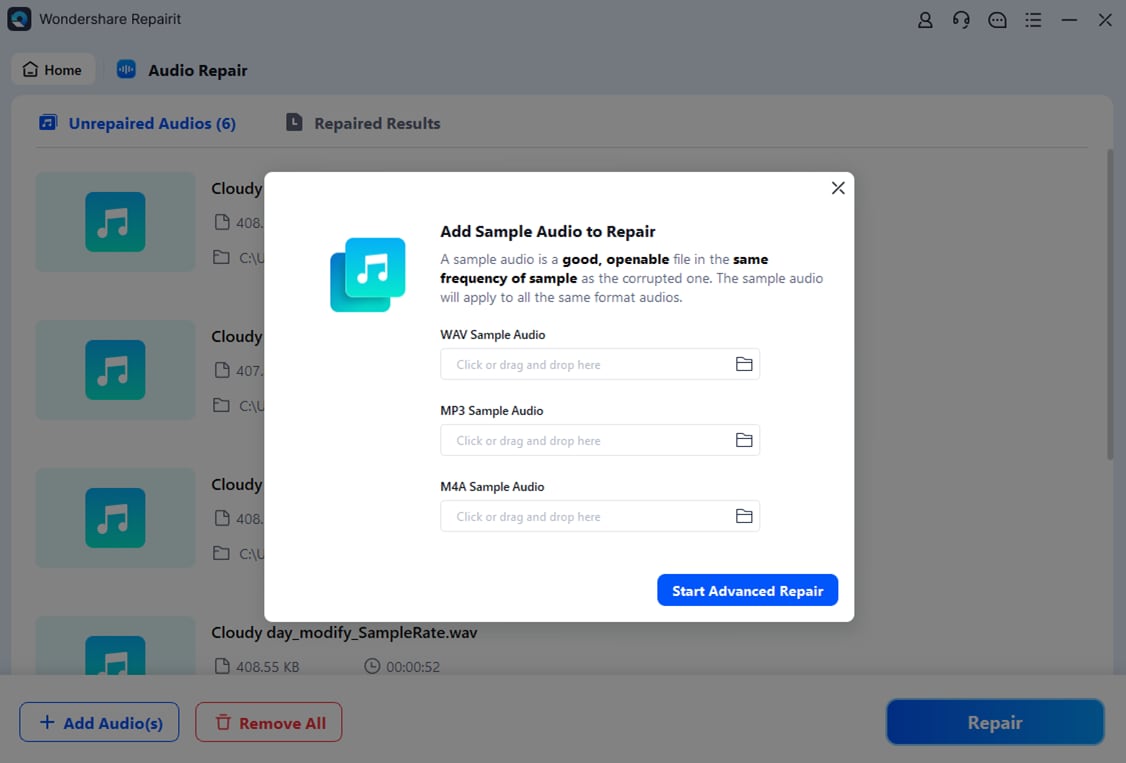
There you will find a new window in front of you asking to add good audio samples with the same audio format as corrupted audio files (you've uploaded). This applies the same audio format to repair files so that you can find the actual results.
Step 4: Repairit will take a couple of seconds to complete the repairing process.
So, wait for a few seconds. When done, you will see the window that indicates the "completed" and "preview" buttons beneath each video.
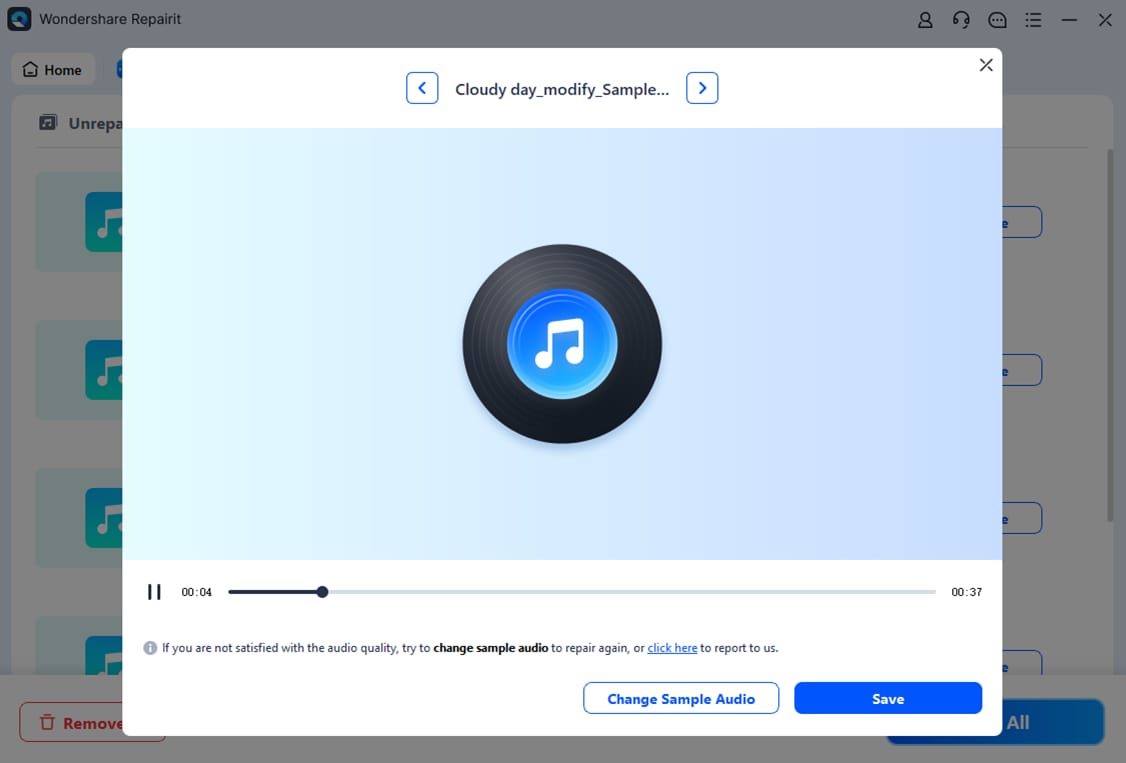
You can choose the preview option to listen to audio files before saving them to another path. This is like assuring you of quality. If you're satisfied with the output quality, click the save button.
After a few seconds, you'll receive another pop-up window showing the audio files' "save successful" status.
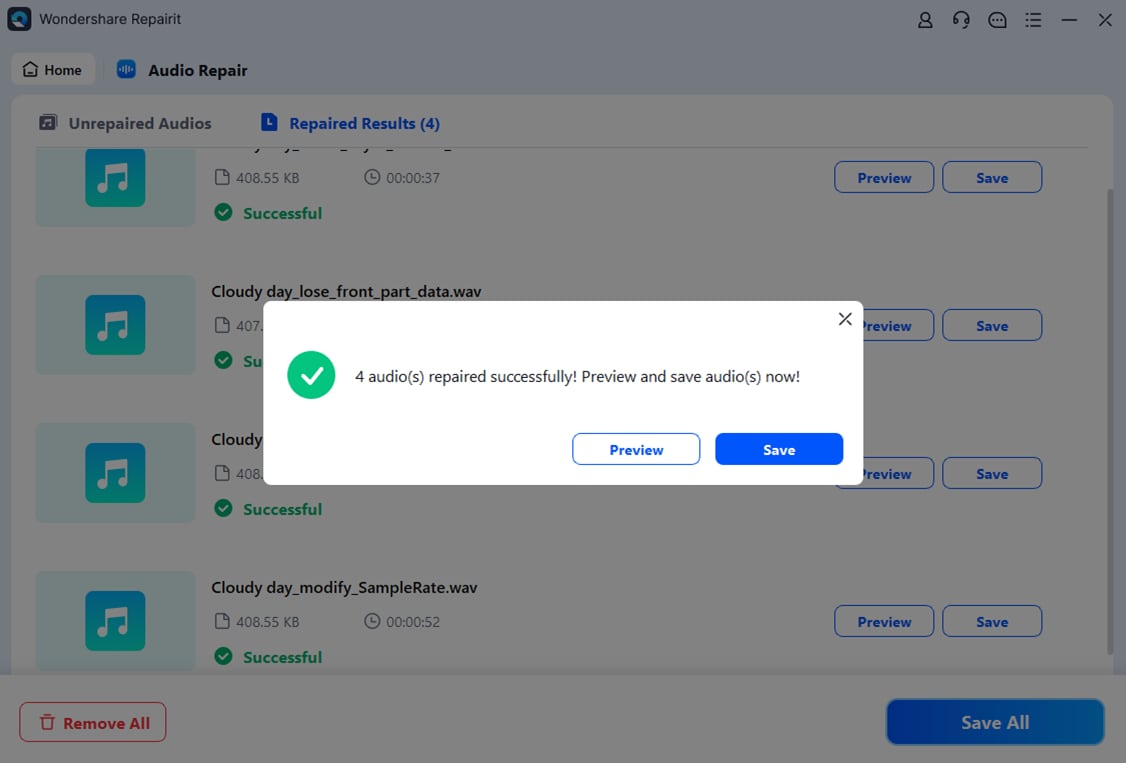
Congratulations! You've successfully repaired the audio files with Wondershare Repairit.
So, do you find it easy? Try it for free!
Frequently Asked Questions (FAQs)
-
Q1. How to find Generic audio driver errors?
-
A1: If you encounter a "generic audio driver detected dell" error on Windows 10 or 111, here's how you can check.
Step 1: Go to the taskbar, use the search box, and type device manager.
Step 2: Now, the device manager will open. Navigate the sound driver.
Step 3: Right-click on the sound driver and choose properties.
Step 4: Choose the driver tab; below, you will find the error "generic audio driver detected." -
Q2. How to reset sound settings in windows 10/11?
A2: There are many ways you can use to reset sound settings. But, here is the most proven way you can try.
Step 1: Press Windows + I key combination to open the sound settings.
Step 2: Choose sound on the right side of the window.
Step 3: Scroll down the window and click on volume mixer.
Step 4: Next, click on the reset button.
This option will reset the sound settings to default. -
Q3. How to install the audio driver on windows 11?
-
A3: In Windows 11/10, you can easily install the audio drivers. Here's how you can download it-
Step 1: Open the device manager.
Step 2: Right-click on input-output devices.
Step 3: Choose scan for hardware devices.
Windows will scan and download the driver automatically. -
Q4. How to change my audio driver into generic?
-
A4: If you want to change the audio driver to generic, follow these steps.
Step 1: Right-click on the screen system and choose the playback devices option.
Step 2: Locate the device set as default with the playback tab.
Step 3: Then, set it to generic after right-clicking on it. -
Q5. How to improve sound quality on Windows 11?
-
A5: Windows 11 is already widespread to provide full-on entertainment to the users. However, if you want to improve sound quality, you can do this by the following steps.
Step 1: Go to the settings.
Step 2: Choose the system and sound from the window's right side.
Step 3: Scroll down the advanced settings and click on the "all sound devices" option.
You will find a list of input/output devices connected to your system. So, make the changes to enhance the sound quality of input or output and enjoy the fantastic results.
Conclusion
When you are stuck with a generic audio driver detected dell error, you cannot listen to audio properly. Sometimes this becomes a long-term error that can't resolve. But hopefully, my methods won't let you down. After investigation and tests, I shared these fixes, so my readers find the actual solutions.
I know trying various methods irritates you, but these are the only ways to figure out and solve the problem. Besides, I have also shared the bonus Wondershare Repairit. It repairs audio files on windows and helps you repair video and corrupt documents on windows in no time.
* Some of the above codec formats may need to be supported by system.