TL;DR:
Converting images into transparent PNGs is efficiently achieved using AI-powered platforms like the Repairit App, Adobe Express, Photoroom, Pixelcut, or Remove.bg, though output accuracy relies heavily on providing source files with sharp contrast.
● Adobe Express and Remove.bg handle larger file uploads at 40MB and 50MB respectively, whereas the Repairit App and Pixelcut specifically utilize text prompts to edit or specify new backgrounds.
● Photoroom, Pixelcut, and Remove.bg lock high-resolution downloads and batch processing capabilities behind premium plans, with Photoroom additionally applying watermarks to all images processed on its free tier.
● These automated background removers frequently fail on low-contrast elements, pixelated photos, or fine details like hair, meaning complex subjects will still require manual adjustment to achieve professional results.
Ask AI for a summary
 ChatGPT
 Perplexity
 Gemini
 Claude
 Grok
Grok
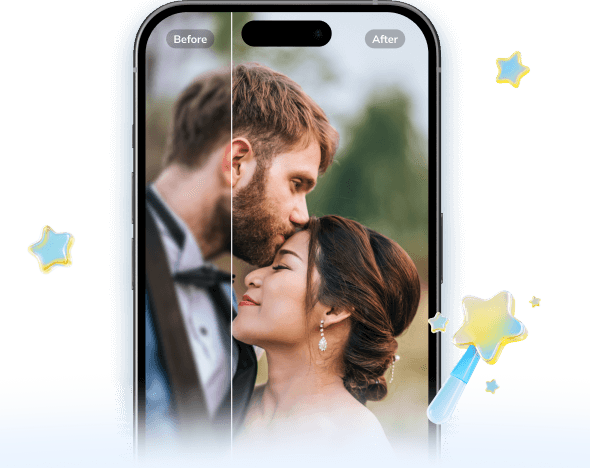
Creating transparent images is a vital skill for digital projects, making it easy to blend photos seamlessly into websites, presentations, logos, or product listings. Transparent photo maker tools enable both beginners and professionals to quickly convert ordinary images into PNGs with invisible backgrounds.
This article will guide you through simple steps using intuitive background remover platforms to convert images to transparent PNGs, which is fast, hassle-free, and produces professional results.
Table of Contents
Part 1. Why You Need a Transparent Background
Before you explore how to use a transparent background image maker, let's dive into the primary real-life scenarios that use cases:

- Company Logos: The clear background enables the company logos to be harmoniously fused into any color or pattern without conflicting, giving it a professional appearance across various platforms.
- Product Pictures: Transparent product pictures provide design and marketing flexibility to a designer and marketer since they allow putting the item in the catalogs.
- Device Mockups: Device mockups are vital with transparent backgrounds that enable the emphasis to be on a software interface or applications without distraction.
- Layered Visuals: Transparency enables users to stack, rearrange, and combine many layers of images in the field of graphic design.
- Social Media Graphics: In social media graphics, transparent backgrounds are commonly applied to allow the creator to create catchy stickers and profile icons.
Part 2. 5 Best Transparent Photo Creator Tools [Free & Paid]
Here we have listed the most efficient transparent image creator tools that you can utilize to remove the unwanted background from your picture:
1. Repairit App
Imagine you own a small business that needs to design social media banners and online product listings regularly. You need to place the logo and product photos over various backgrounds, sometimes plain basics or colorful, to improve search engine rankings. So, in this situation, we recommend using the Repairit App, which offers advanced AI-powered tools to create transparent images with just one click.
Within this tool, users simply need to insert the desired image and write a detailed prompt to specify adding a transparent photo background. Unlike other tools, which require a significant amount of time to perform lengthy procedures, Repairit App has made the process easy. Furthermore, it provides you with prompt suggestions, making it easy to choose one for your image editing.
Key Features
- Smart Eraser: This tool provides an eraser tool to remove any unwanted material from your pictures instantly.
- 3D Figurine: Following the trend of 3D figures, this feature has been introduced to generate 3D artworks from simple portraits.
- Quality Enhancer: If your images are pixelated, it lets you upscale them by providing both General and Portrait modes.
Expert Stepwise Guide to Use the Repairit App “Text-To-Edit” Feature
Now, if you are curious to use this efficient feature of this app to edit picture transparency, then go through the following guide:
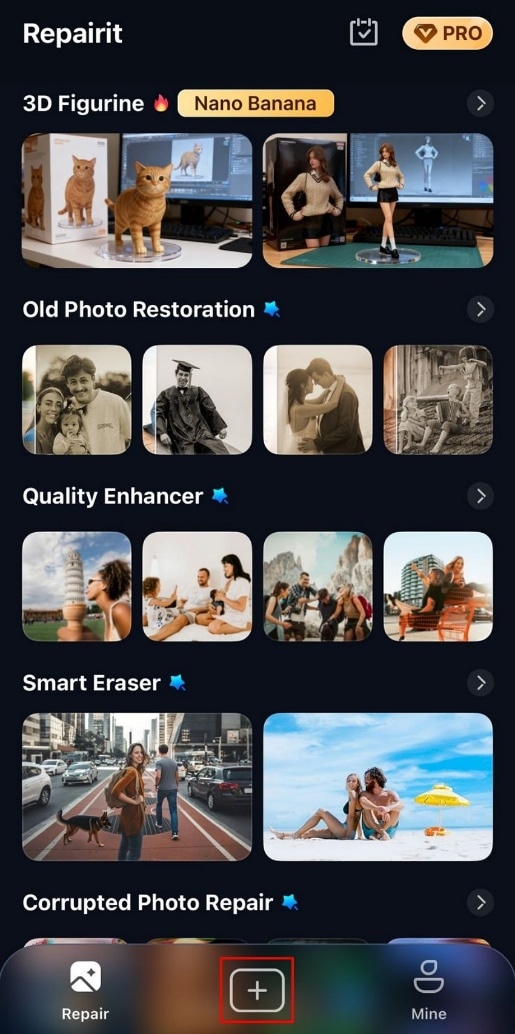
Step 1. Click on the “+” icon and insert an Image
As you enter the Repairit App, click on the “+” icon to insert the desired image you want to edit.
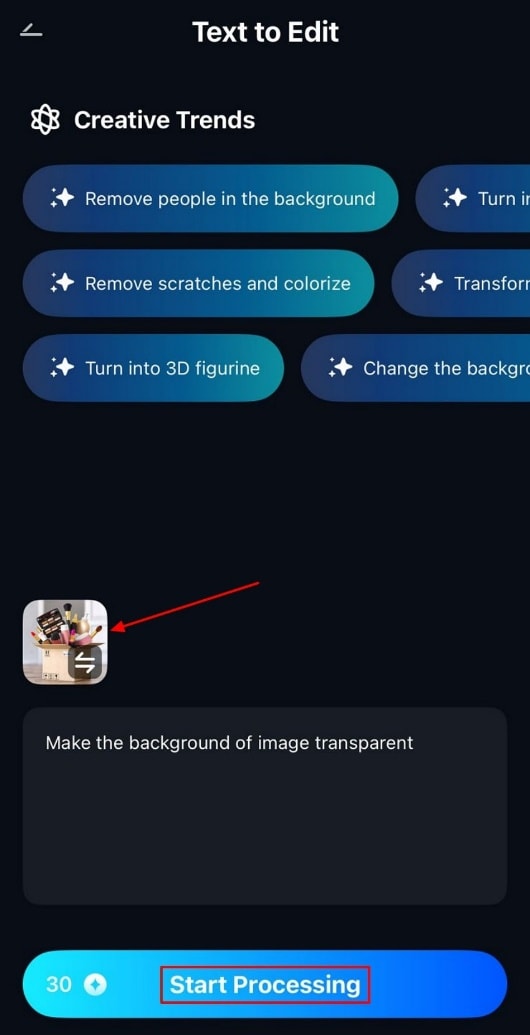
Step 2. Write a Detailed Prompt to Specify Elements
Provide a detailed prompt for removing the background and adding a transparent one. Afterwards, click the “Start Processing” button to start the procedure instantly.
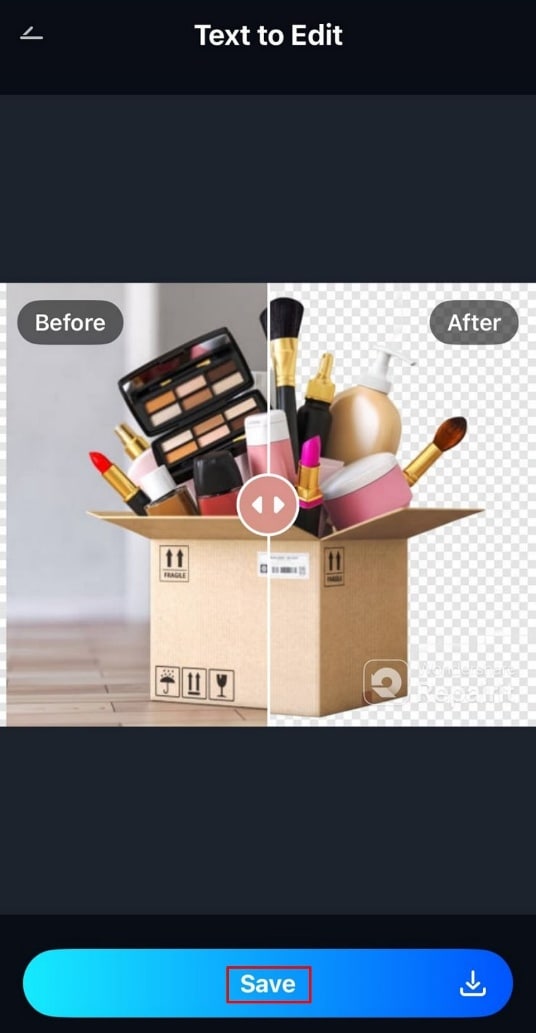
Step 3. Tap on the Save Button to Render it to the Device
Finally, the image has a transparent background now, hit the “Save” button to get the outcome saved to the device.
2. Adobe Express
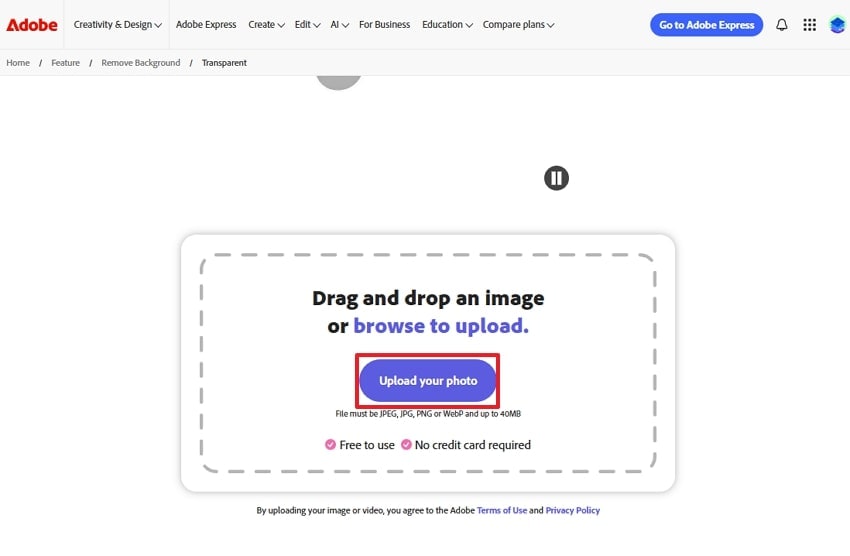
Using Adobe Express to create transparent backgrounds offers speed and professional-quality results online. Within this tool, you simply insert your image directly or drag and drop it across the transparent image maker. After removing the background, it lets you add another background from your device or directly from Adobe stock images. Furthermore, users can upload their images in any format, including JPEG, JPG, PNG, or WebP, up to 40MB.
Simple Guide to Use Adobe Express for Transparent Images
Step 1. Access the tool and click on the “Upload your Photo” button to insert the target picture from the device.
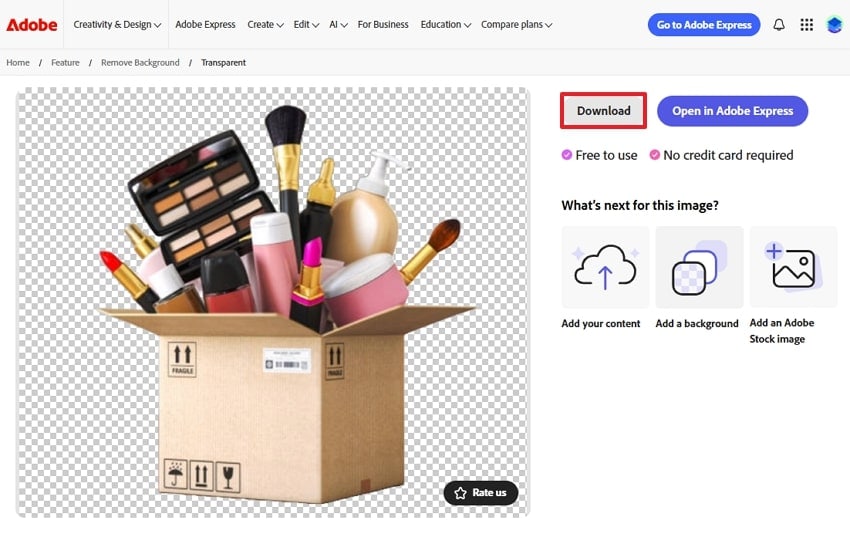
Step 2. Upon inserting the picture, it will automatically convert into a transparent background image, which you can further edit according to need. Afterwards, tap on the "Download" button to get it saved to the designated folder of the device.
Cons
Being a web-based tool, large image files might not be supported.
It can sometimes struggle with complex edges and fine details of the image.
3. Photoroom
PhotoRoom is an excellent choice for creating transparent image backgrounds because it offers fast, AI-powered background removal that's accessible to everyone. Without requiring any technical skill or graphic design expertise, it edits picture transparency with perfection. You simply upload your image, and it will automatically analyze and remove the background from your product picture. Being a cloud-based tool, it also offers batch processing and compatibility across different devices.
Detailed Guide to Use PhotoRoom for Photo Transparency
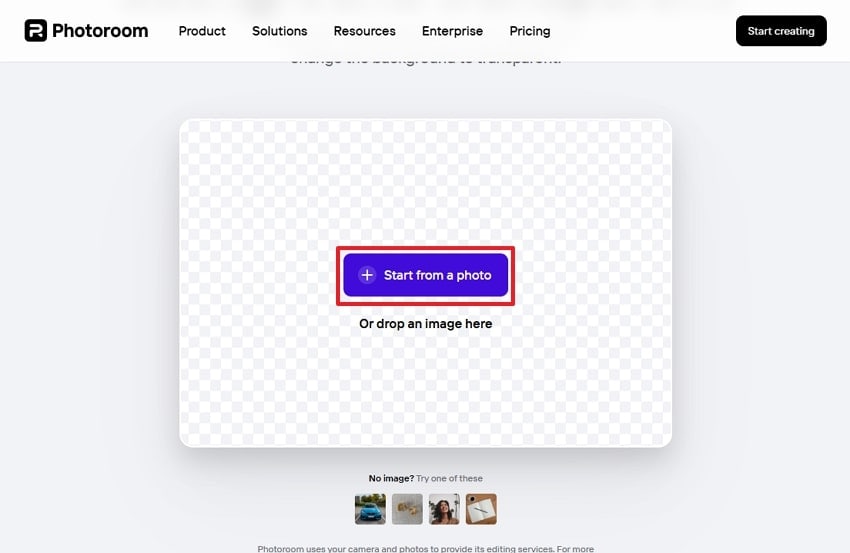
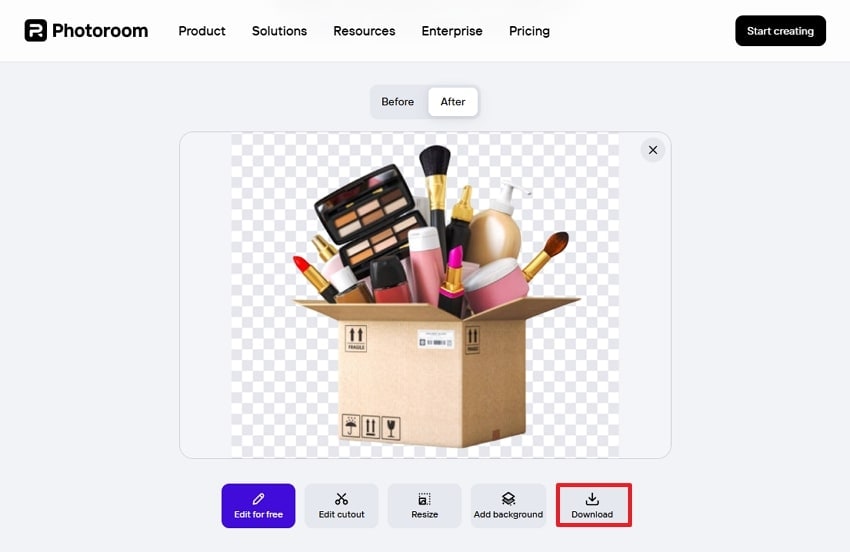
Step 1. Launch Photoroom and hit the “Start from a Photo” button to input the image from which you want to remove the background.
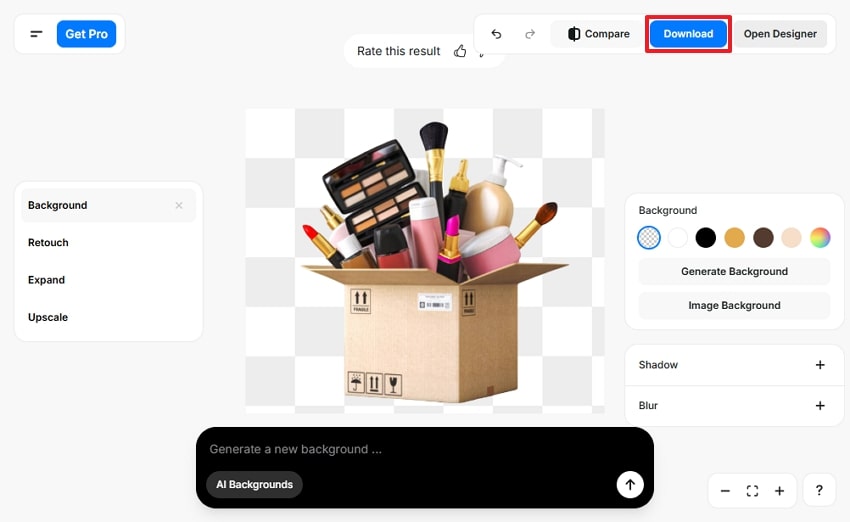
Step 2. After some time, it will provide an image with a transparent background, and you can click on the “Download” icon to render it. However, at this point, you can also access other features like "Edit cutout” and “Resize."
Cons
The free version adds watermarks to processed images and restricts advanced features.
Batch processing or high-resolution exports may be limited or slower than others.
4. Pixelcut
AI algorithms power this transparent photo maker to remove any sort of background from your image. With no technical skill required, it provides an intuitive interface that is easily accessible to both beginners and professionals. Furthermore, it gives both batch processing and ensures the generation of professional, high-accuracy output. For enhanced results, Pixelcut lets you add a text prompt to specify which kind of background you want to add.
Expert Guide to Use Pixelcut Transparent Photo Maker
Step 1. Begin by clicking the “Upload Image” button to insert the required image into Pixelcut for further processing.

Step 2. After some time, it will remove the unwanted background of the picture and hit the “Download” button to save it to the device. You can even choose the desired background color and write a text prompt to specify any changes in the image.
Cons
Batch processing and some editing options may be restricted unless you have premium access.
Fine control over details is more limited compared to professional desktop editors.
5. Remove.bg
Remove.bg transparent image creator easily saves images as PNGs with transparent backgrounds for design, web, product photo, or logo. This tool has the ability to process around 500 images per minute to save plenty of time. Users can upload pictures up to 50MB and get sharp cut-outs, suitable for creating professional outcomes. One can even swap the background of the image for new colors and leverage its AI system.
Guide on How to Use the Removal Tool Across Remove.bg
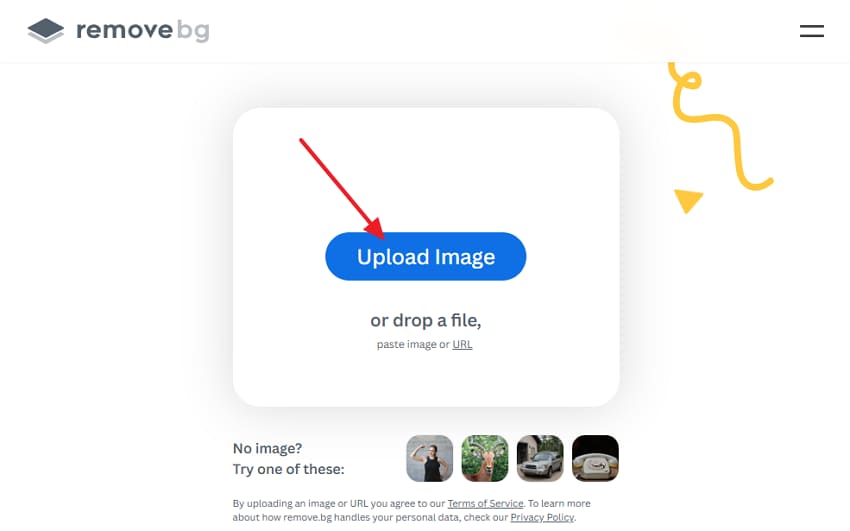
Step 1. Upon accessing the tool, click on the “Upload Image” button to enter the desired picture from the device.
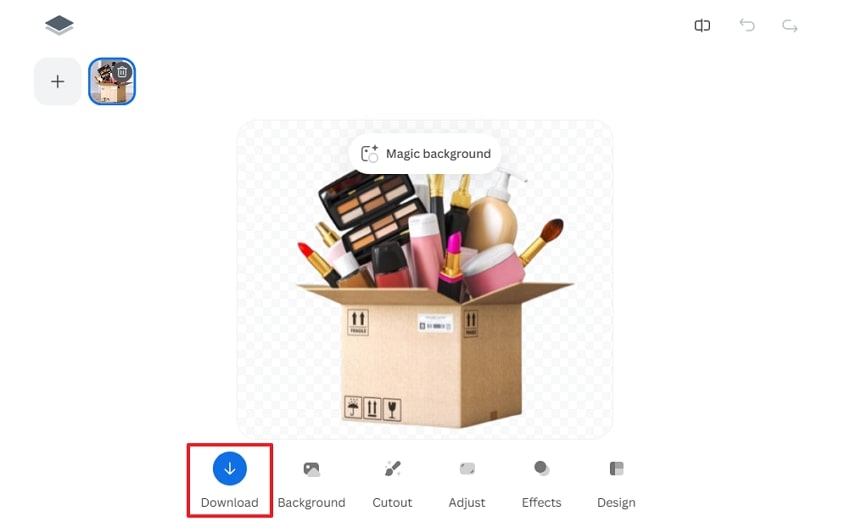
Step 2. Here, it has generated the picture with a transparent background, which you can further edit by choosing the options given below. Afterwards, tap the “Download” icon to save the transparent background image to your desired folder on your device.
Cons
Full high-resolution downloads and advanced features require purchasing credits or a paid plan.
Full high-resolution downloads and advanced features require purchasing credits or a paid plan.
Conclusion
Summing up, in this article, we have provided you with all the efficient transparent photo makers along with their detailed guides. Among these tools, we recommend using the Repairit App, which provides you with a text-to-edit feature to remove the background instantly. Furthermore, you will also be introduced to some common real-life cases to know the importance of these tools.
FAQs
-
1. Why should I convert images to PNG with transparency?
PNG format supports transparency, making your image easy to edit to later post on different social media platforms. This format is ideal for logos, marketing, product photos, and social media graphics. -
2. What types of images work best for background removal?
Images with precise, sharp edges between the subject and the background provide the best result. On the other hand, if the image is of low contrast or pixelated, it will require further manual adjustment for worthy results. -
3. Do I need any graphic design skills to use these tools?
No, numerous tools powered by AI are available worldwide, requiring no technical skill. You can opt for the Repairit App, which lets you remove the background by simply adding a text prompt. -
4. Are there any limitations to automatic background removers?
Yes, automatic background removers can struggle with fine details, hair, or backgrounds. That's why it is suggested to opt for a reliable and well-known transparent image maker that provides maximum accuracy.