
 TL;DR:
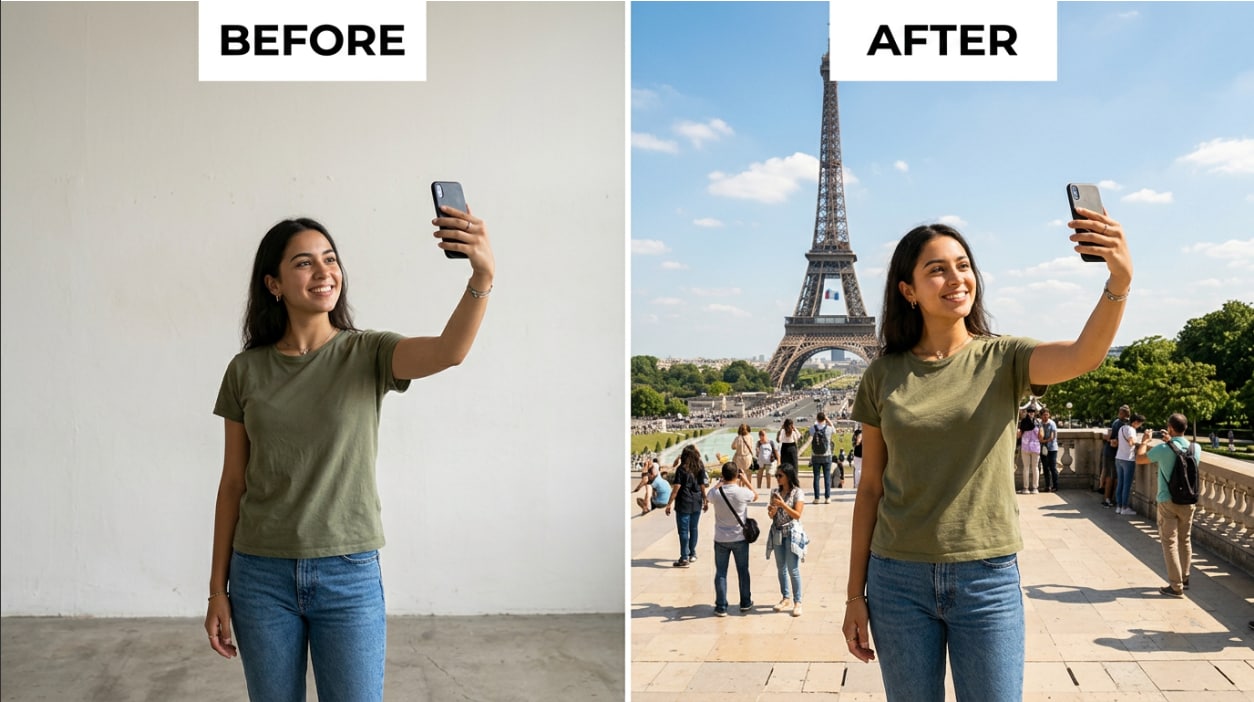
Relumi’s Combine Photo — Travel & Scene Composite is an iPhone AI tool that inserts your front-facing portrait into any text-prompted or uploaded travel scene by matching the destination's lighting and synthesizing natural shadows.
● Unlike basic background-removal apps that leave mismatched lighting, Relumi re-renders the light direction and color temperature on your face to match the new environment while preserving your exact facial identity instead of generating an AI approximation.
● The 15-second generation process requires a clear, forward-facing photo without dark lighting, heavy side angles, or face-covering accessories, and supports uploading multiple portraits simultaneously for group composites.
● The tool provides full-resolution, watermark-free exports on the free tier, making it cost-effective for content creators avoiding $100 to $200 per-session location photography and tourists replacing crowded landmark photos, though higher resolutions require a paid plan.
Ask AI for a summary
 ChatGPT
 Perplexity
 Gemini
 Claude
 Grok
Grok
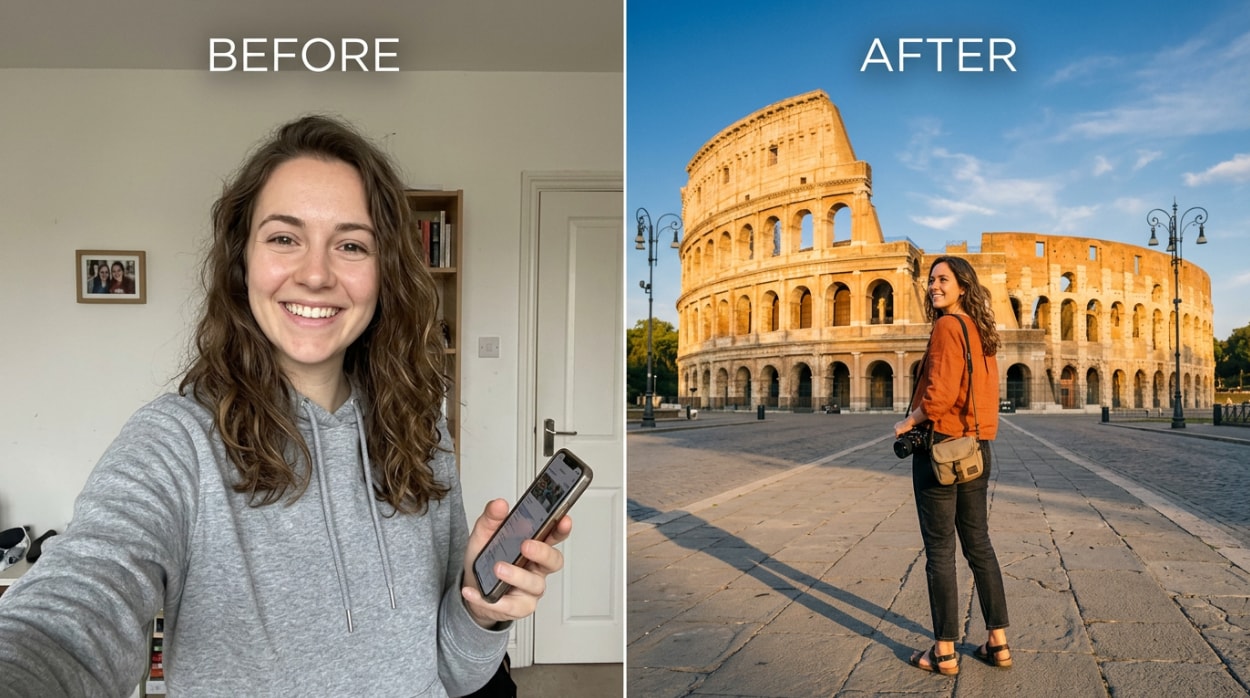
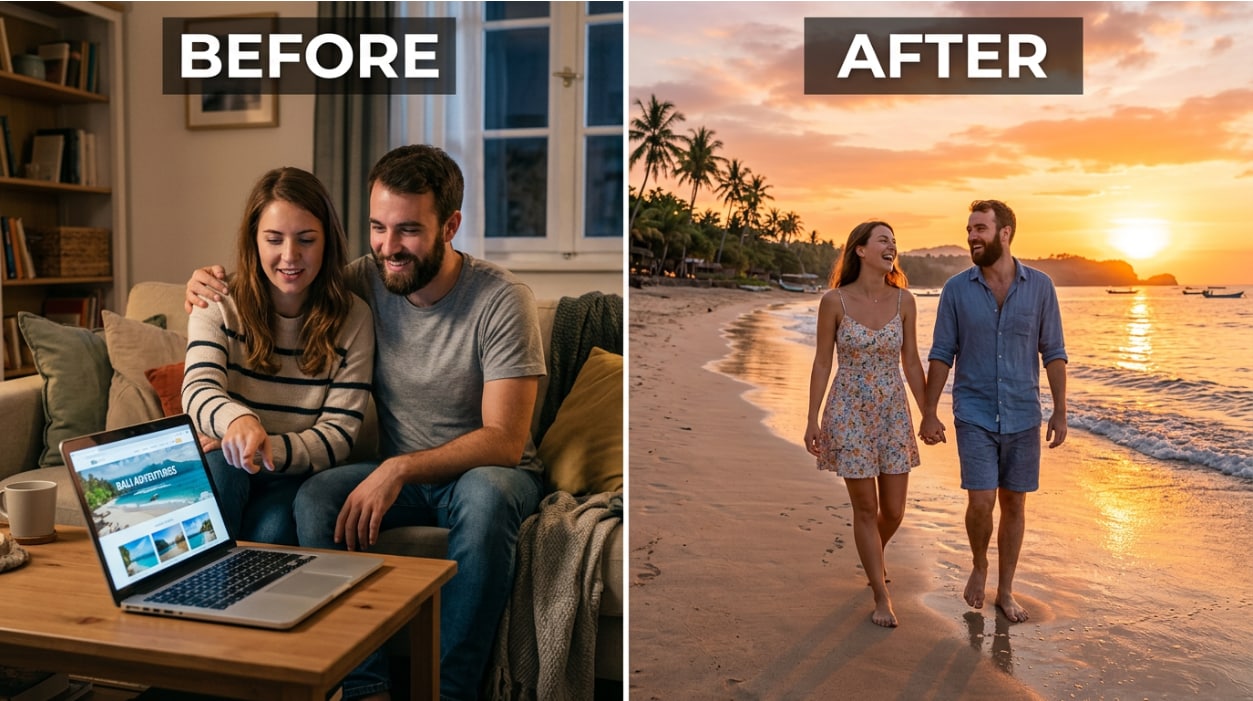
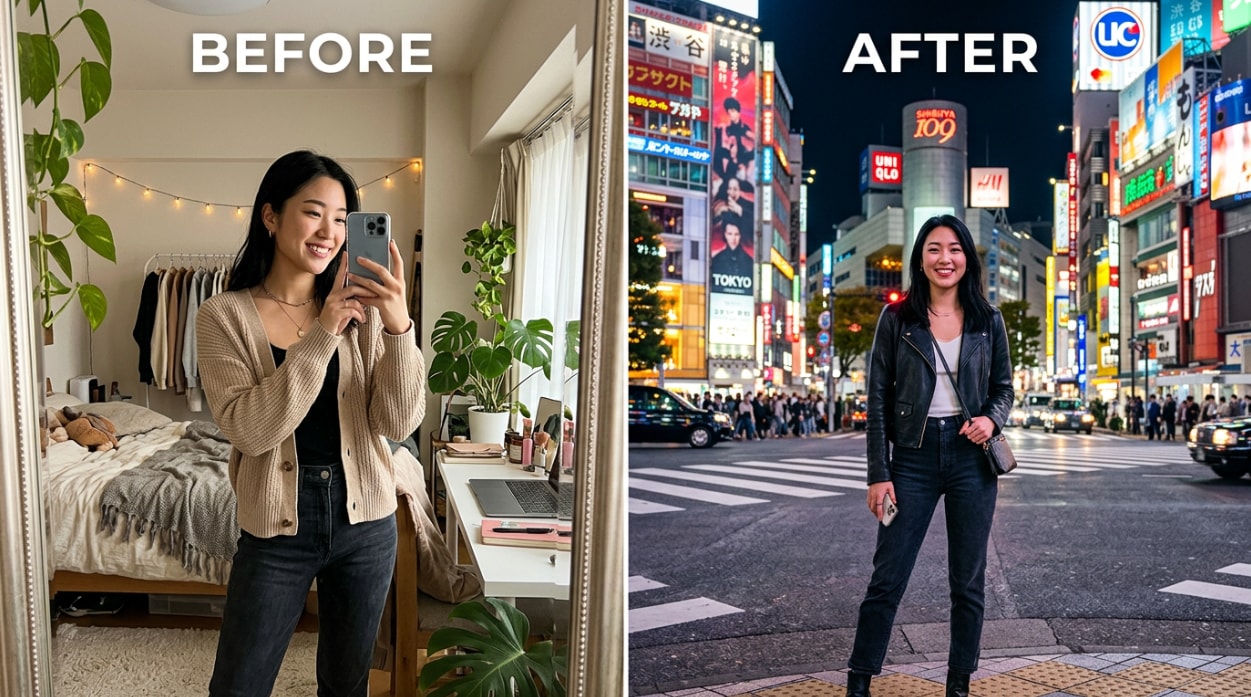
Flights cost money. Visas take time. Crowds ruin the shot. And sometimes the place you want to photograph is 10,000 miles away. All of that used to mean no photo — until now.
Relumi’s Combine Photo — Travel & Scene Composite lets you upload a portrait of yourself and place it naturally into any travel scene: a Paris boulevard, a Bali beach at sunset, a neon-lit Tokyo crossing, or a quiet Roman piazza with no other tourists in the frame. The AI matches your lighting to the scene, handles the shadows, and generates an output that looks like you were actually there. Here’s why it works better than anything else out there — and exactly how to use it.
In this article
Part 1: Why Getting a Great Travel Photo Is Harder Than It Should Be
Travel photography sounds simple: go somewhere beautiful, take a photo. In practice, it fails in the same predictable ways every time.
The landmark is always crowded
The Colosseum, the Eiffel Tower, the Shibuya crossing — these are all incredible in person. In a photo taken at 11am on a Saturday, they look like a sea of baseball hats and selfie sticks. Your experience of the place was magical; the photo doesn’t show it.
The trip is too expensive, the photo still isn’t happening
Even when you do make it to the destination, getting a good photo of yourself there is a separate logistical challenge. Asking a stranger to take your photo is awkward and produces inconsistent results. Hiring a photographer in every city costs $100–$200 per session. A tripod with a timer looks exactly like what it is — staged. Most people come home with no photo of themselves that actually captures the place.
Standard AI background tools don’t match the lighting
Simple background-replacement apps — the kind that cut you out and drop you onto a new backdrop — all have the same flaw: they carry the lighting from your original photo into the new scene. You were photographed under indoor fluorescent light, and now you’re standing in front of the Eiffel Tower at golden hour, glowing with office lighting. The cutout edge is visible. The shadows are missing or pointing the wrong way. Everyone can tell.
The AI generates a random fictional person, not you
Prompting a general AI image generator to “put me in front of the Eiffel Tower” produces a person who kind of resembles you — same hair color, roughly similar face — but isn’t actually you. Face identity drifts. Relumi solves this by anchoring the output to your uploaded portrait, not to the AI’s approximation of you.
Part 2: How Relumi Travel & Scene Composite Works
Relumi AI Photo Enhancer
Combine Photo — Travel & Scene Composite: Place Yourself in Any Location With Matched Lighting, Natural Shadows, and No Cutout Edges
 Scene-aware lighting match: Relumi analyzes the light direction, color temperature, and intensity of the destination scene and re-lights your portrait to match. If the scene is golden-hour sunlight from the left, your face picks up that same warm directional glow — not the flat office light from your original photo.
-
Face identity preservation: Your facial features are carried through from your uploaded portrait. The person in the output is you — your face, your proportions — not an AI approximation that drifts toward a generic face after a few iterations.
-
Natural shadow generation: The AI synthesizes a cast shadow or ground shadow consistent with the scene’s light source. No floating-person effect, no missing shadow that signals a cutout. You look like you’re standing on the actual ground of the location.
The core difference between Relumi and a simple background-swap app is what happens to the light. A background-swap cuts out your silhouette and drops it onto a new backdrop — but your face still carries the lighting from when the original photo was taken. Relumi instead analyzes the destination scene and re-renders the lighting on your face to match. The result doesn’t look like a composite; it looks like a photo taken at that location.
How to Use Relumi Combine Photo — Travel & Scene Composite on iPhone
Step 1. Open Combine Photo & Upload Your Portrait
Open Relumi, tap Combine Photo on the home screen, then select Travel & Scene Composite. Upload a portrait photo of yourself — a clear, front-facing shot works best. Casual selfies are fine; you don’t need a professional headshot.
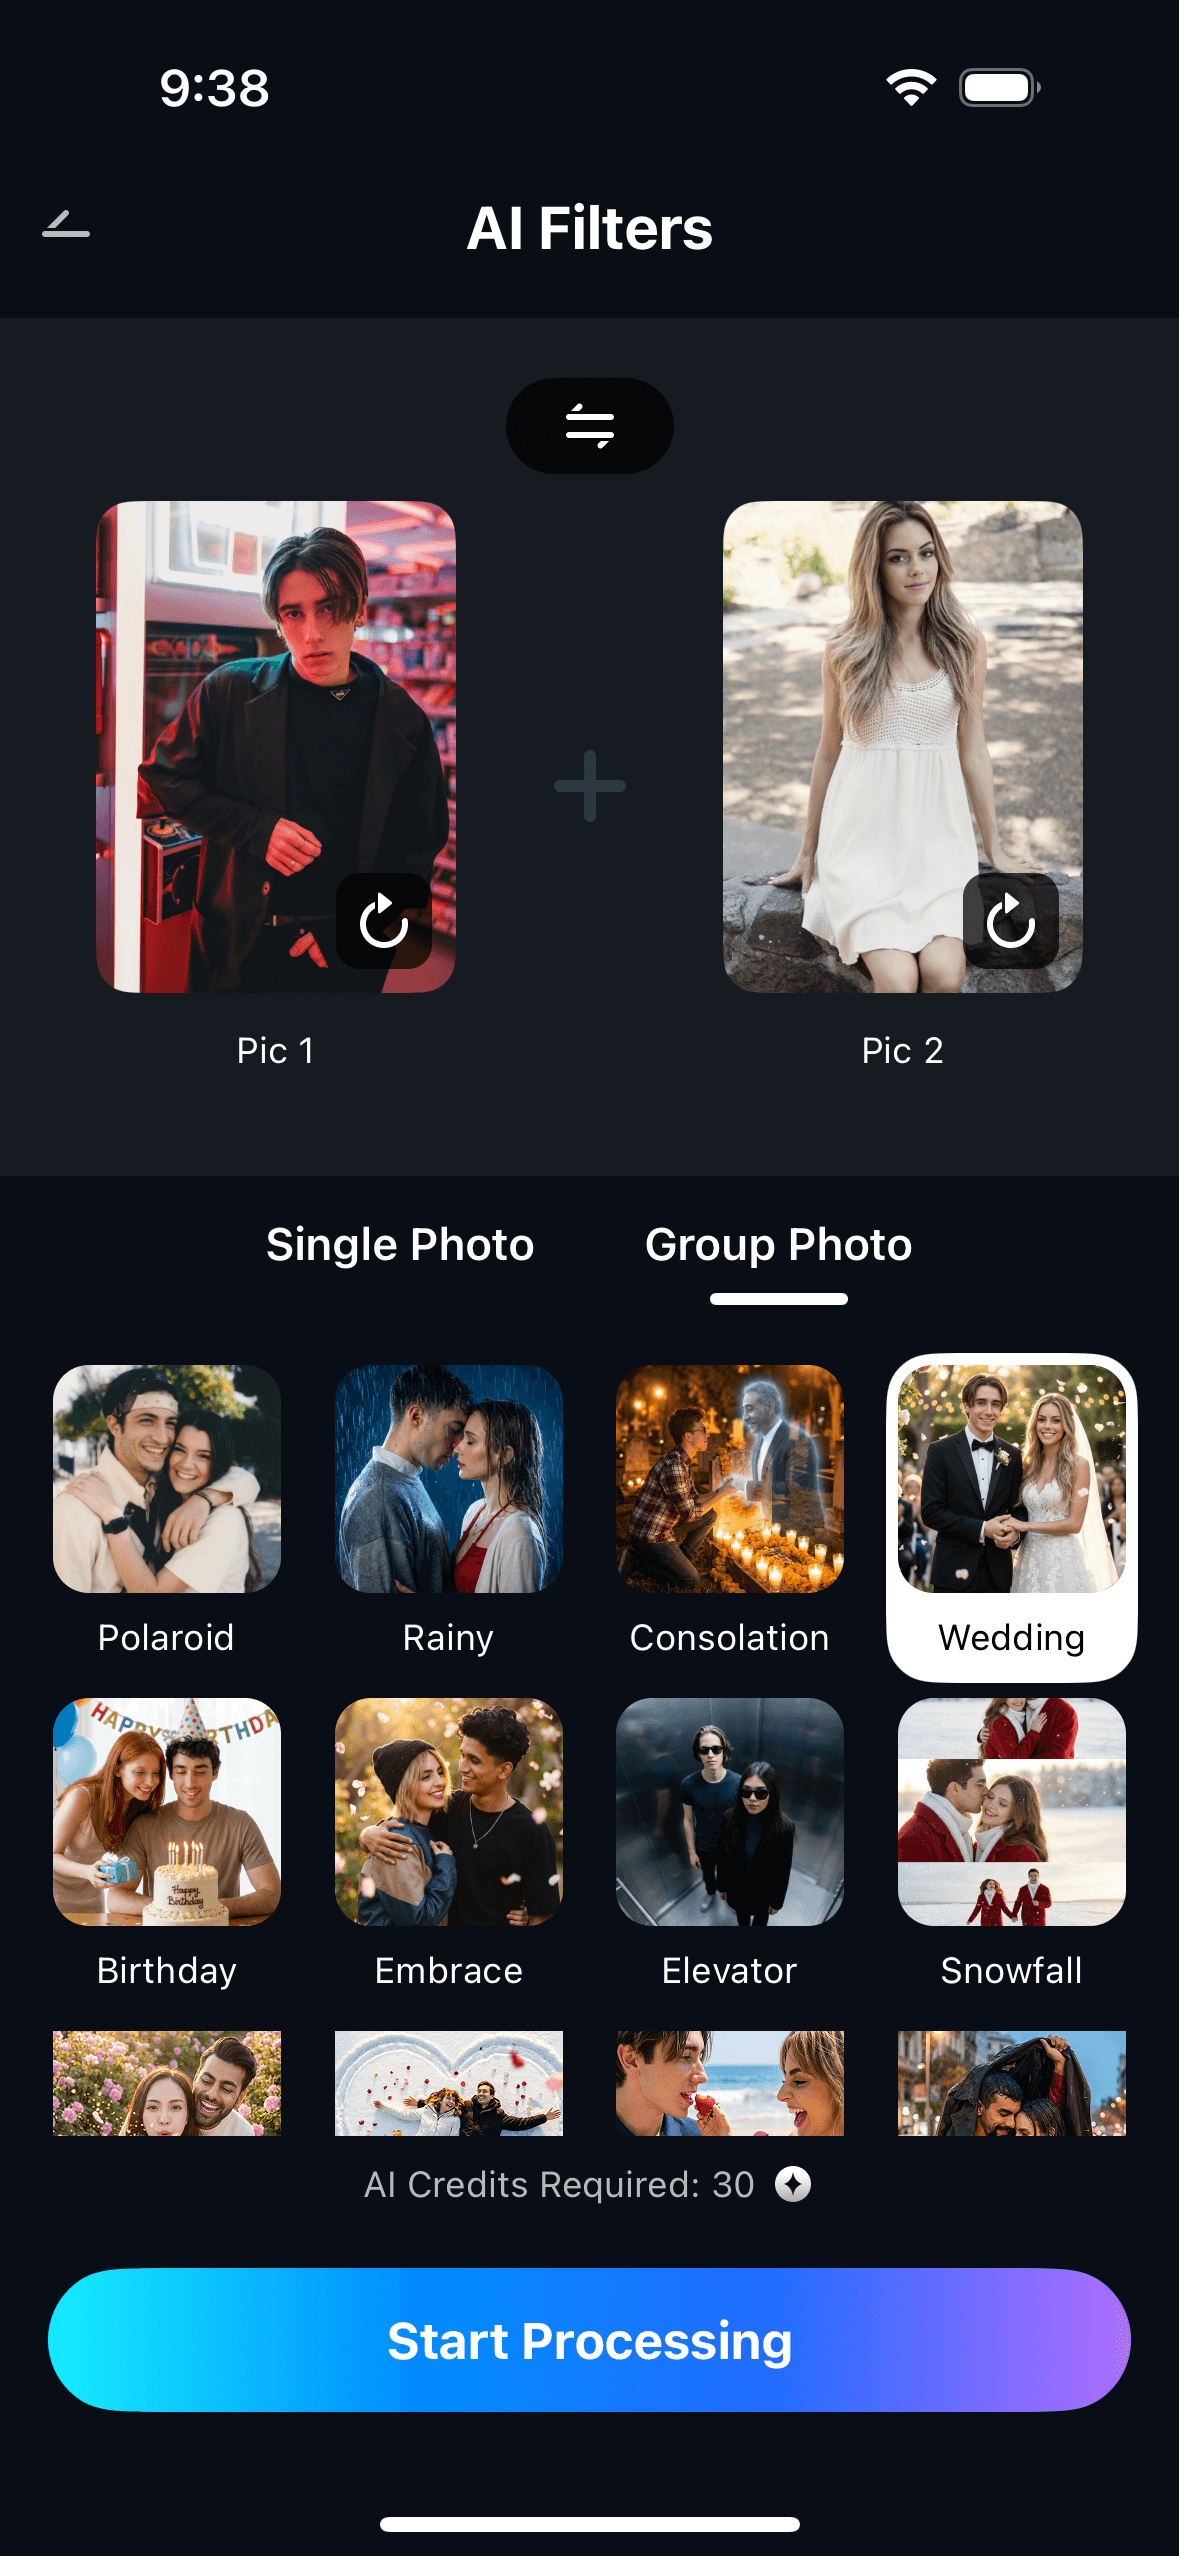
Step 2. Choose or Describe Your Destination Scene
Either upload a destination photo — a landmark image, a travel magazine shot, a screenshot from Google Maps — or type a short scene description such as “Eiffel Tower at golden hour,” “Bali beach at sunset,” or “Tokyo Shibuya crossing at night.” The AI uses this to set the scene around your portrait with the right lighting and environment.

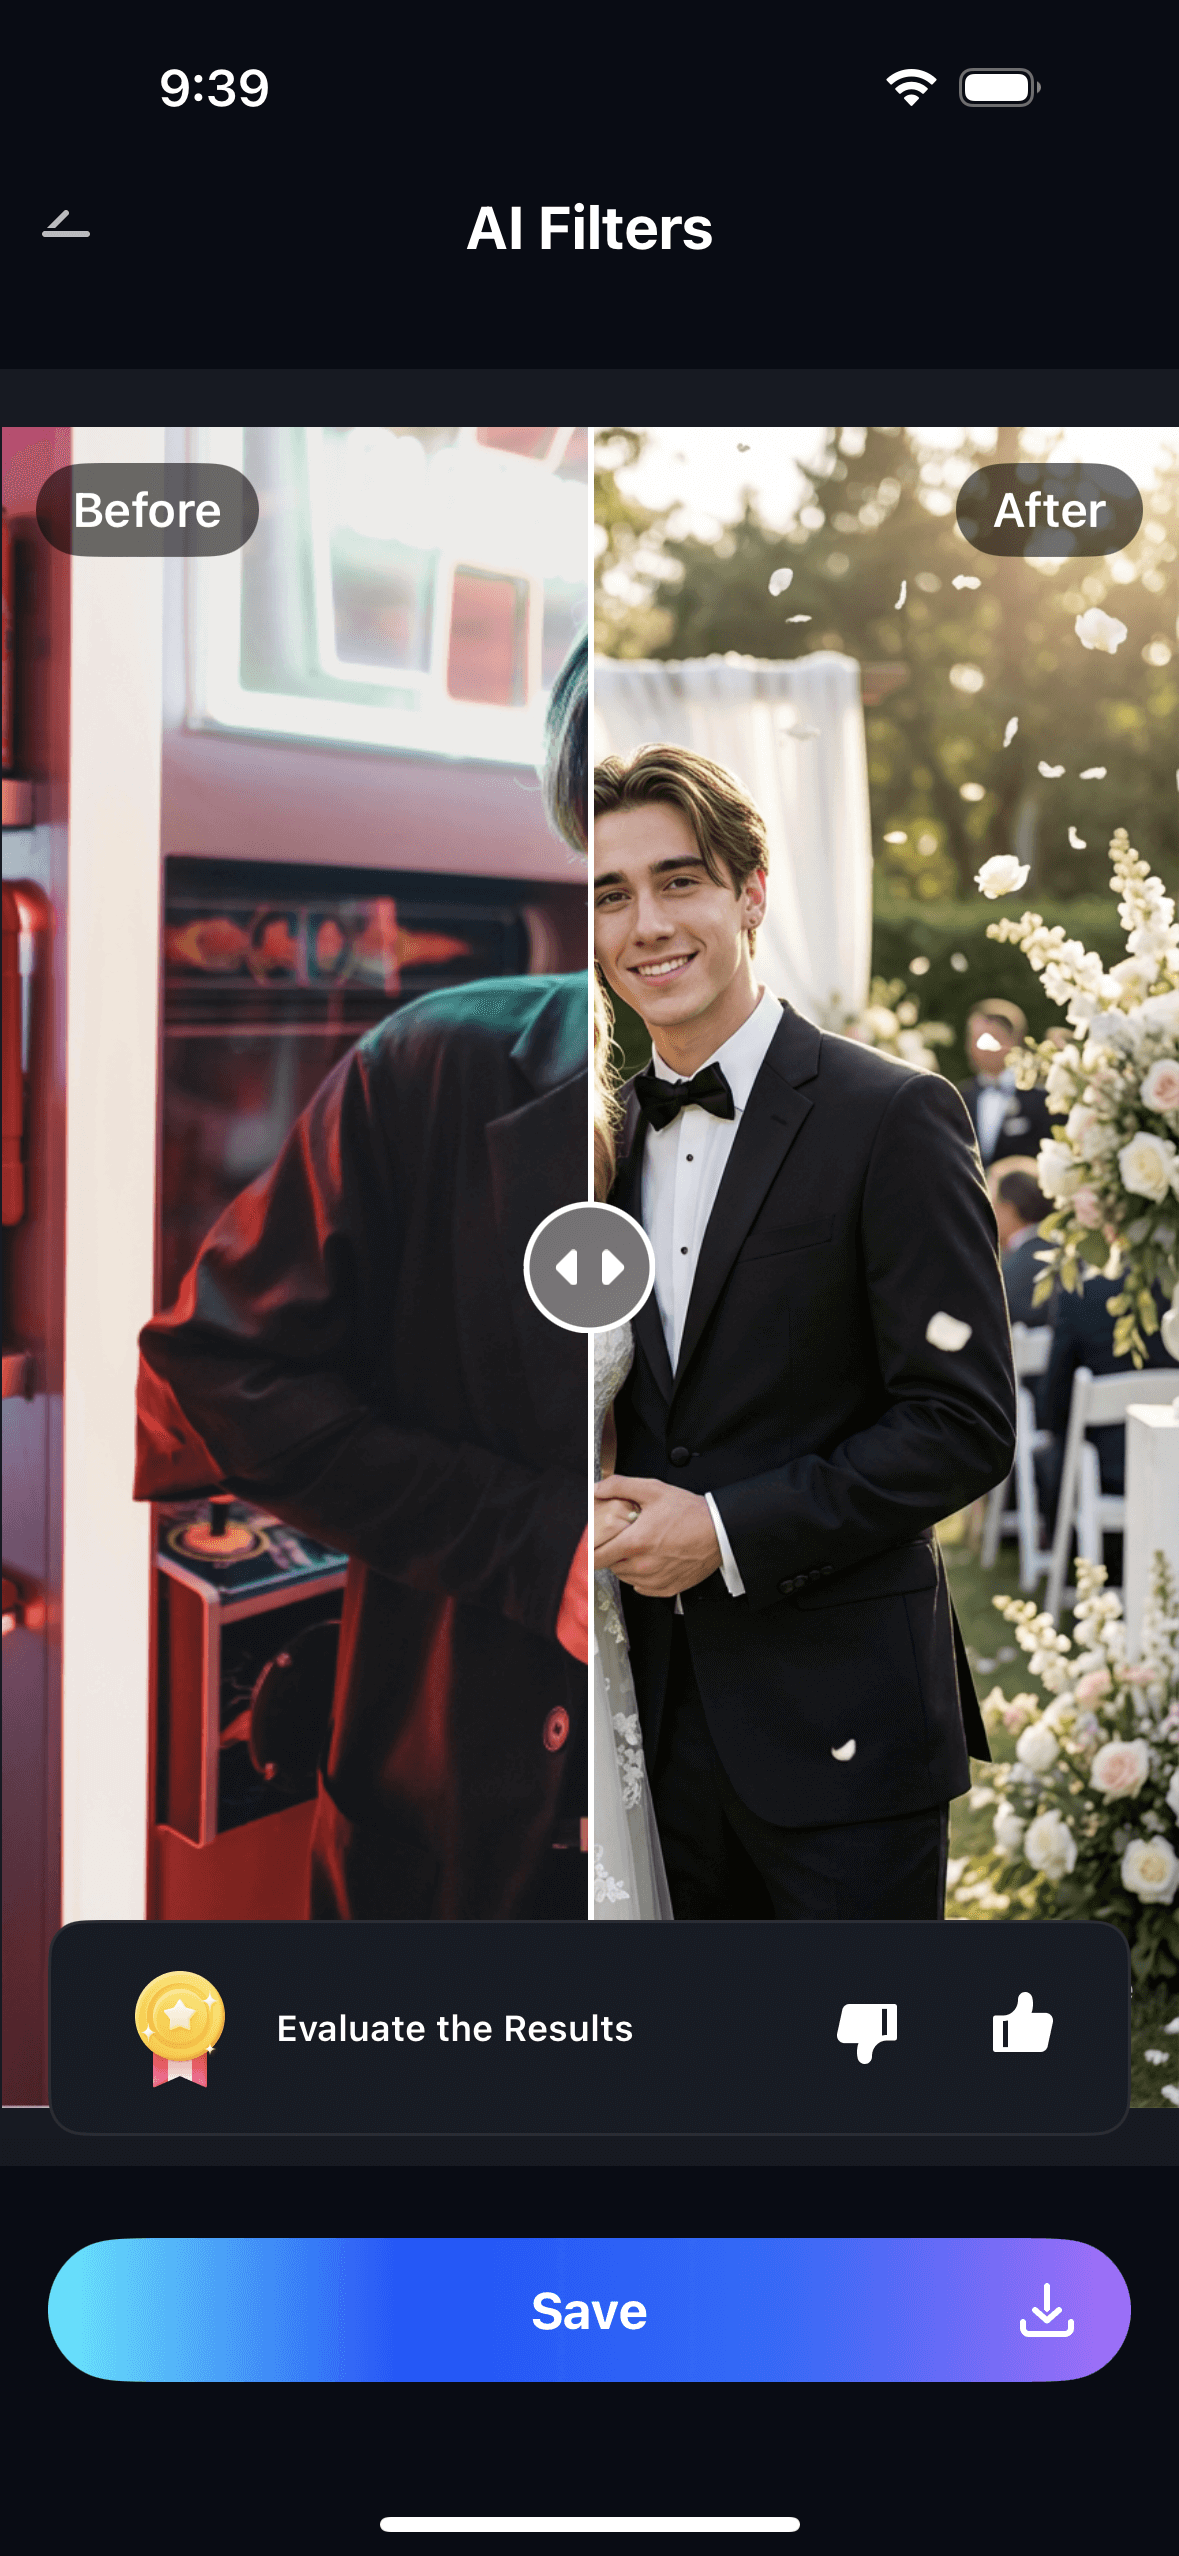
Step 3. Preview, Adjust & Save Your Travel Photo
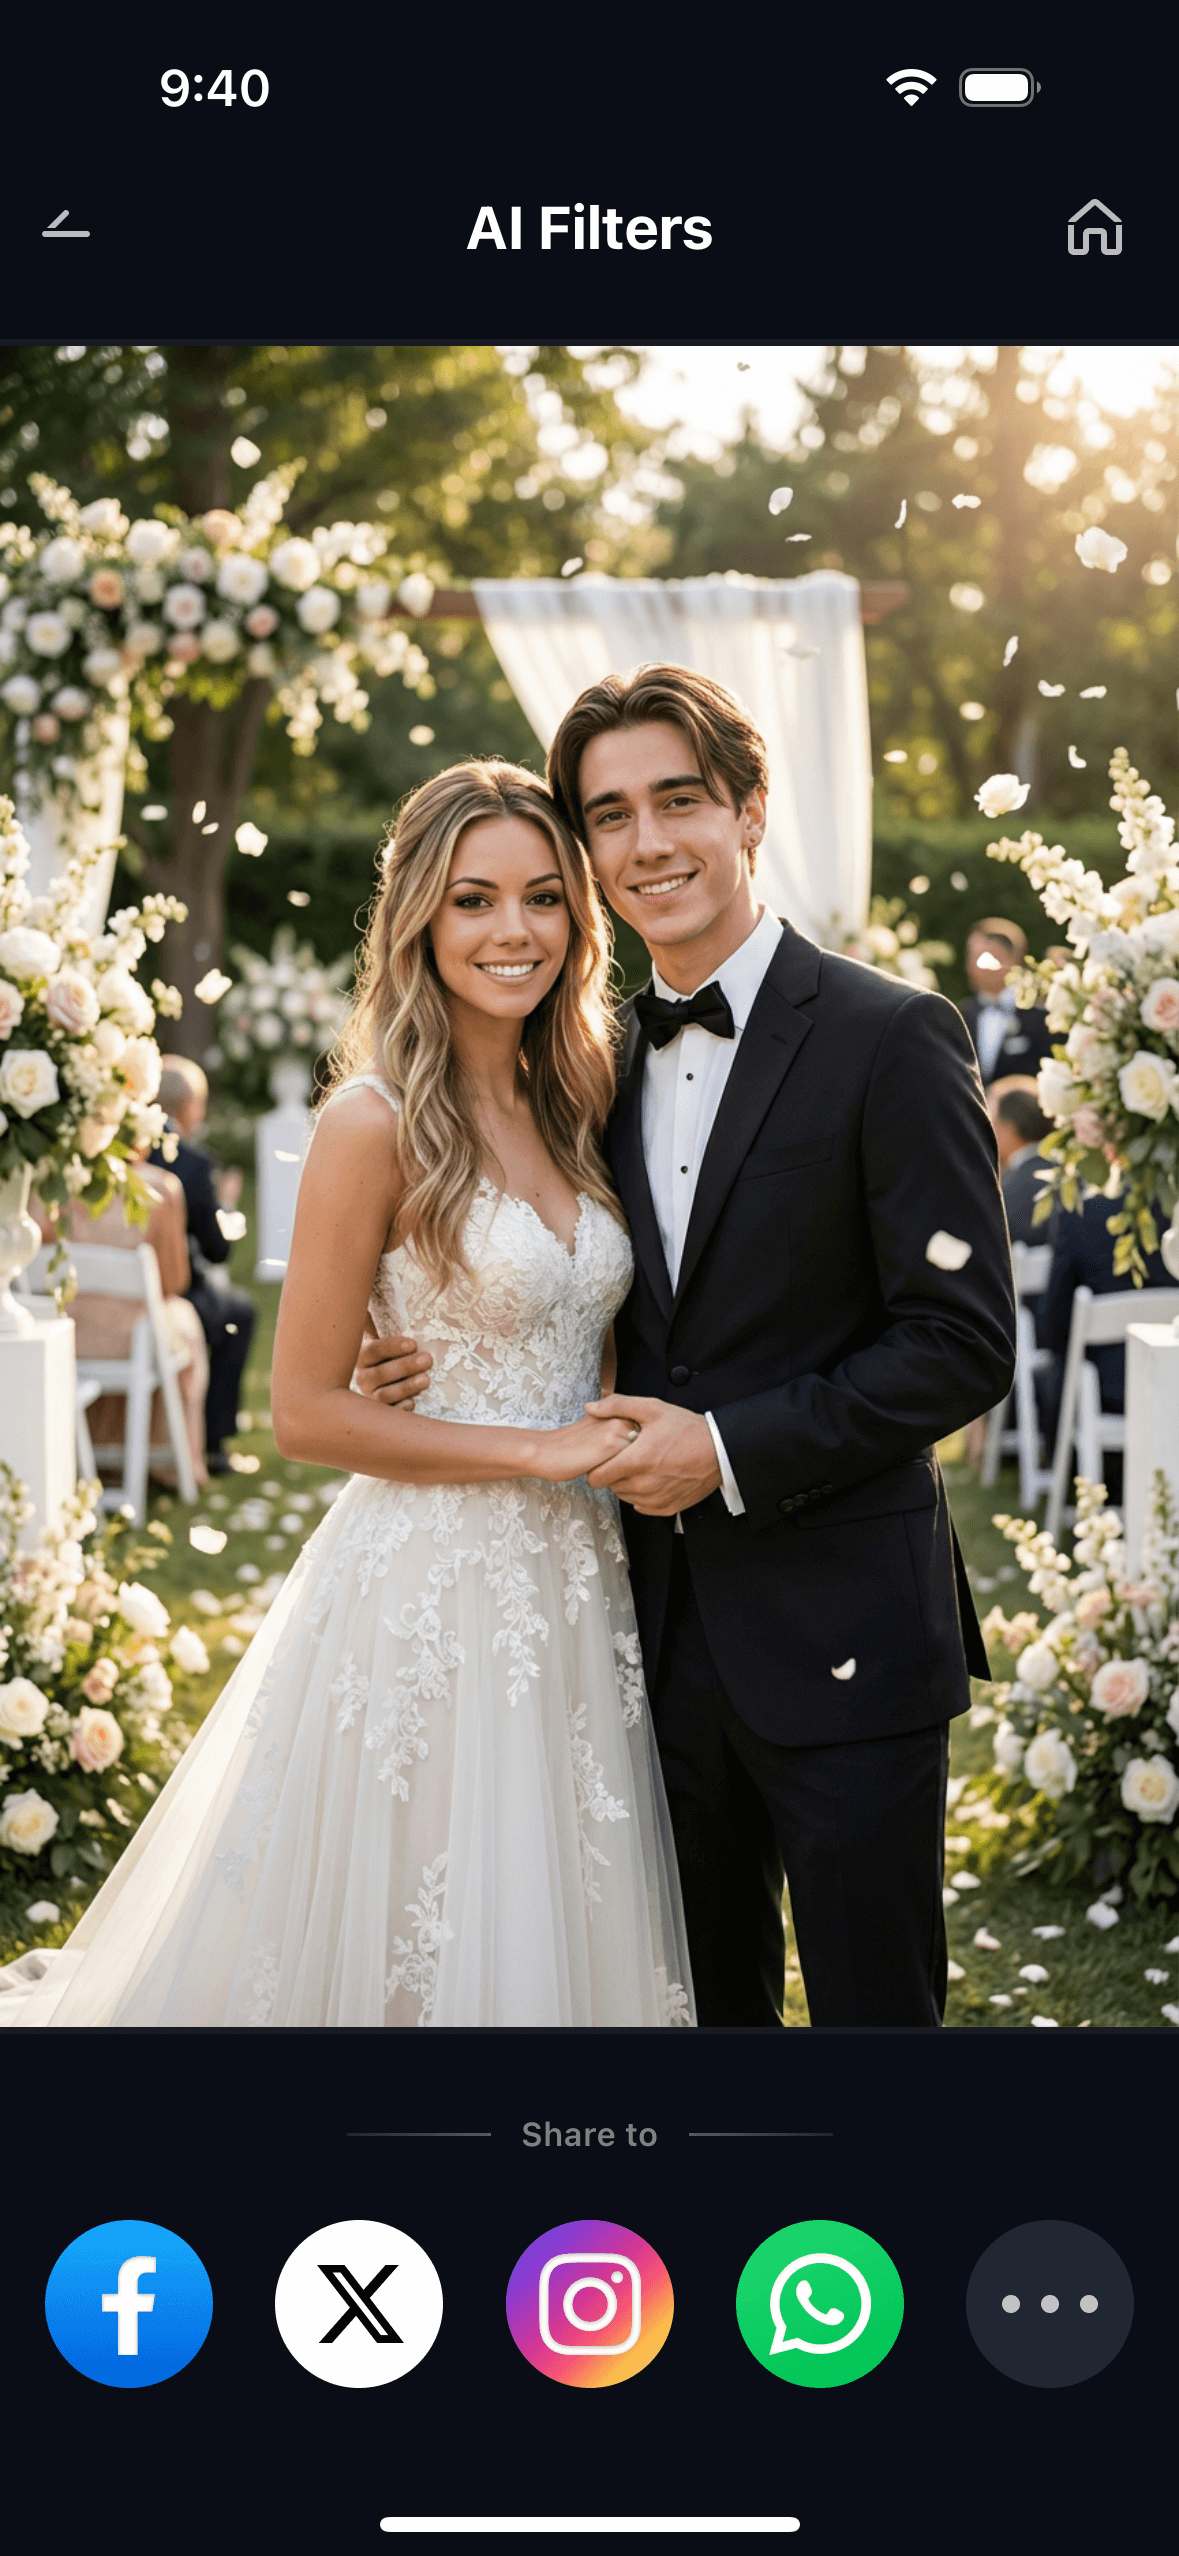
Tap Start Processing. In about 15 seconds, Relumi generates the composite with matched lighting and natural shadows. Preview the result, try different scene descriptions if you want variations, then tap Save to export to your camera roll at full resolution — watermark-free on the free tier.
One portrait can be reused across multiple scene descriptions in the same session. Upload your photo once, then generate yourself in Paris, then Bali, then Tokyo — all from the same starting image. Each generation takes about 15 seconds and lands in My Creations for easy access later.
Part 3: Three Real Ways People Use Travel & Scene Composite
The same feature solves three very different problems. Each one is worth looking at separately, because the approach — and the scene description — changes depending on what you’re trying to get.
✈️ 1. The Solo Landmark Shot — No Crowd, No Compromise
You want the iconic landmark shot. The one where it’s just you and the monument, no strangers in the frame, natural light, the place looking the way it does at 6am before the tour buses arrive — except you can’t get up at 6am, or you’ve already been there and came home with nothing but crowd shots, or you haven’t been there yet.
Upload your portrait and describe the scene you want: “standing in front of the Colosseum at golden hour, empty piazza, warm directional sunlight from the left.” Relumi places you there with the lighting consistent with that time of day, no strangers visible, and no trace of a cutout edge. The output is the landmark shot you wanted from the trip — or the trip you’re planning.
This also works as a genuine memory aid for places you’ve actually visited. If you were at the Colosseum but all your photos have strangers in them, upload your best portrait from that day and regenerate the scene with just you. The landmark is real. Your presence there was real. The photo just needed the crowd removed.
🏖️ 2. The Dream Destination Photo — Before You Can Afford the Trip
Some destinations take years to save for. Bali, Santorini, the Maldives, Patagonia — these aren’t weekend trips for most people. That doesn’t mean you can’t start building a visual relationship with the place you’re working toward.
Upload your portrait — or a photo of you and your partner — and describe the scene: “tropical beach in Bali at sunset, golden orange sky, warm natural light, calm water.” The output places both of you in that scene with matching light and a background that looks genuinely Balinese. Use it for a vision board, a travel planning mood board, or just to imagine the trip before you book it.
There’s also a practical use here: if you’re trying to decide between two destinations, generate yourself in both and see which one actually resonates. Images make abstract plans feel concrete. A photo of you in front of the Amalfi Coast coastline makes the trip feel real in a way that a Google Image search doesn’t.
📸 3. The Content Creator Workflow — A New Location Every Post
Travel content creators face a specific problem: maintaining a consistent posting schedule while actually traveling costs serious money. Professional photography in every city is $100–$200 per session. Even with a tripod, getting a natural-looking shot of yourself at a busy location is genuinely hard — the background is crowded, the light changes, and “trying to take a selfie” is written all over the result.
The workflow: shoot one clean, well-lit portrait of yourself in a controlled environment — your hotel room, a neutral-background space, anywhere with good light. Then use that single portrait across multiple scene descriptions to generate a week’s worth of location photos: Tokyo at night, Santorini rooftop at sunrise, a Bangkok night market, a Kyoto bamboo grove. Each takes 15 seconds. The lighting adapts to each scene. Your face stays consistent across all of them.
This isn’t replacing real travel. It’s filling the gaps between the real moments — the days you were working, in transit, or in a location that didn’t photograph well — with visual content that’s consistent with the trip you’re actually on.
Conclusion
Great travel photos have always required three things to go right at the same time: you had to be at the location, the light had to be right, and no one had to be in your shot. That’s a lot of variables to control, and most people come home from trips with photos that miss at least one of them.
Relumi Combine Photo — Travel & Scene Composite removes the location requirement entirely. Upload your portrait, describe the scene, and the AI generates a photo of you in that place with matched lighting, natural shadows, and no cutout artifacts. It works whether you’re planning a trip, remembering one, or filling the gaps in a content calendar. One portrait. Any destination. 15 seconds.
Upload your photo, describe where you want to be, and see the result.
FAQ
-
Do I need a professional photo of myself to get a good result?
No. A clear, reasonably well-lit selfie or casual portrait works fine — it doesn’t need to be a professional headshot. The AI needs your face to be visible and roughly forward-facing. Avoid very dark photos, heavy side angles, or images where sunglasses or hats partially cover your face. A standard phone selfie taken in decent indoor or outdoor light is enough. -
Will the lighting on my face match the destination scene?
Yes. That’s the core function of the Travel & Scene Composite feature. Relumi analyzes the light direction, color temperature, and intensity in the destination scene and re-lights your portrait to match. If you’re being placed in a golden-hour beach scene, your face picks up warm directional light from that angle — not the flat ambient light from your original selfie. -
Can I use a photo I found online as the destination scene?
Yes. Upload any destination image — a travel photo you saved, a screenshot from Instagram, a Google Maps photo of a landmark — and Relumi will use it as the scene to place you in. Alternatively, skip the destination photo entirely and just type a short scene description. Both approaches produce comparable results. -
Can I place two people in the same scene, or just one?
You can upload multiple portraits to appear together in the same scene. This is useful for couple or group travel composites — both people in the same Bali beach photo, for example. Upload all the portraits you want included, describe the scene, and the AI places everyone in it with consistent lighting and positioning. -
Is there a watermark on the exported photo?
No watermark on the free tier for the core Travel & Scene Composite feature. You can generate and save the travel composite at full resolution without paying anything. Higher-resolution exports and advanced features are available on the paid plan, but the core feature — place yourself in a scene, save the result — is free. -
How is this different from a basic background-removal app?
A background-removal app cuts out your silhouette and drops it onto a new image. Your face retains whatever lighting it had in the original photo, which almost never matches the new background. The result looks composited. Relumi re-renders the lighting on your face to match the destination scene and generates natural shadows, so the output looks like a single photograph taken at that location — not two photos stuck together.

